POWERSIDE PQube 3 Operation And Reference Manual
Power analyzers
Hide thumbs
Also See for PQube 3:
- Installation manual (47 pages) ,
- Quick start manual (2 pages) ,
- Installation manual (13 pages)

Related Manuals for POWERSIDE PQube 3


Summary of Contents for POWERSIDE PQube 3
- Page 1 PQube® 3 Power Analyzers Operation and Reference Manual Revision 3.4 Powerside 980 Atlantic Ave. Suite 100 Alameda, CA 94501, USA Tel +1-510-522-4400 │Powerside.com...
- Page 2 2008–2022 Powerside. All rights reserved. No parts of this document may be copied, reproduced, or translated to another language without the prior written consent of Powerside. “PQube 3” is a registered trademark of Powerside. “Windows” “Excel,” and “PowerPoint” are registered trademarks of Microsoft Corporation. All product names, trademarks and registered trademarks are property of their respective owners.
-
Page 3: Table Of Contents
PQube 3 Email Setup ...................... 22 2.5.1 Setting Up an Email Account on the PQube 3 2.5.2 Getting event notifications and trend data from the PQube 3 by email 2.5.3 Sending commands to the PQube 3 over email Modbus Setup......................... 26 2.6.1... - Page 4 UPS1 Life Expectancy and Long-Term Storage Instructions ..........29 Cleaning Instructions ...................... 30 Reasons for Reset ......................30 Calibration Information for Your PQube 3 ..............30 Reference List of Recorded Parameters ................... 31 5.1.1 List of recorded voltage parameters 5.1.2 List of recorded conducted emission parameters 5.1.3...
-
Page 5: Introduction
Please note that for most users, the PQube 3 Installation Manual covers all the necessary information for installing the PQube 3 modules, CTs, wiring, and configuring. The PQube 3 is easy to use with an intuitive interface and is shipped preconfigured to cover the majority of use cases. -
Page 6: Pqube 3 Operation
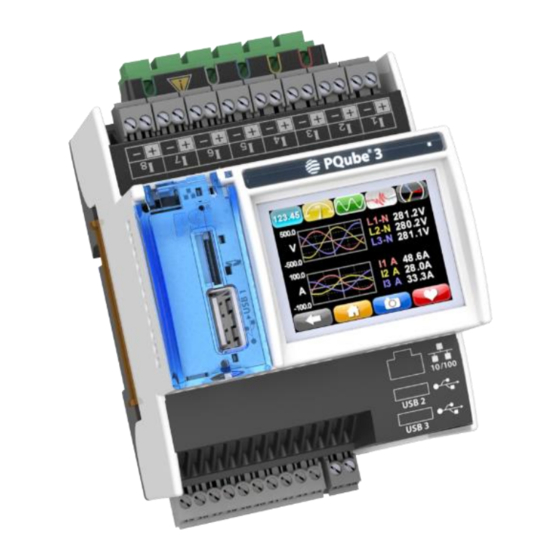
2 PQube 3 Operation 2.1 User Controls 2.1.1 Navigating the Touchscreen Display Use the touchscreen on your PQube 3 to navigate the display. You can view live meters, recent events, system information, and perform actions like ejecting removable media and rebooting the unit. - Page 7 Your PQube 3 will automatically set the correct date and time upon configuring the Setup.ini files or connecting to a network. If SNTP or NTP has been enabled in the Setup.ini file, the PQube 3 will synchronize to UTC time. All measurements will be time tagged with the local time zone.
- Page 8 Advanced: UPS battery status, GPS synchronization status, and IOT Token number are available here. Meters Voltage and Frequency: These are line-to-line, line-to-neutral, and neutral-to- earth true-RMS voltmeters. Different meters will show on these screens, depending on your power configuration. (For example, if the power configuration is “delta,”...
- Page 9 Power: These are the true power, apparent power, and reactive power readings, and they correctly handle harmonics (distorted voltages and distorted currents). If you have set a current transformer ratio or potential transformer ratio in your Setup.ini file, then these meters will reflect those ratios. Peaks: These meters show the peak values on Load, Watts and VARS reached.
- Page 10 Unbalance: These meters show the voltage unbalance and the current unbalance. You can choose whether your PQube 3 calculates unbalance using the ANSI C84.1 method, IEC method, or GB method in your Setup.ini file. Harmonics: Use this screen to view every harmonic up to the 50 for both voltage and current.
- Page 11 Select one harmonic at a time. The selected Interharmonic applies to all channels. (Harmonic values up to the 50 recorded in your PQube 3’s CSV files.) 2 to150 kHz: Use this screen to view the conducted emissions in the 2 to150 kHz range.
- Page 12 Recent Events Your PQube 3 displays the 10 most recent events. For each event, you get a date/time, event type, and magnitude/duration if applicable. Use the up/down arrows to navigate the list. Actions Snapshot: You can trigger a Snapshot (waveform capture) event at any time using this button.
- Page 13 Save Files USB: Use this button to save your recorded data to the USB drive. Optional SD: Use this button to copy data to the removable microSD card. Manual#: 851-000134 Page 13 of 49 Version 3.4 – 08/11/2022...
-
Page 14: Rebooting The Pqube 3
Rebooting the PQube 3 2.2.1 To perform a software reboot You can perform a software reboot on your PQube 3 using two methods: Touchscreen—From the main menu, go to Actions, then Reboot. Web server—Commands page Manual#: 851-000134 Page 14 of 49... -
Page 15: To Perform A Hardware Reboot
2.2.3 Ejecting your USB thumb drive or microSD card You can insert a USB thumb drive or microSD card into your PQube 3. Your PQube 3 will automatically detect it. To remove the USB drive or microSD card, go to the Actions screen and press the Eject button. After the progress bar is complete, you can remove the drive from your PQube 3. -
Page 16: Accessing The Ftp Server On Your Pqube 3
2.3 Accessing the FTP Server on Your PQube 3 Your PQube 3 has a built-in plain FTP server which you can access using any standard FTP client. There are 5 different FTP accounts available. • ftp_user_1, ftp_user_2, ftp_user_3 Use these accounts to access events, trends, and logs. -
Page 17: Accessing The Http Web Server On The Pqube 3
A valid IP address assigned to it (assigned by DHCP or fixed IP) To access your PQube 3 online, enter the IP address of the PQube 3 into your Internet Browser. Your browser will automatically direct you to the main Status page. -
Page 18: Meters
2.4.1 Meters The page refreshes the various meters regularly. The meters list depends on the power configurations, channels configured to be recorded, and environmental probes connected. Manual#: 851-000134 Page 18 of 49 Version 3.4 – 08/11/2022... -
Page 19: Events
2.4.2 Events The page displays the list of events organized around years and months. Clicking the links provides access to the data files and graphs for each of the events. You can refresh the events listing at any time by pressing the refresh button. Links to the details of the events for a... -
Page 20: Trends
2.4.3 Trends You can refresh the trends listing at any time by pressing the refresh button. Links to daily/weekly/monthly trend files Clicking on “File List” brings the list of daily trends for each Clicking on “File List” brings the daily trend files Manual#: 851-000134 Page 20 of 49 Version 3.4 –... -
Page 21: Commands
From the Commands page, you can trigger snapshots or daily trends, send test emails, or reset your PQube 3. You can also apply new setup files and firmware updates from here. You can restrict access to this page by specifying a username and password for the HTTP Administrator in your setup file. -
Page 22: Pqube 3 Email Setup
You can configure your PQube 3 to send you an email if there is any system activity, and whenever new data is available. The PQube 3 can send an email when there is a power quality event, such as a voltage sag or high frequency impulse. - Page 23 Use the PQube 3 Email tab to setup how often it checks for email and whether you wish to use SSL for added security. WARNING Do not assign your personal email address to your PQube 3. Your PQube 3 must have its own dedicated email address that it can use to send and receive email.
-
Page 24: Getting Event Notifications And Trend Data From The Pqube 3 By Email
2.5.2 Getting event notifications and trend data from the PQube 3 by email You can choose the type of data you would like to receive from your PQube 3 using the From_Email Commands including Event data, Trend data, Reset emails, and can include output files as attachments where appropriate. -
Page 25: Sending Commands To The Pqube 3 Over Email
2.5.3 Sending commands to the PQube 3 over email Using the Email Commands tab, incoming emails can be enabled by checking the appropriate boxes. For added security you may want to specify a subject keyword and add names to the email whitelist. -
Page 26: Modbus Setup
Modbus Byte Order: Data values spanning multiple registers (such as floats) can be reported in BIG ENDIAN or LITTLE ENDIAN. Default is BIG_ENDIAN. Modbus Slave ID: The PQube 3 can be assigned a slave ID required in queries. Default value is 0x1. 2.6.1 Scan Rates, Client Load, and Limitations The Modbus protocol limits single query register results to 125 registers per scan. -
Page 27: Apply Firmware Updates Locally
[Choose File] button, and then pressing [Send]. Although the browser states that the file is sent, it may take up to 15 minutes for the PQube 3 to update its firmware and reboot, depending on the firmware file size and network connection speeds. -
Page 28: Apply Firmware Update Over Network
3.3 Apply Firmware Update over Network Log into your PQube 3’s FTP server with the username ftp_updater. Upload the firmware (*. PQ3) into the folder and your PQube 3 will automatically reboot and apply the update. For instructions on how to access your PQube 3’s FTP server, refer to page... -
Page 29: Maintenance
UPS1 module before placing them in storage. To fully charge the batteries, turn on your PQube 3 with the UPS1 module plugged in, and let it run for at least 1 day. Manual#: 851-000134 Page 29 of 49 Version 3.4 –... -
Page 30: Cleaning Instructions
If necessary, wipe the accessible parts of your PQube 3 with a slightly damp cloth while it is powered off. Do not use abrasives or chemical cleaners and do not clean your PQube 3 while it is powered on. 4.6 Reasons for Reset If your PQube 3 is configured to email you whenever system activity occurs, it will notify you whenever it has reset. -
Page 31: Reference
5 Reference 5.1 List of Recorded Parameters 5.1.1 List of recorded voltage parameters VOLTAGE 10 sec 1 min 10 min 2 hour 5.1.2 List of recorded conducted emission parameters Supraharmonics .. x 1 min avg 1 min avg 1 min max 1 min max Manual#: 851-000134 Page 31 of 49... -
Page 32: List Of Recorded Current Parameters
5.1.3 List of recorded current parameters CURRENT 10 sec 1 min 10 min 2 hour 5.1.4 List of recorded environmental parameters ENVIRONMENT (up to 2 probes) 1 min avg 1 min min 1 min max Manual#: 851-000134 Page 32 of 49 Version 3.4 –... -
Page 33: List Of Recorded Analog Channel Parameters
5.1.5 List of recorded analog channel parameters ANALOG CHANNELS 1 min avg 1 min min 1 min max Manual#: 851-000134 Page 33 of 49 Version 3.4 – 08/11/2022... -
Page 34: Pqube 3 Operating Modes
5.2 PQube 3 Operating Modes 5.2.1 PQube 3 LED Blinking Modes Green = Ethernet Link Yellow = Ethernet Activity Purple = Seeking phase lock (still waiting to record data) Green = Locked onto power configuration (recording has started) Light Blue... -
Page 35: Gps-R - Led Indications
5.2.2 GPS-R — LED Indications Green = PPS pulse (blinks at 1Hz) 5.2.3 PM1/PM2 — LED Indications Green = AC input power detected Blue = 24V auxiliary outputs are ON (PM2 only) Manual#: 851-000134 Page 35 of 49 Version 3.4 – 08/11/2022... -
Page 36: Ups1/2/3 - Led Indications
1 Hz = Normal operation Green blinking at 2 Hz = Acceleration event in progress blinking = Powered, but not communicating with PQube 3 solid = Transmitting event data to PQube 3 Manual#: 851-000134 Page 36 of 49 Version 3.4 – 08/11/2022... -
Page 37: List Of Email Commands
Generates the Daily Trends for today. The data ranges from midnight to the moment the email request is received. Note: You can test emails using the PQube 3 screen. You can also send an email remotely from the PQube 3 Command Page by pressing the email test command. -
Page 38: List Of Email Error Codes
Note: If PQube 3 is having trouble reaching the SMTP server, double-check that your PQube 3 was assigned an IP address as well as try pinging the SMTP server from the same LAN that your PQube 3 is connected to. If this works properly, check in with your network administrator to make sure there are no firewall rules blocking SMTP connections. -
Page 39: List Of Error Messages
5.5 List of Error Messages These codes (found in PQube log file) can be used to troubleshoot errors in setup when contacting technical support. Error Codes Error Message command line usage error data format error cannot open input addressee unknown host name unknown service unavailable internal software error... -
Page 40: Ms1 Module To Gps1 Receiver 8-Pin Cable Pinouts
5.6 MS1 Module to GPS1 Receiver 8-pin Cable Pinouts: MS1 Pin-Out with pin 1 on left while GPS1 Receiver Pin-Out based on looking at module from the front standard RJ-45 Ethernet pin-out Pin# Net Name Function Wire Color* Pin # Net Name Function Wire Color* ANT_PPS - Pulse per... -
Page 41: Pqube3 Event Types
Your PQube 3 comes with an embedded library of event triggers. A trigger event is a condition that can be detected by the PQube 3. When triggering on an event, the PQube 3 will record and store an event summary. For certain types of events, the PQube 3 also records a waveform and an RMS evolution. -
Page 42: Triggering Mechanism - General Overview
5.7.1 Triggering mechanism - general overview Detection - state machine: For most of the PQube 3 trigger events, the detection algorithm works with a state machine with one (upper) or two (lower and upper) threshold value(s), along with a hysteresis value. - Page 43 Inrush Current Events: Inrush triggers have thresholds for magnitude and time. If the current increases by the Inrush Threshold value or more, within the specified time period or less, the PQube 3 will trigger an inrush current event. Wave Shape Change Events: Your PQube 3 triggers a wave shape change when the voltage waveform changes abruptly.
-
Page 44: Event Parameters
The section below presents a list of recommended/default thresholds for events: The event [name] is the name that can be seen in the web event list page, and is part of the event filenames or email subjects (emails sent by the PQube 3). Event Type/Name... - Page 45 0.0001 A to no limit I1/I2/I3/.. /I8 channels(*) threshold 1 cycle 1 cycle to no limit Note: (*) 8 channels for PQube 3, 14 channels for PQube 3e Analog channels Events AN1/2/3/4 Sag Analog Channel AN1 through AN4-E Sag No limits...
-
Page 46: Major Sag (Dip) Curves
Samsung Power Vaccine, ITIC, CBEMA, MIL STD 704E, and MIL STD 1399. These standards define ride-through curves based on the depth and duration of voltage dips. When the voltage dips below the ride-through curve, your PQube 3 will trigger a Major Dip event. You can specify which standard to use in your Setup.ini file. -
Page 47: Samsung Power Vaccine
5.8.2 SEMI F47 NOTE: Use this curve to guarantee that a Major Dip is detected for events that lie directly on the SEMI F47 boundary. 5.8.3 Samsung Power Vaccine Manual#: 851-000134 Page 47 of 49 Version 3.4 – 08/11/2022... -
Page 48: Itic
5.8.4 ITIC 5.8.5 CBEMA Manual#: 851-000134 Page 48 of 49 Version 3.4 – 08/11/2022... -
Page 49: Mil Std 704E
5.8.6 MIL STD 704E 5.8.7 MIL STD 1399 END OF DOCUMENT Manual#: 851-000134 Page 49 of 49 Version 3.4 – 08/11/2022...
Need help?
Do you have a question about the PQube 3 and is the answer not in the manual?
Questions and answers