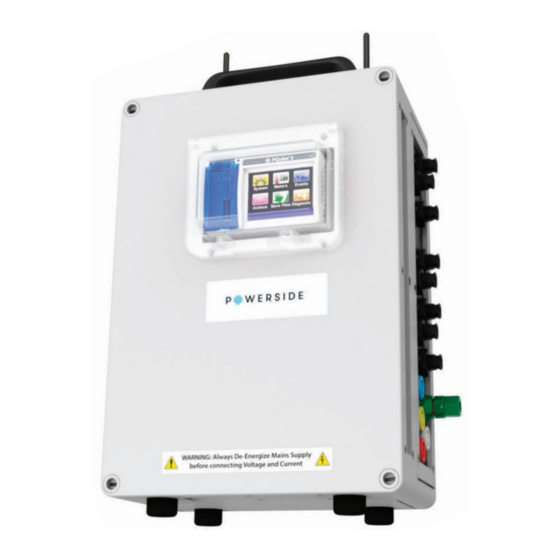
POWERSIDE PQube 3 Portable Installation Manual
Hide thumbs
Also See for PQube 3 Portable:
- Operation and reference manual (49 pages) ,
- Installation manual (47 pages) ,
- Quick start manual (2 pages)
Table of Contents
Advertisement
Quick Links
PQube
Installation Guide
The information contained in this document is subject to change without notice. POWERSIDE MAKES NO WARRANTY OF ANY KIND WITH REGARD TO THIS
MATERIAL, INCLUDING, BUT NOT LIMITED TO, THE IMPLIED WARRANTIES OF MERCHANTABILITY AND FITNESS FOR A PARTICULAR USE. Powerside shall not be
liable for errors contained herein or for incidental or consequential damages in connection with the furnishing, performance, or use of this material. If you do
not accept this limitation on liability, please return the product to Powerside prior to use.
If you find information in this manual that is incorrect, misleading, or
incomplete, we would appreciate your comments and suggestions.
PQube 3 Portable Installation Guide.V2_En
®
3 Portable
Powerside (Canada)
7850 Trans-Canada Highway
Saint Laurent (QC) H4T1A5
1(514)333-8393
Powerside (US)
980 Atlantic Ave
Alameda (CA) 94501
1(510)522-4400
Page
1 | 13
Advertisement
Table of Contents

Summary of Contents for POWERSIDE PQube 3 Portable
- Page 1 Installation Guide The information contained in this document is subject to change without notice. POWERSIDE MAKES NO WARRANTY OF ANY KIND WITH REGARD TO THIS MATERIAL, INCLUDING, BUT NOT LIMITED TO, THE IMPLIED WARRANTIES OF MERCHANTABILITY AND FITNESS FOR A PARTICULAR USE. Powerside shall not be liable for errors contained herein or for incidental or consequential damages in connection with the furnishing, performance, or use of this material.
- Page 2 If this equipment is used in a manner not specified by the manufacturer, the protection provided by the equipment may be impaired. Installation, service, and maintenance of your PQube 3 Portable must only be done by an expert for electrical installations.
-
Page 3: Table Of Contents
Introduction What is the PQube 3 Portable? ....................4 Product Highlights ........................4 What’s included - model PQ3iaB-Portable-4V8I-XXXX-XXXX ............5 What’s included - model PQ3iaB-Portable-NEO-XXXX-XXXX ............6 Overview of Connections ......................7 Portable PQube 3 Installation Important Safety Notices ......................8 Installation Procedures ........................ -
Page 4: Introduction
If you have remote communication enabled, you can receive reports from the PQube3 as soon as it is powered up. The PQube 3 Portable sends events and trends directly to the email inbox of your laptop or smartphone - no software required. -
Page 5: What's Included - Model Pq3Iab-Portable-4V8I-Xxxx-Xxxx
What’s included - model PQ3iaB-Portable-4V8I-XXXX-XXXX Before installation, verify the contents of your PQube 3 Portable package. a. (1) Heavy duty carrying case b. (1) PQube 3 Portable c. (1) AC/DC power supply with power cable – 100 to 240Vac input, 24Vdc output d. -
Page 6: What's Included - Model Pq3Iab-Portable-Neo-Xxxx-Xxxx
What’s included - model PQ3iaB-Portable-NEO-XXXX-XXXX Note: this model does not include a transportation case, and no current sensors. Before installation, verify the contents of the PQube 3 Portable: a. (1) PQube 3 Portable b. (1) AC/DC power supply with power cable – 100~240Vac input, 24Vdc output c. -
Page 7: Overview Of Connections
10/100 Ethernet RJ-45 port. PoE compatible. Analog & Digital I/O terminals. (2) Environment Probe USB interface: 24VDC power supply input. USB 1.0 ports for use ONLY with ENV2. 20Vdc AUX power output (4W max) PQube 3 Portable Installation Guide.V2_En Page 7 | 13... -
Page 8: Portable Pqube 3 Installation
It is very important that installation and servicing of your PQube 3 Portable be done by a qualified person, and in accordance with the local or national electrical guidelines and codes (e.g. ANSI/NFPA 70 in the US, CSA C22.1 in Canada etc ) -
Page 9: Installation Procedures
2. Choose a suitable location to install your PQube 3 Determine where you want to install your PQube 3 Portable. Find a flat, level surface in a secure area, accessible by authorized personnel only. -
Page 10: Install Current Transformers: Model Pq3Iab-Portable-4V8I-Xxxx-Xxxx Only
Rogowski coil. Make sure the arrow points towards the source. Connect the secondary wires of the CTs to the PQube 3 Portable to the bayonet style terminals (see picture below). L1, L2, L3 current flexible CT output connects to terminals I1, I2, I3. -
Page 11: Install The Voltage Sensing Wires
4. Install the voltage sensing wires Your PQube 3 Portable includes voltage sensing leads (wires) with fuses built into three of them (red, yellow, and blue wires). To access the fuse, twist the banana plug from the thick end of the cable. Make sure a fuse is installed inside each of the three wires before installation. -
Page 12: Install The Power Supply (If Applicable)
6. Verify connections Double check and make sure all voltage sensing leads are installed on the correct wires, and all CTs are clamped around the correct conductors. Ensure all connections to the PQube 3 Portable are secure. 7. Secure the area After verifying all connections, close all cabinets and make sure that all hazardous circuits are protected from unauthorized access. -
Page 13: Verify Meter Readings
Please contact support@powerside.com for assistance or further information on this product. Powerside® and PQube® are registered trademarks of Power Survey and Equipment Ltd. and Power Standards Lab. © 2020 Powerside. All rights PQube 3 Portable Installation Guide.V2_En Page 13 | 13...


Need help?
Do you have a question about the PQube 3 Portable and is the answer not in the manual?
Questions and answers