
Related Manuals for Wurkkos TS21


Summary of Contents for Wurkkos TS21
- Page 1 TS21 User Manual 使用说明书 Wurkkos Limited: Tel: +86‐137‐28792565 E‐mail: wurkkos@foxmail.com www.wurkkos.com Adresse: No.1 Qinglin Industrial Center, Guanlan Street, Longhua New District, Shenzhen 518000, China ...
-
Page 2: Technical Parameters
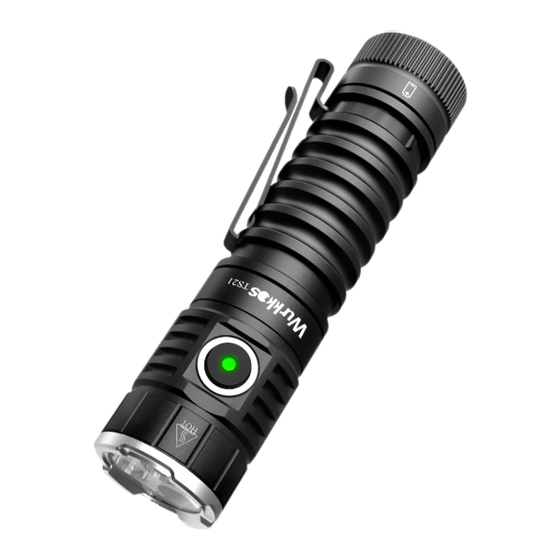
Operating voltage: 2.8V – 4.2V Battery options: 1x 21700 Dimension: 113.4mm (length) x28mm (head diameter) Weight: 79 grams (without battery) Flashlight body: Aerospace grade 6061 grade aluminum alloy, CNC manufactured to hard‐anodized to military grade specification type III, anti‐abrasive finish to get solid built body, anti‐crash geometry and better heat exchange. Water resistance i.a.w. IPX‐8 Mode Memory: memorizes the last brightness level used in the general modes (except Strobe) Low Voltage Protection: If the battery’s voltage is lower than 2.8V, TS21 steps down automatically to avoid battery damage by over discharge. At 2.7V the flashlight will turn off automatically. Advanced Temperature Regulation (ATR) technology: By default ATR will reduce the brightness level automatically when the driver temperature reaches 45°C to prevent overheating. You can set a different temperature threshold by following the thermal configuration guideline. Firmware: TS21 uses open source software called Andúril, distributed under the terms of the GPL v3. The source code is available from http://tiny.cc/TKAnduril Battery Specifications Battery Type Dimension & Quantity Nominal Voltage Compatible Rechargeable Li‐ion battery 21700 x 1 3.7V Yes (recommended) Rechargeable Li‐ion battery 18650 x 1 3.7V NO ... -
Page 3: Safety Precautions
From OFF, hold the button to turn it on in the lowest level. TS21’s output will ramp up from a very low level to maximum output. Release the button when the desired light output level is reached. The full ramp takes about 3s. Use a single‐click at any time to turn TS21 OFF. The Operation Instructions section of this manual describes all the features of TS21. While ramping TS21 blinks to indicate the lowest brightness level (subsequently called FLOOR in this manual) and highest brightness level (subsequently called CEILING in this manual). TS21 has two different ramp modes; SMOOTH RAMP and STEPPED RAMP. You can change between them when TS21 is ON with three clicks. Each ramp mode has its own individual settings for FLOOR and CEILING. The stepped ramp has a user configurable number of steps of output brightness. Further ... -
Page 4: Integrated Charger
TURBO is meant for short bursts, only. After around a minute you may notice it dims slowly down. Use it only for short periods instead of relying on thermal regulation to prevent heat damage. Full turbo is powerful enough to start fires in just a few seconds, especially when aimed at dark‐colored materials. Integrated Charger TS21 uses an integrated USB‐C charging port for convenient recharging of its battery. Please connect it with a quality USB‐C cable and use a USB power adapter with 5V 2A. While charging the LED power indicator flashes red. Once finished the indicator will turn green to indicate a full battery. ... - Page 5 Operation Instructions (Note: Not everything is covered in this diagram, please read the text.) ...
- Page 6 Default UI: Smooth Ramping This mode provides smooth change of light intensity of TS21 between FLOOR (lowest level) and CEILING (highest level) of the smooth ramp range, with an easily accessible max. output TURBO mode. Turn ON: single‐click, TS21 turns ON using the previously used light output level (MEM) Ramp up; brighter: hold the button Reverse ramp: while ramping in one direction, release button briefly and hold again Ramp down; darker: Click & hold, when ON. If you do this when TS21 is OFF, it ramps down from the CEILING (green dashed double lines) Instant top CEILING: from OFF, double‐click (green double lines) TURBO: from ON, double‐click toggles between turbo and the memorized level. from OFF (you must first switch ON): Click, then double‐click from OFF, hold turns on at the FLOOR level, it makes a subtle “blink” to provide a FLOOR/MOON mode: timing hint if you want to stay there. If you keep holding, it ramps up BattCheck: from OFF, triple‐click (4 blinks, a short pause, then 1 blink would indicate 4.1 V) Turn OFF: single‐click Cycle between STEPPED and SMOOTH RAMP: with TS21 ON, three clicks UI: Stepped Ramping This mode provides a programmable number of brightness steps between the floor and ceiling of the ...
- Page 7 UI: Electronic Lockout Lockout mode prevents accidental TS21 activation. Lockout mode also doubles as a momentary dim light, so the user can do quick tasks without having to unlock the flashlight. It uses the FLOOR of the current ramping mode as the light level. With click, hold you can use the FLOOR of the other ramping mode. Electronic Lockout enable: 4 clicks from OFF to enable the electronic lockout. Operation in Electronic Lockout is limited to holding the button to turn on TS21 at the floor of the last ramp range used (either smooth or stepped). Electronic Lockout disable: 4 clicks from OFF to disable the electronic lockout. Blinkies & Strobes Two groups of blinkies are included. To enter them, do either a 3 clicks (3C) from OFF or a “2 clicks and hold” (3H) from OFF. To change to the next blinky mode double‐click. These include: Group 1 Blinkies / utility modes: (always starts from BattCheck) from OFF: 3 clicks. BattCheck: Shows the remaining charge in volts and tenths, e.g. 4 blinks, then pause, 1 blink are 4.1 Volt. A "zero" is represented by a very quick blink. It is recommended that if the BattCheck reveals the cell voltage at 3.1 Volt or lower, it is time to recharge the batteries. To exit BattCheck either one click for off, or two clicks for Sunset / Goodnight mode. Sunset / Goodnight mode: Starts at a low level, then slowly dims down to moon over the course of an hour, then shuts off. It is intended for use when going to bed. To exit Sunset / Goodnight mode, one click for off, two clicks for Beacon. Beacon: Beacon mode uses the last ramped level for its brightness. You must adjust the brightness before you turn beacon on. It blinks at a slow speed: Once every N seconds at the last‐ramped level. ...
- Page 8 Blink one or more times = configuration number To indicate which setting you are in. All config menus “fall through” with no changes if you don’t press the button. “flicker” = TS21 waits for input Flicker is a changing quickly between two brightness levels for about 3 seconds. The User can click one or more times to enter a number. TS21 will keep flickering until the user stops clicking, so there is no need to hurry. Pause and then go to the next option After the light has gone through all of the menu options, TS21 will return to the mode it was in before entering the config mode. Ramp Configuration Both the SMOOTH RAMP and the STEPPED RAMP are configurable. The user can set the FLOOR (lowest level), the CEILING (highest level), and for STEPPED mode only, the number of steps. For either mode there are 150 output levels. The lowest brightness is level 1, and the highest is level 150. While the TS21 is ON in one of the ramping modes, click 4 times to enter RAMP CONFIGURATION for the current ramp. ...
-
Page 9: Thermal Configuration
For STEPPED RAMPING, there are 3 menu options: 1. Floor 2. Ceiling 3. Number of steps For either ramp, to configure the floor level, when TS21 output begins to flicker after one flash, click the button equal to the number of ramp levels (out of 150) at which the floor should be. To set the lowest possible level, click once (MOON). No clicks will result in no change to the current level. For either ramp, to configure the ceiling level, when TS21 output begins to flicker after two flashes, each click goes one level lower. So 1 click sets the highest possible level, 2 clicks is the 2nd‐highest, 3 clicks is the 3rd‐highest level, etc. Ceiling clicks: 151 – ( level you want ) = Clicks. To set a value of 130/150, click 21 times. No clicks will result in no change to the current level. For the stepped ramping, when TS21 output begins to flicker after three flashes, each click represents the number of steps between the floor and the ceiling. The value can be anything from 2 to 150. No clicks will result in no change to the current number of steps. Thermal configuration Look at a thermometer to check the current room temperature. Let us assume it says 21 Celsius. Turn the light off and wait for its temperature to settle to room temperature. ... -
Page 10: Protection Features
Protection Features Some features which aren’t visible on the diagram: Andúril includes low voltage protection (LVP) and thermal regulation. LVP makes the light step down to a lower level when the battery is low, and if the light is already at the lowest level, it shuts itself off. This activates at 2.8V. LVP adjustments happen suddenly, in large steps. Thermal regulation attempts to keeps the light from overheating and otherwise adjusts output to stay as close as possible to the user‐configured temperature limit. Thermal adjustments happen gradually, in steps so small they are difficult for humans to perceive. It ramps smoothly across 512 internal steps (from 1x7135 to full power) to adjust output while it searches for the highest level it can maintain without overheating. Usage of TS21 You can do a little bit more with your new TS21 … TS21 LOCKOUT mode doubles as a momentary moon mode. That way, after locking it and tossing it in a bag, it can still be used to look around inside the bag without unlocking it. Lockout uses moonlight as the floor of the current ramp or, by using click then hold, the floor of the other ramp. If you have two different settings for this, you can have different illumination also. Or you can use Muggle mode if you want a safer way to carry your flashlight with a reduced output and don’t want lockout. While on, a double click toggles between turbo and the memorized level. So, if you want full power for a moment, double click. When you’re done, double click again to return to the original brightness. To customize your TS21 you can adjust the FLOOR and CEILING levels of the two ramps. Let’s say your favorite mode is smooth ramping, but to save the cell charge you want to limit the maximum output brightness level. You can choose level 101 (50 clicks during ) for the smooth ramp ceiling. This keeps the ceiling at a lower level. Smooth ramp floor on level 1 for a really dim moonlight. You can set 20 clicks for stepped floor for a usable low outdoors. And 130 for stepped ceiling if you also like to have a powerful ceiling. If you click zero times, the floor or ceiling value doesn’t change. This is great because you can change just the floor or the ceiling without reprogramming the other. ... - Page 11 Disassembling the sealed head can damage the flashlight and voids the warranty. Wurkkos Ltd. recommends using high‐quality brand batteries. Damage by defective batteries void the warranty. Remove the battery if the flashlight will not be used for an extended period of time. To prevent self‐discharge or accidental activation during storage or transportation, unscrew the tailcap by half a turn or remove battery. Every 6 months threads should be wiped with a clean cloth followed by a thin layer of silicone grease. To maintain a proper level of waterproofness, replace worn‐out o‐rings with an approved spare (2 pieces are shipped with initial order). Troubleshooting: Clean battery contacts regularly as dirty contacts may impair the performance of the flashlight. If you experience problems (flicker, shine intermittently or failure to turn on) the following root causes and solutions should be tried: Reason A: The battery needs replacement (Battery voltage is below 2.7V). Solution: Replace battery with an approved type of fully charged battery. Reason B: Threads, PCB board contact or other contacts are dirty. Solutions: Please clean the contact points with a cotton swab soaked in rubbing alcohol. Reason C: The flashlight will not turn on upon first use. Solution: Please do not forget to remove the insulation sticker from the battery on first use. If the above methods do not work please refer to the warranty policy before contacting your authorized distributor. Please contact us if you have any questions. If your product is defective please contact us for refund or replacement within warranty period. ...
Need help?
Do you have a question about the TS21 and is the answer not in the manual?
Questions and answers