
Related Manuals for Ariens 986501


Summary of Contents for Ariens 986501
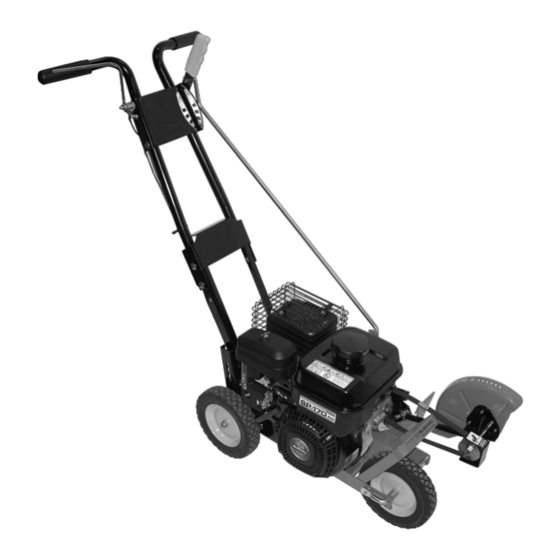
- Page 1 Lawn Edger Operator’s Manual Model 986501 – Lawn Edger Lea el Manual del operador (SN 012000 +) Manuel de l'opérateur Manuale d'uso Gebruikershandleiding Instruktionsbok • 05094315 8/16 Printed in USA...
- Page 2 ÖVERENSSTÄMMELSE UTFÄRDAD AV TILLVERKAREN – ÜRETİCİ TARAFINDAN DÜZENLENEN EC UYGUNLUK BEYANI We the undersigned, ARIENS COMPANY, certify that: My, nížepodepsaní, ARIENS COMPANY, prohlašujeme, že: Der Unterzeichnete, ARIENS COMPANY, bescheinigt, dass: Undertegnede, ARIENS COMPANY, attesterer, at: Nosotros, los abajo firmantes, ARIENS COMPANY, certificamos que: Allekirjoittanut, ARIENS COMPANY, vakuuttaa, että: Nous, soussignés ARIENS COMPANY, certifions que: La sottoscritta società...
- Page 3 (Kw a RPM): Enimmäisteho (Kw @ RPM): Puissance moteur (Kw au régime max.): Potenza max. del motore (Kw a giri/min.): Motor Vermogen (Kw @ RPM): Motoreffekt 986501: 4.2 @3900 (Kw @ RPM): Moc silnika (Kw przy obr./min): Potência (Kw @ RPM): Мощность...
-
Page 4: Table Of Contents
TABLE OF CONTENTS WELCOME ..... . 1 SAFETY......2 Practices &... -
Page 5: Welcome
WELCOME Original Instructions Congratulations on your purchase and welcome to the Ariens family! Every machine in the Ariens lineup is designed for long-lasting and unsurpassed performance. We are confident your machine will be part of your family for many years to come. -
Page 6: Safety
Emission controls and components before leaving operator’s can only be adjusted by an Ariens Company position. dealer or an authorized engine manufacturer's service center. Contact your Ariens Company Equipment Retailer... -
Page 7: Safety Decals
2. Warning 1. Safety Decal Identification WARNING: Indicates a POTENTIALLY HAZARDOUS SITUATION! If not avoided, COULD RESULT in death or serious injury. 3. Caution CAUTION: Indicates a POTENTIALLY HAZARDOUS SITUATION! If not avoided, MAY RESULT in minor or moderate injury. It may also be used to alert against unsafe practices. -
Page 8: Emission Control System
Emission controls and engine. Never remove the components can only be adjusted by an cap of the fuel tank or add Ariens Company dealer or an authorized fuel while the engine is engine manufacturer's service center. running or when the engine Contact your Ariens Company equipment is hot. - Page 9 Do not tilt when starting the engine or Maintenance and storage switching on the motor, unless the edger has a. Keep all nuts, bolts and screws tight to to be tilted for starting. In this case, do not tilt be sure the equipment is in safe working it more than absolutely necessary and lift only conditions.
-
Page 10: Assembly
Check Engine Oil ASSEMBLY 1. Fill engine crankcase with oil. See engine manual. WARNING: AVOID INJURY. Check Engine Fuel Read and understand the entire 1. Fill fuel tank. DO NOT OVERFILL! See Safety section before Check Engine Fuel on page 6. proceeding. -
Page 11: Controls And Features
CONTROLS AND FEATURES Figure 4 1. Operator Presence Control 8. Engine Shut Off Switch 2. Cutting Depth Adjuster 9. Recoil Starter 3. Cutting Angle Adjuster 10. Fuel Shut Off 4. Blade 11. Rear Wheel Height Adjuster 5. Oil Fill/Dipstick 12. Choke 6. -
Page 12: Operation
If the unit does not perform as stated contact Lock adjuster in this your Ariens dealer for repairs. position to start the Engine must not start with the cutting depth edger. - Page 13 1. Loosen the knob and position the wheel Cutting Angle Adjuster so it supports the unit level when (Figure 6) operating, and then securely tighten the Controls the cutting angle of the blade for knob. decorative edging. NOTE: Set the wheel height before starting the engine or engaging the blades.
- Page 14 Front Wheel Adjuster Position wheel away from the blade (Figure 8) for bevel cutting or trimming. Positions the front wheel on the axle to balance the unit when working along curbs or other uneven terrain. NOTE: Make sure the front wheel rolls on the work surface.
-
Page 15: Engine Controls
Engine Controls Oil Drain Plug (Figure 10) Throttle Oil drain plug provides a convenient location (Figure 9) to drain oil. Throttle controls engine speed. 1. Place a pan under the opening in the 1. Set the throttle to slow (turtle) to start the unit frame, remove the plug, remove the unit and when traveling between work oil fill cap/dipstick and allow the oil to... -
Page 16: Filling Fuel Tank
87. DO NOT use E85 blended fuels; the engine is not E20 / E30 / E85 compatible. The maximum recommended ethanol content is 10%. Ariens recommends using a quality fuel stabilizer in all fuel. See Short Term Storage on page 16 4. -
Page 17: Operating Edger
OPERATING EDGER 1. Set the rear wheel to the appropriate height and the front wheel to appropriate location on the axle for the job. 2. Set the blade angle required for the job. 3. Start the engine with the cutting head in the disengaged (fully raised) position. -
Page 18: Maintenance Schedule
MAINTENANCE SCHEDULE IMPORTANT: Proper maintenance can WARNING: AVOID INJURY. prolong the life of unit. The following chart Read and understand the entire shows the recommended service schedule. Safety section before Refer to the maintenance instructions in the proceeding. Engine Manual for additional information. Interval Task Action... -
Page 19: Service & Adjustments
SERVICE & ADJUSTMENTS WARNING: AVOID INJURY. Read and understand the entire Safety section before proceeding. Blade Change (Figure 11) WARNING: Blades are sharp and can cut you. Wear sturdy gloves warning Remove mounting hardware and belt finger. 1. Stop engine, wait for all moving parts to stop and hot parts to cool. -
Page 20: Storage
2. Place an appropriate pan under the oil Oil Change drain opening, and remove oil drain plug NOTE: Follow instructions provided in the from engine. engine owner’s manual. 3. After all oil has drained, replace the 1. Stop engine, wait for all moving parts to drain plug. -
Page 21: Troubleshooting
Squeak Front Wheel 1. Front wheel 1. Lubricate the wheel bushings with a light bushings dry. oil. Does Not Slide SERVICE PARTS See your authorized Ariens dealer for Genuine OEM service parts. Part No. Description 03789800 Blade 07200507 Belt 20020001... -
Page 22: Specifications
SPECIFICATIONS 986501 Model Edger Description Subaru OHC SP170 Engine 169 (10) Displacement – cm 3.4 (.90) Fuel Capacity – L (gal.) 0.60 (20) Engine Oil – L (oz.) See Engine Manual for Type 22.8 cm (9") Blade Blade Cutting Positions 80 –... -
Page 23: Warranty
, Sno-Tek ® and Chore Performing Equipment Limited Warranty Warranty Ariens Company (Ariens) warrants to the original purchaser that Ariens, Gravely, Parker, and Countax ® ® brand chore performing equipment (including Sno-Thro and Sno-Tek equipment) purchased on or after 1/1/2016 will be free from defects in material and workmanship for the time period noted in the chart below. - Page 24 Register the product immediately at the time of sale. If the dealer does not register the product, the customer must complete the product registration card in the literature package and return it to Ariens Company, or register the unit online at www.ariens.com, www.gravely.com, www.countax.com or www.parkersweeper.com.
- Page 25 Exclusions – Items Not Covered by This Warranty • Parts that are not genuine Ariens, Gravely, Parker or Countax service parts are not covered by this warranty and may void the warranty. • Damages resulting from the installation or use of any part, accessory, or attachment which is not approved by the Ariens Company for use with product(s) identified herein are not covered by this warranty.
- Page 26 655 West Ryan Street Brillion, WI 54110 ariensstore.com ariens.custhelp.com...
Need help?
Do you have a question about the 986501 and is the answer not in the manual?
Questions and answers