
Related Manuals for Steamfast SF-547


Summary of Contents for Steamfast SF-547
- Page 1 SF-547 S T A N D G A R M E N T S T E A M E R O W N E R ’ S G U I D E Guía Del Propietario Del Vaporizador de Prendas de Vestir...
-
Page 2: Important Safety Instructions
IMPORTANT SAFETY INSTRUCTIONS This owner's guide and any additional inserts are considered part of the product. They contain important information about safety, use, and disposal. Before using the product, please familiarize yourself with all operating and safety instructions. Please keep all documents for future reference and pass these documents on, together with the product, to any future owner. - Page 3 WARNING: Changes or modifications to this unit not expressly approved by the party responsible for compliance could void the user’s authority to operate the equipment. SAVE THESE INSTRUCTIONS Questions or comments? • steamfast.com • consumerservice@steamfast.com • 1-800-711-6617 Speak your mind! We invite you to review this product online: steamfast.com/reviews...
-
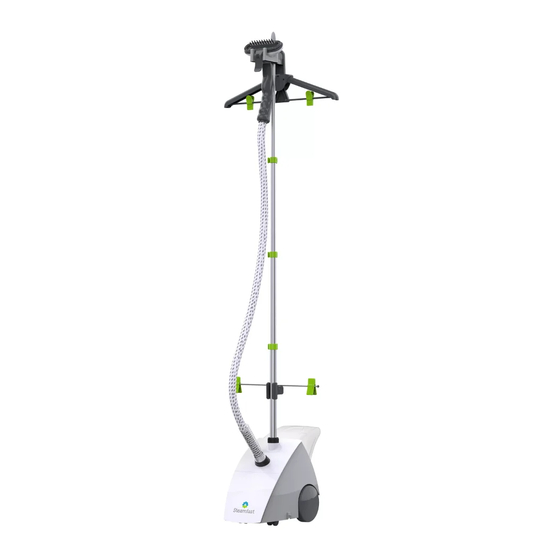
Page 4: Product Information
Product Information The following features and accessories are included with your Stand Garment Steamer. Carefully inspect the packing material for all parts listed below. To obtain possible missing parts, refer to Product Support on Page 14 of this manual for Consumer Service contact information. UNIT FEATURES &... - Page 5 • The Steam Nozzle (1) emits the flow of hot, penetrating steam produced by the Boiler. The Fabric Brush connects to the Steam Nozzle. • The Pole Top (2) connects to the top section of the Telescopic Pole. The Pole Top is comprised of the Steam Nozzle Cradle and Hanger Hook.
-
Page 6: Telescopic Pole
Assembling Your Stand Garment Steamer TELESCOPIC POLE The Telescopic Pole is made up of four sections (FIGURE 1): • TOP (SECTION 1) • MIDDLE-TOP (SECTION 2) • MIDDLE-BOTTOM (SECTION 3) • BOTTOM (SECTION 4) SECTION 1 SECTION 2 SECTION 3 SECTION 4 (TOP) (MIDDLE-TOP) - Page 7 CONNECTING POLE TOP 1. Look at underside of Pole Top, and locate two guide tabs (FIGURE 3-A). 2. Align Pole Top guide tabs with guide grooves on SECTION 1 of Telescopic Pole. NOTE: It is recommended to orient Pole Top so Nozzle Cradle faces forwards towards front of the unit.
- Page 8 CONNECTING HANGER 1. Locate vertical arm on top of Hanger. Locate the side with a raised rim. 2. Align Hanger arm with Pole Top Hanger Hook. Slot raised rim around top of Hanger Hook. 3. Press downward gently to lock Hanger onto Hanger Hook (FIGURE 5).
-
Page 9: Filling With Water
Using Your Stand Garment Steamer FILLING WITH WATER 1. Remove Water Tank from main unit. 2. Holding Water Tank upside-down, unscrew and remove Valve Cap by rotating it in a counter- clockwise direction (FIGURE 7-A). 3. Fill Water Tank with water through Valve Cap hole. At full capacity, the Water Tank holds 78 oz (2,307 ml) of water, and will provide a continuous steam time of approximately 80 minutes. -
Page 10: General Operation
GENERAL OPERATION NOTE: Be sure that Water Tank has been filled and, if desired, the Fabric Brush or Crease Tool is connected before following these steps. 1. For first-time use, remove protective plastic cover that is shipped on electrical plug. Plug power cord into a convenient electrical outlet. - Page 11 FABRIC STEAMING STEAMING GARMENTS: 1. To expand Hanger for use, fold the two arms upward until they lock into place. A garment may now be placed on the Hanger. 2. Alternatively, place garment on a clean, rust-free clothes hanger. Place hanger (with garment) around Hanger Hook (FIGURE 8).
-
Page 12: Storage & Care
Storage & Care PROPER STORAGE Preparing your Stand Garment Steamer for storage is quick and simple. When you have finished your steaming tasks, follow the steps listed below. 1. Set Lighted On/Off Switch to “OFF” position, and unplug power cord from electrical outlet. 2. -
Page 13: Troubleshooting
Troubleshooting PROBLEM POSSIBLE CAUSE SOLUTION Unit is not plugged in. Unit fails to heat up. Lighted On/Off Plug power cord into electrical outlet. Switch DOES NOT illuminate when Household circuit breaker / ground Reset circuit breaker / ground fault set to “ON” position. fault interrupter has tripped or blown interrupter, or replace fuse. -
Page 14: Parts And Accessories
When ordering replacement parts and accessories for your Stand Garment Steamer, you may refer to the part numbers below. Parts and accessories may be ordered through our Website: www.steamfast.com You may also contact Consumer Service directly: consumerservice@steamfast.com or 1-800-711-6617 CREASE TOOL A540-002R- FABRIC BRUSH... -
Page 15: Warranty Information
Warranty Information Steamfast, a division of Vornado Air, LLC. Steamfast warrants to the original consumer or pur- chaser this Steamfast (“Product”) is free from defects in material or workmanship for a period of two (2) years from the date of purchase. If any such defect is discovered within the warranty period, Vornado, at its discretion, will repair or replace the Product at no cost. - Page 16 Steamfast 415 East 13th, Andover, KS 67002 1-800-711-6617 steamfast.com consumerservice@steamfast.com T547-005 R-,V01...
Need help?
Do you have a question about the SF-547 and is the answer not in the manual?
Questions and answers