Table of Contents
Advertisement
Quick Links
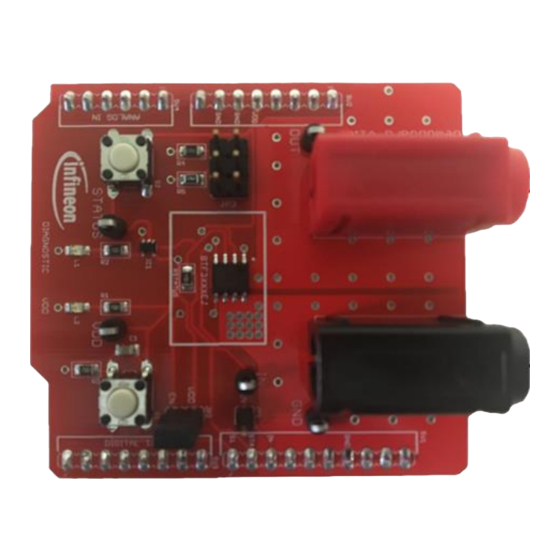
Demoboard BTF3xxxEJ
User Manual V1.0
About this document
Scope and purpose
This document describes how to use the Demoboard BTF3xxxEJ.
Intended audience
Engineers, hobbyists and students who want to switch 12V loads in their Arduino/XMC1100 kit projects.
User Manual
<Revision 1.0>
www.infineon.com
<2016-07-19>
Advertisement
Table of Contents

Subscribe to Our Youtube Channel
Summary of Contents for Infineon Demoboard BTF3 EJ Series
-
Page 1: About This Document
User Manual V1.0 About this document Scope and purpose This document describes how to use the Demoboard BTF3xxxEJ. Intended audience Engineers, hobbyists and students who want to switch 12V loads in their Arduino/XMC1100 kit projects. User Manual <Revision 1.0> www.infineon.com <2016-07-19>... -
Page 2: Table Of Contents
Demoboard BTF3xxxEJ User Manual Table of Contents About this document ........................1 Table of Contents ........................... 2 Getting Started ......................3 BTF3xxxEJ Shield overview ........................3 Key features ............................. 3 Demoboard package contents ....................... 3 Typical connection ..........................4 1.4.1 With Arduino Shield ........................... -
Page 3: Getting Started
The demoboard can be easily connected to any Arduino UNO board or Infineon XMC1100 via headers. Code and graphic interface is available for Arduino UNO. -
Page 4: Typical Connection
Demoboard BTF3xxxEJ User Manual Typical connection 1.4.1 With Arduino Shield BOTTOM ON TOP 1.4.2 Without Arduino shield (For Oscilloscope monitoring) User Manual <Revision 1.0> 2017-11-228... -
Page 5: Demoboard Configuration
Demoboard BTF3xxxEJ User Manual Demoboard configuration o If an Arduino board is used, configuration needs to be set in the software. Please refer to Error! Reference source not found. Error! Reference source not found. command, where parameters of used demoboard can be selected. Status pin connection o BTF3xxxEJ has STATUS pin pulled-up to Vdd to allow fault monitoring, and fault reset o Status pin can be reset via the GUI interface. -
Page 6: Features
Demoboard BTF3xxxEJ User Manual o When the code is correctly uploaded/ installed, the user can plug the demoboard on the Arduino shield. The green LED must turn on, meaning that BTF3xxxEJ logic is supplied. o A message ‘Done uploading’ is displayed in Arduino IDE. o Then, launch “Demoboard_aiko_Universal.exe”. -
Page 7: Alternative Command
Demoboard BTF3xxxEJ User Manual o Button “Pulse” creates a manageable pulse on BTF3xxxEJ. User can create a pulse with period control Ending Action defines if the device is left ON or OFF after the pulses. Duration of ON pulse is adjusted with “Positive width” value ... -
Page 8: Board Connectors Description
Demoboard BTF3xxxEJ User Manual Board connectors description Power connectors Name Connector Type Description JOUT Power supply JGND Ground power Ground ARDUINO/XMC1100 connectors 4.2.1 Connector SV1 Name Type Description No connected No connected No connected Digital Ground Ground No connected No connected ENABLE Digital Input To enable/disable the device... -
Page 9: Connector Sv3
Demoboard BTF3xxxEJ User Manual 4.2.3 Connector SV3 Name Pin Type Description No connected No connected No connected No connected No connected No connected No connected No connected 4.2.4 Connector SV4 Name Pin Type Description No connected No connected No connected No connected No connected No connected... -
Page 10: Schematic
Demoboard BTF3xxxEJ User Manual Schematic User Manual <Revision 1.0> 2017-11-228... -
Page 11: O.m
Demoboard BTF3xxxEJ User Manual B.O.M. Part Value Package Description Qty Distributor Reference HITFET+ Low side HITFET+ TDSO-8 DSO8 Switch S1, S2 B3F-10XX Switch Farnell 176432 1pin 2.54mm Jumper Farnell 2356152 2 pin 2.54mm Jumper Farnell 1022245 6pins 2.54mm Jumper Farnell 1022231 ENABLE GREEN... -
Page 12: Board Layout
Demoboard BTF3xxxEJ User Manual Board Layout BOTTOM User Manual <Revision 1.0> 2017-11-228... -
Page 13: Mechanical View
Demoboard BTF3xxxEJ User Manual MECHANICAL VIEW User Manual <Revision 1.0> 2017-11-228... - Page 14 Demoboard BTF3xxxEJ User Manual Revision History: V1.0 Previous Version: none Revision Date Changes November 22 2017 First release User Manual <Revision 1.0> 2017-11-228...
- Page 15 Demoboard BTF3xxxEJ User Manual User Manual <Revision 1.0> 2017-11-228...
- Page 16 Trademarks of Infineon Technologies AG AURIX™, C166™, CanPAK™, CIPOS™, CoolGaN™, CoolMOS™, CoolSET™, CoolSiC™, CORECONTROL™, CROSSAVE™, DAVE™, DI-POL™, DrBlade™, EasyPIM™, EconoBRIDGE™, EconoDUAL™, EconoPACK™, EconoPIM™, EiceDRIVER™, eupec™, FCOS™, HITFET™, HybridPACK™, Infineon™, ISOFACE™, IsoPACK™, i-Wafer™, MIPAQ™, ModSTACK™, my-d™, NovalithIC™, OmniTune™, OPTIGA™, OptiMOS™, ORIGA™, POWERCODE™, PRIMARION™, PrimePACK™, PrimeSTACK™, PROFET™, PRO-SIL™, RASIC™, REAL3™, ReverSave™, SatRIC™, SIEGET™, SIPMOS™, SmartLEWIS™, SOLID FLASH™, SPOC™, TEMPFET™,...


Need help?
Do you have a question about the Demoboard BTF3 EJ Series and is the answer not in the manual?
Questions and answers