Table of Contents
Advertisement
Quick Links
Advertisement
Table of Contents

Subscribe to Our Youtube Channel
Related Manuals for Modena WF 1030 VDWH


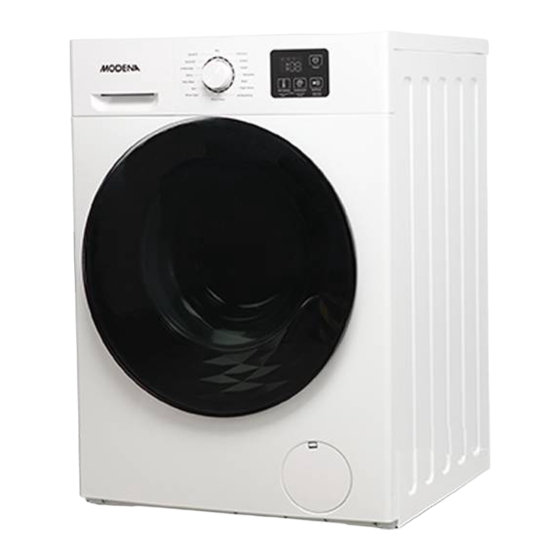
Summary of Contents for Modena WF 1030 VDWH
- Page 1 User Manual Book Washing Machine WF 1030 VDWH...
-
Page 2: Table Of Contents
Cleaning the Universal Coupling Cleaning the Inlet Valve Cleaning the Drain Filter Part 6: Troubleshooting Part 7: Specification This guide book explains everything you need to know about your new product. Please contact our Customer Care should you need further assistance through www.modena.com. -
Page 3: Part 1: Safety Information
PART 1: SAFETY INFORMATION Read the user manual book carefully! • Do not try to install or turn on the unit without having read the indicated safety precautions in this manual. • Do not disassemble the electrical parts of this appliance. Any repairs done by an unauthorized person may cause serious injuries or properties incident. - Page 4 • Do not pull out or insert the plug with wet hands to avoid electric shock. • Do not fasten, twist or tie the power cord. if the power cord is damaged, it should be replaced by the manufacturer, service technician or a qualified person to prevent any risk.
-
Page 5: Environmental Notice
Environmental Notice The packaging material used is recyclable. We recommend that you separate plastic, paper and cardboard and give them to recycling agents. According to WEEE (Waste of Electrical and Electronic Equipment) guidelines, waste from electrical and electronic devices should be collected separately. -
Page 6: Part 3: Installation Guide
PART 3: INSTALLATION GUIDE Installation • The appliance should not be installed in an environment below 0°C. Do not install or place the washing machine outdoors. • When the washing machine is installed on a floor with a carpet, do not block the ventilation orifice of the base. - Page 7 • The tilt angle shall not exceed 1 degree. • Allow sufficient safety distance between the washing machine and the wall or other objects. Distance between the back/left/right of the washing machine and the wall/object should be more than 2 cm. Wall >2cm Wall...
- Page 8 • Please contact professional persons to test whether or not the washing machine is grounded correctly. If the power outlet and the power plug do not match, please do not change the power plug. • If the washing machine smokes or emits a peculiar smell, please cut off the power supply and contact service center.
- Page 9 Connection of water supply hose to faucet Hold the connector with one 2. Loosen the four mounting hand, press the retaining ring screws on the upper part of with the other hand and pull it the connector, and rotate the down separate lower part of the connector to...
- Page 10 5. Rotate two screws (see figure 6. Rotate the lower part of the below) opposite to the wall so connector to screw it tightly that they are in contact with (or else, water may leak from the faucet, and screw them connection).
- Page 11 9. Check whether or not the lower part of the connector and the water supply hose are connected firmly. • Screw the connector of the water supply hose and the inlet valve tightly. Slowly turn on the faucet to check for water leakage.
-
Page 12: Part 4: How To Use
• If the floor is not flat, please adjust the adjustable feet. (Do not insert objects such as wood chips under the adjustable feet). Make sure that the four adjustable feet are in contact with the floor firmly and check that the washing machine is horizontal. (use a levelling tool). •... -
Page 13: Detergent Drawer
Detergent Drawer Pre-Wash Main Wash compartment compartment Softener compartment Main Wash Compartment • Please use synthetic low-foam liquid detergents. • If concentrated liquid detergents are used, please dilute them with water (2:1) and pour them into the detergent compartment. Softener Compartment •... -
Page 14: Precautions Before Washing
ATTENTION! • Use detergents made specially for drum washing machines. • Do not use too much detergent, or too much foams may affect the rinse effect or cause functional faults. • Please follow the instructions of the manufacturer to use detergents by the kinds and colors of clothes, water temperature, degree of staining, etc. -
Page 15: Control Panel
Control Panel Note: Control panel image is for reference only, actual product may have slight difference 1. Program Selection Knob Select an appropriate program by kinds of clothes and degree of stains. 2. Water Temperature Button • Select the water temperature by the kinds of clothes and degree of staining. -
Page 16: How To Start Washing
• Press and hold this button for 2 seconds to open the door temporarily for adding clothes during operation. 5. “Power” button • Press this button to turn the appliance ON or OFF. • After a program is finished, press the “Power” button to turn off the appliance How to Start Washing Prepare for washing... - Page 17 Water temperature Program (°C) Rinse load Cloth type Cotton 40/60/85/normal/20 10 kg General cotton fabric Down 40/normal/20 ≤3kg Down clothing Gentle 40/normal/20 ≤3kg Wool, silk, synthetics Wool 40/normal/20 ≤3kg Machine washable wool fabr Night 40/60/normal/20 ≤4kg Cotton fabric/chemical fiber fabric Antibacterial ≤4kg Need to eliminate mite, bact...
-
Page 18: Part 5: Maintenance
Water temperature Program (°C) Rinse load Cloth type Shirts 40/normal/20 ≤4kg Cotton fabric/chemical fiber fabric Underwear 40/60/normal/20 ≤3kg Cotton fabric/chemical fiber fabric Quick30' normal/20/40 ≤2kg Less soiled clothes or towels that are used frequently Quick15' normal/20/40 ≤2kg Less soiled clothes or towels that are used frequently Notes: The first parameter of water temperature and spin speed is the... -
Page 19: Drum Self-Cleaning
the body with a cloth dipped in appropriate detergents or soapy water. 4. Do not spray water on the body directly 5. Do not wipe the body with chemicals such as putty-powder, diluting agents, gasoline and alcohol 6. Clean the Door Seal. Please wipe stains and foreign matters such as thread chips away with a towel every time after using. -
Page 20: Cleaning The Inlet Valve
4. Install the clean fastener and the water supply hose. 5. Recommended every 6 months Cleaning the Inlet Valve Remove the water supply hose from the washing machine. 2. Take out the filter screen from the inlet valve. 3. Clean the filter screen thoroughly with a toothbrush or similar tools. -
Page 21: Part 6: Troubleshooting
ATTENTION! The filter must be tightly screwed to prevent water from leaking. Do not clean the filter when a program is running PART 6: TROUBLESHOOTING Before contacting service center, check the following table: Problem Possible Cause Recommended Action Appliance is not working •... - Page 22 Problem Possible Cause Recommended Action E2 – Door fault • • Door is open when Check if the door is program is started opened. Close the door E3 – Drain fault • • Drain pipe too high Install according to •...
-
Page 23: Part 7: Specification
PART 7: SPECIFICATION Model WF 1030 VDWH Color White Type Front Load Wash Capacity (kg) 10.5 Max. Spin Speed (rpm) 1200 No. of washing programs Inlet water pressure (MPa) 0.05-0.85 Cold Wash power (Watt) Spin power (Watt) Hot Wash power (Watt) - Page 24 02/22 PT MODENA INDONESIA Jl. Industri Raya I Blok D-8, Jatiuwung, Tangerang 15135...
Need help?
Do you have a question about the WF 1030 VDWH and is the answer not in the manual?
Questions and answers