Table of Contents
Advertisement
Advertisement
Table of Contents

Related Manuals for Modena WF 0532 WSR


Summary of Contents for Modena WF 0532 WSR
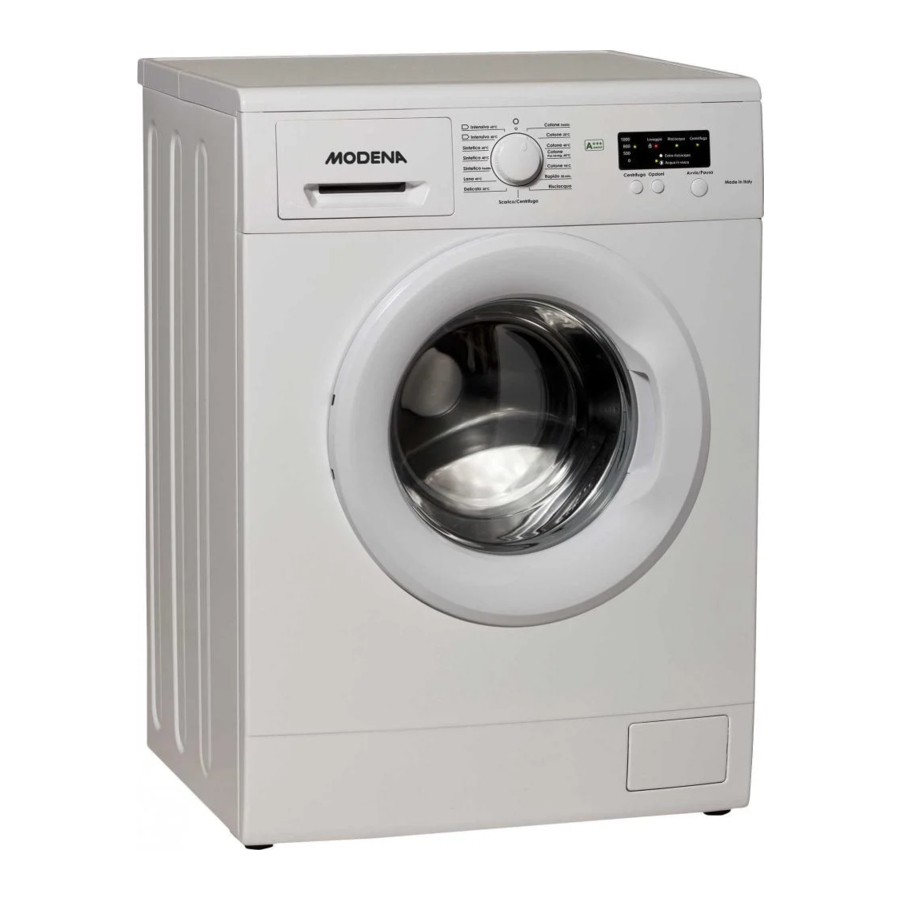
- Page 1 User Manual Book Washing Machine WF 0532 WSR WF 0632 WSR WF 0732 WSR...
-
Page 2: Table Of Contents
TABLE OF CONTENT SAFETY AND WARNING Intended Use Electrical Safety Water Safety Positioning Correct Use FEATURES Control Panel Control Panel Description INSTALLATION General Information Before Use HOW TO USE Washing Instructions Laundry Selection Starting Washing Programs MAINTENANCE Cabinet Detergent Drawer Cleaning Detergent Drawer Drain Pump Filter Cleaning Cleaning of Electro-Valve and Water Supply Hose Filters... - Page 3 Washing Programs, Durations and Options Laundry Symbols for Washing Machine Laundry Symbols Not for Washing Machine This guide book explains everything you need to know about your new product. Please contact our Customer Care should you need further assistance through www.modena.com.
-
Page 4: Safety And Warning
SAFETY AND WARNING This washing machine complies with current safety norms and regulations. If improperly used, it can provoke damage to people and/or goods around you. Before using the washing machine for the first time, please read this user guide carefully. It contains important instructions for the safety, use and maintenance of the washing machine. -
Page 5: Electrical Safety
ATTENTION! • This appliance can be used by children of at least 8 years old and by people with limited physical, sensorial or mental ability or with no required knowledge, as long as they are kept under surveillance or they have been instructed about safety norms to apply for the use of the appliance and possible risks. -
Page 6: Water Safety
• In the event of faults, prolonged absences or to clean the appliance, disconnect it from the electrical mains. • The appliance is considered to be disconnected from the mains when: The power cable is unplugged from the socket. The central switch has been turned off. Water Safety •... - Page 7 before washing in the appliance. • Never detergents with solvents (i.e. petrol, trichloroethylene). These products damage some componentsof the appliance and produce toxic vapors which could potentially provoke fi res, blasts or damaged surfaces. NOTES! The manufacturer cannot be held liable for damages caused because of not following the instructions in the manual.
-
Page 8: Features
FEATURES Control Panel Programs Knob Spin Regulation Options Start/ Pause Wash Phases Child Lock Control Panel Description Programs Knob The program knob is used to select the desired program and to turn off the machine. It can be rotated clockwise and counterclockwise for easy and fast selection of programs. - Page 9 rinse hold and extra rinse. The selection is signalled by the illumination of a LED. Depending on the selection, the LED may Fixed when extra-rinse is selected. Flashing when rinse hold is selected. Off when no option is selected. 4. Start/Pause This key allows for the starting or pausing the washing program momentarily.
-
Page 10: Installation
INSTALLATION General Information The assembled group of the appliance is secured by 4 fixing screws (which protect it during handling and transport operations) as shown in Figure 1. Figure 1 Fixing Screws Removal 1. Before using the appliance, it is necessary to remove the fixing screws by turning counter clockwise. - Page 11 Figure 2 Figure 3 NOTES! If the fixing crews are not removed, this will cause strong vibrations and irregular movements during the washing cycle with subsequent damages. Positioning of Appliance In order to avoid damages or malfunctions, the appliance must not be installed on roofs, balconies, under canopies or in places where it may be exposed to atmospheric agents.
- Page 12 the height by screwing and unscrewing in accordance with the necessities as shown in Figure 4. 4. After regulating the feet, since vibration may modify its level, it is advisable to tighten the docking nut on the feet until it is blocked as shown by the figure below.
- Page 13 Water Supply Inlet Hose 1. The water supply inlet hose has to be connected to a cold water tap with threaded hole of 3/4” and to the appliance. Only use the hose supplied with the appliance and make sure that the rubber gaskets are properly placed on the ends of the hose.
- Page 14 to avoid damages to the clothing and to the washing machine. Use only the water supply inlet hose which is supplied with the appliance. Water Drainage The water drain hose can be positioned in three different ways: 1. On the edge of a sink, using a U-hook plastic (not supplied). Make sure the hose is well fixed on the sink.
-
Page 15: Before Use
Before Use Before using the washing machine for the first time, it is necessary to do a washing cycle (program cotton) with detergent and without laundry, setting the temperature at 60° C. Electrical Connection • The appliance is supplied with a power cable and a Schuko plug for the connection to the 230V/ 50Hz AC grid. - Page 16 • In order to avoid risks of electrical shocks/fi res, the cable must be connected to a wall sucket (C) suitable for the type of plug (B). • Do not modify the connection cable nor use adaptors or extension leads (D). •...
-
Page 17: How To Use
HOW TO USE Washing Instructions • The appliance shall not be used by children or vulnerable persons without appropriate supervision. • Children shall not be allowed to play with the appliance. • For each garment, follow the washing instructions written on the clothing labels. -
Page 18: Laundry Selection
cycle. • Unplug the appliance if it is not used for long periods of time. Laundry Selection To ensure you are getting the best from your washing machine, clothing shall belong to one of the following types: • White clothes •... - Page 19 makes the appliance noisier. • In case of excessive load or lower than half the rated load capacity, it is recommended to reduce to a minimum the spin speed in order to avoid strong vibrations during the spinning cycle. • Before closing the door, make sure that no garment has been left on the edge of the gasket.
-
Page 20: Starting Washing Programs
Figure 12 2. Raise the bulkhead insert to use powder detergent as shown in Figure 13. Figure 13 Starting Washing Programs 1. To start the wash program, turn the program knob onto a desired program. 2. Consider the opportunity to personalize the wash program by regulating the temperature and/or spinning and the selection of one or more special options. - Page 21 Pause Washing • It is possible to stop the washing cycle by pressing the button Start/Pause. This way, the appliance switches to pause mode. • To turn off the machine in order to change program, turn the knob number 1 to the OFF position and then select the new program.
-
Page 22: Maintenance
MAINTENANCE Cabinet It is recommended to clean the cabinet of the appliance with lukewarm water thus preserving its original brightness for a long time. Detergent Drawer To remove detergent deposits, it is recommended to pull out the detergent drawer by pressing the rounded area as shown in Figure 14. Figure 14 Cleaning Detergent Drawer Once pulled the drawer out, remove the steam absorber divider as... -
Page 23: Drain Pump Filter Cleaning
Figure 16 In case the draining hole of the drawer is obstructed by detergent deposits or foreign objects, it is recommended to remove the obstacle making sure not to push it to the bottom because it may clog up the internal circuit. We remind you that the detergent can be easily removed with hot water. - Page 24 NOTES! If the drain circuit is clogged, there could be consistent quantity of water in the appliance (max. 25l). Emptying Procedure 1. Place a tray between the cabinet and the end of the filler. Figure 18 WARNING! After a wash cycle with high temperature, wait until it is cooled down.
- Page 25 3. When there is no more water coming out, unscrew the filter completely and clean it carefully. Remove any foreign objects from the filter. Figure 20 4. Reinsert the drain filter and tighten it firmly until it locks. WARNING! Failure to reinsert the filter or incomplete tightening of the filter may result in water leakage from the machine.
-
Page 26: Cleaning Of Electro-Valve And Water Supply Hose Filters
Cleaning of Electro-Valve and Water Supply Hose Filters To clean the filter, follow the instructions below: • Turn off the washing machine and disconnect the power cable. • Close the water and disconnect the water supply inlet hose from the water tap and from the washing machine. •... -
Page 27: Troubleshooting
TROUBLESHOOTING Most part of malfunctions which occur during the daily use of your appliance can be solved by yourself within a few minutes. In many cases, it is possible to save time and money without necessarily calling the authorized after-sale service. The following table is a valuable help to identify and possibly eliminate malfunctions, in any other case please call the after-sale service. -
Page 28: If Laundry Is Ruined/ Torn
If Laundry is Ruined/ Torn • In some cases, foreign bodies may be present in the clothes to be washed (e.g. hooks, underwires, pins) that can ruin/tear fabrics during washing. • In this case, it is necessary to insert the hand in the drum holding a woman’s stocking in order to see if there are protrusions in relief of these items or similar things from the drum, which could hook to laundries. -
Page 29: Possible Remedies
Possible Remedies Problem Diagnosis Possible Solution • Check whether the plug properly inserted into power socket. The washing • Check whether there machine does power not start. socket. • Verify selector knob is not positioned on OFF. The washing machine does not start the Reopen the door and close it programs (lights... - Page 30 The washing machine does Turn off the washing not heat (lights machine and restart the no. 2 – 3 wash programs. flashing). • Remove drain hose from drainage line make sure it directly drains into The washing container/sink, then machine does select drain not drain (lights...
- Page 31 Switch off the washing Lights no. 1, 2 machine and switch it back – 4 flashing. • Make sure the red light is off. • Make sure appliance is not in soak mode or rinse The door does not open. hold special option.
- Page 32 • Turn off the water tap at the end of every wash cycle. The washing machine take in water continuously even when it is off. • Reduce water pressure or check the autoclave.
-
Page 33: Specification
SPECIFICATION Model WF 0532 WSR WF 0632 WSR WF 0732 WSR Capacity 5 kg 6 kg 7 kg Energy Class Color White White White Display Display Display Display technology technology technology 15 programs + 5 15 programs + 5 15 programs + 5... - Page 34 Product Data Sheet Energy Energy Washing Spin Drying Capacity Type Efficiency Consumption Performance Performance (kg) Class (kWh/cycle) Class Class WF 0532 0.88 WF 0632 0.88 WF 0732 1.02 Max. Water Noise in Water Annual Energy Spin Consumption Washing Type Remaining Consumption Speed per Cycle...
- Page 35 Standard Programme Time Noise in Spinning Phase Type dB(A) Cotton 60°C Full Load (min.) 162.0 WF 0532 WSR 163.0 WF 0632 WSR 166.0 WF 0732 WSR...
-
Page 36: Appendix
APPENDIX Washing Programs, Durations and Options The programs Intensive 60°C and 40°C are test programs (cotton standard 60°C) and (cotton standard 40°C) used to evaluate the efficiency of the appliance. These programs are the most efficient in terms of combined consumption (energy-water) and are indicated for washing cotton laundry which is normally soiled. - Page 37 Cotton 40°C 5 kg 2h 10 • Temperature at min. 6 kg 40°C Extra 7 kg • rinse. 0 – Max spin Rinse • Cotton or linen 2h 20 hold. bedsheets, min. 8 kg pillowcases, and tablecloths Cotton Prewash 5 kg 2h 40 60°C min.
- Page 38 fabrics. Wool 40°C 5 kg 56 min. • Temperature 6 kg at 40°C Extra 7 kg • 0 - 1000 rinse. Rinse rpm. 1h 05 hold. • Wool and min. 8 kg mixed wash- able wool. Synthetic Cold 5 kg 1h 25 min.
- Page 39 pillowcases, Extra rinse. tablecloths. Rinse hold. Reference Laundry Load Weight for Washing Machine Terry Bathrobe 1200 g Terry Towels 900 g Bedspreads 700 g Pajamas 500 g Tablecloth 250 g Pillowcases and Towels 200 g Place Mats and Underwear 100 g...
- Page 40 Program Sequence Rinse Spin Number of Wash Programs Rinse (The Last Intermediate Final Rinse Takes Softener) Cotton Cold 2 + 1* Cotton 20°C 2 + 1* Cotton 40°C 2 + 1* Cotton Pre-Wash 2 + 1* 60 °C Cotton 90°C 2 + 1* Rapid 30°C 1 + 1*...
-
Page 41: Laundry Symbols For Washing Machine
Intensive 60°C 2 + 1* Laundry Symbols for Washing Machine The number inside the basket indicates the maximum temperature at which laundry can be washed. Icon Description Icon Description Delicate wash max 60° C Normal wash max 90° - 95° C Delicate wash max 40°... -
Page 42: Laundry Symbols Not For Washing Machine
Laundry Symbols Not for Washing Machine Delicate dry Dry-cleaning with about 200°C Bleaching allowed No heat hydrocarbon Dry-cleaning with about 150°C Only use oxygen Delicate dry bleach Low heat Dry-cleaning with all about 110° C Do not bleach Delicate dry solvents Medium heat Do not dry clean...
Need help?
Do you have a question about the WF 0532 WSR and is the answer not in the manual?
Questions and answers