Table of Contents
Advertisement
Quick Links
Advertisement
Table of Contents

Related Manuals for FoxESS US Series


Summary of Contents for FoxESS US Series
- Page 1 User Manual US SERIES FOXESS CO., LTD.
-
Page 2: Table Of Contents
Table of Contents 1. Notes on This Manual ..........................3 1.1 Scope of Validity .......................... 3 1.2 Target Group ..........................3 1.3 Symbols Used ..........................3 2. Safety Precautions ..........................5 2.1 Appropriate Usage ........................5 2.2 PE Connection and Leakage Current ..................5 3. - Page 3 9.2 Troubleshooting and Routine Maintenance ................67 10. Decommissioning ..........................69 10.1 Dismantling the hybrid inverter ....................69 10.2 Packaging ..........................69 10.3 Storage and Transportation ..................... 69...
-
Page 4: Notes On This Manual
1. Notes on This Manual 1.1 Scope of Validity This manual describes the assembly, installation, commissioning, maintenance and troubleshooting of the following model(s) of FOXESS products: H1-3.8-US H1-5.7-US H1-7.6-US H1-9.6-US H1-11.4-US AC1-3.8-US AC1-5.7-US AC1-7.6-US AC1-9.6-US AC1-11.4-US Note: Please keep this manual where it will be accessible at all times. - Page 5 Danger. Risk of electric shock! Danger to life due to high voltage. There is residual voltage in the inverter which needs 5 min to discharge. Wait 5 min before you open the upper cover or the lower cover. Read the manual. Product should not be disposed as household waste.
-
Page 6: Safety Precautions
2. Safety Precautions 2.1 Appropriate Usage US series hybrid inverters are designed and tested in accordance with international safety requirements. However, certain safety precautions must be taken when installing and operating this hybrid inverter. The installer must read and follow all instructions, cautions and warnings in this installation manual. - Page 7 PV array, cables or inverter (DC). The RCD in the FOXESS inverter can detect leakage on the DC side. There are 2 trip thresholds for the RCD as required by the UL1741 standard. A low threshold is used to protect against rapid changes in leakage typical of direct contact by people.
-
Page 8: Introduction
3. Introduction 3.1 Basic Features US series is high-quality hybrid inverters which can convert solar energy to AC energy and store energy into battery. The hybrid inverter can be used to optimize self-consumption, store in the battery for future use or feed-in to public grid. Work mode depends on PV energy and user’s preference. -
Page 9: Dimensions
When the grid is off, system will supply emergency power from PV or battery to Back up mode the home loads (Battery is necessary in off-grid mode). This is the preferred mode under a time-of-use rate schedule in which mode the user can set the On peak, Off peak, and Mid peak hours. -
Page 10: Terminals Of Hybrid Inverter
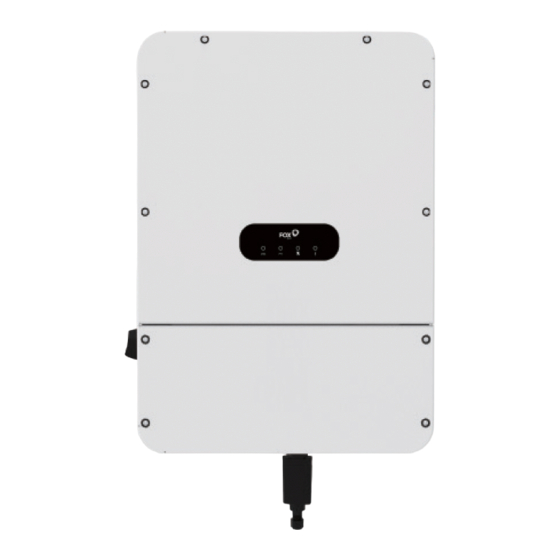
3.3 Terminals of Hybrid Inverter Figure 3-2 Bottom of Hybrid Inverter Item Description PV (For Hybrid Only) WIFI/GPRS/4G/USB AC-GRID AC-BACKUP DC Switch (For Hybrid Only) Waterproof Lock Valve Waterproof Lock Valve COM1 COM2 Table 3-2 Terminal Description... -
Page 11: Technical Data
4. Technical Data 4.1 PV Input (For Hybrid Only) Module H1-3.8-US H1-5.7-US H1-7.6-US H1-9.6-US H1-11.4-US PV INPUT Max. PV input power (W) 5700 8550 11400 14400 17100 Nominal DC voltage (V) Max. DC voltage (V) System startup voltage (V) MPPT Voltage Range (V) 80-550V MPPT Voltage Range (V) (Full 204 –... -
Page 12: Ac Output/Input
Module H1-3.8-US H1-5.7-US H1-7.6-US H1-9.6-US H1-11.4-US Full Load DC operating 95-460 140-460 190-460 235-460 280-460 voltage range (V) Max. continuous charge and discharge current (A) Max. continuous 5700/4180 8550/6270 11400/8360 14400/10560 17100/12540 charge/discharge power (W) Peak discharge current for 60 sec. - Page 13 Module H1-3.8-US H1-5.7-US H1-7.6-US H1-9.6-US H1-11.4-US Operating AC frequency range 57~63 (Hz) Output power factor >0.99 (0.8 leading - 0.8 lagging) Total harmonic distortion <3% INPUT AC (Grid side) Max.AC input power (W) 3800 5700 7600 9600 11400 Input voltage range (V) 211~264 Nominal AC input frequency (Hz)
-
Page 14: Efficiency, Protection And Standard
range (Hz) Output power factor >0.99 (0.8 leading - 0.8 lagging) Total harmonic distortion <3% Maximum Output Overcurrent Protection INPUT AC (Grid side) Max.AC input power (W) 3800 5700 7600 9600 11400 Input voltage range (V) 211~264 Nominal AC input frequency (Hz) Max.AC input current (A) 15.8... -
Page 15: General Data
Module H1-3.8-US H1-5.7-US H1-7.6-US H1-9.6-US H1-11.4-US Unit AFCI Protection STANDARD UL Std No. 1741, UL62109, IEEE1547-2018, IEEE1547a-2020, Safety and EMC IEEE1547.1-2020; CSA C22.2 No.107.1-16, UL1998, UL1699B, FCC part15 CLASS B, HECO Module AC1-3.8-US AC1-5.7-US AC1-7.6-US AC1-9.6-US AC1-11.4-US EFFICIENCY Max. efficiency 97.60% Round-trip efficiency 90.90%... - Page 16 Module H1-3.8-US H1-5.7-US H1-7.6-US H1-9.6-US H1-11.4-US Display LED, App, Website Communication interface CAN2.0, RS485, Meter, CT, ISO alarm, SUNSPEC Monitoring Module: Smart Optional WiLAN/GPRS Warranty Standard 10 years Module AC1-3.8-US AC1-5.7-US AC1-7.6-US AC1-9.6-US AC1-11.4-US Dimension and Weight Dimension (W/H/D) 658/462/234.5mm Weight 80.5 lbs /36.5kg Enclosure rating...
-
Page 17: Installation
5. Installation 5.1 Check for Physical Damage Make sure the hybrid inverter is intact during transportation. If there is any visible damage, such as cracks, please contact your dealer immediately. 5.2 Packing List Open the package and take out the product, please check the accessories first. The packing list is shown as below. - Page 18 The wall hanging the hybrid inverter should meet conditions below: 1. Solid brick/concrete, or strength equivalent mounting surface; 2. Hybrid inverter must be supported or strengthened if the wall's strength isn't enough (such as wooden wall, the wall covered by thick layer of decoration). Please avoid direct sunlight, rain exposure, snow laying up during installation and operation.
- Page 19 Figure 5-3 Staggered installation • Mounting Steps Tools required for installation: Category Tools Sleeves Crimping pliers Cross screwdriver Installation Stripping pliers Percussion drill Internal hexagonal wrench...
- Page 20 Crystal head crimping pliers Straight screwdriver • Inverter Installation Step 1: Fix the bracket on the wall Choose the place on which you want to install the hybrid inverter. Place the bracket on the wall and mark the position of the 4 holes from bracket. Figure 5-4 Marking the position of the bracket Drill holes with electric drill, make sure the holes are at least 50mm deep, and then tighten the expansion tubes.
- Page 21 Hang the hybrid inverter over the bracket, slightly lower the hybrid inverter, and make sure the two mounting grooves on the back are properly fixed with the two bracket bars. Figure 5-7 Hanging the hybrid inverter Tighten the anti-theft screw with a screwdriver as shown below: Figure 5-8 Tightening the anti-theft screw •...
- Page 22 Figure 5-10 Tightening expansion tubes Insert the expansion tubes into the holes and tighten them. Install the bracket with the expansion screws. Figure 5-11 Tightening expansion tubes Step 2: Match the FOX Hub with wall bracket Hang the FOX Hub over the bracket, slightly lower the FOX Hub, and make sure the two mounting grooves on the back are properly fixed with the two bracket bars.
- Page 23 Figure 5-13 Tightening the anti-theft screw Suggestion: the height difference between the highest installation holes of the FOX Hub bracket and the inverter bracket is 101.3mm. Figure 5-14 Suggested installation distance...
-
Page 24: Electrical Connection
6. Electrical Connection 6.1 Battery Connection • Choose 6 AWG copper cable to connect the battery module. • Trim 12mm of insulation from the cable end. Figure 6-1 Trim length of the cable • Connect the DC connector (battery) via the above copper cable as below. Figure 6-2 Connecting the battery with power cables •... -
Page 25: Pv Connection (For Hybrid Only)
6.2 PV Connection (For Hybrid Only) Step 1: PV String Connection US series hybrid inverters can be connected with 3~4-strings of PV modules. Please select suitable PV modules with high reliability and quality. Open circuit voltage of module array connected should be less than 550V, and operating voltage should be within the MPPT voltage range. -
Page 26: Grid Connection
6.3 Grid Connection Step 1: Grid Cable Connection US series hybrid inverters are designed for split-phase grid. Voltage is 120/240V; frequency is 60Hz. Other technical requests should comply with the requirement of the local public grid. Table 6-1 Technical requests of cables and breakers H1-3.8-US... - Page 27 Figure 6-6 Example of forbidden connection of loads Step 2: Grid Wiring • Check the grid voltage and compare with the permitted voltage range (refer to technical data). • Disconnect the circuit-breaker from all the phases and secure against re-connection. Trim the cables •...
-
Page 28: Communication Device Installation (Optional)
Figure 6-9 Connecting the AC connector with power cables 6.4 Communication Device Installation (Optional) US series hybrid inverter are available with multiple communication options such as Smart WiLAN, GPRS, RS485 and Meter with an external device. Operating information like output voltage, current, frequency, fault information, etc., can be monitored locally or remotely via these interfaces. -
Page 29: E-Stop Wiring
BMS-CANL BMS-CANH BMS-CANH BMS-CANL • Meter The hybrid inverter has integrated export limitation functionality. To use this function, a power meter with CTs must be installed. The meters are wired as below: Figure 6-10 Meter wiring diagram 6.5 E-STOP Wiring Signal Wire Wiring Remove the protection wire at the P4 module of the AC adaptor. -
Page 30: Fox Hub Wiring
Figure 6-11 E-STOP wiring diagram Warning: do not remove the protection wire at the P4 module of the AC adaptor if E-STOP is not used. 6.6 FOX Hub Wiring Signal Wire Wiring Choose a multi-paired and individually foil shielded wire with a conductor cross-sectional area range of 24-16 AWG to connect the FOX Hub. - Page 31 Figure 6-13 Connecting the Fox Hub to the generator Choose cables with the following cable diameters to connect conductors L1 and L2 of the LOADS module of the FOX Hub to the sub panel. Figure 6-14 Connecting the Fox Hub to the loads Choose cables with the following cable diameters to connect conductors L1 and L2 of the GRID module of the FOX Hub to the switch.
-
Page 32: System Wiring Diagram
Figure 6-15 Connecting the Fox Hub to the grid Notes: 1.FOX Hub: Used for On-Grid and Off-Grid switching of hybrid inverters, improve maximum off-grid loads capacity, maximum bypass current is 200A. 2.When the grid power is off, ensure that the Back-up load power is lower than the hybrid inverter's maximum output power. - Page 33 Partial Home Backup Figure 6-17 Partial-home backup wiring diagram A. Common loads description Under off-grid mode, if need to connect the inductive load on off-grid port, please ensure that the instantaneous power of the load at startup is lower than the maximum power of the off-grid mode. Below table shows some conventional and reasonable loads for you reference.
-
Page 34: Hybrid Inverter Start-Up
Figure 6-18 Common loads 6.8 Hybrid Inverter Start-Up Please refer to the following steps to start up the hybrid inverter. Make sure the inverter is fixed well on the wall. Make sure all cables are completed. Make sure the meter and external off-grid Energy Hub connected well (if needed). Make sure the battery and E-STOP wires are connected well. -
Page 35: Operations On The Foxessus App
7. Operations on the FoxEssUS App 7.1 App Overview • Function The FoxEssUS app is a mobile phone app that locally communicates with the hybrid inverter to allow for querying alarms, configuring parameters, and performing routine maintenance, and commissioning. • Connection Method After the DC or AC side of the hybrid inverter is energized, the app can connect to the hybrid inverter in either of the following ways:... - Page 36 Step 2 Make role choice.The app users are classified as the installer and end user. For installer Select “Installer”, enter the installer’s information, tick the box, and tap “Register”to complete registration. For end user Select “Enduser”, enter the end user’s information, tick the box, and tap “Register” to complete registration.
-
Page 37: Resetting The Password
7.4 Resetting the Password If you forget the password, tap “Forgot Password”, enter the information as desired, tap “Submit” to reset the password. 7.5 WIFI Configuration Step 1 Open the APP, tap “ ”, and tap “Wifi Configuration”. - Page 38 Step 2 Scan the QR code on the Smart WiLAN, or enter the SN code, and then tap “confirm”. Select the house router WiFi, input the house router’s password, and tap “Start configuration”. Note: • if you cannot perform the next step, 1.
-
Page 39: App Operations By The Installer
1. check whether the frequency band of WiFi is 2.4G. • if the page is loaded for a long time and wifi configuration is not successful, 1. check whether the WiFi password is correct; 2. check whether the WiFi signal of the WiLAN is weak; and 3. - Page 40 Querying the information of clients To query the information of the client, choose “Client” from the home screen. “Client” exhibits search and a list of end users.
- Page 41 Tap “Search”, and query the information of clients by entering user name, Email, Device SN, and status. ② Tap “ ” to edit user information, unbind the device, and handover target installer account.
- Page 42 ③ Query “Energy Status” by tapping any of the list of end users. The page of “Energy Status” exhibits user information, current power, day generation power, power curve, statistics histogram and a list of devices, and work order, wherein “Power” exhibits the day power condition of the inverter, and the installer can screen dates to query historical power curves;...
- Page 43 Tap “ ” to perform remote settings when the device is online. Select different options on the page of remote settings.
- Page 44 ⑤ Query work order conditions by tapping any device in the list of “Work Order Record” of “Energy Status”. The page exhibits user information, work order information, and timeline. When the status is “Initiated”, tap “ ” to modify into “Issue Confirmed”.
- Page 45 When the status is “Issue Confirmed”, tap “ ” to modify into “Solving”. Note: the installer needs to classify the issue and enter reasons and solutions. Wait for the end user to confirm the work order to complete work order processing.
- Page 46 Adding new client Tap “ ” at the bottom to add a new client, enter new client’s information, adding a device by tapping “+ Add Device”, and slide leftward to delete the device. Logging out of the App and canceling the account The page of “Me”...
-
Page 47: App Operations By The End User
② Tap “Account Cancellation”, and enter correct password to cancel the account (on the premise that it is mandatory to transfer user information to another account before being allowed to log out). 7.7 App Operations by the End User... - Page 48 For end user Figure 7-4 Operation permissions of the end user Querying device details Tap “Flow Diagram” in “Equipment” to find a flow diagram exhibiting the power flow condition of the current device. ① Tap “ ” to query real-time data. Tap “...
- Page 49 Tap “Device Details” in “Equipment” to exhibit power generation today, year/month/day charge and discharge statistics, SOC/battery charge and discharge status, power, and statistics, wherein “Power” exhibits the day power condition of the inverter, and the end user can screen dates to query historical power curves;...
- Page 50 Querying energy status Tap “Details” in “Energy” to find generating power, power generation today, total charge, total discharge, charging power, discharge power, today’s charge energy data, today’s discharge energy data, power, and statistics, wherein “Power” exhibits the day power condition of the inverter, and the end user can screen dates to query historical power curves;...
- Page 51 Tap “Equipment” in “Energy” to find details of the device. Querying work order and installer information Tap “Function” at the bottom to find work order request, installer information, and device time zone.
- Page 52 Tap “ ” at the top right corner to create a work order. Tap any in the work order list to check details of the work order.
- Page 53 Tap “Completed” at the top right corner to confirm the work order if the work status is confirming. Changing the password, logging out of the App and canceling the account The page of “Me” exhibits partial user information, App version, change password, log out, and account cancellation.
- Page 54 ② Tap “Change Password” to change user’s password. ③ Tap “Log Out” to log out of the current account.
- Page 55 ④ Tap “Account Cancellation”, and enter correct password to cancel the account.
-
Page 56: Operation
8. Operation 8.1 Control Panel LED Description Status Meaning DC Status AC Status Off-grid Alarm Green Green The inverter is running in on-grid state and exporting power to the power grid. Blinking The DC is on and the AC is off in on-grid green mode. -
Page 57: Maintenance
9. Maintenance This section contains information and procedures for solving possible problems with the FOXESS hybrid inverters and provides you with troubleshooting tips to identify and solve most problems that can occur. 9.1 Alarm List Alarm Alarm Item Alarm Name... - Page 58 1. If the alarm is triggered accidentally, it may be due to temporary abnormalities in the power grid. The inverter will automatically recover after the power grid has resumed normal functioning. 2. If the alarm is triggered Shutdown, The grid voltage frequently, check whether the alarm reporting, GridUnderVo...
- Page 59 the fault is is short-circuited. fault is rectified. rectified. As a result, the 2. If the alarm is triggered inverter transient frequently and affects the power output current production of the PV plant, check exceeds the upper whether grid or the output is threshold and, short-circuited.
- Page 60 1. If the alarm is triggered accidentally, it may be due to The leak current leak current exceeding the RMS value threshold or temporary dynamic exceeds the value exceeding the threshold. Shutdown, threshold specified The inverter will automatically alarm reporting, for leak current, cLeakCurrFa recover when the leak current is...
- Page 61 1. Check that the grid voltage is within the normal range. Shutdown, 2. Check the connection of the The difference alarm reporting, AC output power cable. between grid GridVoltUnb and automatic 3. If the cable is connected 1040 Major phase voltages alanFault recovery after properly but the alarm is...
- Page 62 1. If the alarm is triggered accidentally, it may be due to temporary abnormalities in the power grid. The inverter will automatically recover after the power grid has resumed normal Shutdown, The actual grid functioning. alarm reporting, frequency is below GridLowFreq 2.
- Page 63 Shutdown, alarm reporting, The PV1 module cPV1RevCo and automatic Check whether the PV1 module 1066 Major output is reversely nnFault recovery after output is reversely connected. connected. the fault is rectified. Shutdown, alarm reporting, The PV2 module cPV2RevCo and automatic Check whether the PV2 module 1067 Major...
- Page 64 1. If it is triggered accidentally, the external power cable may be Shutdown, Residual Current abnormal temporarily. The alarm reporting, CT check failure. inverter automatically recovers cLeakCurrCh and automatic The insulation after the fault is rectified. 1109 Major anFault recovery after impedance of the 2.
- Page 65 the impedance between the PV string and ground is not below the lower threshold. Shutdown, The power of the alarm reporting, Off-Grid Load is Check if the power of the Off-Grid cLoadOverP and automatic 1136 Major higher than the Load exceeds the permitted owerFault recovery after upper threshold in...
- Page 66 The grid voltage 1. The inverter monitors its drops dramatically external working conditions in or the power grid real time. And it can Shutdown, or the output load automatically recover after the alarm reporting, is short-circuited. fault is rectified. cInvSndOver and automatic As a result, the 2.
- Page 67 recovery after upper threshold. 2. Check that the the fault is 1. The battery is communications cable and power rectified. faulty. cable between the inverter and 2. The battery the battery are properly SOC is too low. connected. 3. Send a shutdown command on the app.
- Page 68 switch in sequence after 5 minutes. 3. If the alarm still exists, contact your installer. Shutdown, alarm reporting, The battery output cBatRevCon and automatic Check whether the battery output 1247 Major is reversely nFault recovery after is reversely connected. connected. the fault is rectified.
- Page 69 Are the configurations settings correct for your particular installation? Are the display panel and the communications cable properly connected and undamaged? Contact FOXESS Customer Service for further assistance. Please be prepared to describe details of your system installation and provide the model and serial number of the unit.
- Page 70 10. Decommissioning 10.1Dismantling the hybrid inverter Disconnect the hybrid inverter from DC (for hybrid only) Input and AC output. Wait for 5 minutes for the hybrid inverter to fully de-energize. Disconnect communication and optional connection wirings. Remove the hybrid inverter from the bracket.
- Page 71 The copyright of this manual belongs to FOXESS CO., LTD. Any corporation or individual should not plagiarize, partially or fully copy (including software, etc.), and no reproduction or distribution of it in any form or by any means is permitted.
Need help?
Do you have a question about the US Series and is the answer not in the manual?
Questions and answers