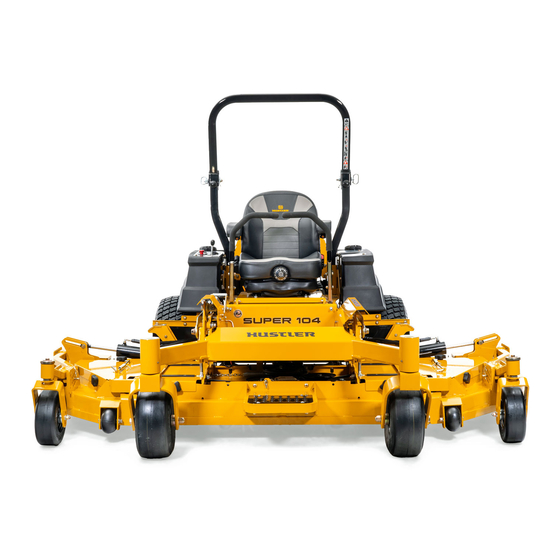
HUSTLER Super 104 General Service Manual
Hide thumbs
Also See for Super 104:
- Operator's manual (56 pages) ,
- Service manual (53 pages) ,
- Operator's manual (60 pages)

Related Manuals for HUSTLER Super 104


Summary of Contents for HUSTLER Super 104
- Page 1 Hustler Super 104™ ® General Service Manual 200 South Ridge Road Hesston, Kansas 67062 125816 REV B...
- Page 2 WARNING The engine exhaust from this product contains chemicals known to the state of California to cause cancer, birth defects or other reproductive harm. NOTICE OF REQUIREMENT OF SPARK ARRESTER MUFFLER This equipment may create sparks that can start fires around dry vegetation. California Public Resources Code Section 4442.6 provides that it is unlawful to use or operate an internal combustion engine on any forest-covered, brush-covered, or grass-covered land unless the engine is equipped with a spark arrester maintained in effective working order.
-
Page 3: Table Of Contents
General Information ........1-1 Hustler Service Program ......1-1 Maintenance Introduction . - Page 4 Deck Adjustments ........6-1 Deck Leveling .
-
Page 5: General Information
Clear away heavy build-up of grease, oil and dirt, especially in the engine compartment and under the seat platform areas; minute dust particles are abrasive to close-tolerance This manual is part of a service package for the Hustler ® engine and hydraulic assemblies. - Page 6 REV B 125816...
-
Page 7: Safety
SAFETY • Do not smoke while refueling. Extinguish all cigarettes, cigars, pipes and other sources of ignition. • Do not remove fuel cap or fill tank with engine running or while engine is hot. Clean up any This safety alert symbol is used to call attention to a gasoline spills. -
Page 8: Operation Precautions
Understand Machine Operation Never leave machine unattended with ignition key in switch, especially with children present. Only qualified and trained personnel should operate Follow daily and weekly checklists, making sure hoses the equipment. are tightly secured and bolts are tightened. ... -
Page 9: Maintenance Precautions
• Hydrogen gas forms inside the battery. This gas them. is both toxic and flammable and may cause an Use original Hustler replacement parts or parts that ® explosion if exposed to flame. Always disconnect are equivalent in overall performance. - Page 10 Sparks can cause a battery gas explosion which will If you spill acid on yourself: result in personal injury. • Flush your skin with water. • Prevent the battery terminals from touching any • Apply baking soda or lime to help neutralize the metal mower parts when removing or installing acid.
-
Page 11: Torque
TORQUE Standard Torques The following chart lists the standard torque values for the threaded fasteners found in this manual. Torque all cap screws, nuts and set screws to these values unless a different torque is shown in the Special Torques section. Size ft-lbs N•m... - Page 12 REV B 125816...
-
Page 13: Power Unit Maintenance
POWER UNIT MAINTENANCE Steering Adjustments Untrained maintenance personnel should never attempt to make any adjustments or repairs to the Steering Control Lever Neutral Adjustment mower’s drive system while the engine is running. The mower’s steering has been factory adjusted to The following procedures should be performed by eliminate creeping when the steering control levers are in the trained maintenance personnel only. - Page 14 12. IMPORTANT: With the engine off, disconnect the two Steering control levers in neutral position female spade connectors from each other (from step #3) and reconnect them to the seat switch. This must be completed so that the safety circuit is functioning properly.
- Page 15 arms are stopping the forward motion of the control arms, loosen the jam nut on the adjustable stop of the corresponding side, turn the stop (set screw) inward to stop the steering control levers slightly before the pump bottoms out. Lock in place when the adjustment is correct by re-tightening the jam nut.
- Page 16 Steering control lever shown in park brake position A. Steering control levers Figure 4-6 A. Cap screws Figure 4-8 A. Steering damper spring housing B. Rear ball stud Figure 4-7 A. Align steering control lever ± .125” (3.175 mm) Figure 4-9 REV B 125816...
-
Page 17: Park Brake Adjustment
Park Brake Adjustment Never work under the machine or attachment unless it is safely supported with jack stands. • Make certain machine is secure when it is raised and placed on the jack stands. • Use only certified jack stands. Use only appropriate jack stands, with a minimum weight rating of 2000 pounds (907 kg) to block the unit up. -
Page 18: Belts
• weather checking Fluid level should be 1” (25.4 mm) from top of reservoir. • cracking Use only 15W50 synthetic oil or 20W50 synthetic oil. Hustler • burns caused by slipping. Full Synthetic 20W50 Hydrostatic Transmission Oil is Slight raveling of belt covering does not indicate failure, recommended. -
Page 19: Checking The Deck Lift Circuit Pressure
Use this procedure when checking the relief setting of the adding system oil. deck lift circuit. The Super 104™ hydraulic system filter is located inside 1. With an operator on the seat, place the steering control the hydraulic reservoir on the underneath side of the tank. - Page 20 6. Select the proper hose and 2000 psi gauge from the Pressure Test Gauge Kit (601661) or Gauge (607464). Attach the gauge to the hose. Attach the hose to the gauge port. Figure 4-18 & Figure 4-19 7. Set the throttle to full throttle and hold the side deck lift switch in the down position and read the gauge.
-
Page 21: Test Procedure For Ddc20 Pump
6. Test procedures are the same for both the right and You should easily get a 2600 PSI reading from the left sides. other gauge. 7. Install Hustler Test Gauge Kit (p/n 007898) as shown ® in Figure 4-22 and Figure 4-23. Check the bypass valve (tow valve) to make sure it is fully seated. -
Page 22: New Or Rebuilt Ddc20 Pump Startup Procedure
Pressure test gauge kit shown installed Never operate the mower with a non-functioning seat switch. Always reconnect the seat switch to the mower harness. 2. Remove the Hustler Pressure Test Gauge Kit. ® 3. After all repairs are completed, check to make sure all tools and obstructions are removed from under the mower. - Page 23 Right side pump as viewed from rear of mower C. Seat switch D. Female spade connectors E. Mower harness Figure 4-25 A. Bypass valve B. Top of pump oil or 20W50 synthetic oil (Hustler Full Synthetic ® 20W50 Hydrostatic Transmission Figure 4-24...
-
Page 24: Warner Clutch Re-Gap Adjustment Procedures
14. Left Side Pump Replacement Only – Follow the flushing Left side pump procedures outlined in the Super 104™ Filter Flush Kit (122756) instructions. 15. IMPORTANT: With the engine off, disconnect the two female spade connectors from each other (from step #3) and reconnect them to the seat switch. - Page 25 Figure 4-28 A. Brake fastener E. Armature B. Brake spacer F. Re-gap shim C. Field shell G. Rotor D. Brake pole H. Gap A. Gap between the rotor and armature face must be greater than .070" prior to shim removal. Figure 4-27 Figure 4-29 Procedure:...
- Page 26 A. M6 x 1 bolt Figure 4-32 Figure 4-30 Figure 4-33 Perform Safety Check: Figure 4-31 5. Using a .015” thick feeler gage, verify that a gap is present between the rotor and armature face on both ends of the brake pole as shown. Figure 4-32 and Figure 4-33 Observe deck operation from the operator’s seat.
-
Page 27: Caster Fork Tapered Bearings Replacement
2. Apply a light coating of grease to the caster pocket before installing the outer bearing races. 3. Use the Hustler Bearing Race Installation Kit (p/n ® 124351) to install the outer races into the caster A. -
Page 28: Tapered Wheel Bearing Replacement
10. Install the upper bearing. Figure 4-37 A. Upper bearing B. Tapered roller bearing race Figure 4-37 11. Install the caster fork assembly, taking care not to damage the lower seal lip. Figure 4-36 IMPORTANT: Stack the cup washers as shown in Figure 4-38. - Page 29 A. Wheel D. Flat washer B. Fork E. Lock nut C. Axle bolt Figure 4-40 A. Outer bearing race C. Wheel housing B. Housing shoulder Figure 4-42 A. Dust cap C. Seal B. Bushing D. Bearing & outer race A. Seal B.
-
Page 30: Tires
Drive wheels ..15–20 psi (103–138 KPa) Front wheels ..20–25 psi (138–172 KPa) If you wish to use non-pneumatic tires on your Hustler ®... -
Page 31: Engine Maintenance
Check engine oil daily and after every 4 hours of operation. The machine must be sitting level when checking oil. Refer to engine manual maintenance schedule recommendation and capacities. Hustler Motor Oil is ® recommended. Change the engine oil and filter after the first 5 hours of operation engine manufacturer’s... -
Page 32: Engine Air Filter
The safety element does not require servicing unless it Vanguard engine (EFI) shown becomes contaminated with dirt or moisture. Vanguard engine (non EFI) shown A. Pre-cleaner C. Dust cap B. Canister D. Clamps Figure 5-4 Vanguard engine (EFI) shown A. Oil drain valve B. - Page 33 Kawasaki engine (non EFI) shown Engine air filter may vary from this illustration A. Pre-cleaner C. Dust cap B. Canister D. Clamp A. Safety filter Figure 5-6 Figure 5-8 Kawasaki engine (EFI) shown Recommended Service Procedure 1. Release clamps and remove element. Clean the air cleaner canister with a damp cloth.
-
Page 34: Fuel Evaporation System Filter
Fuel Evaporation System Filter first. Some Hustler Super 104™ mowers have a fuel evaporation ® system filter. This filter must be checked and replaced every 500 hours or annually whichever comes first. Figure 5-10 Fuel &... - Page 35 A. Fuel evaporation system filter A. Fuel tank B. Tee Figure 5-10 C. Vapor line D. Fuel evaporation system filter Figure 5-12 A. Fuel tank C. Fuel line B. Fuel shutoff valve D. Seat support Figure 5-11 125816 REV B...
-
Page 36: Engine Rpm Settings
Engine RPM Settings The engine rpm’s are set at the factory for maximum mowing efficiency. Occasionally it may be necessary to check and adjust the settings. The high idle speeds, with no load, should be set as follows: Vanguard M61 / M61 EFI ENGINE SPEED Model No. -
Page 37: Deck Adjustments
DECK ADJUSTMENTS Deck Leveling The deck lift mechanism is under pressure. Use caution when performing deck adjustments or maintenance. Figure 6-1 A. Height stop pin Figure 6-2 7. Set the cutting height of the side decks at 3.25” (82.6 mm). Lower the side decks fully. Stop engine. - Page 38 A. Measure to top of deck here B. 3" block Figure 6-3 Side view A. 3" block B. Locator triangles Figure 6-4 Drive wheels ..15–20 psi (103–138 KPa) Front wheels ..20–25 psi (138–172 KPa) 2.
- Page 39 A. 3" (76.2 mm) block A. Nut B. Deck lift hanger Figure 6-8 Figure 6-6 9. Loosen the two 1/2” bolts on the rear gauge wheel 5. Lower the center deck to rest against the stop pin. arm. Loosen the jam nut and adjusting bolt so the rear gauge wheel is not supporting any of the weight of the side deck.
-
Page 40: Blades
above and below the front wheel pivot tube. fork assembly until the deck just begins to lift away Figure 6-10 from the 3” (76.2 mm) block. Figure 6-9 Once Steps 11 & 12 have been satisfied proceed to 14. Tighten the jam nut. Figure 6-9 Step 13. - Page 41 Comparison of Warped and Straight Blades A 15/16" wrench is required to remove the 5/8" cap screw holding the blade to the spindle shaft. NOTE: A blade holding tool (P/N 381442) is available from Hustler Turf Equipment. ® It is designed to prevent the blades from rotating when they are being removed or installed on the spindle.
-
Page 42: Belts
When mounting blades, rotate them after installation to make sure blade tips do not touch each other or sides of the mower. Belts Inspect belts frequently for wear and serviceability. Replace a belt that shows signs of severe cuts, tears, separation, weather checking and cracking, or burns caused by slipping. - Page 43 Center Deck Belt Routing & Tensioning NOTE: 1. Spring length after tensioning new belt. Measured from outside of hook to outside of hook with deck set at 3¼” (82.6 mm) cut height. 2. Route belts as shown. 9.3” – 10.3” (236 –...
- Page 44 Center Deck To Side Deck Belt Routing & Tensioning NOTE: 1. Spring length after tensioning new belt. Measured from one end of the spring to the other end with deck set at 3¼” (82.6 mm) cut height. 2. Route belts as shown. See Detail B See Detail A Adjusting nut...
-
Page 45: Electrical
ELECTRICAL Electrical Schematic – Vanguard Main Mower Harness WHT/RED (20) WHT/RED (20) GRN/WHT (20) WHT/GRN (20) BLK (20) BLK (20) RED (12) RED (12) RED (14) RED/BLK (18) YEL/BLK (18) ORG/GRN (18) BRN (18) YEL/BLU (18) ORG (14) BRN (18) 125816 REV B... - Page 46 Electrical Schematic – Kawasaki Main Mower Harness REV B 125816...
- Page 47 Electrical Schematic – Kawasaki (EFI) Main Mower Harness 125816 REV B...
- Page 48 Electrical Schematic – Side Deck Harness REV B 125816...
-
Page 49: Maintenance
MAINTENANCE Maintenance Schedule Figure 8-1, Figure 8-2, Figure 8-3, Figure 8-4, Figure 8-5, Figure 8-6, Figure 8-7, and Figure 8-8 WEEKLY MONTHLY * ANNUALLY SERVICE AT OR 50 OR 100 OR 500 INTERVALS INDICATED HOURS HOURS HOURS Verify safety start interlock system Prior to each use Visually inspect unit for loose hardware and/or damaged parts Prior to each use... - Page 50 10. Refer to engine owner’s manual for engine service information. 11. If caster fork tapered bearing seals leak, refer to the Super 104™ General Service Manual (p/n 125816) for repair procedures. 12. Refer to the General Service Manual (P/N 125816) to service or repair the tapered wheel bearings.
-
Page 51: Maintenance Locator Chart
Maintenance Locator Chart Mowers with Vanguard engines 1. Engine Oil Fill and Dipstick (Kawasaki) 2. Fuel Filter 3. Engine Air Cleaner 4. Engine Oil Drain Plug 5. Battery 6. Fuel Tanks 7. Hydraulic Oil Reservoir 8. Hydraulic Oil Filter 9. Front Wheel Bearing Zerks (2) Figure 8-1 10. - Page 52 Mowers with Vanguard EFI engines 1. Engine Oil Fill and Dipstick (Kawasaki) 2. Fuel Filter 3. Engine Air Cleaner 4. Engine Oil Drain Plug 5. Battery 6. Fuel Tanks 7. Hydraulic Oil Reservoir 8. Hydraulic Oil Filter 9. Front Wheel Bearing Zerks (2) 10.
- Page 53 Figure 8-5 Figure 8-6 1. Engine Oil Fill and Dipstick (Kawasaki) 11. Deck Height Pivot Zerks (4) 21. Hydraulic Oil Heat Exchanger 2. Fuel Filter 12. Park Brake Switch 22. Deck Belt - Side Deck 3. Engine Air Cleaner 13. Drive Tires 23.
- Page 54 Figure 8-7 1. Engine Oil Fill and Dipstick (Kawasaki) 11. Deck Height Pivot Zerks (4) 21. Hydraulic Oil Heat Exchanger 2. Fuel Filter 12. Park Brake Switch 22. Deck Belt - Side Deck 3. Engine Air Cleaner 13. Drive Tires 23.
-
Page 55: Troubleshooting
TROUBLESHOOTING SUGGESTED SYMPTOMS PROBABLE CAUSES SUGGESTED REMEDIES SYMPTOMS PROBABLE CAUSES REMEDIES Hydraulic system oper- Low hydraulic oil level Fill reservoir ates hot (oil in reservoir Starting motor does not Steering control levers not Place steering control smells rancid) Hydraulic pump faulty Contact your dealer crank in park brake position or... - Page 56 SUGGESTED SYMPTOMS PROBABLE CAUSES REMEDIES Uneven cutting height The blade(s) are not sharp Sharpen the blades A cutting blade(s) is/are Install new cutting blade(s) bent The deck is not level Level the deck per the Deck leveling and height adjust- ment section of the General Service Manual An anti-scalp wheel is not...
- Page 57 Inconsistent cut quality across width of deck Cutting blade(s) are damaged or bent. Install new cutting blade(s). A blade spindle is bent. Contact your Hustler ® dealer. The underside of the deck is dirty. Clean the underside of the deck.
- Page 58 Deck Functionality Symptoms Probable causes Suggested Remedies Grass is not being cut by side deck when mow- Side deck hydraulic cylinders are not fully Fully extend the side deck hydraulic cylinders ing crown of hills or other undulations. extended to allow ±15 degree articulation. using the side deck lift switch.
-
Page 59: Deck Zone Chart
Deck Zone Chart Deck Front Left Right Side Side BLADE IDENTIFICATION TABLE BLADE CHAMBER COLOR BLADE LENGTH (IN) 23.86 20.5 BLACK 20.5 BLACK 20.5 BLACK 23.86 CHAMBER CHAMBER CHAMBER CHAMBER CHAMBER Inches from left edge of cut DETAIL A Deck Front See Detail A Right Left... - Page 60 REV B 125816...
- Page 61 INDEX PAGE PAGE Air Restriction Indicator .............5-4 Maintenance Precautions ..........2-3 Avoid Acid Burns ..............2-4 Maintenance Schedule ............8-1 Avoid Fire Hazards ............2-2, 2-3 Mower Blade Maintenance ..........6-4 Belts ................4-6, 6-6 Mower Blade Removal ............6-5 Blades ...................6-4 Operate Machine Safely .............2-2 Center Deck Belt Routing & Tensioning ......6-7 Operation Precautions ............2-2 Center Deck Belts Adjustment ..........6-6 Park Brake Adjustment ............4-5...
- Page 62 REV B 125816...
Need help?
Do you have a question about the Super 104 and is the answer not in the manual?
Questions and answers