Advertisement
Available languages
Available languages
security
Made in Italy
Lead free
Pb
BT2014/35/UE
RoHS
EMC2014/30/UE
compliant
INSTALLAZIONE
Foro 6mm per tamper antistrappo
Eseguire un foro da 6mm ed
inserire il tassello in dotazione.
Avvitare la vite fino ad ottenere
la sporgenza utile.
Essa servirà ad attivare il
tamper antistrappo posto sul
retro della centrale serie PROTEC
(vedi figura a destra).
Installazione tamper alla base
PROTEC
Inserire nel foro il supporto in
plastica fornito.
Innestare il cavetto alla scheda.
Bloccare con le 2 viti la scheda
tamper sulla base della centrale,
facendo attenzione che la molla
del tamper vada ad inserirsi
all'interno dell'apposito alloggio.
(vedi figura a destra)
Collegamento tamper alla centrale
Il tamper antistrappo va collegato
al morsetto sulla 24H della
centrale, mediante il cavo in
dotazione.
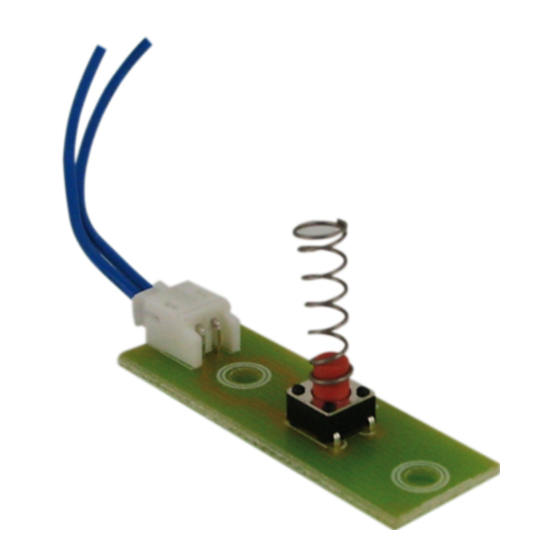
Scheda tamper antistrappo per serie PROTEC
ESEMPIO DI INSTALLAZIONE
PROTEC-ST
2 viti
supporto
di fissaggio
in plastica
sulla base
Serie PROTEC
PROTEC-ST
vite +
tassello
Advertisement
Table of Contents

Related Manuals for Hiltron security PROTEC-ST


Summary of Contents for Hiltron security PROTEC-ST
- Page 1 PROTEC-ST security Made in Italy Lead free Scheda tamper antistrappo per serie PROTEC BT2014/35/UE RoHS EMC2014/30/UE compliant INSTALLAZIONE ESEMPIO DI INSTALLAZIONE Foro 6mm per tamper antistrappo Eseguire un foro da 6mm ed inserire il tassello in dotazione. Avvitare la vite fino ad ottenere PROTEC-ST la sporgenza utile.
- Page 2 PROTEC-ST security Made in Italy Lead free Tear resistant tamper circuit for PROTEC series BT2014/35/UE RoHS EMC2014/30/UE compliant INSTALLATION MODEL OF INSTALLATION Hole 6mm for tear resistant tamper Make a hole of 6mm and to insert the screw anchor issue.
Need help?
Do you have a question about the PROTEC-ST and is the answer not in the manual?
Questions and answers