Bedfont NObreath User Manual
Fractional exhaled nitric oxide (feno) monitor
Hide thumbs
Also See for NObreath:
- User manual (28 pages) ,
- Operating manual (16 pages) ,
- Quick start manual (2 pages)

Related Manuals for Bedfont NObreath


Summary of Contents for Bedfont NObreath
- Page 1 NObreath ® Fractional Exhaled Nitric Oxide (FeNO) Monitor User Manual Aids in the diagnosis & management of asthma, one breath at a time.
-
Page 2: Definitions
NOTE: Only technical data and no patient data is collected by Bedfont® NOTE: The NObreath® should be charged for a minimum of 24 hours before first use. NOTE: The default PIN for the NObreath® is 0000. Bedfont® strongly advises that this PIN is changed upon installation and set-up of the device. - Page 3 CAUTION: Portable and mobile RF communications equipment can affect the NObreath®. CAUTION: A great way to keep the NObreath® charged when not in use is to use the docking station included. This can be connected via the pre-approved mains adapter supplied, or plugged into a working USB port, to ensure the NObreath®...
- Page 4 NOTE: Bedfont® will make available on request service training to appropriately qualified personnel.
-
Page 5: Table Of Contents
Maintenance ............................. 21 Settings.............................. 25 Data Reset ............................34 Cybersecurity ............................ 36 Technical Specification ........................37 Using the NObreath® with FeNOchart™ ................... 38 Buttons Explained ..........................38 Troubleshooting ..........................39 Glossary of Symbols and Safety Information ..................48 Wireless ............................. 50 Emissions ............................ -
Page 6: Introduction
NObreath® is intended for children, 7-17 years, and adults 18 years and older. NObreath® 12 second test mode is for age 7 and up. NObreath® 10 second test mode is for ages 7-10 only who cannot successfully complete a 12 second test. -
Page 7: Parts And Accessories
1. NObreath® Dock 7. Microfiber cloth 2. 1.8m USB cable 8. Quick Start Guide 3. Mains plug and universal adaptors 9. Screwdriver 4. NObreath® Forum information 10. Infection Control Maintenance Guidelines 5. Interpretation chart 11. Patient Preparation 6. NObreath® mouthpiece... -
Page 8: Instrument Layout
Instrument Layout 1. ON/OFF switch 5. Manufacturer label 2. Touchscreen 6. Vent hole 3. Mouthpiece aperture 7. Serial label 4. Screw 8. Vent hole 9. USB port... -
Page 9: Installation And Set-Up
NOTE: The NObreath® should be charged for a minimum of 24 hours before first use. NOTE: It is best practice to not let the battery run flat. If the NObreath® does not switch on, or displays the battery symbol on the last bar of charge, the NObreath® should be charged for 24 hours prior to use. - Page 10 When receiving power, the LED on the Dock will light up green and the NObreath® can be placed in the Dock to charge. If the LED light is red, please see ‘Troubleshooting’.
-
Page 11: User Interface
Place the NObreath® monitor into the Dock. The screen will indicate that the monitor is charging if powered off. Alternatively, the NObreath® FeNO monitor can be charged by plugging the micro USB cable provided directly into the NObreath®. This can then be connected either to the pre-approved mains adapter or into a computer USB port. - Page 12 The information screen displays information about the monitor and sensor. Settings Menu Page 1 1. Date and time options 2. Test log 3. Change PIN number 4. Enable/disable PIN use 5. Change flow-meter style 6. Start ambient air test 7. Service Area 8.
-
Page 13: Demo Mode
Demo mode The NObreath® has an in-built demonstration video of the breath test process. It is recommended to watch this video prior to using the device for the first time. This demo can also be used to explain to patients how the test will run, prior to performing one. - Page 14 A demonstration will run through the breath test process. The whole test will be shown, but at an accelerated speed. Only a successful test will be demonstrated.
-
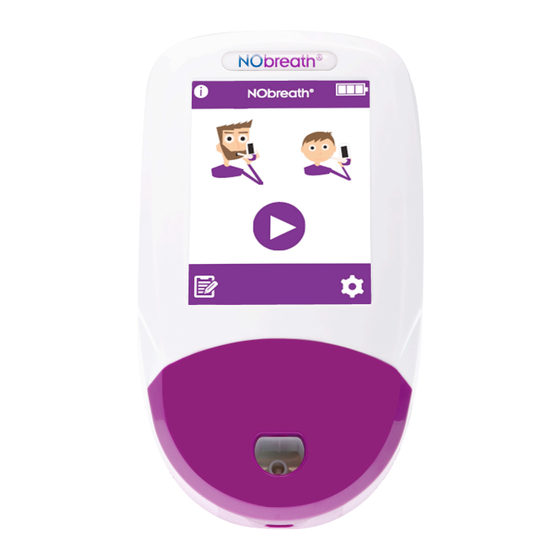
Page 15: Performing A Breath Test
Press the home icon to return to the home screen. Performing a Breath Test Open and insert a new mouthpiece into the NObreath® monitor. To start a breath test, select either the adult or child patient. As prompted onscreen, take a deep breath. - Page 16 When the exhale icon displays, keep the monitor upright and blow gently into the mouthpiece. NOTE: Make sure the vent holes are not covered. The exhalation time is approximately 12 seconds for an adult and 10 for a child. The onscreen flow meter will guide the patient on the exhalation rate: Keep the Keep the Keep the dial...
- Page 17 The results will then be shown onscreen in ppb. Return to the home screen by pressing the home button or save the result to a patient profile. If the patient exhales outside of the exhalation guidelines, the test will beep before indicating a fail and a red cross will appear.
-
Page 18: Patient Profiles
Patient profiles The NObreath® is designed to be capable of storing up to 25 results in up to 50 patient profiles. Press the profiles icon to access patient profiles. If the PIN has not been entered in the last 30 minutes, the 4-digit code will be required before the patient profiles can be accessed. - Page 19 Create a new patient profile To create a new profile, choose an empty name slot. Use the keypad to enter a name or reference. Click the save icon to create the profile. To cancel, press the back arrow to return to the list of profiles or the home icon to return to the main screen.
- Page 20 Once an adult or child breath test has been selected, the profile will only offer that breath test mode in future. It is not possible for the user to save an adult breath test to a child’s profile, or a child’s breath test to an adult’s profile.
- Page 21 Use the keypad to edit the profile. Click the save icon to save the changes. To cancel, press the back arrow to return to the list of profiles or the home icon to return to the main screen. Delete a patient profile Select the patient that will be deleted to load their profile.
-
Page 22: Maintenance
Maintenance NObreath® - FeNO testing without limits The NObreath® has been validated for up to 29,000 tests when used as instructed and properly maintained and serviced. The number of tests can be periodically checked within the settings of the device; when 29,000 tests are reached a service is recommended. Contact Bedfont® or the local service centre. - Page 23 CAUTION: Use of accessories not approved by the manufacturer will invalidate the warranty and may compromise the safety of the device. 4. It is best practice to not let the battery run flat. If the NObreath® does not switch on, or displays the battery symbol on the last bar , the NObreath®...
- Page 24 Possible Cause Recommended Action The NObreath® is due The NObreath® is due its full its full service in ≤30 service by the date displayed. days. A service reminder will be displayed every day until a full service has been carried out by a trained engineer.
- Page 25 A list of approved wipes can be found here: https://www.bedfont.com/cleaning-bedfont-monitors. The device or consumables cannot be sterilised. It is recommended that wipes are used once and for one surface only. The NObreath® device should be cleaned for initial use and after each patient use.
-
Page 26: Settings
Settings Change the date/time To change the date or time, press the edit date/time icon on the 1 page of the settings menu. Select either d-m-y or m-d-y for the date format and 12h or 24h for the time format. The purple circle, , indicates the selected option. - Page 27 The most recent test results are automatically saved in the log and the NObreath® can store 250 at a time. Use the arrows to scroll through the log. Press the back arrow to return to the settings menu or the home icon to return to the main screen.
- Page 28 Enter the current PIN and press the next arrow to proceed. A prompt will then ask for a new PIN number to be entered. Enter a new memorable 4 digit code and press the next arrow to continue.
- Page 29 A prompt will ask for the new PIN number to be re-entered for confirmation. Re-enter the PIN to confirm the new 4 digit code and press the tick to register the change. To cancel, press the back arrow to return to the settings menu or the home icon to return to the main screen.
- Page 30 A prompt will ask for the PIN number to be entered in order to disable the PIN function. Once the PIN function is disabled, it will be crossed out in the settings menu. To re-enable the PIN function, simply press the enable/disable button again and re-enter the PIN to confirm.
- Page 31 Select either the adult or child test mode to change the flow-meter style. The current flow-meter style will be highlighted. Select the new style and press the save icon to register.
- Page 32 Ambient air test To perform an ambient air test, press the ambient test icon on the 1 page of the settings menu. The NObreath® will begin sampling the atmosphere and an hourglass be shown onscreen.
- Page 33 The result will be shown onscreen. Press the back arrow to return to the settings menu or the home icon to return to the main screen. To adjust the brightness of the display, go to the page of the settings menu and use the arrows to increase/decrease the brightness of the screen.
- Page 34 Bluetooth pairing To pair a device with the NObreath®, go to the 2 page of the settings menu and press the Bluetooth pairing icon. The screen will display the Bluetooth pairing PIN.
-
Page 35: Data Reset
Data Reset Using the screwdriver provided with the NObreath®, unscrew the screw on the back of the monitor. Remove the back cover by sliding and lifting it off. To access the Data Reset button, first remove the back cover and the breath drying cartridge. - Page 36 Press the tick to confirm the data reset or cross to cancel. An hourglass will display onscreen as the NObreath® begins erasing all data. NOTE: This can take up to 5 minutes to complete. Once complete, the screen will prompt for the back cover to be replaced.
-
Page 37: Cybersecurity
CAUTION: The operating system of the PC/laptop should be kept up to date. WARNING: Any data on the NObreath® device needs to be cleared (via a reset) before returning to Bedfont® or one of its distributors for service or repair and before the unit is disposed at end-of-life. -
Page 38: Technical Specification
1 x main rechargeable Li-ion battery – Approx. 100 uses on fully charged battery Model: RRC1120. Voltage: 3.6V / 3.7V Capacity: NObreath® monitor 2350mAh / 2000mAh 2 x Li-ion coin cell batteries – Approx. 5 years Model: LIR2032. Voltage: 3.6V. Capacity: 45mAh Power Model: LIR2450. -
Page 39: Using The Nobreath® With Fenochart
Insert the USB lead into the PC, and connect the other end to the rear of the docking station. Place the NObreath® into the docking station, connecting it to the micro USB in the base. Alternatively, the micro USB lead can be directly connected to the base of the NObreath® unit itself. -
Page 40: Troubleshooting
Troubleshooting Possible Cause Recommended Action The sensor requires The calibration or change of the sensor and the calibrating or changing replacement of the NO and the NO scrubber scrubber is due by the date requires replacing displayed onscreen. within ≤30 days. This reminder will be displayed every day until it has been reset by... - Page 41 Possible Cause Recommended Action The NObreath® is due The NObreath® is due its its full service in ≤30 full service by the date days. displayed. A service reminder will be displayed every day until a full service has been carried out by a trained engineer.
- Page 42 Possible Cause Recommended Action The full service for the The full service for the NObreath® is now NObreath® was due on the overdue by ≥30 days. date displayed. A service reminder will be displayed every day until a full service has been carried out by a trained engineer.
- Page 43 Possible Cause Recommended Action There has been a Contact Bedfont® or their local verification error in distributor. the flash memory of the device. Possible Cause Recommended Action There has been an Contact Bedfont® or their local error in the distributor.
- Page 44 Possible Cause Recommended Action There has been a Contact Bedfont® or their local database failure. distributor. Possible Cause Recommended Action The back cover of the Make sure the back of the device is device is open secure and the turn lock is closed.
- Page 45 Possible Cause Recommended Action No sensor detected Ensure a sensor is inserted into the device. The sensor is not Ensure the sensor is correctly correctly inserted inserted by pushing firmly in the top connector. Check the date & time. Change the date/time to the If this does not show current date/time and charge the the current date &...
- Page 46 CaliBag® from Bedfont® or the local distributor, or send to the local service centre. The device may have Allow the device to rest for up to 24 been exposed to high hours in a VOC free environment.
- Page 47 Possible Cause Recommended Action If the patient exhales Press the retry icon to retake the test outside of the or if after multiple attempts the exhalation guidelines, patient is unable to comply, the the test will beep reading can be viewed by pressing the before indicating a fail next arrow.
- Page 48 See ‘Installation and Setup’ section of this manual The battery has been inserted incorrectly The device is not charging Contact Bedfont® or the local distributor for The battery contacts are blocked assistance The power button is damaged There is a screen issue...
-
Page 49: Glossary Of Symbols And Safety Information
NO NObreath® Dock is showing a Indicates a fault, overcurrent, red light undervoltage or overvoltage Contact Bedfont® or the local distributor for protection circuit has triggered assistance. Glossary of Symbols and Safety Information Glossary of Symbols Title of Symbol... - Page 50 Dispose of according to WEEE DO NOT THROW IN EN 50419 GENERAL RUBBISH DISPOSAL/TRASH! – Directive 2012/19/EU, Waste Electronic Annex IX Equipment Serial number Indicates the manufacturers serial ISO 15223 – 1. Clause 5.1.7 number so that a ISO 7000 – 2498 specific medical device can be identified Manufactured by...
-
Page 51: Wireless
Wireless Bluetooth Low Energy (BLE) is used as a means of communication between the monitor and FeNOchart™ software running on a PC. The FeNOchart™ software is a charting program that retrospectively collects data from the NObreath® monitor when it is not monitoring. It is not time critical, there are no alarms. - Page 52 The USB port is to be used for charging the NObreath® device, this should be carried out via the supplied USB lead and also can be used for transferring encrypted patient data to and from FeNOchart™...
-
Page 53: Emissions
Note that the presence of RFID devices may not be obvious. If such interference is suspected reorient equipment if possible, to maximize distances. Emissions The NObreath® Monitor is intended for use in the electromagnetic environment specified below. The user should assure that it is used in such an environment. Emission Tests Compliance Electromagnetic Environment –... -
Page 54: Immunity
Immunity Guidance and manufacturer’s declaration: Electromagnetic immunity The NObreath® is intended for use in the electromagnetic environment specified below. The customer or the user of the NObreath® should ensure that it is used in such an environment. Immunity test IEC 60601 test level... -
Page 55: Warranty
Electromagnetic Immunity The NObreath® is intended for use in the electromagnetic environment specified below. The customer or the user of the NObreath® should assure that it is used in such an environment. Immunity Test Compliance Level Electromagnetic Environment – Guidance Conducted RF IEC 61000-4-6 3 Vrms (1kHz 80%) 150kHz –... -
Page 56: Returns
Never dispose of any electronic instrument or batteries in domestic waste. At the end of the product’s life, contact Bedfont® or its distributor for disposal instructions. Returns Please contact Bedfont® or its local distributor for instructions on returning goods. Responsible Manufacturer and Contacts Bedfont® Scientific Ltd. - Page 57 Email: ask@bedfont.com Web: www.bedfont.com © Bedfont® Scientific Limited 2023 Issue 13 - February 2023, Part No: LAB759 Bedfont® Scientific Limited reserves the right to changeor update his literature without prior notice. Registered in: England and Wales. Registered No: 1289798 MD 502905...
Need help?
Do you have a question about the NObreath and is the answer not in the manual?
Questions and answers
We have a brand new NObreath V2 FENO monitor, The mouth pice we have purchased does not fit the monitor. Which ones do we need and should there be one in the box? as the isn't. Thanks for your help.
The compatible mouthpiece for the Bedfont NObreath V2 FeNO Monitor is the Single-Use Patient Mouthpiece designed specifically for this device. It includes an integrated infection control filter that removes and traps >98% of airborne bacteria and >96% of viruses. A mouthpiece should be included in the box along with the monitor, as indicated in the description of the monitor's contents.
This answer is automatically generated