Bedfont Gastro+ Gastrolyzer User Manual
Hide thumbs
Also See for Gastro+ Gastrolyzer:
- User manual (38 pages) ,
- Quick start manual (11 pages) ,
- Manual (4 pages)

Related Manuals for Bedfont Gastro+ Gastrolyzer


Summary of Contents for Bedfont Gastro+ Gastrolyzer
- Page 1 Gastro Gastrolyzer ® USER MANUAL Helping to detect gastrointestinal disorders, one breath at a time.
-
Page 2: Important Information/Reminders
WARNING: Under no circumstances should the instrument be immersed or splashed with liquid. WARNING: Breath tests must only be carried out with Bedfont® accessories. Failure to do so may cause incorrect readings. -
Page 3: Table Of Contents
Contents Important Information/Reminders ..................... 1 Introduction ............................3 Definitions ............................3 Compliance ............................3 Intended Use ............................4 Contraindications ..........................4 Instrument Layout..........................4 User Interface ............................. 5 Taking a breath test ..........................6 Taking a face mask test ........................10 Conducting multi-patient breath tests ..................... -
Page 4: Introduction
Introduction is generated in the intestinal lumen by bacterial action on carbohydrates in the small or large intestine. Once the resultant H is diffused into the bloodstream it is transported to the alveoli and then can be detected in expiratory air. Levitt demonstrated the correlation between intestinal lumen H production and H... -
Page 5: Intended Use
Intended Use The Gastro ™ Gastrolyzer® is a breath hydrogen (H ) monitor used to measure hydrogen levels in expired breath. It is intended for multi-patient use by healthcare professionals in a clinical environment. Contraindications There are no known contraindications. Instrument Layout 1. -
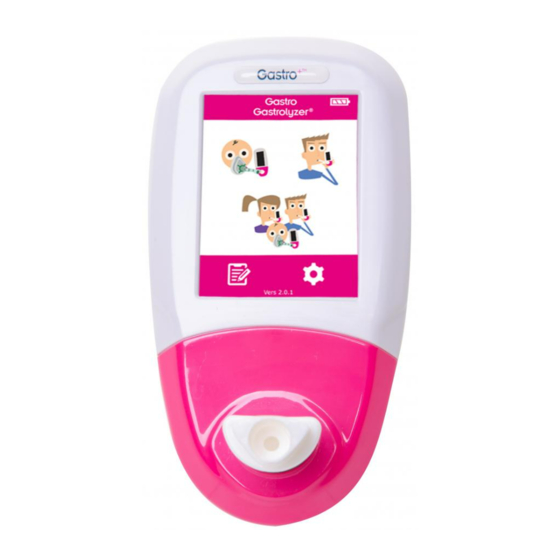
Page 6: User Interface
User Interface Home Screen 1. Battery status 2. Face mask breath test 3. Normal breath test 4. Multi-patient air test 5. Patient profiles 6. Settings... -
Page 7: Taking A Breath Test
Taking a breath test Attach a breath sampling D-piece™ and SteriBreath™ mouthpiece. Turn on the monitor by pressing the power button once. Press the breath test icon on screen. - Page 8 If the timer is shown, the sensor is stabilising. Inhale and hold breath for the pre-set 15 second countdown as shown on screen. If unable to hold breath for full 15 seconds, the timer can be adjusted in the settings. Press the home button at any time to cancel the breath test.
- Page 9 A beep will sound during the last three seconds of the countdown. Blow slowly into mouthpiece, aiming to empty lungs completely.
- Page 10 The ppm will rise and hold onscreen. When the test is finished, the breath test, home and save icons will appear at the bottom of the screen. To repeat breath test, press the breath test icon and repeat steps. To return to the home screen, press the home icon.
-
Page 11: Taking A Face Mask Test
To save the reading, press the save icon and select the relevant patient profile. Remove the D-piece™ between tests to purge sensor with fresh air. To switch off, press and hold the power button for 3 seconds, unit will also power off after 45 minutes of inactivity to save power. - Page 12 If the timer is shown, the sensor is stabilising. Inhale and exhale into the face mask, the device will take the reading in real-time.
- Page 13 The ppm levels will rise and hold at the peak level, when this has stopped rising for a period of 5 consecutive seconds the test result can be recorded and the test stopped. When the test is finished, the face mask breath test, home and save icons will appear at the bottom of the screen.
-
Page 14: Conducting Multi-Patient Breath Tests
Conducting multi-patient breath tests WARNING: Ensure batteries are full or device is connected to computer USB port (it will be powered by the USB). If the device loses power during the automatic testing mode only saved results will remain on the device and the protocol timings will be lost. - Page 15 Select the protocol for each patient; their name will be shown at the top of the screen. Select the protocol by pressing the protocol name, for example ‘lactose’, when selected the protocol will change to green. To edit the protocol timings please see ‘edit testing Protocols’...
- Page 16 If the test is unsuccessful in any way, take the test again by pressing the back arrow on the result screen, this will overwrite the previous result. To save this reading to the patient profile, press the save icon. This is the base sample; once the result has been saved, a prompt will appear to give the patient the relevant substrate/sugar.
- Page 17 When the final patient has provided a sample and taken the substrate/sugar, a screen will show all the patients in the testing session with countdown timings for each patient until their next test. When the timer for a patient reaches zero, an alarm will sound indicating the next test is ready to be taken and the patient name will turn green.
- Page 18 Confirm the action by pressing the same icon on the next screen. Once the complete patient session has finished, all name slots will show as green.
-
Page 19: Patient Profiles
Return to the home screen in order to view results by pressing the profile icon. Results can be downloaded to GastroCHART™ for future reference or printing, follow instructions in ‘GastroCHART™ software’ section of this manual. Patient Profiles The Gastro ™ Gastrolyzer® allows up to 10 patient profiles to be set-up on the device in order to record readings to a specific patient profile and then downloaded later using GastroCHART™. - Page 20 Press the patient profile icon on the home screen. Press a patient profile to go to the edit screen.
- Page 21 Press the patient profile slot again to enter the name for the patient using the keyboard provided. Once name or ID has been edited, press the save icon. The patient profile has now been successfully set-up. More patient profiles can be set-up by pressing the back arrow and repeating steps.
-
Page 22: Protocol Pre-Set Timings
Protocol pre-set timings The Gastro ™ Gastrolyzer® is pre-set with testing protocols that follow time intervals recommended by clinical research. Test Dosage Test frequency (minutes) Samples Lactose 25g of Lactose in 250ml of water 0, 15, 30, 60, 90, 120 Lactulose 10g of Lactulose in 200ml of 0, 20, 40, 60, 80, 100, 120, 140, 160,... - Page 23 Press the protocol icon. Select the protocol to be changed; this will change to green when selected. Press the right arrow to continue.
-
Page 24: Edit Protocol Names
Select up to 10 time intervals by pressing the interval slot and increasing/decreasing the up or down arrows. The base sample cannot be changed and will show as ‘base’, active intervals will show in green. Once the protocol has been edited, press the save icon to save. - Page 25 Press the protocol icon. Select the protocol to be changed; this will change to green when selected. Press the right arrow to continue.
- Page 26 Press the protocol name at the top of the screen. Enter the new or preferred protocol name using the keyboard provided. Press the save icon to save.
-
Page 27: Protocol Pre-Set Thresholds
Protocol pre-set thresholds Below is an interpretation table for general guidance on interpreting the H values for supporting a diagnosis of conditions. Other factors through qualified judgement need to be taken in account by looking at the patient history, on-going symptoms and symptoms during test. H readings can be interpreted as positive or negative using the following pre-set thresholds (this is the increase in reading compared to the base sample):... -
Page 28: Edit Protocol Pre-Set Positive Thresholds
Edit protocol pre-set positive thresholds The testing protocols names can be edited. Press the settings icon on the home screen. Press the protocol icon. - Page 29 Select the protocol to be changed; this will change to green when selected. Press the right arrow to continue. Press the graph and ppm icon.
-
Page 30: Reviewing History
Press the up or down arrow to increase or decrease the threshold. Press the save icon to save. Reviewing history The Gastro ™ Gastrolyzer® will record every reading taken in its history up to 150 readings. To access this, press the settings icon. -
Page 31: Changing Date And Time
Press the history icon. Changing date and time To change the date and time on the Gastro ™ Gastrolyzer®, press the settings icon. - Page 32 Press the date & time icon. Select either d-m-y or m-d-y for the date format and 12h or 24h for the time format. Dates and times are then adjusted by selecting the number and pressing the up or down arrows to increase and decrease. Save the settings by pressing the save icon.
-
Page 33: Technical Specification
Technical Specification Concentration range 0-500ppm Display Full colour touchscreen Detection principle Electrochemical Sensor Repeatability <5% Accuracy ≤±3ppm/10% - whichever is greater* Power 3 x AA (LR6 or equivalent) – up to 1000 minutes 1 x CR2032 Lithium coin cell response time <40 seconds Operating temperature 15-35ᵒC... -
Page 34: Environment
Dispose of according to WEEE Serial number Manufacture by and date Bedfont® logo Environment The Gastro ™ Gastrolyzer® product complies with the Medical Device Directive 93/42/EEC as amended by 2007/47/EC and the Medical Device Electromagnetic Compatibility standard EN 60601- 1-2. - Page 35 870MHz 28 V/m PM 18 Hz 930MHz 28 V/m PM 18 Hz 1720MHz 28 V/m PM 217 1845MHz 28 V/m PM 217 1970MHz 28 V/m PM 217 2450MHz 28 V/m PM 217 5240MHz 9 V/m PM 217 5500MHz 9 V/m PM 217 5785MHz 9 V/m PM 217 Conducted Immunity: 6V rms ISM and amateur...
-
Page 36: Display Symbols
Display symbols Description Gastro ™ Gastrolyzer® Battery condition: full Battery condition: low Battery condition: empty Breath test Face mask test Automatic patient breath test Inhale Hold breath Edit countdown (breath hold) timer Countdown (breath hold) Exhale ppm reading Save Settings Home Patient profiles Patient profile slot... - Page 37 Delete patient record Time until next breath sample Finish and save Change D-piece™ Next step Previous step Sensor change due soon Sensor change overdue Calibration due date Calibrate device Attach flow meter to gas canister Attach calibration adaptor to D- piece™...
-
Page 38: Maintenance
This can be ignored by pressing the home icon until the date at which the sensor should be changed arrives, at this point the ‘change sensor’ symbol will be shown. Change sensor if trained to by an approved Bedfont® engineer or send to Bedfont® or the local representative. -
Page 39: Calibration
Under no circumstances should the instrument be immersed in liquid or splashed with liquid. Calibration The Gastro ™ Gastrolyzer® is calibrated at 21°C (±4°C) before leaving Bedfont®. The instrument should be calibrated at 21°C (±4°C) as this is the temperature at which we recommend it is to be used. The Gastro ™... - Page 40 Press the cylinder icon once to proceed. The monitor must be zeroed, this will happen automatically. Do not connect the gas at this stage. Ensure the fine control valve is in the off position.
- Page 41 Screw the fine control valve and flow indicator assembly to the gas can. This is best done by screwing the gas can into the valve. Once this has been successfully carried out, the first step of the calibration process will be shown onscreen. Allow the gas to flow at 0.5 litres per minute.
- Page 42 A failed calibration will be indicated by the red cross icon, press the rotating arrow icon to attempt calibration again – if the problem persists see ‘troubleshooting’ or call the local supplier of Bedfont® products. Return to the home screen by pressing the home icon.
-
Page 43: Troubleshooting
Troubleshooting The unit fails to turn on If the unit fails to turn on properly, check if the low or empty battery symbols are shown or replace the batteries. Ensure that the batteries are inserted the correct way around, matching the symbols moulded into the plastic. -
Page 44: Returns Procedure
5. If the monitor is still in warranty and the fault is covered by warranty, see ‘warranty’ section of this manual, Bedfont® will repair it and return it with an ‘engineer’s report’, free of charge. 6. If the repair is not carried out, a handling fee will be charged. Ensure that a completed authorisation form with an ‘official purchase order number’... -
Page 45: Spares
Spares SteriBreath™ mouthpiece SteriBreath™ mouthpieces are both cost effective and compact. They are individually sealed for optimum infection control, whilst condensation in the tube confirms an accurate breath sample. D-piece™ The D-piece™ is used to attach a SteriBreath™ mouthpiece to the monitor. The D-piece™ incorporates a one-way valve and an infection control filter, which are proven to remove and trap >99% of viruses... -
Page 46: Warranty
Bedfont® or the local representative. This warranty is automatically invalidated if the products are repaired; altered, void labels removed or otherwise tampered with by unauthorised personnel, or have been subject to misuse, neglect or accident. - Page 48 Tel: +44 (0)1622 851122 Fax: +44 (0)1622 854860 Email: bedfont-gmbh@bedfont.com Email: ask@bedfont.com Web: www.bedfont.com Issue 8 - November 2020, Part No: LAB678 Bedfont® Scientific Limited reserves the right to change or update his literature without prior notice. Registered in: England and Wales. Registered No: 1289798...
Need help?
Do you have a question about the Gastro+ Gastrolyzer and is the answer not in the manual?
Questions and answers