Advertisement
Advertisement
Table of Contents

Related Manuals for CoolLED pE-400 Series


Summary of Contents for CoolLED pE-400 Series
- Page 1 Quick Start Guide This Quick Start Guide provides basic information required to install your new pE-400 Series Illumination System. For additional details and other valuable resources, please see the pE-400 Series User Manual or the CoolLED website at www.coolled.com. Rev 1...
- Page 2 • If your CoolLED Light Source must be operated while not attached to a microscope, all personnel must wear appropriate eye shielding and protective clothing. CoolLED strongly discourages using any CoolLED Light Source when not securely mounted to a microscope.
- Page 3 1.5 mm 3. Installation The pE-400 Series is available in two light delivery configurations: Direct Fit and Liquid Light Guide These determine the installation procedure. pE-400 Series Direct Fit Light Source pE-400 Series Liquid Light Guide Light Source...
- Page 4 Direct Fit Attach the Light Source directly to the epi-illumination port of a microscope using a suitable CoolLED adaptor. Note: • The CoolLED adaptor is specified on ordering and will already be installed on your Light Source. • The exact method of attachment depends on the microscope configuration – please follow microscope manufacturer’s instructions.
- Page 5 Collimator. 4. Electrical Connections The pE-400 Series Control Pod and Power Supply must be connected to the Light Source using the following steps. 1. Ensure the Power Switch on the back panel of the Light Source is in the off position.
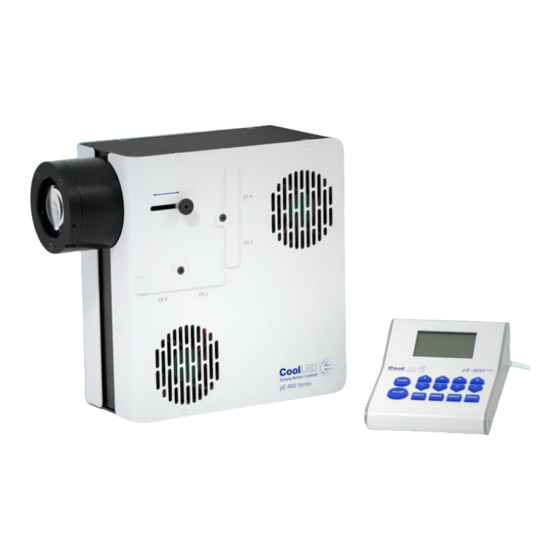
- Page 6 5. Control Pod Operation Once your pE-400 Series Light Source is installed and connected, the following steps initiate illumination. pE-400 Control Pod Item Description Mode button On/Off button Increase global irradiance Decrease global irradiance The pE-400 Control Pod Illuminating the pE-400 1.
- Page 7 pE-400 Control Pod Item Description Mode button (access additional features) On/off button Increase irradiance of each channel Decrease irradiance of each channel Select each channel The pE-400 Light Source Control Pod Illuminating the pE-400 Operation is similar to the pE-400 Control Pod, detailed above. 1.
- Page 8 6. Optical Adjustment Direct Fit pE-400 Series Illumination Systems must be focused to deliver bright, homogenous illumination. 1. Loosen the focus adjustment thumbscrew by rotating the screw anticlockwise. Warning: The focus adjustment thumbscrew must be loosened and not removed. Removing the Thumbscrew may damage your Light Source.
Need help?
Do you have a question about the pE-400 Series and is the answer not in the manual?
Questions and answers