Advertisement
Quick Links
Advertisement
Chapters

Related Manuals for MSI HMI 2.0


Summary of Contents for MSI HMI 2.0
- Page 1 HMI 2.0 Smart Touch Panel (for MSI Desktops) User Guide...
-
Page 2: Table Of Contents
Hardware Monitor ....................19 Video/Image ......................20 System Clock ......................21 Live Weather ......................22 Set APP Shortcut ....................23 MSI Center – Gaming Mode, User Scenario, Mystic Light ........24 Gaming Mode ......................24 User Scenario ....................... 25 Mystic Light ......................26... -
Page 3: Notices
Notices Micro-Star Int’l Co.,Ltd. The MSI logo used is a registered trademark of Micro-Star Int’l Co., Ltd. All other marks and names mentioned may be trademarks of their respective owners. No warranty as to accuracy or completeness is expressed or implied. MSI reserves the right to make changes to this document without prior notice. -
Page 4: Hmi 2.0
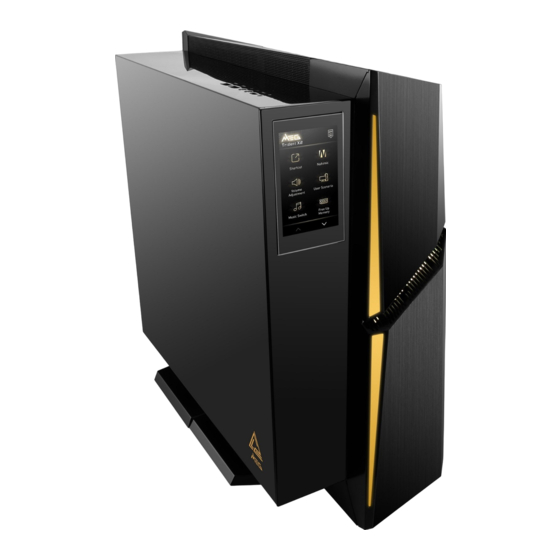
Through the HMI 2.0 touch panel, users can set Shortcut, Volume Adjustment, User Scenario, Music Switch, Mystic Light, Gaming Mode, etc. For selected MSI Gaming monitors, HMI 2.0 allows users to directly control the monitor through the touch panel’s OSD Control. -
Page 5: Touch Panel Settings
Previous Page Next Page 1. Shortcut ∙ MSI Center is the default. Tap to launch HMI 2.0 in MSI Center. ∙ The rest 5 shortcuts are customizable through MSI Center. MSI Center ∙ Various shortcut formats are (default) supported, including .exe files, web... -
Page 6: Nahimic
2. Nahimic ∙ Tap to select your desired Nahimic audio mode. 3. Volume Adjustment ∙ Tap + once to increase volume by 6 percent. ∙ Tap - once to decrease volume by 6 percent. Volume Shortcuts... -
Page 7: User Scenario
4. User Scenario ∙ It is required that you install User ∙ Tap to select your desired User Scenario through MSI Center in order Scenario. to use this function. -
Page 8: Music Switch
5. Music Switch ∙ Tap the function icons to switch music Player Control - Previous Song, Play/ Pause, Next Song or adjust volume. Volume Control - Mute, Volume Up, Volume Down 6. Free Up Memory ∙ Tap Free Up Memory and the memory freed up will be shown for 3 seconds before it goes back to the Main Menu. -
Page 9: Countdown Timer
7. Countdown Timer Show the countdown timer in HH:MM:SS. Enter hours, minutes and seconds to count down. Reset the countdown. Start the countdown. Cancel the countdown setting and back to the home screen. ∙ The countdown starts. Tap Cancel to ∙... -
Page 10: Mystic Light
8. Mystic Light ∙ It is required that you install Mystic ∙ Tap to select your desired Mystic Light through MSI Center in order to Light. use this function. ∙ Up to 20 unique lighting effects. -
Page 11: Gaming Mode
9. Gaming Mode ∙ It is required that you install Gaming ∙ Tap to turn on/off the gaming mode. Mode through MSI Center in order to use this function. -
Page 12: Osd Control
10. OSD Control ⚠ Important OSD Control is available only for selected MSI Gaming ∙ monitors. A warning message will pop up if your monitor doesn’t support OSD Control. Compatible Monitors MPG ARTYMIS 273CQRX-QD Optix MPG321QRF-QD Optix MPG321UR-QD Optix MPG341QR... -
Page 13: Main Menus
Main Menus Tap to view the Tap to return to the next page previous page Brightness Game Mode ∙ Tap + once to increase brightness by ∙ Tap to select your desired Game 5 percent. Mode. ∙ Tap - once to decrease brightness by 5 percent. -
Page 14: Pro Mode
Pro Mode Input Source ∙ Tap to select your desired Pro Mode. ∙ Tap to select your Input Source. Smart Crosshair Night Vision ∙ Through AI algorithm, this function ∙ This function optimizes background enhances the visibility of in-game brightness and is recommended for crosshair. -
Page 15: Response Time
Response Time Optix Scope ∙ Tap to select the monitor Response ∙ Tap to turn on/off the Optix Scope. Time. ∙ The center point will zoom in when ∙ Setting to Fastest will reach the Optix Scope is enabled. shortest response time and help improve blurred images when playing very fast games. -
Page 16: Msi Center - Hmi 2.0
MSI Center – HMI 2.0 Activate MSI Center and go to Features > Gaming Gear. Click HMI 2.0 to call forth the function menu. -
Page 17: Firmware Update
Firmware Update If new firmware is available when activating HMI 2.0, users will be prompted to update to the latest version. Click Install, select a language, and click Update to update the firmware. - Page 18 Follow the on-screen instructions to complete the firmware update.
-
Page 19: Hardware Monitor
Hardware Monitor Go to Features > Gaming Gear > HMI 2.0, and click Hardware Monitor. Click to select the touch panel language. Click to adjust the touch panel brightness. Click to turn ON Click Hardware Monitor. the touch panel. Click ON... -
Page 20: Video/Image
Video/Image Go to Features > Gaming Gear > HMI 2.0, and click Video/Image. Click Video/Image. Preview the Select from the preset styles or Click to apply the selected style and selected style. upload your customized video/ image files as the display style of enter Video/Image standby mode. -
Page 21: System Clock
System Clock Go to Features > Gaming Gear > HMI 2.0, and click System Clock. Click System Clock. Preview the Select clock style. Click to apply the selected style. selected style and enter System Clock standby mode. -
Page 22: Live Weather
Live Weather Go to Features > Gaming Gear > HMI 2.0, and click Live Weather. ⚠ Important Live Weather needs an Internet connection for location service. Click Live Weather. Preview the Select live weather style. Click to apply the selected style. -
Page 23: Set App Shortcut
(default) .exe files, web links, Steam games, Uplay games, and Epic Games. Customizable Go to Features > Gaming Gear > HMI 2.0, and click Set APP Shortcut. Click to add shortcut to Gaming Mode. Click to save Click to add an the shortcuts. -
Page 24: Msi Center - Gaming Mode, User Scenario, Mystic Light
Mystic Light Gaming Mode It is required that you install Gaming Mode through MSI Center in order to use the Gaming Mode function of HMI 2.0 touch panel. Activate MSI Center and go to Features > Gaming Mode. Gaming Mode... -
Page 25: User Scenario
User Scenario It is required that you install User Scenario through MSI Center in order to use the User Scenario function of HMI 2.0 touch panel. Activate MSI Center and go to Features > User Scenario. Software Control Mode ON/OFF switch Choose from three scenarios and one customized option as needed. -
Page 26: Mystic Light
Mystic Light It is required that you install Mystic Light through MSI Center in order to use the Mystic Light function of HMI 2.0 touch panel. Activate MSI Center and go to Features > Mystic Light. Game Sync ON/ OFF switch... - Page 27 System Clock (系統時鐘) ..................19 Live Weather (即時天氣) ..................20 Set APP Shortcut (設定 APP 捷徑) ............... 21 MSI Center – Gaming Mode, User Scenario, Mystic Light ........22 Gaming Mode (電競模式) ..................22 User Scenario (使用者場景) ................. 23 Mystic Light (動態 RGB LED 炫光系統) ..............24...
-
Page 28: 關於 Hmi 2.0
關於 HMI 2.0 微星電競桌機獨家搭載 HMI (Human Machine Interface 人機介面) 2.0 觸控面板,提供 便捷、智能化的人機互動/通訊體驗。使用者可透過 HMI 2.0 觸控面板設定捷徑、音量控 制、使用者場景、音樂切換、Mystic Light、電競模式等。 針對支援此技術的微星電競螢幕,使用者還能透過 HMI 2.0 觸控面板的 OSD Control (螢 幕顯示控制) 功能,直接調整其 OSD 螢幕顯示。 ⚠ 重要 本使用手冊中的 UI 螢幕截圖僅供參考,實際 UI 設計可能有所 ∙ 不同。 所有資訊如有變更,恕不事先通知。 ∙ ∙... -
Page 29: 觸控面板設定
觸控面板設定 點擊以關閉觸控面板。點擊任意位 置以啟動面板並從上次中斷的地 方繼續。 上一頁 下一頁 1. Shortcut (捷徑) ∙ 預設為 MSI Center。點擊以啟動 MSI Center 中的 HMI 2.0。 ∙ 可透過 MSI Center 自訂其他 5 個捷 徑。 MSI Center ∙ 支援多種捷徑格式,包含 .exe 檔、網 (預設) 址連結、Steam/Uplay/Epic Games 平 台遊戲。 可自訂... -
Page 30: Nahimic 音效
2. Nahimic 音效 ∙ 點擊選擇您想要的 Nahimic 音效。 3. Volume Adjustment (音量控制) ∙ 點擊 + 一次可將音量提高 6%。 ∙ 點擊 - 一次可將音量降低 6%。 音量快 捷鍵... -
Page 31: User Scenario (使用者場景)
4. User Scenario (使用者場景) ∙ 您需要透過 MSI Center 安裝 User ∙ 點擊選擇您想要的 User Scenario。 Scenario 才能使用此功能。... -
Page 32: Music Switch (音樂切換)
5. Music Switch (音樂切換) ∙ 點擊功能鍵可切換音樂或調節音量。 播放器控制 - 上一曲、播放/暫停、 下一曲 音量控制 - 靜音、增大音量、減小 音量 6. Free Up Memory (釋放記憶體) ∙ 點擊釋放記憶體,釋放的記憶體將 顯示 3 秒鐘,隨即返回主選單。... -
Page 33: Countdown Timer (計時器)
7. Countdown Timer (計時器) 以 時:分:秒 顯示倒數計時 器。 輸入小時、分鐘和秒以倒數 計時。 重設倒數計時。 開始倒數計時。 取消倒數計時設定並返 回主選單。 ∙ 倒數計時開始。必要時可點擊取消以停 ∙ 設定的時間到時,您會收到計時器關閉 止計時器。 的提醒。 點擊以停止提醒,並返回計時器 功能頁。... -
Page 34: Mystic Light (動態 Rgb Led 炫光系統)
8. Mystic Light (動態 RGB LED 炫光系統) ∙ 您需要透過 MSI Center 安裝 Mystic ∙ 點擊選擇您想要的 Mystic Light 燈效。 Light 才能使用此功能。 ∙ 多達 20 種獨特的燈光效果。... -
Page 35: Gaming Mode (電競模式)
9. Gaming Mode (電競模式) ∙ 您需要透過 MSI Center 安裝 Gaming ∙ 點擊以啟動/關閉 Gaming Mode。 Mode 才能使用此功能。... -
Page 36: Osd Control (螢幕顯示控制)
10. OSD Control (螢幕顯示控制) ⚠ 重要 OSD Control (螢幕顯示控制) 僅適用於特定的 MSI 電競螢幕。 ∙ 如果您的螢幕不支援此功能,點擊此功能將彈出提示訊息。 適用型號 MPG ARTYMIS 273CQRX-QD Optix MPG321QRF-QD Optix MPG321UR-QD Optix MPG341QR Optix MAG281URF Optix MAG274QRX Optix MPG321UR-QD Xbox Edition ∙ 要啟用 OSD Control,您需要以相容的 USB 傳輸線連接桌機的 USB 埠與螢幕的 USB 埠。建議使用... -
Page 37: 功能主選單
功能主選單 點擊查看下一頁 點擊返回上一頁 Brightness (亮度) Game Mode (遊戲模式) ∙ 點擊 + 一 次可將亮度提高 5%。 ∙ 點擊選擇您想要的 Gaming Mode。 ∙ 點擊 - 一次可將亮度降低 5%。 亮度快捷鍵... -
Page 38: Pro Mode (專業模式)
Pro Mode (專業模式) Input Source (輸入來源) ∙ 點擊選擇您想要的 Pro Mode。 ∙ 點擊選擇您想要的 Input Source。 Smart Crosshair (智慧準心) Night Vision (夜視效果) ∙ 透過 AI 演算法,本功能可加強遊戲準 ∙ 此功能可優化背景亮度,推薦用於 心能見度。 FPS (第一人稱射擊遊戲)。 選擇準心 樣式 選擇準心 顏色... -
Page 39: Response Time (回應時間)
Response Time (回應時間) Optix Scope (Optix 準心模式) ∙ 點擊選擇螢幕的 Response Time。 ∙ 點擊以啟動/關閉 Optix Scope。 ∙ 設置為 Fastest (最快速) 將達到最短的 ∙ 啟用 Optix Scope 功能時,中心點將 螢幕回應時間,並有助於改善玩極速 放大。 遊戲時的圖像殘影。 PIP/PBP (子母畫面/畫面並排) ∙ 點擊以啟動/關閉 PIP (子母畫面), PBP (畫面並排)。... -
Page 40: Msi Center - Hmi 2.0
MSI Center – HMI 2.0 啟動 MSI Center 並進入 Features > Gaming Gear。 點擊 HMI 2.0 以開啟功能選單。... -
Page 41: 韌體更新
韌體更新 如果啟動 HMI 2.0 時有新韌體可用,系統會提示使用者更新至最新版本。 點擊 Install (安裝),選擇語言,然後點擊 Update (更新) 以更新韌體。... - Page 42 依照螢幕上的指示完成韌體更新。...
-
Page 43: Hardware Monitor (硬體監控)
Hardware Monitor (硬體監控) 進入 Features > Gaming Gear > HMI 2.0 並點擊 Hardware Monitor。 點擊以選擇觸控面板 語言。 點擊以調整觸控面板 亮度。 點擊以開啟 / 關閉 點擊 Hardware Monitor。 觸控面板。 點擊以開啟 / 關閉 觸控面板睡眠模式。 預覽選定的設計。 選擇要顯示的硬體資 選擇樣式並點擊 Apply 訊。若未進行任何選擇 以套用選定的設計並進 或更改,Apply 將反灰 入 Hardware Monitor 無法選擇。... -
Page 44: Video/Image (影片/圖像)
Video/Image (影片/圖像) 進入 Features > Gaming Gear > HMI 2.0 並點擊 Video/Image。 點擊 Video/Image。 點擊以套用選定的 預覽選定的樣式。 從預設樣式中選擇或上傳您自訂 的影片/圖像檔作為觸控面板的顯 樣式並進入 Video/ Image 待機模式。 示樣式。上傳的檔案應為 800x480 pixel、BMP/JPG/PNG/GIF/MP4 格式。... -
Page 45: System Clock (系統時鐘)
System Clock (系統時鐘) 進入 Features > Gaming Gear > HMI 2.0 並點擊 System Clock。 點擊 System Clock。 預覽選定的樣式。 選擇 System Clock 樣式。 點擊以套用選定的樣式 並進入 System Clock 待機模式。... -
Page 46: Live Weather (即時天氣)
Live Weather (即時天氣) 進入 Features > Gaming Gear > HMI 2.0 並點擊 Live Weather。 ⚠ 重要 Live Weather 需要網路連線才能進行定位服務。 點擊 Live Weather。 預覽選定的樣式。 選擇 Live Weather 樣式。 點擊以套用選定的樣式 並進入 Live Weather 待 機模式。... -
Page 47: Set App Shortcut (設定 App 捷徑)
Set APP Shortcut (設定 APP 捷徑) 最多可自訂 5 個應用程式/網站捷徑至 HMI 2.0 觸控 面板。 支援多種捷徑格式,包含 .exe 檔、網址連 MSI Center (預設) 結、Steam/Uplay/Epic Games 平台遊戲。 可自訂 進入 Features > Gaming Gear > HMI 2.0 並點擊 Set APP Shortcut。 點擊以新增捷徑至 Gaming Mode。 點擊以儲存捷徑。 點擊以將應用程式新增 為捷徑。... -
Page 48: Msi Center - Gaming Mode, User Scenario, Mystic Light
MSI Center – Gaming Mode, User Scenario, Mystic Light Gaming Mode (電競模式) 您需要先透過 MSI Center 安裝 Gaming Mode,才能使用 HMI 2.0 觸 控面板中的 Gaming Mode 功能。 啟動 MSI Center 並進入 Features > Gaming Mode。 切換 Gaming Mode 開/關 經 Gaming Mode 優化的... -
Page 49: User Scenario (使用者場景)
User Scenario (使用者場景) 您需要先透過 MSI Center 安裝 User Scenario,才能使用 HMI 2.0 觸 控面板中的 User Scenario 功能。 啟動 MSI Center 並進入 Features > User Scenario。 切換 Software Control Mode 開/關 依個人需求從三個預設場景和一個自訂 場景進行選擇。 User Scenario 詳細說明請參閱: http://download.msi.com/manual/mb/MSICENTER.pdf... -
Page 50: Mystic Light (動態 Rgb Led 炫光系統)
Mystic Light (動態 RGB LED 炫光系統) 您需要先透過 MSI Center 安裝 Mystic Light,才能使用 HMI 2.0 觸控 面板中的 Mystic Light 功能。 啟動 MSI Center 並進入 Features > Mystic Light。 切換 Game Sync 開/關 將 LED 燈效同步到: 選擇 LED 樣式並調整設定後,點擊 Apply 以套用燈光效 果,並將您的 LED 燈效設定儲存到 Profile 1~3。...
Need help?
Do you have a question about the HMI 2.0 and is the answer not in the manual?
Questions and answers