Advertisement
- 1 Overview
- 2 What it is and does
- 3 Turn the hearing aid on and off
- 4 Identify left and right hearing aid
- 5 When to replace the battery
- 6 Battery tip
- 7 Optional LED
- 8 How to replace the battery (size 312)
- 9 Put on the hearing aid
- 10 Flight mode
- 11 Change program
- 12 Change volume
- 13 To be filled out by the hearing care professional
- 14 Mute
- 15 Other options
- 16 Documents / Resources
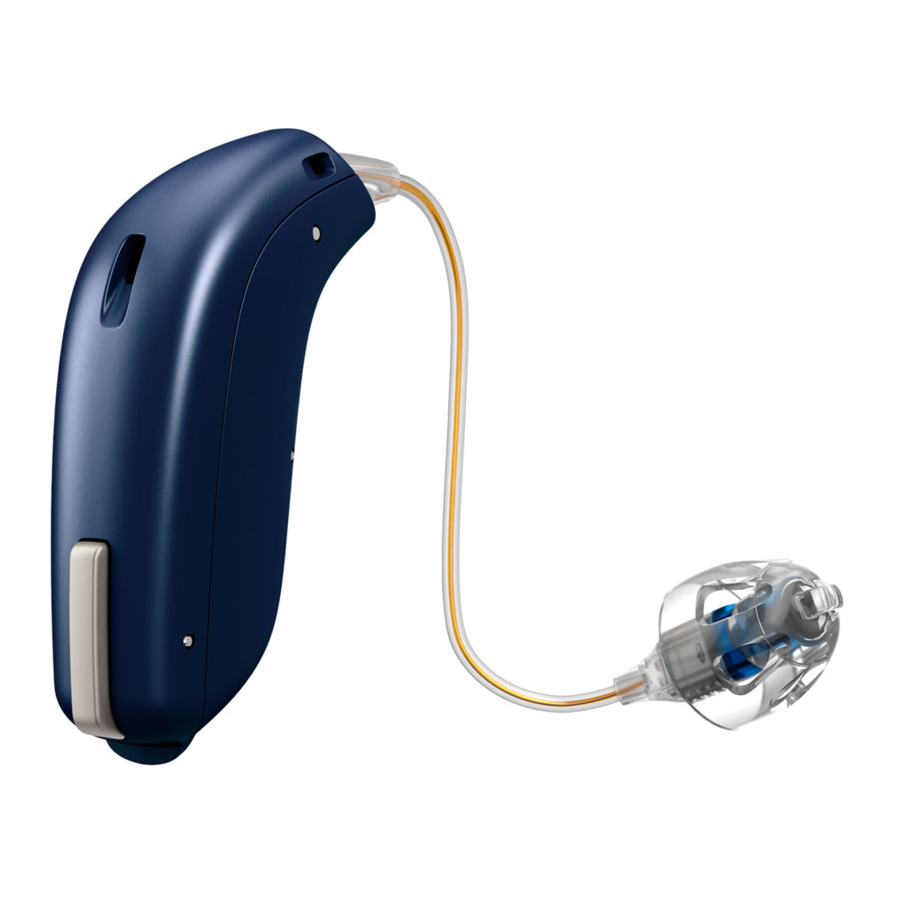
Overview

The hearing aids uses one of the following speakers:
Standard speakers

Power flex mould speakers

What it is and does

Microphones
Sound in
Push button
Mute, change volume, and programs
Nail grip
Open the battery drawer
Battery drawer
Contains the battery and functions as an on/off switch
Wax filter
Protects the speaker from wax
Speaker
Sound out
Ear grip
Holds the speaker in place (optional)
The standard speakers use one of the following earpieces:
Standard earpieces:

Grip Tip
Available in small and large, left and right, with or without vent.
Dome sizes

* only as open dome for speaker 60
** not for open dome
Turn the hearing aid on and off
The battery drawer is used to switch the hearing aid on and off. To save battery life, make sure your hearing aid is switched off when you are not wearing it. If you wish to return to the standard settings of the hearing aid, simply open and close the battery drawer (quick reset).
Turn ON
Close the battery drawer with the battery in place.

Turn OFF
Open the battery drawer.

Identify left and right hearing aid
It is important to distinguish between the left and the right hearing aid, as they may be programmed differently.
You can find left/right colour indicators in the battery drawer and on 60 and 85 speakers as shown. Indicators (either L or R) can also be found on 100 speakers and some earpieces.

(A RED indicator marks the RIGHT hearing aid. A BLUE indicator marks the LEFT hearing aid.)
When to replace the battery
When it is time to replace the battery, you will hear three beeps repeated in moderate intervals until the battery runs out.
 Three beeps* = The battery is running low
 Four descending tones = The battery has run out
Battery tip
To make sure the hearing aid is always working, bring spare batteries with you, or replace the battery before you leave home.
Optional LED
Red blinks, continuously repeated, to indicate battery low.
* Bluetooth® will be turned off and it will not be possible to use wireless accessories.
Note: Batteries need to be replaced more often if you are streaming to your hearing aid.
How to replace the battery (size 312)
- Remove
Fully open the battery drawer. Remove the battery.

- Uncover
Remove the sticky label from the + side of the new battery.
![]()
Tip:
Wait 2 minutes so that the battery can draw air, to ensure optimal functioning. - Insert
Insert the new battery into the battery drawer. Make sure the + side is facing up.

- Close
Close the battery drawer. The hearing aid will play a jingle through the earpiece. Hold the earpiece close to your ear to hear the jingle.


Put on the hearing aid
Step 1
Place the hearing aid behind your ear. The speaker should always be used with an earpiece attached. Use only parts designed for your hearing aid.

Step 2.
Hold the bend of the speaker wire between your thumb and index finger. The earpiece should point towards opening of the ear canal.

Step 3.
Gently push the earpiece into your ear canal until the speaker wire sits close to your head. If the speaker has an ear grip, place it in Ear grip the ear so it follows the (optional) contour of the ear.

Flight mode
When flight mode is activated, Bluetooth® is turned off. The hearing aid will still be working. Pressing the push button on one hearning aid will activate flight mode on both hearing aids.

To activate and deactivate
Press the push button for at least 7 seconds. A jingle confirms your action.
Opening and closing the battery drawer will also deactivate flight mode.
Change program
Your hearing aid can have up to 4 different programs. These are programmed by your hearing care professional.
Press the button to change program
Note that if you have two hearing aids, the RIGHT hearing aid switches forwards, e.g. from program 1 to 2, and the LEFT hearing aid switches backwards, e.g. from program 4 to 3.

Change volume
The push button allows you to adjust the volume. You will hear a click when you turn the volume up or down.

(A short press on the RIGHT hearing aid increases the volume.
A short press on the LEFT hearing aid decreases the volume)

To be filled out by the hearing care professional
| Program | Activation sound | When to use |
| 1 |  "1 beep" "1 beep" | |
| 2 |  "2 beeps" "2 beeps" | |
| 3 |  "3 beeps" "3 beeps" | |
| 4 |  "4 beeps" "4 beeps" |
Mute
Use the mute function if you need to silence the hearing aid. The mute function only mutes the microphone(s) on the hearing aid.

(Apply a long press (4 seconds) to the button to mute the hearing aid. To reactivate, push the button briefly.)
Other options
Autophone is a program that will automatically be activated when your telephone has a built in teleloop (see above). A magnet needs to be placed at your telephone next to the sound outlet.


Documents / ResourcesDownload manual
Here you can download full pdf version of manual, it may contain additional safety instructions, warranty information, FCC rules, etc.
Download Oticon Engage miniRITE - Hearing Aid Instructions For Use
Advertisement


Need help?
Do you have a question about the Engage miniRITE and is the answer not in the manual?
Questions and answers