
Related Manuals for UTAH SCIENTIFIC Utah-400 XL


Summary of Contents for UTAH SCIENTIFIC Utah-400 XL
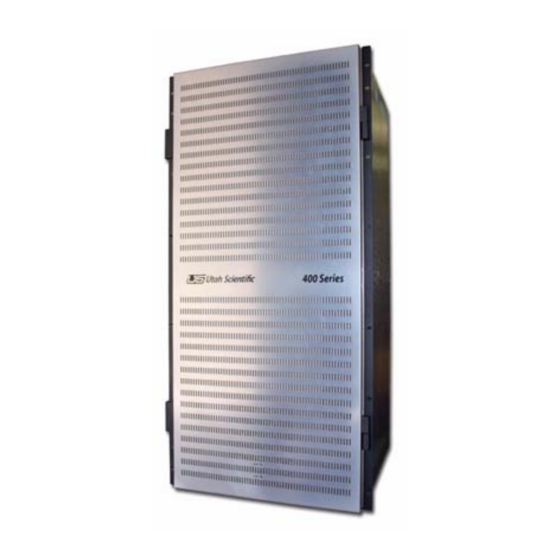
- Page 1 The Utah-400 XL Digital Routing Switcher 528 and XL Systems Setup and Operations Guide...
- Page 2 Information contained in this guide is subject to change without notice or obligation. While every effort has been made to ensure that the information is accurate as of the publication date, Utah Scientific, Inc. assumes no liability for errors or omissions. In addition, Utah Scientific, Inc. assumes no responsibility for damages resulting from the use of this guide.
- Page 3 Following the provisions of the Directive(s) of the Council of the European Union: EMC Directive 89/336/EED • Low Voltage Electrical Directive 72/23/EEC • Utah Scientific, Inc. hereby declares that the product specified above conforms to the above Directive(s) and Standard(s). UTAH-400 528 and XL Systems...
- Page 4 Important Safeguards and Notices This section provides important safety guidelines for the Operator and Service Personnel. Specific warnings and cautions are found throughout the guide where they apply, but may not appear here. Please read and follow the important safety information, specifically those instructions related to risk of fire, electric shock, or injury to persons.
- Page 5 Dangerous voltages exist at several points in this product. To avoid personal • injury, do not touch exposed conductors and components while power is on. Do not insert anything into either of the systems two-power supply cavities with power connected. Do not wear hand jewelry or watches when troubleshooting high current cir- •...
- Page 6 Company Information Utah Scientific, Incorporated 4750 Wiley Post Way, Suite 150 Salt Lake City, Utah 84116-2878 U.S.A. Telephone: +1 (801) 575-8801 • FAX: +1 (801) 537-3098 • Technical Services (voice): +1 (800) 447-7204 • Technical Services (FAX): +1 (801) 537-3069 •...
- Page 7 Warranty Policies Hardware Warranty Utah Scientific, Inc. warrants to the original purchaser that the Utah Scientific hardware is free from defects in materials and workmanship and will perform substantially in accordance with the accompanying written materials under normal use and service for a period of ten (10) years from the date of shipment.
- Page 8 Utah Scientific products, even if Utah Scientific has been advised of the possibility of such damages. Because some states/jurisdictions do not allow the exclusion or limitation of liability for consequential or incidental damages, the above limitation may not apply in those circumstances.
-
Page 9: Table Of Contents
Table of Contents Table of Contents Introduction CHAPTER 1 In This Guide ................1-1 Conventions ................1-3 Abbreviations ................1-4 Terms ..................1-5 Routing Switcher Basics ............1-6 Switching Matrix ................1-7 Signal Levels .................. 1-8 The Utah-400 Routing Matrix ............ - Page 10 I/O Card Replacement - Rear Panel ..........2-40 Connecting and Disconnecting Power ........2-43 DC Connectivity ................2-44 Pre Power-Up Checks ...............2-45 Hardware Checkout ..............2-47 Configuration and Operation CHAPTER 3 In This Chapter .................3-1 Utah 400 SC-4 Control .............3-2 Module Array – Panel Front .............3-4 Operation ..................3-6...
- Page 11 Table of Contents Overview ..................4-18 Circuit Description ................. 4-18 Controls and Indicators ..............4-19 Indicators..................4-19 Video Crosspoint Board ............4-20 Overview ..................4-20 Circuit Description ................. 4-21 Controls and Indicators ..............4-21 Rear Panel Considerations ............4-23 MX Bus ..................
- Page 12 Power ..................A-2 Input Power and DC Power Specifications .......A-2 Digital Video ................A-3 Digital Audio Specifications ............A-4 Reference ..................A-5 Reference Specifications ..............A-5 Control ..................A-6 Control Specifications ..............A-6 Alarms ..................A-6 Alarm Specifications ...............A-6 Physical ..................A-7 Physical Specifications ..............A-7 Regulatory .................A-8 Regulatory Specifications ...............A-8 Connector Suppliers and USI Part Numbers ......A-9...
- Page 13 Table of Contents The Utah-400 Digital Audio Breakout Panel APPENDIX C Scope ..................C-2 The AES Breakout Panel Kit ........... C-2 Description of the AES Breakout Panel ........C-2 Installation of the AES Breakout Panel ........C-3 Label Instructions for the Utah-400 Breakout Panel ....C-5 Scope ....................
- Page 14 UTAH-400 528/XL Operations Guide...
-
Page 15: Introduction
In This Guide This guide provides instruction for the installation, configuration, and operation the Utah Scientific, Utah-400 528 and XL Router Systems. These routers contain redundant crosspoints with 44 to 88 slots for both the input and output and cards, and stand 20 and 40 rack units in height. - Page 16 "Troubleshooting" looks at some of the common hardware and software problems, diagnostics and solutions available to the user on site. Included in this section is information on the various avenues to contact Utah Scientific Technical Services and tips on discussing equipment prob- lems.
-
Page 17: Conventions
Conventions Conventions The following conventions are used throughout this guide: Connectors and terminators will be indicated by bold, upper case text in Arial Black font. • For example: • Connect the MX-Bus to J-1 Operator Actions will be indicated in Helvetica Bold where a board is inserted, removed •... -
Page 18: Abbreviations
Introduction Abbreviations The following abbreviations may be used in this guide: See Appendix A for an additional Glossary of Terms and further definitions. Common Abbreviations and Mnemonics TABLE 1. Abbreviation Description Audio Tape Recorder Audio Engineering Society Central Processing Unit Digital Tape Recorder European Broadcast Union ENET... -
Page 19: Terms
Terms Terms The following terms are used throughout the documentation in this guide: "Operator" and "User" refer to the person using or operating the Utah-400 Digital Router • System. "System" refers to the entire interconnected Utah-400 System including control panels, •... -
Page 20: Routing Switcher Basics
Introduction "Monitor" refers to the monitor attached to the monitor matrix port of a video or audio router • system. "High Definition" " refers to signals conforming to the SMPTE -292 specification. The typ- • ical high definition data rate is 1.485 Gb/sec or 1.483 Gb/sec and a 16:9 Aspect Ratio Pic- ture characterizes this technology. -
Page 21: Switching Matrix
Routing Switcher Basics Switching Matrix A switching matrix is the internal array of inputs, crosspoints and outputs that allow a routing switcher to perform the task of routing signals from sources to destinations. The figure below illustrates a simple 10 X 10 switching matrix – with 10 Inputs and 10 Outputs. Note the following points regarding the illustration: Inputs 0 1 2 3 4 5 6 7 8 9... -
Page 22: Signal Levels
Introduction Signal Levels A "signal level" represents one of many specific types of audio or video elements that a routing switcher is capable of handling. The typical signals capable of being switched are: Analog Video • Analog Audio (stereo with left and right channels). •... -
Page 23: The Utah-400 Routing Matrix
Routing Switcher Basics The Utah-400 Routing Matrix The Utah-400 router utilizes a ‘3 board’ architecture that consists of an input-crosspoint-output card combination. This unique 3-board technology allows for a greater flexibility of input and output combinations available to the user. Each input or output board contains twelve signal paths so the user can expand in groups of twelve up to the maximum capacity of the router. - Page 24 Introduction The output from the crosspoint is directed to its proper path on the output bus and the appro- priate output board slot. When the output board detects a valid output signal, it will illuminate the appropriate Signal Presence LED. From this point the output signal is sent to its output driver and its BNC.
- Page 25 Routing Switcher Basics The 528 and XL systems utilize all the same plug-in cards to create their configurations. The 528 frame offers redundant crosspoints and a 528 port input by 528 port output system in 20 RU, while the XL system provides no dedicated cross point redundancy, but a 1056 port router in 40 RU.
-
Page 26: Component Locations
FAN 1 FAN 2 1 2 3 4 OUTPU TS OUTPU TS 0 - 263 264 - 527 INPU TS INPU TS 0 - 263 264 - 527 FRAME CONT ROLLERS Power Supply The Utah-400 XL Configuration FIGURE 1-3. 1-12 Introduction... - Page 27 Component Locations The XL Router Includes: - redundant cards optional • • (8) Crosspoint Boards • (0) Redundant Crosspoint Boards • (88) Input Boards • (88) Output Boards • (2) External Power Supply Frames • (4) Frame Controller Modules • (4) Fan Modules •...
-
Page 28: 528 Configuration
Introduction 528 Configuration Monitor Matrix 1 2 3 4 Frame Controllers External Power Supply The Utah-400 528 x 528 Configuration FIGURE 1-4. 1-14 Introduction... - Page 29 Component Locations The 528 x 528 Router Includes: - redundant cards optional • • (2) Crosspoint Boards (528 x 264) • (2) Redundant Crosspoint Boards • (44) Input Boards (000 – 527) • (44) Output Boards (000 – 527) • (1) External Power Supply Frame •...
- Page 30 Introduction 1-16 Introduction...
-
Page 31: Hardware Installation
Hardware Installation CHAPTER 2 In This Chapter This chapter provides instructions for installing your Utah-400 router in your facility. The following topics are covered: Caution: To avoid damage to the system, do not connect AC power until the hardware is fully installed. Unpacking and Inspection .............. -
Page 32: Unpacking And Inspection
Contact your dealer and shipper immediately if you suspect any damage has occurred during shipping. Check the contents of each carton against your Utah Scientific order and verify them against the shipping manifest. If any items are missing, contact your dealer or Utah Scientific immediately. -
Page 33: Unpacking And Inspection
Unpacking and Inspection Recommended unpacking method: With carton setting upright, open the top. Remove the Styrofoam packing material in the top of the box. Remove the accessories. Remove the Styrofoam packing from the top of the Utah-400. Carefully cut the packaging around the base of the unit (see illustration below), then pull the shipping container away from the chassis. -
Page 34: Xl Systems Carton Handling And Chassis Management
Contact your dealer and shipper immediately if you suspect any damage has occurred during shipping. Check the contents of each carton against your Utah Scientific order and verify them against the shipping manifest. If any items are missing, contact your dealer or Utah Scientific immediately. - Page 35 Unpacking and Inspection Carton truck removal - 2 FIGURE 2-4. Carton top removed - 1 FIGURE 2-5. 528 and XL...
- Page 36 Hardware Installation Carton top removed - 2 FIGURE 2-6. Carton housing lifted from base - 1 FIGURE 2-7. Hardware Installation...
- Page 37 Unpacking and Inspection Carton housing lifted from base - 2 FIGURE 2-8. Carton housing separated from base FIGURE 2-9. 528 and XL...
- Page 38 Hardware Installation Rack lifted off carton base FIGURE 2-10. Rack lifted away from carton base FIGURE 2-11. Hardware Installation...
- Page 39 Unpacking and Inspection Rack carried to staging area FIGURE 2-12. Rack brought upright FIGURE 2-13. 528 and XL...
- Page 40 Hardware Installation Rack upright, ready for final location move FIGURE 2-14. 2-10 Hardware Installation...
-
Page 41: Transferring An Xl System Between Equipment Racks
Transferring an XL system between Equipment Racks In certain instances, a different equipment rack is required other than the one shipped by the Utah Scientific factory. The following description and illustration set will assist you in completing a chassis-to-rack swap when necessary. - Page 42 Hardware Installation With all screws removed, begin lifting the chassis from the bottom of the unit. Once the front of the chassis has cleared the top of the frame (by several centime- ters), allow each person to one-by-one reposition their hands to the lip on the front of the chassis (as shown).
- Page 43 Unpacking and Inspection Lifting from the chassis lip, all attendants will carefully walk the router to the replacement rack, which should be positioned lengthwise next to the original rack. XL chassis lift and carry FIGURE 2-17. 2-13 528 and XL...
- Page 44 Hardware Installation Reverse the lift-out process by lowering the chassis into the new rack, and like before, each individual should shift their hold (one-by-one) from the chassis lip to the rack bottom. XL placement into the new rack FIGURE 2-18. 2-14 Hardware Installation...
- Page 45 Unpacking and Inspection Once the chassis has been seated in the new rack, replace all front mounting screws and lift the assembly into its original upright position. XL chassis - new rack positioning and upright placement FIGURE 2-19. 2-15 528 and XL...
-
Page 46: Installing Physical Equipment - 528 And Xl Systems
Installing MX-Bus cables. Connecting the AES Reference Signal. Determining and Setting the Router Signal Level(s). Installing Audio/Video signal cables. Connecting power. Connecting the SMPTE alarm port. Hardware checkout. 1. The Utah-400 XL System ships in its own equipment rack 2-16 Hardware Installation... -
Page 47: Mounting Equipment In Rack Frames - 528 Systems
Mounting Equipment in Rack Frames - 528 Systems Mounting Equipment in Rack Frames - 528 Systems 2-17 528 and XL... -
Page 48: Installing The Utah-400 Digital Routing Switcher
Hardware Installation Installing the Utah-400 Digital Routing Switcher Use the following steps to install the Utah-400 Systems into the rack frames: Determine the vertical layout of your frames before you begin the installation. Please note: • You may wish to place blank panels between the systems to increase ventilation and make cabling easier. - Page 49 Install the Utah-400 chassis' in the 19" rack frame. Note: Utah Scientific recommends a minimum of two persons, preferably three, to install the chassis in the rack frame. Install all mounting screws in the front of the chassis; the entire weight of the router and cables are supported by the chassis side-frames.
- Page 50 Hardware Installation a. Determine the height to mount the Utah-400 in the rack frame. b. Install two rack screws 3/4 of the way into the empty rack frame below the height determined in step a, above (leave a 1/8” gap). These screws will be used to sup- port the weight of the chassis when it is moved into the rack frame.
- Page 51 Mounting Equipment in Rack Frames - 528 Systems Replace all front covers when the installation is complete. 19" Rack Frame Slide Utah-400 Chassis into 19" Rack Frame #10 Rack Screw Sliding the Utah-400 Chassis into Rack Frame FIGURE 2-21. 19" Rack Frame Gently lower chassis onto the extended rack screw #10 Rack Screw...
-
Page 52: Installing The Mx-Bus Cables
Your Utah-400 router is shipped standard with: One MX-Bus Cable – 10 ft. (USI Part Number: 80229-10). Other lengths are available and • may be ordered through Utah Scientific sales at 1–800–453–8782. 2-22 Hardware Installation... -
Page 53: Interconnecting The Sc-4 And Utah-400 Frames
Installing the MX-Bus Cables Interconnecting the SC-4 and Utah-400 Frames The MX-Bus interconnection to the Utah-400 typically starts at the SC-4 control system and is terminated at the last physical Utah-400 chassis. The actual physical arrangement depends on the site placement of the various physical components. The following illustration shows a typical MX-Bus installation. - Page 54 Hardware Installation The following illustration is a block diagram showing the Utah-400 in an MX-Bus daisy chain with other Utah Scientific equipment. Block Diagram of the MX-Bus Daisy Chain. FIGURE 2-25. 2-24 Hardware Installation...
-
Page 55: Connecting The Aes Reference Signal
Installing the MX-Bus Cables Connecting the AES Reference Signal The AES Reference input corresponds to the Sync Input BNC on the back of the 528 chassis. This BNC signal connection is terminated in 75 Ohm. The Reference signal is required so the Utah-400 Digital Audio Router can switch on the frame boundary. -
Page 56: Determining And Setting Router Signal Levels
Hardware Installation Determining and Setting Router Signal Levels Signal levels are preset at the factory and tested during manufacturing, determined by cus- tomer input and requirements. The installation of your new Utah-400 Router should not require any signal level changes to operate after the new installation. By definition, a signal level represents distinct elements of the broadcast system. - Page 57 Installing the MX-Bus Cables Switch Settings Should you ever need to change the signal level of your router it is useful to determine: What new signal level is required. • If other signal levels will have to be modified to accommodate the new signal level. •...
-
Page 58: Offset Switch
Hardware Installation Offset Switch The offset switch allows you to provide a base offset to the router; containing inputs, outputs, or both. This applies when multiple routers are to be ‘stacked’ on the same level, or when mul- tiple router frames are placed in a larger matrix. To offset the inputs by 528 inputs, move the ‘I”... -
Page 59: Serial Port
Installing the MX-Bus Cables Serial Port This is a RS-232 DTE port, and is used as for diagnostic purposes. A terminal emulation program such as Tera Term is used for communication. Baud Rate Information Baud 38,4000 Data Bits Stop Bits Parity Bits Handshake XON/XOFF... -
Page 60: Ethernet Port
Hardware Installation Ethernet Port The 10/100 ethernet port is used as a diagnostic and monitoring port. Connect this to a stan- dard ethernet network. 2-30 Hardware Installation... -
Page 61: Gpio Port
Installing the MX-Bus Cables GPIO Port The GPIO block provides the following functions: GPIO# Direction Function INPUT Indicate Power Supply Failure INPUT Unconnected (TBD) INPUT Controller Changeover INPUT Crosspoint Changeover SMPTE Alarm To activate a GPI input, short the + and - leads together. When the SMPTE Alarm is active, there will be a short circuit across the + and - pins. -
Page 62: Installing The Video/Unbalanced Digital Audio Input & Output
Hardware Installation Installing the Video/Unbalanced Digital Audio Input & Output This section provides guidelines for installing the Utah-400 Video Inputs and Outputs on the backplane connectors. Serial Digital Video and Audio cable specifications are listed below. Recommended Cable Maximum Cable Input Signal Type Length... - Page 63 Installing the MX-Bus Cables Utah-400 528 and XL Video Unbalanced, or Audio Rear Panel FIGURE 2-28. 2-33 528 and XL...
-
Page 64: Installing The Audio Input And Output Cables
The standard configuration for the Utah-400 Audio Input and Output using DB-37 connectors. The DB-37 connector used on the backplane has the same wiring format for the input and out- puts. Although any wiring scheme may be used, Utah Scientific makes the following recom- mendations:... - Page 65 Installing the Audio Input and Output Cables Use a high quality shielded cable for the Digital Audio. See the chart below. • Maximum Cable Physical Recommended Cable Length Characteristics Shielding Belden 9993 (or better) 100 M. / 300’ 12 pair / 24 AWG / Individual Shields Stranded and Drain wires...
- Page 66 Hardware Installation Utah-400 Balanced Digital Audio/Analog Audio TABLE 2-1. (Pinout Connections) DB-37 (Male) DB-37 (Female) Pair Pin Number Signal Drain Wire (GND) Input/Output 0 + Input/Output 0 - Input/Output 1 + Input/Output 1 - Input/Output 2 + Input/Output 2 - Input/Output 3 + Input/Output 3 - Input/Output 4 +...
- Page 67 Installing the Audio Input and Output Cables DB-37 (Male) DB-37 (Female) Input/Output 7 + Input/Output 7 - Isolated Chassis Ground 2-37 528 and XL...
- Page 68 Hardware Installation DB-37 (Male) DB-26 High-Density Male Connector FIGURE 2-29. DB-37 (Female) DB-26 High-Density Female Connector FIGURE 2-30. 2-38 Hardware Installation...
- Page 69 Installing the Audio Input and Output Cables 121237 - Card Displayed FIGURE 2-31. 2-39 528 and XL...
-
Page 70: I/O Card Replacement - Rear Panel
Hardware Installation I/O Card Replacement - Rear Panel The following process applies to all Utah-400 routers containing 12 I/O ports on the rear panel. These card components will occasionally require removal (during fiber card replacement for example), and in this case special care should be given to proper guide alignment during the alternate component’s re-installation. - Page 71 I/O Card Replacement - Rear Panel Next, both mounting screws are removed from the rear section, then the component is pulled away and lifted upward to clear the frame. Rear Component removal FIGURE 2-33. 2-41 528 and XL...
- Page 72 Hardware Installation During component insertion, reverse the removal process by lifting the component upward, and carefully follow the card guide as the part is secured in place. Card Guide Card Guide (interior) I/O card insertion FIGURE 2-34. Mate the component back to the the larger I/O card, then re-insert the rear component’s mounting screws to complete the installation.
-
Page 73: Connecting And Disconnecting Power
Connecting and Disconnecting Power Connecting and Disconnecting Power The UT-400 528x frame receives 48 volts from an external 1 rack unit power supply chassis, except in the case where it is to be supplied 48 volts directly from the facilities power distribution system. -
Page 74: Dc Connectivity
Hardware Installation DC Connectivity The 528 and XL routers do not contain internal power supplies or AC connections. Each card in the system receives 48 VDC from two external video connections. Ground - Frame or chassis grounding point • 0V - Most positive leg of -48V DC connection. •... -
Page 75: Pre Power-Up Checks
Pre Power-Up Checks Pre Power-Up Checks Before applying power to the router, check the following: • All boards within the router must be fully seated; not crooked or outside the card guides. Monitor Matrix card Input and Output cards Crosspoint card Controller card Power On LEDs FIGURE 2-37. - Page 76 Hardware Installation Initial System Power-Up After verifying AC and DC power connections, apply power to the system. Verify that the fol- lowing system indications are present. All Chassis fans are turning, and all eight LEDs are green. The AC and DC power OK LEDs on the external power supply are on. The green Power OK LEDs on the crosspoint cards are on.
-
Page 77: Hardware Checkout
Hardware Checkout Hardware Checkout Use the following flow chart to check out your Utah-400 System. Note the following important points: For the Video and Audio System columns may be switched numerically if encoding is not • required. For the System Control column, the SC-4 Control system may require some configuration •... - Page 78 Hardware Installation 2-48 Hardware Installation...
-
Page 79: Configuration And Operation
Configuration and CHAPTER 3 Operation This chapter provides an explanation for specific Utah-400 configurations, and basic instruction for the handling and operation of your Utah-400 system. In This Chapter Utah 400 SC-4 Control ............3-2 Module Array – Panel Front ........... -
Page 80: Utah 400 Sc-4 Control
Configuration and Operation Utah 400 SC-4 Control Configurator Computer SC-4 Control System UNET Canbus Terminator Terminator SCP/UCP Ethernet Panel UCP/UNET Panel CNTL E-NET Port To UNET Port CSP - 16160 /8 Panel MC-2020 Digital Master Control Processor Serial 2 Ethernet Hub UTAH 400 528 x528 Redundant MCP-2020 Digital Master... - Page 81 Utah 400 SC-4 Control SC-4 Configuration for the Utah-400 and MC/MCP-2020 TABLE 2-1. SC-3/4 System Cable / Termination Table Part Name Part Number Description Comments UNET Terminator 65324-04 8 RJ-45 Supplied by USI MX-Bus Terminator 70797-1 DB-25P Module Supplied by USI MX-Bus Cable 80229-010 Parallel / DB-25P...
-
Page 82: Module Array - Panel Front
Configuration and Operation Module Array – Panel Front There are 22 slots containing the input modules within the router’s lower left and right sides. Input 0 is located at the bottom, while inputs 263 and 527 are at the top of the array. The 22 output slots are placed on the upper left and right, with outputs 0 and 264 located at the bottom, and outputs 263 and 527 positioned at the top (upper array). - Page 83 Module Array – Panel Front INPUTS INPUTS 1055 OUTPUTS OUTPUTS 1055 OUTPUTS OUTPUTS INPUTS INPUTS Module Array - XL System FIGURE 3-3. 528 and XL...
-
Page 84: Operation
Configuration and Operation Operation Alarm Indication The alarm LED located on the front of the UT-400 chassis is a universal indicator, and will illuminate when any alarm condition is sensed. Router Alarm Indication - 528 and XL chassis FIGURE 3-4. The SMPTE alarm port is used to generate contact closures indicating a problem within the system. -
Page 85: Ethernet And Rs-422 Connection
Operation Ethernet and RS-422 Connection The Ethernet and RS-422 connections are diagnostic. Crosspoint Cards Maintenance The UT-400 chassis contains two vertical crosspoint cards at the center of the chassis; the leftmost being the primary card, while the card on the right is redundant. Health SG Active Seat... -
Page 86: Input And Output Card Removal And Replacement
Configuration and Operation Input and Output Card Removal and Replacement To correctly remove and replace the individual input and output cards, always make sure the guides are located (inside the chassis) and the card slides all the way in before the ejector is locked in place. -
Page 87: Air Dam Removal And Maintenance
Operation Air Dam Removal and Maintenance The Plexiglas air dam covers the fan controllers and monitor matrix cards. It is critical that these components receive proper cooling during normal operation. Make sure the air dam is removed only during periods of needed maintenance. -
Page 88: Fan Service
Configuration and Operation Fan Service Alarm indicators on the crosspoint control card and power supplies will indicate any fan prob- lems. Individual fan modules can be lifted out by removing the two top screws that hold each in place. The new module is connected by simply aligning each and pushing it in place, then re- attaching the two screws. -
Page 89: Power Supply
The power supply interconnects with the router at the bottom of the assembly using a cabled interface. Using Utah Scientific’s pre-molded cable assembly, the ground signal and 48 volt conversion are carried to the UT-400 router. You will also see an additional cable assembly that is used for the micro controller inside the router that communicates with the alarm circuitry inside router. - Page 90 Configuration and Operation 3-12 Hardware Installation...
-
Page 91: Utah-400 Components
Utah-400 Components CHAPTER 4 In This Chapter This chapter contains descriptions of each video and audio board type con- tained within the Utah-400; including Input, Output, Crosspoint and Inter- face (midplane) cards, and Power Supplies. Information regarding LED indications and alarms is also provided. Video Input .............. -
Page 92: Video Input
Utah-400 Components Video Input Video connectivity on the back of the router is handled through BNC or Fiber (optional). The primary connection to the outside environment occurs via the MX bus. There are two MX bus connectors, with the second one terminated if no connection is to be made to another router. Multi-rate Part # 121229-1, the Multi-rate SDI Input Card is designed to receive 12 individual single ended data streams at data rates between 3 Megabits per second to 3 Gigabits per second. - Page 93 Video Input • SMPTE-424 – 2.970 Gb/Sec- 100 Meter equalization capability The equalization stage also provides an indication that the equalizer has detected and is equalizing a signal. After the cable equalization stage, the signal enters a 1x4 fanout distribution stage. One of these four signals is driven to each individual crosspoint in the system.
-
Page 94: Video Output Boards
Utah-400 Components Video Output Boards The Utah-400’s Video Output cards receive signals from the Crosspoint card, where user specified switching takes place. All three card types (below) perform a signal presence detec- tion, while the SD and HD Output cards contain a re-clocking stage. Multi-rate Part # 121230-1, the Multi-rate Output card is used to drive single ended data signals out of the router. - Page 95 Video Output Boards Once an input is selected, the output stage typically reclocks it, unless the signal is not a stan- dard SMPTE video frequency, and then the signal is bypassed. After the signal passes thru the reclocker stage, it is presented to the cable driver stage which generates signal centered around 0V with an amplitude of 800mV.
-
Page 96: Multirate Fiber Input Card - 121234-1
Utah-400 Components Multirate Fiber Input Card - 121234-1 General This card is designed to receive 12 individual differential pair data streams at data rates between 3 megabits per second to 3 gigabits per second. This range allows the card to receive SMPTE SDI signals in the 259, 292, and 424 standards as well as non SMPTE standards like DVB-ASI, AES-3 audio, and SMPTE-310 signals. -
Page 97: Multirate Differential Pair Output Card - 121235-1
Video Output Boards There are three types of indicators on this card – Communications indicator – yellow. Illuminated when the card has been addressed by the Frame Controller Module. PS Fail LED. – Red – Illuminated when the 3.3V power supply falls out of + - 5% toler- ance. - Page 98 Utah-400 Components Circuit Description Signals enter this card from multiple crosspoint cards. The control signals from the Frame Communications module determine whether he output stage selects signals from the Primary or Redundant Crosspoint cards. Once an input is selected, the output stage typically reclocks it, unless the signal is not a stan- dard SMPTE video frequency, and the signal is bypassed.
- Page 99 Video Output Boards There are four types of indicators on this card – Communications indicator – yellow, Illuminated when the card has been addressed by the Frame Controller Module. PS fail LED – Red – Illuminated when the 3.3V power supply falls out of + - 5% toler- ance.
-
Page 100: Fiber Interface - (Optional)
Utah-400 Components Fiber Interface - (Optional) Utah 400 systems with fiber connectivity will contain dedicated input and output boards for this purpose. Instead of using BNCs for the physical connection, the system utilizes small modules that plug directly into the rear of the UT-400 chassis. The Input and Output board’s LEDs are identical in functionality to their Multi-Rate Input and Output counterparts. - Page 101 Fiber Interface - (Optional) Optical Fiber Input – 1310 nm Class1 laser • Optical Input Power - -20dB min • Optical Fiber Type – 9/125 uM Single Mode Fiber • Connector Type - LC • Typical Cable Length – 18 Miles SD, 10 Miles HD 4-11 528 and XL...
-
Page 102: Standard Digital Audio Input Card - 121243-1
Utah-400 Components Standard Digital Audio Input Card – 121243-1 General The Standard Digital Audio Input Board (121243-1) receives 12 AES3 audio signals. These signals are received and individually analyzed to see if they qualify for synchronization to the digital audio reference (DARS). In its standard form DARS is an AES, 48kHz signal with sam- ple and frame rate information. - Page 103 Fiber Interface - (Optional) Controls And Indicators There are no controls on this card, other than P1. This is a standard UT400 diagnostic port that provides detailed operational status and control for this card. There are five types of LED indicators present on the front edge on this card COMMS ->...
-
Page 104: Standard Digital Audio Output Card - 121244-1
Utah-400 Components Standard Digital Audio Output Card – 121244-1 General The Standard Digital Audio Output Board (121244-1) receives 12 AES3 digital audio signals from the appropriate xpoint boards. These signals are individually driven to the monitor matrix module and router output BNCs. These signals pass through the output card as unmanipulated AES3 digital audio. - Page 105 Fiber Interface - (Optional) Controls And Indicators There are no controls on this card, other than P1. This is a standard UT400 diagnostic port that provides detailed operational status and control for this card. There are four types of LED indicators present on the front edge on this card COMMS ->...
-
Page 106: Frame Controller
It has several communications busses, including the Utah Scientific MX-Bus which carries crosspoint switches and general status to and from the control system, a diagnostic serial port, and an Ethernet port for more detailed status and control. - Page 107 Frame Controller Controls and Indicators Controls for this card are concentrated on the router rear panel, in the Ethernet and Diagnostic serial ports. The only board level control is the Speaker Enable or Disable jumper, J3, that allows the audible alarm to be turned off. The audible alarm sounds any time that the SMPTE alarm is on.
-
Page 108: Monitor Matrix Module
Utah-400 Components Monitor Matrix Module Overview Part # 121227-1, the Monitor Matrix module is a standard system component that allows for all input and output signals of the router to be presented to a single port. It allows for two copper and one streaming Ethernet signal from the router core to be monitored at the users discretion. - Page 109 Monitor Matrix Module Once the signal has been selected, the crosspoint passes that signal to a reclocker where the signal is re-timed. It is then presented to a Cable driver and BNC in the case of the two electri- cal signals, or to the baseband to streaming submodule board. This board is discussed sepa- rately.
-
Page 110: Video Crosspoint Board
Utah-400 Components Video Crosspoint Board Overview Part # 121222-1, the Video Crosspoint Card is the central component in the UT400 528 routing switcher. The same card can be placed in any one of the four crosspoint card slots in the sys- tem without changing any configuration settings on the card. - Page 111 Video Crosspoint Board Circuit Description Each of the 576 input signals differential input signals is carried to a single crosspoint module, where it is resistively split and applied to two different 144x144 crosspoint chips. The outputs of the four crosspoint modules are passively combined, and coupled with the proper switching commands from the Frame Controller Module, allow for the large crosspoint array size.
- Page 112 Utah-400 Components Crosspoint LEDs (Active) The yellow LED pulses continuously when conditions are normal. A solid LED indicates the ‘standby’ crosspoint in a redundant system. Health FCM COMM XP COMM XP PS Seat Scangate Active Video Crosspoint LEDs FIGURE 4-11. 4-22 Utah-400 Components...
-
Page 113: Rear Panel Considerations
Rear Panel Considerations Rear Panel Considerations VIDEO VIDEO GPIO REF A REF B -48V LEVEL OFFSET E-NET SERIAL MX-BUSS 1 2 4 8 10 FIGURE 4-12. MX Bus This is the control bus between the UT-400 and an SC-3/4 controller. Each chassis contains two connectors, fed through either side, then distributed to the next piece of equipment from either side. - Page 114 Utah-400 Components Video Ref A, Video Ref B Used as a switching reference. Provides analog blackburst or tri-level sync. This port is a loop thru, and the unused BNC must be terminated in 75 Ohms. AES Ref Requires an AES, DARS signal if any synchronous AES routing is operated within the frame. 4-24 Utah-400 Components...
-
Page 115: Power Supplies
The power supply interconnects with the router at the bottom of the assembly using a cabled interface. Using Utah Scientific’s pre-molded cable assembly, the ground signal and 48 volt conversion are carried to the UT-400 router. You will also see an additional cable assembly that is used for the micro controller inside the router that communicates with the alarm circuitry inside router. -
Page 116: Router Power Supplies
Utah-400 Components The unique cable assembly allows the micro controller to efficiently communicate, sending accurate alarm signals any time an issue arises. Cable Assembly FIGURE 4-14. Router Power supplies The Utah-400’s power supplies are standard, with AC input, alarm monitoring circuitry, and DC output going to the system. -
Page 117: Led Indications
Power supplies LED Indications If no alarms are present, the ALM LED will be off while the yellow LEDs (AC OK and DC OK) will be illuminated. Error Indication (Red) Power OK Indications (Yellow) Power Supply FIGURE 4-15. Individual supply alarms will be indicated with the corresponding red LED. Specific adjust- ments are available for individual voltage indications within this guide’s Troubleshooting sec- tion. - Page 118 Utah-400 Components 4-28 Utah-400 Components...
- Page 119 This chapter is designed to help the user diagnose problems on the Utah- 400 Routers to the subsystem level. There are no repairable boards in the Utah-400 system, contact Utah Scientific Technical Services at 800-447- 7204 regarding any problems you may be having. Should any printed circuit boards need repair, Technical Services can advise you on shipping and on the repair process.
-
Page 120: Subsystem Level Troubleshooting
Troubleshooting Subsystem Level Troubleshooting A routing system is typically comprised of several subsystems: Video System • Audio System • Control System • Power System • Fault finding is simplified by first isolating the problem to one of these subsystems. For example, if the audio-sys- tem is functioning normally, but there are problems with video, the problem is probably confined to the video sys- tem. - Page 121 Main Troubleshooting Chart Main Troubleshooting Table TABLE 2-1. Subsystem Table Reference Problem Video Audio Power Control No Video or Audio outputs Video and Audio outputs are present but neither can 1,2,6 be switched No Video output, Audio functions normally 1,2,3 No Audio output, Video functions normally 1,2,3 Video switches normally but audio does not switch...
-
Page 122: Video Subsystem Troubleshooting Table
Troubleshooting Video Subsystem Troubleshooting Table Use the following table to troubleshoot specific video subsystem problems. The numbers in the left-hand column indicate specific references from the Video column in the Main Troubleshooting Table. Video Subsystem Troubleshooting Table TABLE 2-2. Problem Check No video output Control cable connected, or internal con-... -
Page 123: Audio Subsystem Troubleshooting Table
Audio Subsystem Troubleshooting Table Audio Subsystem Troubleshooting Table Use the following table to troubleshoot specific audio subsystem problems. The numbers in the left-hand column indicate specific references from the Audio column in the Main Troubleshooting Table. Audio Subsystem Troubleshooting Table TABLE 2-3. -
Page 124: Power Subsystem Troubleshooting Table
Troubleshooting Power Subsystem Troubleshooting Table Use the following table to troubleshoot specific power subsystem problems. The numbers in the left-hand column indicate specific references from the Power column in the Main Troubleshooting Table. Power Subsystem Troubleshooting Table TABLE 2-4. Problem Check No video output Power applied to video frame? -
Page 125: Control Subsystem Troubleshooting Table
Control Subsystem Troubleshooting Table Control Subsystem Troubleshooting Table Use the following table to troubleshoot specific control subsystem problems. The numbers in the left-hand column indicate specific references from the Control column in the Main Troubleshooting Table. Control Subsystem Troubleshooting Table TABLE 2-5. -
Page 126: System Controller Alarms
Troubleshooting System Controller Alarms System controller alarms are indicated by LEDs on the front of each controller card. The active LED should be lit on one of the controller cards. If only one controller is present • (non redundant system), the active LED should be illuminated. Please note the following additional points regarding the controller: The heartbeat LED (DS6) indicates that the processor is communicating with the vital parts •... -
Page 127: Control Panel Troubleshooting
Control Panel Troubleshooting Control Panel Troubleshooting If your control panel does not control any of the matrix, check that power is applied to the panel. UNET Panels Panels communicate to the controller by a special network known as U-Net. Panels are •... - Page 128 Troubleshooting 5-10 Troubleshooting...
- Page 129 Specifications APPENDIX A In this Appendix This appendix provides detailed lists of all system audio, video, control, physical, power and regulatory specifications. Power ..................A-2 Input Power and DC Power Specifications ......A-2 Digital Video ................A-3 Reference ................A-5 Control ...................
-
Page 130: Power
Specifications Power The following table lists power specifications: Input Power and DC Power Specifications Input and DC specifications TABLE A-1. Parameter Specification (AC Supply) Input Power Consumption Voltage 1250 Watts per module, max Voltage 90 - 240 Volts AC, universal power supply Frequency 50 - 60 Hertz... -
Page 131: Digital Video
Digital Video Digital Video The following table lists the system digital video specifications. Digital Video Specifications TABLE A-2. Jitter Conforms to SMPTE 259, 292, 424 Reclocked Data Rates 270, 1485, 2970, Mb/Sec Input Return Loss < -15 dB to 1.5 Ghz, -10dB to 3Ghz Output Return Loss <... - Page 132 Specifications Digital Audio Specifications TABLE A-3. Parameter Specification Digital Audio Processing 48 kHz. 16 - 24 Bit, AES / EBU; AES-3 Input Impedance - Balanced 110¾ ±20%. 100 KHz. to 6.144 MHz Input Level minimum: 200 mVPP. w/> 50% Eye Pattern Opening Modes of Operation Synchronous and Asynchronous Input Level maximum:...
-
Page 133: Reference
Reference Reference The table below lists reference specifications Reference Specifications TABLE A-4. Parameter Specification Audio One 75Ohm terminated AES sync Video 1 NTSC or PAL black burst, or Tri-Level Sync Video 2 NTSC or PAL black burst, or Tri-Level Sync Specifications... -
Page 134: Control
Specifications Control The following table lists control specifications: Control Specifications TABLE A-5. Parameter Specification Control MX-Bus Daisy Chain - Terminated Audio One AES Audio Sync Alarms The following table lists alarm specifications: Alarm Specifications TABLE A-6. Parameter Specification Primary alarm ANSI / SMPTE 269M fault reporting (Relay clo- sure) Connector Type... -
Page 135: Physical
Physical Physical The following table lists physical specifications: Physical Specifications TABLE A-7. Parameter Specification Width EIA – RS-310 – D 92 19” rack mount standard Height 20 rack units for the 528 (300 lbs.), and 40 rack units for the 400 XL (600 lbs.) Depth 19 inches, 483 mm maximum... -
Page 136: Regulatory
Specifications Regulatory The following table lists system regulatory specifications Regulatory Specifications TABLE A-8. Parameter Specification EN50 081-1 (EN50 022 Class A) Susceptibility EN50 082 (IEC 801-3, IEC 801-4) Safety EN60 950, UL 1950, CSA 022.2 No. 234 Shock / Vibration MIL Std. -
Page 137: Connector Suppliers And Usi Part Numbers
Connector Suppliers and USI Part Numbers Connector Suppliers and USI Part Numbers The following table lists connector supplies and Utah Scientific Part Numbers where applicable: Not all connectors are used on the Utah-400 but are supplied as a courtesy. Connector Suppliers TABLE A-9. - Page 138 Specifications A-10 Utah-400 Series...
- Page 139 The Debug Port APPENDIX B This Appendix contains the following: Diagnostic Port Usage ....................B-2 System Diagnostic Port ....................B-2 M = FPGA Memory Status ....................B-2 V = Version ........................B-3 R = Router Crosspoint Status ................... B-4 I = IO Card Information ....................B-5 S = Hardware Status ......................
- Page 140 The Debug Port Serial Port Usage Baud Rate Information Baud 38,4000 Data Bits Stop Bits Parity Bits Handshake XON/XOFF Output Translation CR = CR/LF Pinout Information Signal Name Direction Receive Data Transmit Data Ground The Debug Port...
-
Page 141: Diagnostic Port Usage
Diagnostic Port Usage Diagnostic Port Usage The diagnostic port is a ‘command and response’ type interface. The system will display a menu in response to a press of the spacebar. Pressing the letter that is displayed on the screen in front of a particular menu item will cause that item to be executed. The Menu on each device in the system is similar, but each has its own unique set of command and status values based on the function of the device. -
Page 142: Version
This register is communicated to the control system for board information gathering purposes. V = Version Pressing the ‘V’ key will display the software version banner – ************************************************ Utah Scientific Inc. Utah-400 528R Video System Monitor, Rev. x.11 ************************************************ The Debug Port... -
Page 143: R = Router Crosspoint Status
Diagnostic Port Usage R = Router Crosspoint Status Pressing the ‘R’ key will display the map of connected crosspoints in the system. The display numbering is in hexadecimal. Each line contains entries for 16 outputs, starting at the number indicated on the far left, and the number in the entry indicates the source connected to that output. -
Page 144: I = Io Card Information
The Debug Port I = IO Card Information Pressing the ‘i’ key will display an entry for each of the IO, Crosspoint and Monitor matrix cards installed in the system. IO card raw status PN-rev SPD SN IC TM VR ER X1 X2 X3 E1 E2 E3 Card 0 - 12290105 0300 0332 0C 15 0D 00 00 00 00 55 55 55 Card 1 - 12290105 0100 0281 09 18 0D 00 00 00 00 55 55 55 Card 2 - 12290105 0000 0150 09 14 0D 00 00 00 00 55 55 55... -
Page 145: S = Hardware Status
Diagnostic Port Usage S = Hardware Status Pressing the ‘s’ key will display the status of the Frame Controller Module itself. System Type -> 528 System - In an 528 Chassis. Slot = Redundant Local Voltage Levels 5V = 5122mv 3.3V = 3302mv 2.5V = 2509mv 1.2V = 1222mv... - Page 146 The Debug Port V = Version Pressing the ‘V’ key will display the software version banner – ************************************************ Utah Scientific Inc. UT400-528 IO CD Monitor R0.13 ************************************************ S = Hardware Status Pressing the ‘s’ key will display the status of the IO card hardware.
-
Page 147: Crosspoint Card Diagnostic Port
Diagnostic Port Usage F = Fiber Module Status Pressing the ‘f’ key will display the status of the fiber modules if connected to a fiber optic IO card. Crosspoint Card Diagnostic Port The Crosspoint Card diagnostic port (P1) is a black plastic RJ45 connector on the front edge of the card. - Page 148 The Debug Port V = Version Pressing the ‘v’ key will display the following information- ************************************************ Utah Scientific Inc. Utah-400-528 Routing System Monitor, Rev. 0.01 ************************************************ FPGA MEMORY STATUS Level Switch = 01 Offset Switch = 00 SysType fr FCM= 00 Decoded IO Val= 00 MX Active? ->...
- Page 149 Diagnostic Port Usage R = Router Crosspoint Status Pressing the ‘R’ key will display the map of connected crosspoints in the system. The display numbering is in hexadecimal. Each line contains entries for 16 outputs, starting at the number indicated on the far left, and the number in the entry indicates the source connected to that output.
- Page 150 The Debug Port S = Hardware Status Pressing the ‘s’ key will display the status of the crosspoint card. HARDWARE STATUS Crosspoint type = 576X288 XPT Part Number = 1222-1001 Total Power Consumption = 72W XPT1 IO voltage = 1807 mV XPT2 IO voltage = 1820 mV XPT3 IO voltage = 1820 mV XPT4 IO voltage = 1820 mV...
- Page 151 The Utah-400 Digital Audio APPENDIX C Breakout Panel This Appendix contains the following: Scope .................C-2 The AES Breakout Panel Kit ........C-2 Description of the AES Breakout Panel ......C-2 Installation of the AES Breakout Panel ......C-3 Label Instructions for the Utah-400 Breakout Panel ...C-5 Scope .................C-5 Application...
-
Page 152: Scope
The customer is responsible for wiring the Sources and Destinations to each panel. The AES Breakout Panel Kit Each breakout panel kit ordered from Utah Scientific is shipped with the following items: (1) Breakout Panel (part number 161044-1) •... -
Page 153: Installation Of The Aes Breakout Panel
Installation of the AES Breakout Panel Installation of the AES Breakout Panel To install the Breakout Panel: Install the BOP at the desired location on the rack frame. (Within three feet of the Utah- 400 Digital Audio Backplane.) Install the D/D 26 pin cables from the Utah-400 input or output 00 - 07 to the BOP backplane input or output 00 - 07. - Page 154 The Utah-400 Digital Audio Breakout Panel Note: Wiring is the same for each sequential block following 0 - 7. Example; 8 - 15, 16 - 23, etc. Failure to follow these steps will result in loose or no connections, and the wire may fall out of the hole.
-
Page 155: Label Instructions For The Utah-400 Breakout Panel
Label Instructions for the Utah-400 Breakout Panel Label Instructions for the Utah-400 Breakout Panel Scope This document applies to the label installation on the Utah-400 Breakout Panel. Labels included in this kit include the 54450-1035 (Input Labels 000 through 287) and 54450-1036 (Output Labels 000 through 287). - Page 156 The Utah-400 Digital Audio Breakout Panel The illustration below shows the proper application of the labels on the breakout panel. Apply New Label over existing panel silkscreen Inputs 000 - 007 0 - 7 Inputs 8 - 15 008 - 015 Front Section View of the Utah-400 Breakout Panel Apply New Label over...
- Page 157 Index display 1-5 high definition 1-6 hot swappable 1-5 Numerics monitor 1-6 0V 2-44 output 1-5 10 X 10 switching matrix 1-7 serial digital 1-6 26-pin high-density connector 2-34 signal level 1-5 -48V 2-44 source 1-5 digital audio specifications A-4 Abbreviations 1-4 AES Breakout Panel C-2 equipment installation 2-22...
- Page 158 MX-Bus cable installation 2-22 troubleshooting chart 5-2 troubleshooting tables audio subsystem 5-5 control panel 5-9 physical specifications A-7 control subsystem 5-7 pin-out main 5-3 26-pin high-density connector table 2-36 power subsystem 5-6 DB-26 high-density illustrations 2-38 video subsystem 5-4 power connections 2-43 power subsystem troubleshooting table 5-6 power supplies 4-25 power supply alarms 5-6...
Need help?
Do you have a question about the Utah-400 XL and is the answer not in the manual?
Questions and answers