Subscribe to Our Youtube Channel
Summary of Contents for Living & Co Waipoua
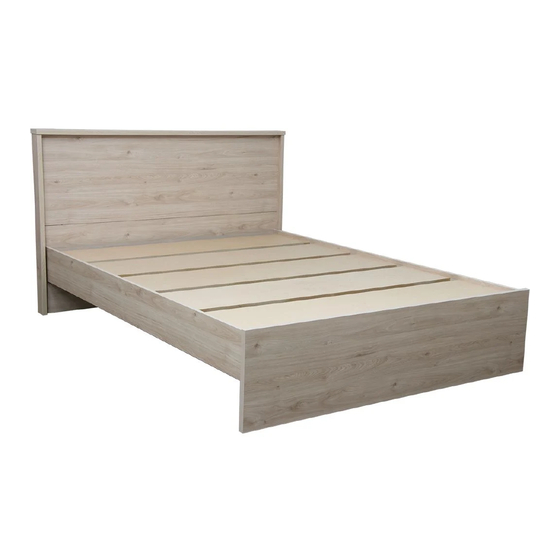
- Page 1 Waipoua Queen Bedframe 162.2cm 102.5cm 212.8cm INSTRUCTION MANUAL Maximum recommended weight is 200kg Job no.
-
Page 2: Assembly Details
Assembly Details Floor Area 3m x 4m Required Assembly Space Approximate Assembly Time 2 Person Assembly Tools Required AFTER SALES SUPPORT support@compacfurniture.co.nz or 0800 100 858... -
Page 3: Care And Maintenance
Tips before you start 1. For the protection of your furniture, we recommend that the product is placed on a protected surface during assembly to prevent damage 2. Please check that all parts are present before you start the assembly of your furniture 3. -
Page 4: Parts List
Parts List PART MEASUREMENTS NOTES Headboard Top 1622 x 92 x 25mm Laminate on both sides Headboard LH End 1000 x 80 x 25mm Laminate on both sides (green mark on back) Headboard RH End 1000 x 80 x 25mm Laminate on both sides (red mark on the back) Headboard Top Panel 1560 x 500 x 15mm... - Page 5 Cam Installation & Operation Guide The Cam and Connecting Bolt system is used to put your unit together. Below is an explanation of how this system works. Press the cam fitting into the hole provided. The arrow on the top of the cam must point to the connecting hole in the edge of the board.
- Page 6 Assembly STEP 1: Headbaord Top • To begin assembly, lay the Top down with the holes facing up on a clean and clear surface. • Screw six Connecting Bolts into the holes as shown. • Insert the two Dowels into the holes as shown. Dowel Connecting Bolt Connecting Bolts...
- Page 7 STEP 2: LH & RH Headboard Ends • Lay the LH end down with the holes facing up on a clean and clear surface. • Insert the cam into the large hole as shown on page 5. Ensure they are inserted in the right orientation. •...
- Page 8 STEP 3: Headboard Panels • Lay the headboard top panel with the holes facing up on a clean and clear surface. • Insert the eight Cams into the holes as shown on page 5. Ensure they are inserted in the right orientation.
- Page 9 STEP 4: Bed Brackets • Flip the headboard bottom panel over and lay down with the cams facing down, finished side up. • Place three brackets over the small pre-drilled holes and insert the four 25mm Woodscrews in each one as shown below. Ensure the slots in the brackets on the sides are closest to the edge of the panel and the centre bracket has the slot on the RH.
- Page 10 STEP 5: Side Rails • Lay one of the Side Rails finished side down on a clean clear surface. • Position the Bed Brackets over the holes at each end of the rail ensuring the type 1 and 2 are at opposite ends as shown below.
- Page 11 STEP 6: Assemble Headboard • Bring all the components for the headboard together including the Top the LH and RH Ends the Top Panel and the Bottom Panel. A. Join the Top and Bottom Panel as show below by inserting the dowels into their appropriate holes. B.
-
Page 12: After Sales Support
STEP 7: Install Bed Rails • Attach the bed rails to the headboard and the footboard by hooking the brackets together. A second person may be needed to assist in this step. • First hook the bracket together at the footboard end other end of the rail onto the headboard. Ensure hooks are pushed in tightly. - Page 13 STEP 8: Install the Slats • Place the five slats in place an insert the H5 Large screws H5 Large Screw H5 Large Screws AFTER SALES SUPPORT support@compacfurniture.co.nz or 0800 100 858...
- Page 14 Congratulations, your Waipoua Queen Bed Frame is now complete. Thank you for supporting New Zealand Made furniture. AFTER SALES SUPPORT support@compacfurniture.co.nz or 0800 100 858...
-
Page 16: Warranty
WARRANTY We pride ourselves on producing a range of quality products that are both packed with features and completely reliable. We are so confident in our products; we back them up with a five-year warranty. Now you too can relax knowing that you are covered.


Need help?
Do you have a question about the Waipoua and is the answer not in the manual?
Questions and answers