Table of Contents
Advertisement
Available languages
Available languages
Quick Links
USA office: Fontana
AUS office: Truganina
GBR office: Ipswich
If you're having difficulty, our friendly
customer team is always here to help.
FRA office: Saint Vigor d'Ymonville
USA:cs.us@costway.com
AUS:cs.au@costway.com
GBR:cs.uk@costway.com
FRA:cs.f r @costway.com
Electric Fireplace
Cheminée Électrique
FP10235US
THIS INSTRUCTION BOOKLET CONTAINS IMPORTANT SAFETY INFORMATION. PLEASE READ AND KEEP FOR FUTURE REFERENCE.
Advertisement
Table of Contents

Related Manuals for Costway FP10235US


Summary of Contents for Costway FP10235US
- Page 1 GBR office: Ipswich FRA office: Saint Vigor d'Ymonville USA:cs.us@costway.com If you're having difficulty, our friendly AUS:cs.au@costway.com customer team is always here to help. GBR:cs.uk@costway.com THIS INSTRUCTION BOOKLET CONTAINS IMPORTANT SAFETY INFORMATION. PLEASE READ AND KEEP FOR FUTURE REFERENCE. FRA:cs.f r @costway.com...
- Page 2 Before You Start Please read all instructions carefully. Electric Fireplace Retain instructions for future reference. Separate and count all parts and hardware. Read through each step carefully and follow the proper order. NO VENTING REQUIR ED We recommend that, where possible, all items are assembled near to the area in which they will be placed in use, to avoid moving the product unnecessarily once Read and understand this entire owner's manual, assembled.
-
Page 3: Packing List
5. Do not install damaged, incomplete or substitute components. 1.0 PACKING LIST 6. To prevent accidental swallowing, small kits should be kept away from children and infants. 7. There is small batteries in the remote. Please keep away from children. 8. -
Page 4: Listing Approvals
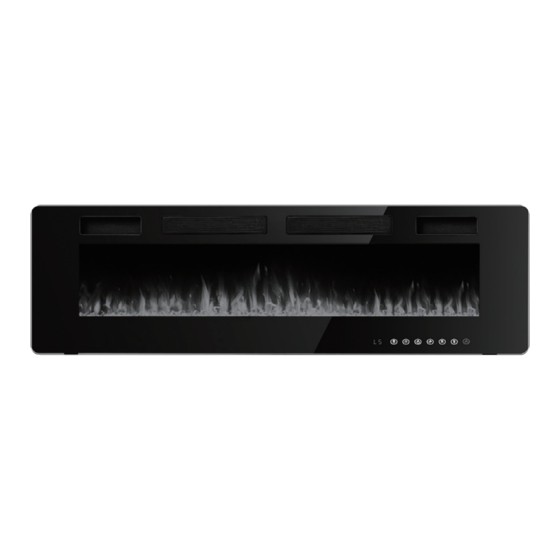
1.1 DIMENSIONS NOTE: ※ The size of column B left some space for the main power switch on the HEAT VENTS (DON'T COVER) SIDE top, you can also choose 3.54 inches for full embedding, since the touch SIDE screen also has a main power switch. ※... -
Page 5: Installation Instructions
RISK OF FIRE! THE POWER CORD MUST NOT BE PINCHED 7. Make sure that there is no possibility of inflammable material, AGAINST A SHARP EDGE. combustible material, or curtains coming into contact with the heater. SECURE CORD TO AVOID TRIPPING OR SNAGGING TO 8. - Page 6 Option 1: - Take the glass frame 4-8 inches(10-20 cm) away from the appliance, pull out the data cable connector with the help of others or put the glass panel Wall Hanging..down on the ground before complete separation. WHITE SCREW CAUTION WHITE...
- Page 7 Step 3. Choosing a Wall Location Step 6. Locking the Fireplace on the Bracket - Find a safe location, where use the screw we removed from step 2. minimum clearance from the ceiling and the mantel must be at least 8 inches (200 mm); minimum clearance from the Top View front must be at least 3 feet...
- Page 8 Step 9. Refasten the Glass Frame Step 5. Placing the Pads and Fixing the Fireplace - Thread the M4 X 12 screw into the threaded holes on the glass panel. Check the alignment of the glass panel and securely tighten the screws. - Screws (Part A) pass through the holes from the front of fireplace with screwdriver.
-
Page 9: Control Panel / Remote Control Operation
Step 8. Refasten the Glass Frame Main Power button Thread the M4 X 12 screw into the threaded holes on the glass panel. Check the alignment of the glass panel and securely tighten the screws. M4 X 12 SCREW M4 X 12 SCREW Note: Make sure the Main Power Switch is turned on before operating. -
Page 10: Troubleshooting Guide
NOTICE: To improve operation, aim the remote control at the front of the Turn the appliance ON/OFF. fireplace. DO NOT press the buttons too quickly. Give the unit time to NOTE: Make sure the main switch on the top of fireplace is POWER turned on before operating. - Page 11 This is normal. The fans blow cool air while the 1. Flame element Contact us via Amazon Message appliance gradually heat up. The fans blow after the is not attached to The mounting bracket Flame are frozen appliance turn off to cool the appliance and prevent the motor.
-
Page 12: Maintenance
7.1 PARTIALLY REFLECTIVE GLASS CLEANING 1. Loose wiring. Contact us via Amazon Message The partially reflective glass is cleaned in the factory during the assembly operation. During shipment, installation, handling, etc., the partially reflective 2. Bad heating Contact us via Amazon Message glass may collect dust particles;... -
Page 13: Download The App
(2) Reflected strip noise. It is coming from the back of the fireplace. Please 1 Download the app take the fireplace apart, find the reflective strip, and cut off the excess. (3) Fan noise. It is coming from top of the fireplace. Please contact customer service. -
Page 14: Control Devices
Cheminée Électrique AUCUNE VENTILATION REQUISE Lisez et comprenez l'intégralité de ce manuel du propriétaire, y compris toutes les informations de sécurité avant de brancher ou d'utiliser cet appareil. Le AVERTISSEMENT non-respect de cette consigne peut entraîner un incendie, un choc électrique ou des blessures graves. 4 Add a device 5 Control devices INSTRUCTIONS DE SÉCURITÉ... -
Page 15: Liste De Colisage
7. N'installez pas de composants endommagés, incomplets ou de remplacement. 1.0 LISTE DE COLISAGE 8. Pour éviter une ingestion accidentelle, les petits kits doivent être tenus à l'écart des enfants et des nourrissons. 9. Il y a de petites piles dans la télécommande. Veuillez tenir à l'écart des enfants. 10. -
Page 16: Instructions Générales
1.1 DIMENSIONS REMARQUE: ※ La taille de la colonne B laissait un peu d'espace pour l'interrupteur ÉVENTS DE CHALEUR (NE PAS COUVRIR) CÔTÉ d'alimentation principal sur le dessus, vous pouvez également choisir 3,54 CÔTÉ pouces pour une intégration complète, car l'écran tactile dispose également d'un interrupteur d'alimentation principal. -
Page 17: Instructions D'installation
RISQUE D'INCENDIE ! LE CORDON D'ALIMENTATION NE 7. Assurez-vous qu'il n'y a aucune possibilité que des matériaux DOIT PAS ÊTRE PINCÉ CONTRE UN BORD COUPANT. inflammables, des matériaux combustibles ou des rideaux entrent en SÉCURISEZ LE CORDON POUR ÉVITER DE TRÉBUCHER OU contact avec l'appareil de chauffage. -
Page 18: Construction Intégrée
Option 1 : - Éloignez le cadre en verre de 4 à 8 pouces (10 à 20 cm) de l'appareil, débranchez le connecteur du câble de données avec l'aide d'autres Suspension murale personnes ou posez le panneau de verre sur le sol avant la séparation complète. - Page 19 Étape 3. Choisir un emplacement mural Étape 6. Verrouillez la cheminée sur le support - Trouvez un emplacement Utilisez la vis que nous avons retirée à l'étape 2. sécuritaire, où le dégagement minimum entre le plafond et le manteau doit être d'au moins 8 pouces (200 mm);...
- Page 20 Étape 9. Refixer le cadre en verre Étape 5. Placer les coussins et fixer la cheminée - Vissez la vis M4X12 dans les trous filetés du panneau de verre. Vérifiez l'alignement du panneau de verre et serrez bien les vis. VIS M4X12 VIS M4X12 - Les vis (pièce A) passent à...
-
Page 21: Instructions D'utilisation
Étape 8. Refixer le cadre en verre Bouton d'alimentation principal - Vissez la vis M4X12 dans les trous filetés du panneau de verre. Vérifiez l'alignement du panneau de verre et serrez bien les vis. VIS M4X12 VIS M4X12 Remarque : Assurez-vous que l'interrupteur d'alimentation principal est allumé... -
Page 22: Guide De Dépannage
REMARQUE : Pour améliorer le fonctionnement, dirigez la télécommande Allumer/éteindre l'appareil. vers l'avant du foyer. NE PAS appuyer sur les boutons trop rapidement. REMARQUE : Assurez-vous que l'interrupteur principal sur le ALIMENTATION dessus du foyer est allumé avant de l'utiliser. Donnez à... - Page 23 C'est normal. Les ventilateurs soufflent de l'air frais 1. L'élément Contactez-nous par Amazon L'appareil ne souffle pendant que l'appareil chauffe progressivement. Les flamme n'est pas Message pas d'air chaud Les flammes sont ventilateurs soufflent après l'arrêt de l'appareil pour fixé au moteur. lorsqu'il s'allume et gelées.
-
Page 24: Entretien
Le verre partiellement réfléchissant est nettoyé en usine lors de l'opération de 1. Câblage Contactez-nous par Amazon montage. Pendant l'expédition, l'installation, la manutention, etc., le verre desserré. Message partiellement réfléchissant peut recueillir des particules de poussière ; ceux-ci peuvent être enlevés en époussetant légèrement avec un chiffon propre et sec. 2. -
Page 25: Télécharger L'application
(2) Bruit de bande réfléchi. Il vient de l'arrière de la cheminée. Veuillez 1 Télécharger l'application démonter le foyer, trouver la bande réfléchissante et couper l'excédent. (3) Bruit du ventilateur. Il vient du haut de la cheminée. Veuillez contacter le service client. - Page 26 Return / Damage Claim Instructions DO NOT discard the box / original packaging. In case a return is required, the item must be returned in original box. Without this your return will not be accepted. Take a photo of the box markings. A photo of the markings (text) on the side of the box is required in case a part is needed for replacement.
Need help?
Do you have a question about the FP10235US and is the answer not in the manual?
Questions and answers
the remote quit
The remote for the Costway FP10235US may have stopped working due to the following reasons:
1. Battery Not Properly Installed – Ensure the battery is correctly installed and remove the transparent insulating piece before use.
2. Not Pointing at the Right Position – Aim the remote control directly at the receiver.
3. Obstacle Blocking Signal – Remove any objects between the remote and the receiver that might block the signal.
4. Pressing Buttons Too Quickly – Press the buttons more slowly to allow the unit time to respond.
If the remote still does not work, try unplugging the unit, waiting for 10 minutes, and plugging it back in to reset the system.
This answer is automatically generated