Table of Contents
Advertisement
Quick Links
Owners &
Installation
LISTINGS AND CODE APPROVALS
These gas appliances have been tested in
accordance with AS/NZS 5263.0 & AS/NZS
5263.1.3-2021 and have been certified by
IAPMO for installation and operation as de-
scribed in these Installation and Operating
Instructions. Must be installed as per AS/
NZS5601.
Your unit should be serviced annually
by an authorised service person.
GFi750 GAS INBUILT
PLEASE KEEP THESE INSTRUCTIONS FOR FUTURE
WARNING:
Improper installation, adjustment,
alteration, service or maintenance can
cause injury or property damage. Refer to
this manual. For assistance or additional
information consult an authorised installer,
service agency or the gas supplier.
FOR YOUR SAFETY
Do not store or use gasoline or other
flammable vapours and liquids in the
vicinity of this or any other appliance.
Installation and service must be performed
by an authorised installer, service agency
or the gas supplier.
920-457
Models: GFi750NG
REFERENCE
FOR YOUR SAFETY
What to do if you smell gas:
Do not try to light any
appliance
Do not touch any electrical
switch: do not use any
phone in your building.
Immediately call your gas
supplier from a neighbour's
phone. Follow the gas
supplier's instructions.
If you cannot reach your
gas supplier, call the fire
department.
GFi750LP
GFi750ULPG
11/23/22
Advertisement
Table of Contents

Related Manuals for Regency GFi750


Summary of Contents for Regency GFi750
- Page 1 Owners & Installation GFi750 GAS INBUILT Models: GFi750NG GFi750LP GFi750ULPG PLEASE KEEP THESE INSTRUCTIONS FOR FUTURE REFERENCE WARNING: FOR YOUR SAFETY Improper installation, adjustment, What to do if you smell gas: alteration, service or maintenance can Do not try to light any cause injury or property damage.
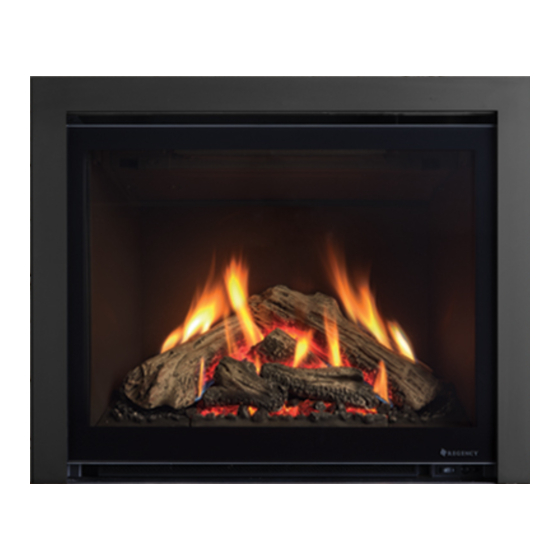
- Page 2 Fireplace Series of appliances has been designed to provide you with all the warmth and charm of a fireplace, at the flick of a switch. The model GFi750 of this series has been approved by IAPMO for both safety and efficiency. As it also bears our own mark, it promises to provide you with economy, comfort and security for many trouble free years to follow.
-
Page 3: Unit Dimensions - Flush Install (Millimeters)
UNITS IN INCHES ANGULAR = DATE: E.C.N.: SIGN: THIS DRAWING IS THE PROPERTY OF FPI LTD., IT MAY NOT BE COPIED IN WHOLE OR IN PART, OR DISCLOSED TO A THIRD PARTY WITHOUT OUR PRIOR WRITTEN CONSENT. Regency GFi750 Gas Inbuilt Fireplace... -
Page 4: Unit Dimensions - With Backing Plate (Millimeters)
UNITS IN INCHES ANGULAR = E.C.N.: SIGN: DATE: THIS DRAWING IS THE PROPERTY OF FPI LTD., IT MAY NOT BE COPIED IN WHOLE OR IN PART, OR DISCLOSED TO A THIRD PARTY WITHOUT OUR PRIOR WRITTEN CONSENT. Regency GFi750 Gas Inbuilt Fireplace... -
Page 5: Table Of Contents
Primary Glass Guard Installation and Removal ....... 19 Glass Door Installation and Removal ..........19 Faceplate Installation and Removal ..........20 Backing Plate Installation ............. 20 Final Check ................. 21 Wiring ..................21 Standard Wiring ................21 Regency GFi750 Gas Inbuilt Fireplace... -
Page 6: Data Badge
This is a copy of the label that accompanies each Regency GFi750 Gas Check the label on the unit and if there is a difference, the label on the Inbuilt fireplace. We have printed a copy of the contents here for your unit is the correct one. -
Page 7: Important Message
8) To prevent injury, do not allow anyone who is masonry fireplace only. unfamiliar with the operation to use the fireplace. 9) Only Regency flue kit part # 946-773 can be used. This flue kit contains all the components required to safely install this GFi750 gas inbuilt. -
Page 8: Installer's Information
Minimum Fireplace Opening Installation Checklist The minimum fireplace openings for the Regency GFi750 gas space heater are shown below: Before installing vent system ensure that the damper Height Width Front Depth Width-Back Lintel Depth (mm) plate is open and secure to prevent the damper plate... -
Page 9: Installation
The Air Intake pipe must be attached to the inlet installed at a lower overall height may air collar of the adaptor. not be lower than 152 mm from the top of the fireplace opening. Regency GFi750 Gas Inbuilt Fireplace... -
Page 10: Flue Liner Installation
6. When finished reading the manometer, turn off the unit, disconnect the hose, and tighten the screw (clockwise) with a 3mm flat screwdriver. Screw should be snug, but do not over tighten. Regency GFi750 Gas Inbuilt Fireplace... -
Page 11: Installation In Full Masonry Chimney
Co-Axial adaptor. Attach the Flex Liner ends at the top of the chimney to the Co-Linear to Co-Axial adaptor. Use four sheet metal screws to connect each Flex Liner run to the Co-Linear to Co-Axial adaptor. 8. Install termination cap. Regency GFi750 Gas Inbuilt Fireplace... -
Page 12: System Data - Gfi750L
(Close the aeration for a more yellow flame, or open it to make the flame bluer). 5mm open Propane: Fully open ULPG: Fully open • Any damage due to carboning resulting from improperly setting the aeration and restrictor setting controls is NOT covered under warranty. Regency GFi750 Gas Inbuilt Fireplace... -
Page 13: Conversion Kit #346-969 From Ng To Propane/Ulpg Model
1. Remove faceplate, glass guard, door, logs and crushed glass media. (See instructions) 2. Remove the burner by removing the 2 screws as shown below. Ensure that the wires do not touch underneath the firebox and light housing. 920-534 09.20.22 Regency GFi750 Gas Inbuilt Fireplace... - Page 14 (see page 28 of the manual or instructions included with the remote) 10. Remove pilot retainer clip with pliers and pull off the pilot cap to expose the pilot orifice. Pilot retainer clip Regency GFi750 Gas Inbuilt Fireplace 920-534 09.20.22...
-
Page 15: Glass Panel Installation (Part #346-906)
GFi750 installation GFI750 OPTIONAL INNER GLASS PANEL Optional Inner Glass Panel Installation (Part #346-906) INSTALLATION (PART #346-906) Note: Inner glass panel installation must be done prior to logs installation. 1. Remove faceplate, glass guard, door, logs, crushed glass media, 7. Remove the insulation from the rear inner metal panel and add it to and burner (see instructions in this manual). -
Page 16: Log Set Installation
Crushed Glass Panel #1 Panel #2 Panel #3 1. Place the 3 base panels as shown above. 2. Add 320 grams of 19 mm crushed glass on the light tray. Regency GFi750 Gas Inbuilt Fireplace 920-459 Page 1 of 3 04/28/22... - Page 17 6. Place log #7 as shown above. Maintain a gap 9. Place log #10 on left burner. between the log and the burner on the right side (see diagram 1). 920-459 Regency GFi750 Gas Inbuilt Fireplace 04/28/22 Page 2 of 3...
- Page 18 Diagram 2 12. Place log #13 on the pin on log #12. Place the other end of log #13 on notch located on base panel #2 (see diagram 3). 920-459 Page 3 of 3 04/28/22 Regency GFi750 Gas Inbuilt Fireplace...
-
Page 19: Primary Glass Guard Installation And Removal
Primary Glass Guard Installation and Removal Glass Door Installation and Removal Regency GFi750 Gas Inbuilt Fireplace... -
Page 20: Faceplate Installation And Removal
GFi750 installation GFI750 BACKING PLATE (PART #346-936) INSTALLATION INSTRUCTIONS Backing Plate Installation (Part #346-936) 2. Slightly lift up the Primary Glass Guard and tilt forward and out. 1. Remove the faceplate. 3. Screw the 4 bracket to the the side of the unit (as shown above). -
Page 21: Final Check
BROWN BATTERY HOLDER ON/OFF MAIN ON/OFF BAT -/+ IPI/CPI EV GND YELLOW/GREEN EV P/M ORANGE GREEN BLACK MOTOR BROWN YELLOW ORANGE SPLIT FLOW BLACK BLACK YELLOW WHITE YELLOW WHITE LIGHT BLACK BLACK RESET SWITCH LOAD Regency GFi750 Gas Inbuilt Fireplace... -
Page 22: Lighting Procedure
12 minutes (if in on position) Manual mode: Fan will turn on and off immediately using the remote control transmitter if the fan function is in the "on" position. Continuous Pilot/Intermittent Pilot (CPI/IPI) selection See remote control instructions for details. Regency GFi750 Gas Inbuilt Fireplace... -
Page 23: Copy Of Lighting Instruction Plate
Note: The first attempt to ignition will last approximately 60 seconds. If there is no flame ignition (rectification) the board will stop sparking for approximately 35 seconds. After this wait time, the board will start a second try for ignition by sparking for approximately 60 seconds. If there is still no positive ignition after the second attempt the board will go into lock out. The system will need to be reset as follows (after going into lock out mode): a) Wait 5 minutes - turn the system off by press- ing the ON/OFF button on the remote. b) After approximately 2 seconds, press the ON/ OFF button again. c) Unit will repeat step 2. TO TURN OFF GAS APPLIANCE Press the ON/OFF button once. Turn off all electric power to the unit if service is to be performed. DO NOT REMOVE THIS INSTRUCTION PLATE 920-463 Regency GFi750 Gas Inbuilt Fireplace... -
Page 24: Normal Operating Sounds Of Gas Appliances
APPLIANCE. Blower: DO NOT MODIFY THIS APPLIANCE. Regency gas appliances use high tech blowers to push heated air farther into the room. It is not unusual for the fan to make a "whirring" sound when ON. This sound will "Appliances incorporating a increase or decrease in volume depending on the speed setting of your fan speed control. -
Page 25: Proflame Ii Remote Control Operating Instructions
On button. The Receiver will “beep” four times to indicate the Transmitter’s command is accepted and sets to the particular code of that Transmitter. The system is now initialized. Figure 2: Transmitter LCD Display Figure 3: Battery Compartment Regency GFi750 Gas Inbuilt Fireplace... - Page 26 Transmitter LCD display will only show the room temperature (Fig. 6). At the same time the Receiver will turn off the appliance. A single “beep” from the Receiver confirms reception of the command. Figure 9 Figure 10 Regency GFi750 Gas Inbuilt Fireplace...
- Page 27 (Fig. 13). Use the Up/Down Arrow Keys (fig.1) to turn on, off or adjust the fan speed (fig. 14). A single “beep” will confirm reception of the command. Figure 13 Figure 14 Regency GFi750 Gas Inbuilt Fireplace...
- Page 28 3. Reinstall battery removed in Step 1 while holding both buttons—keep holding buttons, then release the MODE button only. 4. The screen will show either "Clr" or "Set" as the first option available is to disable or enable a mode. Regency GFi750 Gas Inbuilt Fireplace...
-
Page 29: Proflame Ii Battery Replacement & Battery Back Up
1. Remove fascia and glass guard. 2. Remove louver by removing the 2 screws. How to replace/add the batteries on backup battery holder (Proflame 2). 3. Pull out the battery holder and add/replace batteries. Battery Holder Location Regency GFi750 Gas Inbuilt Fireplace... -
Page 30: Maintenance
GLASS The heater is finished in a heat resistant paint UNTIL COOLED and should only be refinished with heat resist- Your Regency stove is supplied with high tempera- NEVER ALLOW CHILDREN ant paint (not with wall paint). Regency uses TO TOUCH GLASS ture, 5 mm Neoceram ceramic glass that will with- StoveBright Paint - Metallic Black #6309. -
Page 31: Fan Removal And Installation Option 1 (Front)
9. Disconnect the three fan connectors and lift the fan up and out. and flame sensor. 10. Reverse the above steps to install the new fan. • Replace any damaged gaskets when reinstalling all the components. Regency GFi750 Gas Inbuilt Fireplace... -
Page 32: Fan Removal And Installation Option 2 (Rear Fan Access)
5. Pull the unit out and remove the rear fan access panel by removing 8 screws. 6. Disconnect 3 fan connectors and lift the fan up and out. 7. Reverse the above steps to install the new fan. Replace gas access panel gasket if it has been damaged. Regency GFi750 Gas Inbuilt Fireplace... -
Page 33: Inner Panel Removal And Installation
5. Loosen the four screws and remove the mesh. Mesh 6. Remove the back panel by tilting it forward, then lifting it up and out. 6. To install, do steps 5 to 1 in that order. Regency GFi750 Gas Inbuilt Fireplace... -
Page 34: Gas Appliance Maintenance
- Lockout: If three trials for ignition fail the RED LED indicator will pulse three times in intervals. To clear lockout, turn the remote control hand-held to OFF position and then back to ON position. Regency GFi750 Gas Inbuilt Fireplace... - Page 35 Burner orifice • Burner media (change as needed) • Thermocouple (millivolt models) • Air shutter setting • Thermopile (millivolt models) • Wiring Gas Leak Tests • Check main gas line connection to valve • Check shut off valve connections • Check connection at gas valve outlet • Check connection at main burner orifice • Check pilot fuel line at valve and at pilot assembly 920-324 09.14.20 Regency GFi750 Gas Inbuilt Fireplace...
-
Page 36: Main Assembly
346-097 Valve Access 910-037 Pilot Orifice - LP 346-095 Gasket Valve Access 911-038 Flame Electrode 911-298 IFC Board SIT Proflame II CE 0.584.316 911-037 Flame Sensor 346-519 Louvre Assembly 346-025 Panel Rear 346-026 Panel Lh Regency GFi750 Gas Inbuilt Fireplace... - Page 37 Fitting Male Flarex Mpt Strt Adaptor 911-173 Wire Harness IFC No CPI Switch 584.924 911-018 Holder Battery W/9V Snap 4 Cell Stack 346-068 Front Shield 346-082 Glass Trim Left 346-083 Glass Trim Right 346-107 Firebox Baffle Regency GFi750 Gas Inbuilt Fireplace...
-
Page 38: Faceplate Assembly
N/S 346-969 Conversion Kit LP/ULPG 346-936 Backing Plate 346-025 Black Inner Panel - Rear N/S 346-906 Inner Panel Glass Black 346-026 Black Inner Panel - Left 346-028 Black Inner Panel - Right 346-140 Inner Panel Rear Insulation Regency GFi750 Gas Inbuilt Fireplace... - Page 39 FPI Fireplace Products International Ltd. (“the manufacturer”) through its wholly owned subsidiary, Fireplace Products Australia Pty Ltd (for Australia and New Zealand customers) and sold under the Regency® brand of fireplace products (collectively referred to herein as “FPI”), extends this Limited Lifetime Warranty to the original purchaser of this appliance provided the product remains in the original place of installation.
- Page 40 (including but not limited to cap size or type), operator error, abuse, misuse, use of improper fuels, accidents, lack of regular maintenance and upkeep, acts of God, weather related problems from hurricanes, tornados, Revision Date: December 2016 Regency Gas Products Warranty Regency GFi750 Gas Inbuilt Fireplace...
- Page 41 FPI may void this warranty. INCORRECT INSTALLATION OR GAS PRESSURE SETTINGS ARE NOT COVERED BY WARRANTY. A SERVICE OR CALLOUT FEE WILL BE CHARGED IN THESE CIRCUMSTANCES. Revision Date: December 2016 Regency Gas Products Warranty Regency GFi750 Gas Inbuilt Fireplace...
- Page 42 (b) Loss means any expense, cost or damage of any kind and includes Consequential Loss and a fine or penalty imposed by a statutory or other authority. Revision Date: December 2016 Regency Gas Products Warranty Regency GFi750 Gas Inbuilt Fireplace...
- Page 43 Product Registration and Customer Support: Thank you for choosing a Regency Fireplace. Regency strives to be a world leader in the design, manufacture, and marketing of hearth products. To provide the best support for your product, we request that you complete a product registration form at http://www.regency-fire.com.au/Customer-Care/Warranty-Registration.aspx...
- Page 44 Product Registration and Customer Support: Thank you for choosing a Regency Fireplace. Regency strives to be a world leader in the design, manufacture, and marketing of hearth products. To provide the best support for your product, we request that you complete a product registration form found on our Web Site under Customer Care within ninety (90) days of purchase.
- Page 45 Regency GFi750 Gas Inbuilt Fireplace...
- Page 46 Regency GFi750 Gas Inbuilt Fireplace...
- Page 47 Regency GFi750 Gas Inbuilt Fireplace...
- Page 48 Dealer Name & Address: ________________________________________________ ____________________________________________________________________ Installer: ____________________________________________________________ Phone #: ____________________________________________________________ Date Installed: ________________________________________________________ Serial #:_____________________________________________________________ Printed in Canada Regency and City Series are trademarks of FPI Fireplace Products International Ltd. © Copyright 2022, FPI Fireplace Products International Ltd. All rights reserved.
Need help?
Do you have a question about the GFi750 and is the answer not in the manual?
Questions and answers