Table of Contents
Advertisement
Quick Links
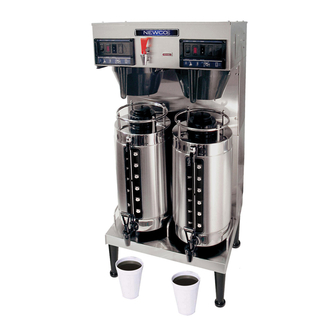
INSTALLATION and OPERATION MANUAL for GXD SERIES BREWERS
GXDF2-30
Model
Warmers
GXDF2-15
GXDF2-30
GXDF-8D
GXDF-8D
* Height does not include the 4" adjustable legs. Add approximately 4" to the height shown when using these legs.
NOTE: Automatic models without faucet are also available.
BREWER SPECIFICATIONS
No of
Width
Length
2
19"
19-1/8"
2
19"
19-1/8"
N/A
19"
19-1/8"
N/A
19"
19-1/8"
Shipping weight is approximately 65 pounds for all above units
US
Height*
120V
Amps
21-3/8"
13.5
26-5/8"
14.0
30-3/4"
11.5
30-3/4"
N/A
Man Pt No 701859
GXDF-8D
US
120/240V
Phase
Amps
24.9
Single
25.4
Single
22.9
Single
25.3
Three (delta)
Rev 3-01
Advertisement
Table of Contents

Related Manuals for Newco GXDF-8D


Summary of Contents for Newco GXDF-8D
- Page 1 GXDF2-30 No of Model Warmers GXDF2-15 GXDF2-30 GXDF-8D GXDF-8D * Height does not include the 4” adjustable legs. Add approximately 4” to the height shown when using these legs. NOTE: Automatic models without faucet are also available. BREWER SPECIFICATIONS Width...
- Page 2 GXD DUAL BREW SYSTEM DESIGN FEATURES Equipped with a 6.5-gallon hot water tank, the brewer is powered by a 5500 watt, 240-volt element on single-phase units and three 3500 watt, 240-volt elements on three phase units. A single control board controls water temperature, brew volume, Visa-Brew, Auto-Arm, and the inlet water valve.
- Page 3 PLUMBER'S INSTALLATION INSTRUCTIONS (AUTOMATIC BREWERS) CAUTION: Power to brewer must be OFF before proceeding with plumbing installation. 1) Flush water line before installing brewer. Brewer should be connected to COLD WATER LINE for best operation. 2) Water pressure should be at least 20 lbs. For less than a 25 ft run, use 1/4" copper tubing and connect to 1/2" or larger water line.
- Page 4 WARNING: - Read and follow installation instructions before plugging or wiring in machine to electrical circuit. 1) Place a suitable container in place below the brew basket to catch water. Depress the brew start/stop switch and the tank will begin to fill. The tank lid has a probe in it to signal the control board when the water has reached the appropriate level to begin the timing for the brew cycle.
- Page 5 7. CAUTION: The water faucet will dispense hot water when the handle is pulled. WARRANTY Newco coffee brewers are warranted against defects in workmanship or materials, under normal use, for 90 days from the date of purchase. Brewer parts are warranted against defect for 12 months from date of purchase.
- Page 6 1) Place filter into brew basket. 2) Put the appropriate amount of ground coffee into the filter for the volume of coffee being brewed. 3) Slide the brew basket into holder. 4) Set the volume selection switch to the appropriate position for the volume of coffee being brewed. 5) For warmer units: Place empty decanter on warmer located directly under the brew basket.
- Page 7 FACE PLATE DIAGRAM (MODEL GXDF-8D) WIRING DIAGRAM Newco Enterprises, Inc. * 1735 South River Rd. * P.O. Box 852 * St. Charles, MO 63303...
Need help?
Do you have a question about the GXDF-8D and is the answer not in the manual?
Questions and answers