Table of Contents
Advertisement
Available languages
Available languages
Quick Links
Advertisement
Table of Contents

Related Manuals for KNOVA KN 9818

Summary of Contents for KNOVA KN 9818
- Page 1 1800 Electric high pressure washer Hidrolavadora eléctrica KN 9818...
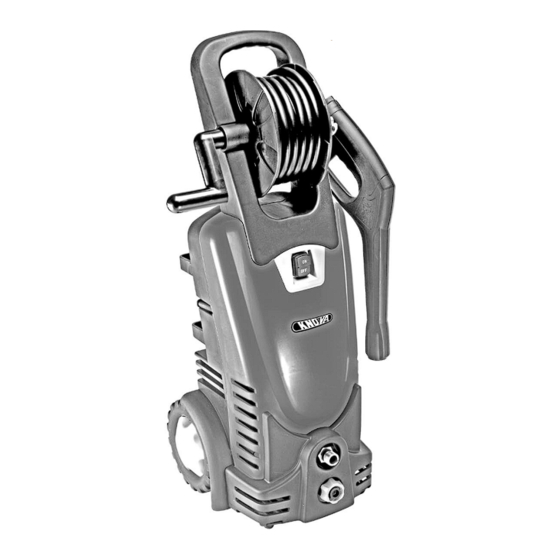
- Page 2 CO MPONEN TS OPERAT I NG ELE ME N T S ( fi g. A) 1. Hose reel 5. Turbo nozzle and spray wand 8. Nozzle cleaner 12. Spray gun 2. Holder for accessories 6. Variable (Hi-Low) 9. High pressure hose 13. Water outlet (connection nozzle and spray wand for high pressure hose) 3. Water filter 10. Detergent tank 7. Water inlet 4. Garden hose connector 11. On/Off switch EA S Y IN S TAL LAT I O N...
- Page 3 Unblocked trigger Blocked trigger 90º...
-
Page 4: For Your Safety
FOR YOUR SAFETY Please read the following safety notes carefully before using • There is a risk of kickback and sudden torque load against your pressure washer. the jet spray when the spray gun is opened. Use both hands when operating the pressure washer to ensure that you are Safety precautions always in complete control of the spray wand. • Leave the hose connected to the machine and the spray gun • Model KN 9818 includes a pressure switch that automatical- while the unit is pressurised. It is dangerous to detach the ly turns off the motor once the set pressure has been reached. hose while the unit is pressurised. When the water gun is closed, the pressure increases directly to almost the limit of 2000 PSI, causing the bypass to open • This unit ¡5 not intended to be used by people (including automatically and the pressure to decrease again rapidly. -
Page 5: Power Supply
• Do not use the unit if you are tired or under the influence of tively affect the safety of the unit. medicine or alcohol. • To ensure safe operation of the unit, only use original spare • Do not attempt to work with the unit too far away from your parts from the manufacturer or spare parts recommended by body. Operate the unit only on stable surfaces. Wear sturdy KNOVA. footwear and always maintain a well balanced stance. • For safety reasons, high pressure hoses, valves and cou- • Instruct all people to leave the operating area. Do not use plings must be used with this unit. Only use such hoses, the unit near people who are not wearing protective clothing. valves and couplings that are recommended by KNOVA. • Observe the maintenance notices in this instruction man- Attach the hose to the water supply before turning on the ual. -
Page 6: Adjustable Spray Nozzle
Clean any dirt or foreign particles out of the outlet on the Detach the hose carrying the water first from the device, then spray gun and the coupling with the internal threading of the from toe water supply. spray wand. Caution! Insert the spray wand into the spray gun’s quick-connect cou- pling by holding the spray wand firmly and turning it 90º to Vibrations from the unit can lead to numbness in your hands secure it (sae fig. F). when working for long periods of time. It is not possible to make a general statement regarding the recommended healthy working time, since the following factors all play a role: • Tendency to poor blood circulation (cold or numb fingers). -
Page 7: High Pressure/Turbo Spray
The detergent injection system must be completely dean be- a garden hose. For the low-pressure setting, turn off the unit fore you change detergents: and use only the water pressure from the garden hose supply- ing the water. Ensure that the pressure washer is turned off and the electri- cal cable is removed from the power socket. CAuTION! Use only detergents Intended for use in pressure washers with Ensure that the water supply is cut off and press the trigger to this unit. Ask at your KNOVA about these special products. allow me unit to depressurise. Do not use any bleach, chlorine products or acidic cleaning agents. • Detach the spray nozzle from the spray wand. use of detergents • Clean the nozzle. • Rinse the nozzle with water in the reverse direction. • Re-attach the nozzle to the spray wand. Turn the nozzle on the spray wand until it locks into place completely. Re-attach the pressure washer, turn it on, and press the trigger on the spray gun. If the pressure is still too... -
Page 8: Unit Maintenance
Cleaning the water filter U NI T MAINTENAN CE The pressure washer le equipped with a water inlet filter to Cleaning the cooling system protect the pump (sea fig. E-6). Clean the vents on the outer area of the pressure washer with To clean the internal water filter, remove the garden hose con- a damp cloth. In order to ensure that the air-cooling system nector and dismount the filter from the pump inlet. works property while in operation, do not allow the vents to Rinse with water in the reverse direction to clean the filter. clog. Ra-insert the filter and garden hose connector to prevent for- Never clean the pressure washer directly with the jet eign particles from entering into the pump. spray. Unplug the mains plug before beginning to clean! If the filter is not cleaned, the water flow in the pressure wash- er la reduced and the pump becomes damaged. WARNING NOTICE: Be careful not to damage the filter when removing or cleaning Avoid allowing water to permeate through the vents of the it. Any foreign particles that enter the pump can damage it. -
Page 9: Troubleshooting
TROUBLES hOOTING P R O B L E M P O S S I B L E C A U S E S O L U T I O N Check if air trapped in the hoses or Fluctuating pressure Pump la drawing in air connections Vents are dirty, worn nr stuck Clean or replace... - Page 10 GRAPh O F PA RT S...
- Page 11 L IS T OF PARTS Quan- Quan- Part no. Name of part Part no. Name of part tity tity 1 21006600 Screw 2 1 42120701 Back housing 2 21006700 Screw 2 2 37010800 Electric current protector 3 I10002700 Motor 2 3 10114301 GHC 4 10007500 Thrust bearing...
- Page 12 C O MPONE NTE S C O MPONE NTE S d E OP E RA CI ON ( fi g. A ) 5. Boquilla turbo y varilla pulverizadora 10. Tanque de detergente 1. Carrete porta mangueras 2. Soporte para el cable eléctrico 6. Boquilla variable (alto-bajo) y varilla pulverizadora 11. Interruptor de encendido/apagado y la manguera de alta presión 7. Ingreso de agua 12. Gatillo pulverizador 3. Filtro de agua 8. Limpiador de boquillas 13. Conexión de salida de agua para manguera de alta presión...
- Page 13 Gatillo libre Gatillo bloqueado 90º BAJA ALTA PRESION PRESION...
-
Page 14: Precauciones De Seguridad
PARA S U SAGURIdAd Por favor, lea las siguientes instrucciones de seguridad cui- manos al operar la hidrolavadora para asegurar que siempre dadosamente antes de usar su hidrolavadora. tiene el control completo de la varilla pulverizadora. • Deje la manguera conectada a la máquina y el atomizador Precauciones de seguridad mientras la unidad es presurizada. Es peligroso separar la manguera mientras esto sucede. • El modelo KN 8918 incluye un interruptor de presión que apaga automáticamente el motor cuando se ha llegado a la • Esta unidad no está diseñada para ser usada por personas presión deseada. Cuando la pistola de agua está cerrada, la (incluyendo niños) con habilidades físicas, sensoriales o men-... -
Page 15: Instrucciones De Armado
• No intente trabajar con la unidad demasiado lejos de su cuerpo. Opere la unidad sólo sobre superficies estables. Use • Para asegurar la operación segura de la unidad, sólo use calzado fuerte y siempre mantenga una postura buen bal- piezas de repuesto originales del fabricante o recomendadas anceada. por KNOVA. • Indique a todas las personas que se alejen del área de op- • Por razones de seguridad, las mangueras, válvulas y acoples eración. de alta presión deben ser usados con esta unidad. Sólo use mangueras, válvulas y acoples recomendados por KNOVA. - Page 16 Limpie cualquier suciedad o partícula extraña de la salida del Separe la manguera de agua primero del aparato, luego de la pulverizador y del acople con el encadenamiento interno de la fuente de agua. varilla pulverizadora. ¡Advertencia! Inserte la varilla en el acople de rápida conexión de la pistola sosteniendo la varilla firmemente y girándola 90 grados para Las vibraciones de la unidad pueden causar entumecimiento ajustarla (ver fig. F). en las manos al trabajar por largos períodos de tiempo. No es posible realizar afirmaciones generales sobre el tiempo sa- ludable de trabajo recomendado ya que todos los siguientes factores juegan un rol: 90º • Tendencia a circulación sanguínea pobre (dedos fríos o en- tumecidos). • Bajas temperaturas. Use guantes abrigados para proteger sus manos. • Sostener la unidad demasiado fuerte corta la circulación de Asegúrese de que la varilla pulverizadora ajuste correcta- las manos.
- Page 17 El sistema de inyección de detergente debe ser lavado com- agua de la manguera de jardín que provee el agua. pletamente antes de cambiar de detergente. ¡CuIDADO! Asegúrese de que la hidrolavadora está apagada y el cable eléctrico retirado del enchufe. Use sólo detergentes diseñados para usar con hidrolavadoras en esta unidad. Pregunte en su agente KNOVA sobre estos Asegúrese de que el suministro eléctrico esté apagado y pre- productos especiales. No use productos de lejía o cloro o sione el gatillo para que la unidad se despresurice. agentes de limpieza acídicos • Desajuste la boquilla pulverizadora de la varilla. uso de detergentes • Limpie la boquilla.
-
Page 18: Mantenimiento De L A Unidad
Limpiar el filtro de agua MANTENIMIENTO dE L A UNIdAd La hidrolavadora está equipada con un filtro interior para pro- Limpiar el sistema de refrigeración teger la bomba (ver fig. D-9). Limpie las ventilaciones del área exterior de la hidrolavadora Para limpiar el filtro de agua interno, retire el conector de con una tela húmeda. Para asegurar que el sistema de re- la manguera de jardín y desmonte el filtro de la toma de la frigeración funciona correctamente durante la operación, no bomba. -
Page 19: Res Olucion De Probl Emas
RES OLUCION dE PROBL EMAS P R O B L E M A C A U S A P O S I B L E S O L U C I O N Fluctuación de presión La bomba está aspirando aire Revisar si hay aire atrapado en las mangueras o conexiones Las ventilaciones están sucias, Limpiar o reemplazar... - Page 20 d IA GRAM A dE PARTE S...
- Page 21 L IS TA d E PARTES Quan- Quan- Part no. descripción Part no. descripción tity tity 1 21006600 Tornillo 2 1 42120701 Carcaza posterior 2 21006700 Tornillo 2 2 37010800 Protector de corriente eléctrica 1 3 I10002700 Motor 2 3 10114301 GHC 4 10007500 Balero de impulso 2 4 42122401...
- Page 22 www.knova.com.mx...
Need help?
Do you have a question about the KN 9818 and is the answer not in the manual?
Questions and answers