Advertisement
Quick Links
Advertisement

Related Manuals for CristalRecord Bell


Summary of Contents for CristalRecord Bell
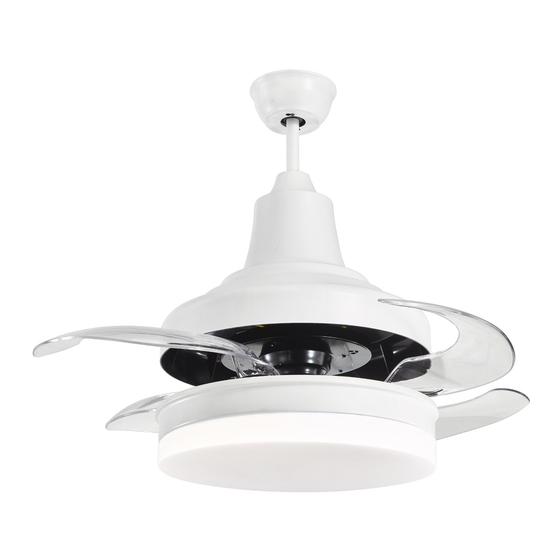
- Page 1 Bell Ventilador de techo LED Ventilador de teto LED LED Ceiling fan Ventilateur de plafond LED...
- Page 2 Carefully read these instructions before mounting the fan. Keep original carton and Styrofoam as warran- ty repair and service will not be carried out unless the fan is returned in complete original packaging. The fan must be installed by qualified personnel. SAFETY PRECAUTIONS IMPORTANT: PLEASE READ BEFORE INSTALLATION 1.
- Page 3 Lea atentamente estas instrucciones antes de montar el ventilador. Guarde la caja original del ventilador ya que la garantía no se hará efectiva en caso de no devolver el ventilador en su embalaje original. El ventilador debe ser instalado por personal cualificado. PRECAUCIONES DE SEGURIDAD IMPORTANTE: POR FAVOR LEA ANTES DE LA INSTALACIÓN 1.
- Page 4 Lisez attentivement ces instructions avant de monter le ventilateur. Conservez la boîte de ventilateur d’origine car la garantie ne sera pas effective si vous ne retournez pas le ventilateur dans son emballage d’origine. L’installation du ventilateur doit être effectuée par un personnel qualifié. LES PRÉCAUTIONS DE SÉCURITÉ...
- Page 5 Leia estas instruções cuidadosamente antes de instalar o ventilador. Guarde a caixa do ventilador origi- nal, pois a garantia não será efetiva se o ventilador não for devolvido em sua embalagem original. O ventilador deve ser instalado por pessoal qualificado. PRECAUÇÕES DE SEGURANÇA IMPORTANTE: POR FAVOR LEIA ANTES DA INSTALAÇÃO 1.
- Page 6 CONTENIDO DE LA CAJA BOX CONTENTS CONTENU DE LA BOITE CONTEÚDO DA CAIXA...
- Page 7 Mounting bracket Bolt Screws bag Soporte de montaje Perno Bolsa de tornillos Support de montage Goupille Sac de vis Suporte de montagem Parafuso Saco de parafusos Canopy Motor Balancing Kit Embellecedor Motor Kit de equilibrio Embellissement Moteur Kit d’équilibrage Embelezamento Motor Kit de Equilíbrio Downrod and hanger ball...
- Page 8 FAN INSTALLATION INSTALACIÓN DEL VENTILADOR INSTALLATION DU VENTILATEUR INSTALAÇÃO DO VENTILADOR INSTALLING THE ROOF SUPPORT INSTALAR EL SOPORTE AL TECHO L’INSTALLATION DU SUPPORT DE TOIT INSTALAÇÃO DO SUPORTE DO TELHADO Ensure that the mounting allows for 2.13m clearance to the floor and a distance of 1m to any wall or obstruction.
- Page 9 FOR WOODEN CEILING PARA TECHO DE MADERA POUR PLAFOND EN BOIS PARA TECTO DE MADEIRA 1. To use four screws to install the mounting bracket firmly. 2. Pass the wood screes with washer trough the safety cable, fasten the safety cable onto the wooden ceiling. 1.
- Page 10 DOWNROD AND HANGER BALL MOUNTING MONTAJE DE LA TIJA Y LA BOLA DE SUSPENSIÓN MONTAGE DE LA TIGE ET BOULE DE SUSPENSION MONTAGEM ESFERA DE SUSPENSÃO E HASTE Remove the bolt and pin from Loosen the screws on the Slide the ball down. Remove the bolt.
- Page 11 CHANDE THE DOWNROD The fan is supplied with a standard downrod CAMBIAR LA TIJA pre-mounted to the suspension ball. A longer downrod CHANGER LE TIGE of 25cm has been added in case you have a higher roof SUBSTITUIR O HASTE that requires it.
- Page 12 HANG THE FAN COLGAR EL VENTILADOR ACCROCHER LE VENTILATEUR DESLIGAR O VENTILADOR Hang the fan on the hanger bracket. Raise the fan until the suspension ball is positioned in the bracket and turn it until the slot in the ball fits into the lug of the bracket. Cuelgue el ventilador del soporte del techo.
- Page 13 ELECTRICAL CONNECTIONS CONEXIONES ELECTRICAS LES CONNEXIONS ÉLECTRIQUES LIGAÇÕES ELÉCTRICAS Making cable connections Hacer las conexiones de los cables Effectuer les connexions par câbles Efectuar as ligações dos cabos SETTING THE CANOPY COLOCACIÓN DEL EMBELLECEDOR MONTAGE DE L’ EMBELLISSEMENT MONTAGEM DO MBELEZAMENTO Pull the canopy up to the ceiling and secure it to the bracket with the screws.
- Page 14 INSTALLATION OF LIGHTKIT INSTALACIÓN DEL KIT DE LUZ INSTALLATION KIT D’ÉCLAIRAGE INSTALAÇÃO DO KIT DE LUZ Remove the three screws from the motor plate. Quite los tres tornillos de la placa del motor. Retirez les trois vis de la plaque du moteur. Retirar os três parafusos da placa do motor.
- Page 15 REMOTE CONTROL The remote control comes pre-paired from the factory. If the remote control loses its pairing, you can pair it again by tur- MANDO ning on the power and within 30 seconds press the button TÉLÉCOMMANDE (6) for 5 seconds. You will hear a long beep if the pairing has CONTROLO REMOTO been carried out correctly.
- Page 16 MAINTENANCE TIPS IMPORTANT: PLEASE READ BEFORE INSTALLATION 1. Because of the fan’s natural movement, some connections may be loose. To check the support connections, brackets and blades attachments 2 times a year. Make sure they are all secured (it is not necessary to dismantle the entire fan from ceiling) 2.
- Page 17 CONSEILLES DE MAINTENANCE IMPORTANT : À LIRE AVANT L’INSTALLATION 1. En raison du mouvement naturel du ventilateur, certaines connexions peuvent se desserrer. Vérifiez les connexions du porte-lame, des supports et des accessoires deux fois par an. Assurez-vous qu’ils sont tous bien fixés (il n’est pas nécessaire de retirer tout le ventilateur du plafond) 2.
- Page 18 PROBLEM POTENTIAL REASON SOLUTION Fan not moving 1. Main cables not connected. 1. Check mains and sub circuit 2. Check the line wires. breakers or fuse. 2. Check the line wires connections to the fan ans switch housing. Fan noisy 1.
- Page 19 PIÈGES POTENTIELS MOTIVE SOLUTION Le ventilateur ne bouge pas 1. Les câbles principaux ne 1. Vérifiez les interrupteurs et les sont pas connectés. sous-circuits du secteur ou le fusible. 2. vérifiez les fils de la ligne. 2. Vérifiez les connexions des fils de ligne au ventilateur et à...
Need help?
Do you have a question about the Bell and is the answer not in the manual?
Questions and answers