Table of Contents
Advertisement
Advertisement
Table of Contents

Related Manuals for Sailrite ULTRAFEED LS


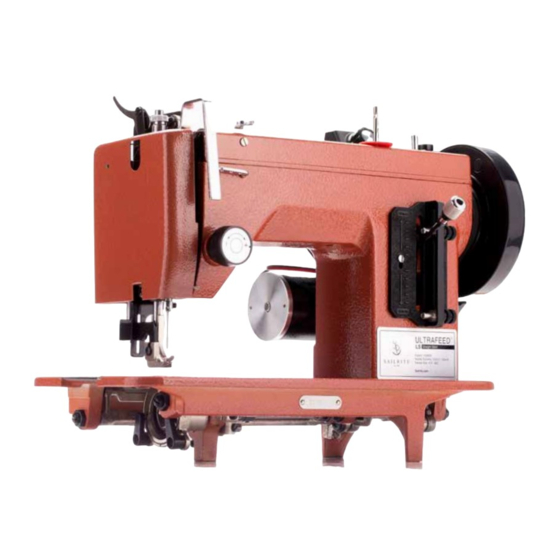
Summary of Contents for Sailrite ULTRAFEED LS
- Page 1 ULTRAFEED LS ® GUIDEBOOK USE, MAINTENANCE, TROUBLESHOOTING, SCHEMATICS...
-
Page 2: Table Of Contents
Using the Ultrafeed ���������������������������������������� 20 Ultrafeed Timing ��������������������������������������� 45-54 To watch all of the setup and maintenance videos in this guidebook, please visit Sailrite�com/LS-Guidebook-Videos Starting to Sew ���������������������������������������������� 20 for a complete video playlist� Schematics������������������������������������������������ 55-66 Regulating Stitch Length �������������������������� 21-22 Sewing in Reverse�����������������������������������������... - Page 3 Ultrafeed Safety Ultrafeed Machine Damage Prevention Please observe the following when using your Sailrite ® sewing machine: To prevent damage and keep your machine running smoothly, please observe the following when sewing: • Turn off the motor when servicing, changing needle or •...
- Page 4 Stitch by Stitch ® Variable Speed Needle and thread recommendations for sewing specialty fabrics are available online in our “Thread & Needle Recommendation Guide�” Search #300032XHT at Sailrite�com to learn more� 140 spm* 550 spm** *65 spm with optional Monster ll Balance Wheel ®...
- Page 5 Needle Types Ultrafeed Sewing Machines require 135x17 or 135x16 needles sizes #10 to #22, all available at Sailrite � ® Triangular Point needles have sharp, three-sided DI needles have large, diamond-shaped cutting points cutting points that easily sew thick or hard leather� They that easily sew heavy, dry and hard leather�...
- Page 6 If it isn’t, loosen the needle screw and push the needle farther up until it stops moving� Scan to watch a video on how to install a needle� Sailrite�com Ultrafeed LS Guidebook ®...
- Page 7 Install a Feed Dog” before proceeding to step 3� wheel until the needle is in its highest position� Firmly tighten the screw (A)� Scan to watch a video on how to install a presser foot set� Sailrite�com Ultrafeed LS Guidebook | 10 ®...
- Page 8 NOTE: When the Ultrafeed is not being used, remove the Posi-Pin and place it in the Posi-Pin Keeper (B) or the storage cubby ® Scan to watch a and can only be found on Sailrite sewing machines� Its main purpose is to prevent (C)� This is to prevent the compression shaft from enduring unnecessary deformity over time� video on how the internal damage in the event that the machine jams, the needle collides with Posi-Pin works�...
- Page 9 Push the Posi-Pin all the way in until the shoulder is how to wind a bobbin� flush against the balance wheel. Rotating the balance wheel will now cause the machine to function� 13 | Sailrite�com Ultrafeed LS Guidebook | 14 ®...
- Page 10 (O)� Finally, pass the thread through the hole in the presser foot from top to bottom (P)� Scan to watch a video on how to thread the machine� 15 | Sailrite�com Ultrafeed LS Guidebook | 16 ®...
-
Page 11: Removing & Installing Bobbin Case
Bobbin Finger Bobbin Case Tension Adjustment Screw Slit Tension Plate Spring-Loaded Lever NOTE: Machine head tilted back� Scan to watch a video on how to wind a bobbin� 17 | Sailrite�com Ultrafeed LS Guidebook | 18 ®... -
Page 12: Picking Up Bobbin Thread
(30)� Press the foot control pedal to begin sewing and 7� release the trapped threads after the first few stitches. Scan to watch a video on how to get started sewing� 19 | Sailrite�com Ultrafeed LS Guidebook | 20 ®... -
Page 13: Regulating Stitch Length
This will cause a skipped stitch or needle deflection. -6mm Rotating the material while the machine is at rest with the presser foot down may bend the needle� Reverse Feed 21 | Sailrite�com Ultrafeed LS Guidebook | 22 ®... -
Page 14: Thread Tension Adjustment
1/4 turn until proper tension is achieved� Knots centered — PERFECT STITCH NOTE: Decorative cap removed (Excessive tension shown)� Scan to watch a video on how to adjust stitch tension� 23 | Sailrite�com Ultrafeed LS Guidebook | 24 ®... - Page 15 When sewing delicate or spongy materials, reduce the foot pressure� Turn the thumbscrew until it comes free of the machine, and then rethread it about three complete rotations for the lightest spring setting (40)� Decrease Downward Pressure Increase Downward Pressure 25 | Sailrite�com Ultrafeed LS Guidebook | 26 ®...
- Page 16 Marine Use & Potential for Rust If the machine will be used or stored in a harsh environment, lubricate the working parts of the machine with Sailrite Sewing Machine Oil prior to storage and before each use� We also recommend using Boeshield T-9, a paraffin-based protectant, ®...
- Page 17 Left end and back side lubrication points Underside lubrication points NOTE: Retaining ring removed� 29 | Sailrite�com Ultrafeed LS Guidebook | 30 ®...
-
Page 18: Troubleshooting The Ultrafeed
You can start a support case by visiting Sailrite�com/support and filling out the online form. One of our support team members will review your case and contact you. We will do our best to satisfy every support request accurately, completely and in a timely manner�... - Page 19 Scan to watch a video on how Spin the arm of the spring clockwise past the slot in 6� to replace the take-up spring� the plastic core� 33 | Sailrite�com Ultrafeed LS Guidebook | 34 ®...
-
Page 20: If Posi-Pin
Install a new needle and you are ready to keep sewing� 7� Scan to watch a video on how to replace the Posi-Pin� Gib Hook Axle 35 | Sailrite�com Ultrafeed LS Guidebook | 36 ®... -
Page 21: Skipped Stitches
> Shuttle Gib Hook > Retaining Ring Cap Spring Increase the downward pressure on the presser foot by tightening the presser regulating thumbscrew (p� 25, 39, A)� 37 | Sailrite�com Ultrafeed LS Guidebook | 38 ®... -
Page 22: Thread Issues
Check that your thread is correctly threaded along the thread path (p� 15)� 3� Thread Snagging Make sure the thread is not snagging anywhere from the cone/spool to the needle� > Gib Hook > Retaining Ring Cap Spring 39 | Sailrite�com Ultrafeed LS Guidebook | 40 ®... - Page 23 (p� 15, K) reaches its uppermost position, then starts to descend� This allows the hook to release the thread loop and proper upper tension to be applied to finish the stitch. 41 | Sailrite�com Ultrafeed LS Guidebook | 42 ®...
-
Page 24: Needle Issues
Use a 2�5mm hex key to tighten the 3� two set screws (p� 23) that fasten the bushing to the machine’s upper shaft, then reinstall the balance wheel and check for proper operation� 43 | Sailrite�com Ultrafeed LS Guidebook | 44 ®... - Page 25 If your Ultrafeed is still not performing properly after adjusting the needle bar height, proceed to check the rotational timing (p� 47)� Scan to watch a video on how to adjust machine timing� 45 | Sailrite�com Ultrafeed LS Guidebook | 46 ®...
- Page 26 Once proper position is found, retighten the two set screws (H)� After adjusting the driver, check the left-right positioning of the shuttle gib hook (p� 49)� 47 | Sailrite�com Ultrafeed LS Guidebook | 48...
- Page 27 For the sake of clarity, (69) shows the machine without the retaining ring installed� While this makes it easier to see > the timing, the hook must be held in place with light finger pressure to keep it from falling out of the shuttle assembly when rotating the balance wheel� 49 | Sailrite�com Ultrafeed LS Guidebook | 50 ®...
- Page 28 (H)� After adjusting/verifying the correct left-right position of the shuttle gib hook, proceed to check the rotational positioning of the shuttle race guide shaft (p� 53)� 51 | Sailrite�com Ultrafeed LS Guidebook | 52...
- Page 29 (B) to slide the cap spring forward or back� If more movement is required, you’ll need to adjust the rotational positioning of the shuttle race guide shaft (p� 54)� 53 | Sailrite�com Ultrafeed LS Guidebook | 54 ®...
- Page 30 Needle Plate Screw A052 Slide Plate 120346 Three Hole Thread Guide W029 Upper Tension Assembly (includes 24) 8511 Components may be Thread Guard Screw 103253 purchased separately� Top Plate Set Screw E072 55 | Sailrite�com Ultrafeed LS Guidebook | 56 ®...
- Page 31 Needle Bar Support Lever Cam B016 B048SS-2 Needle Bar & Zigzag Connecting Rod Set Crank Rod Lever Cam Follower Adjust Screw D097 W028-2 Zigzag Connecting Rod W015 Needle Bar Connecting Joint Pin B099 57 | Sailrite�com Ultrafeed LS Guidebook | 58 ®...
- Page 32 Compressible Timing Clamp Pin A084 Compressible Timing Clamp Screw B153 Shuttle Race Guide Shaft B170 Lower Shaft B172 Shuttle Driver W172 Shuttle Gib Hook 960122 Bobbin 123100 Bobbin Case Assembly 1232 Screw B139-2 59 | Sailrite�com Ultrafeed LS Guidebook | 60 ®...
- Page 33 Feed Dog Screw A078 Sawtooth Feed Dog W011 Driving Crank Guide Nut W046-1 Driving Crank Guide Screw A061 Feed Lifting Rock Shaft A072 Feed Lifting Rock Shaft Crank A073 Screw B139-2 61 | Sailrite�com Ultrafeed LS Guidebook | 62 ®...
- Page 34 Feed Screw Crank Rod Bearing Set Base W020-1 W025 End Plate W041 Crank Rod Bearing Set Base Screw End Plate Set Screw W025-1 W041-1 Presser Foot Bracket Limiter W014 Screw C097 63 | Sailrite�com Ultrafeed LS Guidebook | 64 ®...
- Page 35 Speed Reduction Pulley Set Nut W061-2 Integrated LED Light 123701 Pulley Bracket W059 Motor Bracket Set Washer LT-2M-4 Motor Bracket Lock Washer LT-2M-3 Motor Bracket Bolt LT-2M-2 Belt Cover With Hex Bolt & Gasket 123315 65 | Sailrite�com Ultrafeed LS Guidebook | 66 ®...
- Page 36 Output Watts #10-#22 Needle Size Range Built-in On-Off Switch Home Sizes to V-92 (T-90) Thread Range Select according to max amperage rating printout on bottom of WorkerB Control Box� 250V Fuse Type 67 | Sailrite�com Ultrafeed LS Guidebook | 68 ®...
- Page 37 ® liability is limited to the amount paid, less shipping� If sending the Ultrafeed (or related components) to Sailrite for repair, the customer is responsible for all shipping costs Warranty applies to the original to and from Sailrite� Please insure the machine/components machine purchaser and is in transit�...
- Page 38 Sailrite�com/support One of our support staff members will review your case and contact you� Sailrite.com Equipping you to sew Serial #: ������������������������������������������� Date of Purchase: ������������������������������������ 124688*1 Guidebook for Sailrite Ultrafeed ® ® Qty: 1 Ultrafeed Patented Technology Patent #7438009...
Need help?
Do you have a question about the ULTRAFEED LS and is the answer not in the manual?
Questions and answers