
Related Manuals for Electrolux HOOT11E


Summary of Contents for Electrolux HOOT11E
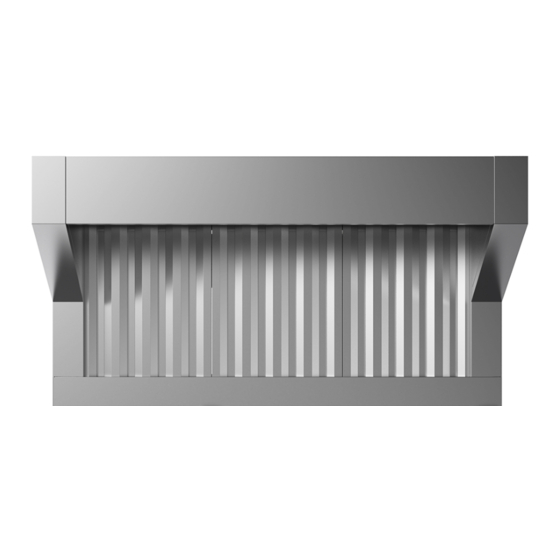
- Page 1 Built-in Hood for Electric Oven 922718 HOOT11E Level 922719 HOOT21E Level 922720 HOOV11E Level 922722 HOOS11E Level 922721 HOOS21E Level Installation manual* Original Instructions 220801 IM_HO_04_ELUX_EN.docx...
-
Page 2: Hoods Installation Diagram
922718 HOOT11E 922719 HOOT21E Hoods Installation Diagram 922720 HOOV11E 922722 HOOS11E 922721 HOOS21E... - Page 3 Foreword The installation, use and maintenance manual (hereinafter Manual) provides the user with information necessary for correct and safe use of the machine (or “appliance “). The following must not be considered a long and exacting list of warnings, but rather a set of instructions suitable for improving machine performance in every respect and, above all, preventing injury to persons and animals and damage to property due to improper operating procedures.
-
Page 4: Table Of Contents
Contents HOODS INSTALLATION DIAGRAM ..................................2 WARNINGS AND SAFETY INFORMATION............................5 General information ................................... 5 Personal Protective Equipment ................................. 6 General safety ....................................6 Transport, handling and storage ................................ 7 Installation and assembly .................................. 7 Positioning ......................................8 Machine scrapping .................................... 8 APPLIANCE AND MANUFACTURER’S IDENTIFICATION DATA ...................... -
Page 5: Awarnings And Safety Information
A WARNINGS AND SAFETY INFORMATION General information To ensure safe use of the machine and a proper understanding of the manual it is necessary to be familiar with the terms and typographical conventions used in the documentation. The following symbols are used in the manual to indicate and identify the various types of hazards: WARNING Danger for the health and safety of operators. -
Page 6: Personal Protective Equipment
Personal Protective Equipment Summary table of Personal Protective Equipment (PPE) to be used during the various stages of the machine's service life. Stage Protective Safety Gloves Glasses Safety garments footwear helmet — ● ○ — Transport — ● ○ — —... -
Page 7: Transport, Handling And Storage
• Do not use products (even if diluted) containing chlorine (sodium hypochlorite, hydrochloric or muriatic acid, etc.) to clean the appliance or the floor under it. • Do not spray water or use water jets or steam to clean the equipment. •... -
Page 8: Positioning
• The connection point has an efficient earth contact and the mains voltage and frequency match that given on the data plate. In case of doubts regarding the efficiency of the earth wire, have the system checked by specialised personnel; •... -
Page 9: Bappliance And Manufacturer's Identification Data
B APPLIANCE AND MANUFACTURER’S IDENTIFICATION DATA IMPORTANT The hood is intended specifically work with the Electrolux Professional SkyLine and Magistar Oven only; the manufacturer declines any responsibility in case of different use. Data plate position This instruction manual contains information relevant to various appliances. -
Page 10: Appliance And Manufacturer's Identification Data
• specialised personnel - Customer Care (see Copyright service manual). This manual is intended solely for consultation by the operator and can only be given to third parties with the permission of Electrolux Professional SpA. Keeping the manual... -
Page 11: Definitions
Machine Hood installed above the oven body. Manufacturer Electrolux Professional SpA or any other service centre Liability authorised by Electrolux The Manufacturer declines any liability for Professional SpA. damage and malfunctioning caused by:... -
Page 12: Dtransport, Handling And Storage
D TRANSPORT, HANDLING AND STORAGE D.2.3 Placing the load D.1 Introduction • Before placing the load, make sure the way is free Transport (i.e. transfer of the machine from one place and that the floor is flat and can take the load. to another) and handling (i.e. -
Page 13: Storage
The place where the machine is stored must have a be replaced with original parts. flat support surface to avoid deforming the machine or damage to the support feet. E TECHNICAL DATA Technical data - models PNC – MODELS 922718 HOOT11E 922719 HOOT21E 922720 HOOV11E 922722 HOOS11E 922721... -
Page 14: Hood Dimensions
185,83 922720 HOOV11E 361,02 1085 427,17 177,17 185,83 922722 HOOS11E 344,49 1070 421,26 1191 468,9 177,17 185,83 922721 HOOS21E 1098 432,28 1266 498,43 1387 546,06 177,17 185,83 Hood weights MODELS 922718 HOOT11E 922719 HOOT21E 922720 HOOV11E 922722 HOOS11E 922721 HOOS21E... -
Page 15: Finstallation And Assembly
INSTALLATION AND ASSEMBLY 3. Lift the appliance and pallet using suitable F.1 Place of installation lifting equipment and place the hood in front • The appliance must be installed in compliance the oven; with the applicable local and national regulations: concerning air intake and exhaust;... -
Page 16: Operations On Oven Before Positioning
FRONT Width MODELS inches 922718 HOOT11E 344,49 922719 HOOT21E 1098 432,28 922720 HOOV11E 361,02 922722 HOOS11E 344,49 922721 HOOS21E 1098 432,28 F.3.2 Oven Quenching Modification When the oven is installed for the first time, follow the procedure to install “Oven Quenching F.3 Operations on oven before... -
Page 17: Positioning
In some cases, the following items could be installed under a hood or ventilated ceiling. Therefore, it is not possible for them to be connected to a centralised system as suggested above. 922718 HOOT11E 922719 HOOT21E 922720 HOOV11E 922722 HOOS11E... -
Page 18: Assembling Hood On Oven
positioned, to prevent steam from escaping when the oven is working. • If hood maintenance is required, shift the oven forward using suitable equipment. 3. Fix the hood and oven to the previously assembled support (ref. pag.16) using the screws and toothed washers supplied, to ensure mechanical fastening and the equipotential connection. - Page 19 • Connect the appliance to the power supply in a permanent way with an H07 RN-F type cable dim. 3G1,5mmq; • Install the power cable in a metal or rigid plastic pipe without any sharp parts; • Install ahead of the appliance an omnipolar switch of suitable capacity with contact gap of at least 3 mm.
- Page 20 6. Assemble the Touch Screen Panel on the left 4. Insert the male thread curve supplied, relevant side on the oven, as indicated in the “Oven to the interface cable, and secure it with the Service Manual”. nut supplied; 7. Follow the instructions in point G.2 below to set 5.
-
Page 21: Gcommissioning And Settings
COMMISSIONING AND SETTINGS Introduction CAUTION G.2.2 Stacking ovens mode setting Make sure the appliance is In the case of installing the hoods, 922721 or connected to a water 922722, drainage system, a power • on MASTER oven follow the previous G.2.1 socket, and to the oven and setting the parameter “347 Hood”... -
Page 22: Hmachine Scrapping
MACHINE SCRAPPING of in a differentiated way, according to their WARNING different characteristics (e.g. metals, oils, greases, Refer to plastic, rubber, etc.). “WARNINGS and Different regulations are in force in the various Safety Information “ countries, therefore comply with the provisions of the laws and competent bodies in the country where scrapping takes place. - Page 24 Electrolux Professional SpA Viale Treviso 15 33170 Pordenone www.professional.electrolux.com...
- Page 25 AL01 IM_HO_L1_L2_L3_L4 Rel. 211221 pag. 1 TOUCH Oven settings for Hood 8-digit Password digit Hood...
- Page 26 AL01 IM_HO_L1_L2_L3_L4 Rel. 211221 pag. 2 TOUCH Oven settings for Hood...
- Page 27 AL01 IM_HO_L1_L2_L3_L4 Rel. 211221 pag. 3 TOUCH Oven settings for Hood Only for L4 Hoods, carry out following operations NO CHANGE...
- Page 28 AL01 IM_HO_L1_L2_L3_L4 Rel. 211221 pag. 4 TOUCH Oven settings for Hood...
- Page 29 AL02 IM_HO_L1_L2_L3_L4 DIGIT Oven settings for Hood Rel. 210220 pag. 1...
- Page 30 AL02 IM_HO_L1_L2_L3_L4 DIGIT Oven settings for Hood Rel. 210220 pag. 2...
- Page 31 AL03 IM_HO_L4 Electrolux Skyline Rel. 210220 pag. 1 Oven 06-10grids – Hood Level 4 Quenching modification procedure Remove left side panel and back panel Inside the component compartment, disconnect the blue pipe from the solenoid valve (black sticker, first one...
- Page 32 AL03 IM_HO_L4 Electrolux Skyline Rel. 210220 pag. 2 Oven 06-10grids – Hood Level 4 Quenching modification procedure Plug the newly disconnected pipe using a clamp or Remove the screw in the inlet (position 4) of the screw (check that the other end of the pipe is still...
Need help?
Do you have a question about the HOOT11E and is the answer not in the manual?
Questions and answers