Table of Contents
Advertisement
Quick Links
Tennant Company
10400 Clean Street, Eden Prairie,
MN 55344-2650
Telephone: (800) 553-8033
Internet:
www.tennantco.com
To view, print, download the parts
manual visit:
www.tennantco.com/manuals
i-mop Lite
Auto scrubber for hard floor surfaces
User manual
Model part No. : 1263271
115.0155.2099.00T
Revision: 00 (07/2022)
Advertisement
Table of Contents

Related Manuals for Tennant i-mop Lite


Summary of Contents for Tennant i-mop Lite
- Page 1 Lite Auto scrubber for hard floor surfaces User manual Model part No. : 1263271 Tennant Company 10400 Clean Street, Eden Prairie, MN 55344-2650 Telephone: (800) 553-8033 Internet: www.tennantco.com To view, print, download the parts manual visit: www.tennantco.com/manuals 115.0155.2099.00T Revision: 00 (07/2022)
-
Page 2: Preface
Preface Thank you for choosing the i-mop Lite, the auto scrubber that cleans faster, cleaner, safer, ® greener, and is better for everyone. The i-mop Lite's compact design allows you to clean ® right to the edge and under obstacles, minimizing manual scrubbing. The battery operated i- Lite is equipped with two counter-rotating brushes that provide a deep scrub and a ®... -
Page 3: Purpose Of The User Manual
Purpose of the user manual The purpose of the user manual is to provide the user with information in such a way that during the life of the i-mop Lite, the machine is used correctly, efficiently and safely, even in ®... -
Page 4: Reading Guide
Reading guide The following symbols and terms are used throughout this manual to alert the reader to safety issues and important information: S S ymbol T T erm E E xplanation W ARNING Indicates a hazardous situation which, if the safety instructions are not followed, can lead to injuries of the operator or bystanders and light and/or moderate damage to the product or the... -
Page 5: Table Of Contents
Content Preface ......................................2 Purpose of the user manual ..............................3 Target audience ..................................... 3 Operators of the i-mop Lite ..............................3 ® Reading guide ....................................4 Content ......................................5 Introduction ................................... 7 1.1. Intended use of the product ..........................7 1.2. - Page 6 5.2. Assembly .................................. 18 5.2.1 Charging the battery ..........................18 5.2.2 Attaching the brushes ..........................18 5.2.3 Attaching the squeegee ..........................19 5.2.4 Installing the cleaning solution tank ..................... 19 5.2.5 Installing the recovery tank ........................20 Operation ..................................... 21 6.1.
-
Page 7: Introduction
1. Introduction The i-mop Lite is a safe, user-friendly machine. This manual helps you to get started and ® explains the operation and maintenance procedure. You will be pleasantly surprised by the fast and effective use of the battery operated i-mop Lite. -
Page 8: Non-Intended Use Of The Product
1.2. Non-intended use of the product W ARNING Non-intended use can have consequences for the safety of operators and bystanders and will void the warranty on the product. N N EVER operate the i-mop Lite near flammable dusts, liquids or vapors. ®... -
Page 9: Specifications
1.5. Specifications Figure 2 Product size: 120 x 43 x 38 cm | 47.24”x16.93”x 14.96” Product size in store position: 120 x 43 x 34 cm | 47.24”x16.93”x 13.38” Weight (including Battery): 12.5 kg | 27.56 lbs Li-on battery: DC (18V, 12.48Ah, 250Wh) Battery capacity: 1 Battery Operation time of batteries:... -
Page 10: Warranty
Lite outside will void the warranty on the product. ® Fill out the supplied machine installation/warranty report and send to Tennant. 1.7. Identification The ID tag, containing a serial number and production number, can be found on the bar behind the wastewater tank. -
Page 11: Description
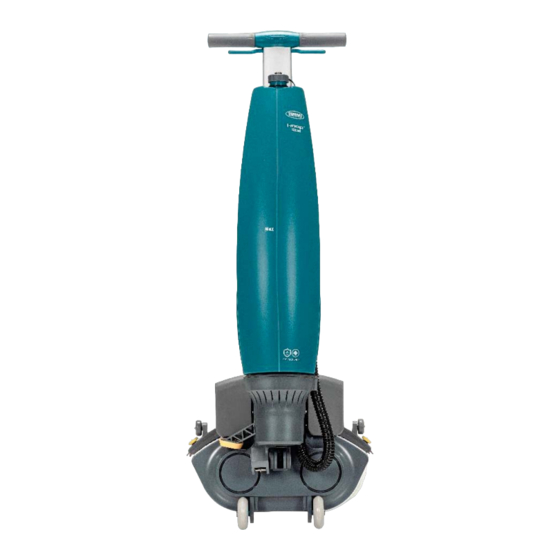
2. Description The compact i-mop Lite consists of two main parts: ® The body that contains the motor, cleaning solution tank, recovery tank, handle with triggers and control panel. The scrub deck that contains the brushes and squeegee. The i-mop Lite can be folded into a store position;... -
Page 12: Safety
3. Safety Safety comes first. Therefore, please take your time to read and understand these safety instructions. Improper use can case cause harm or void the manufacturer’s warranty. 3.1. General safety instructions 3.1.1 Sweep before scrub Remove loose objects from the floor that can be propelled by or caught in the rotating brushes. -
Page 13: Risks During Operation
3.2. Risks during operation 3.2.1 Dress safely Do not wear a necktie, scarf, or any loose or dangling clothing or jewelry of any type while operating this i-mop Lite. These types of clothing or jewelry could become tangled in rotating ®... -
Page 14: Transport And Storage
4. Transport and storage 4.1. General C C AUTION Always keep the body of the i-mop Lite in an upright position when filling the ® cleaning solution tank or inserting the battery. Before storage or transport, drain the machine and remove the battery after each use. 4.2. -
Page 15: Transport Outside
4.3. Transport outside Figure 6 When outside: 1. Put the i-mop Lite in store position, see section 4.2. ® 2. Carry the i-mop Lite with one hand while holding the handle (Figure 6, pos 1) with your ® other hand. C C AUTION The transport wheels are not designed to roll over dirty surfaces, sand can cause the wheels to block. -
Page 16: Transport In A Vehicle
4.4. Transport in a vehicle The preferred way to transport your i-mop Lite is in an upright position and safely ® secured. 1. Make sure both tanks are empty. 2. Put the i-mop Lite in store position, see ® section 4.2. 3. -
Page 17: Assembly And Installation
5. Assembly and installation The i-mop Lite does not require much assembly. Most importantly, you will have to attach ® the brushes and squeegee. 5.1. Unboxing The i-mop Lite body is packed in a single box. The battery and charger are delivered in a ®... -
Page 18: Assembly
5.2. Assembly 5.2.1 Charging the battery Charge the battery according to the instructions in the battery charger manual. Make sure the battery is charged regularly. 5.2.2 Attaching the brushes Figure 9 To attach the brushes: 1. Put the i-mop Lite in store position, see section 4.2. ®... -
Page 19: Attaching The Squeegee
5.2.3 Attaching the squeegee Figure 10 To attach the squeegee: 1. Hold the scrub deck firmly with one hand. 2. Align the pins on the scrub deck (Figure 10, pos 2) with the holes on the squeegee (Figure 10, pos 1). 3. -
Page 20: Installing The Recovery Tank
5.2.5 Installing the recovery tank 1. Put the tank (Figure 12, pos 1) on the i-mop Lite with the bottom first. ® 2. Position the tank on the nipples. 3. Push the tank in place, the magnet will lock the recovery tank in place. Figure 12... -
Page 21: Operation
6. Operation 6.1. Before you start Check the brushes and squeegee for wear and tear, see chapter 7 for maintenance instructions. 6.1.1 Inserting the battery C C AUTION Only use i-power batteries specifically designed for use in i-mop devices. ® ®... -
Page 22: Filling The Cleaning Solution Tank
6.1.2 Filling the cleaning solution tank 1. Remove the cap on the tank. 2. Pour in a maximum of 0.79 gal/ 3 L of cleaning fluid. 3. Replace cap and make sure it seals tightly. 4. Put the i-mop Lite in store position, see ®... -
Page 23: Operation Procedure
6.2. Operation procedure 6.2.1 Walking to the job site Figure 15 To move the i-mop Lite from one location to another one in a building: ® 1. Put the i-mop Lite in store position, see section 4.2. ® 2. Hold the handle with one hand (Figure 15, pos 1). 3. -
Page 24: At The Job Site
6.2.2 At the job site 1. Mark the job site using a wet floor marker. 2. Crouch down while holding the scrub deck firmly with one hand (Figure 16, pos 2). 3. Push the handle forward with your other hand (Figure 16, pos 1). 4. - Page 25 Figure 17 5. Stand behind the i-mop Lite. Choose your cleaning mode via the buttons on the control ® panel (Figure 17, pos 1 to 4). You can select the options independently or combined. Mode Press Brush only Vacuum only Use cleaning solution Use Eco mode Brush and cleaning solution...
- Page 26 TIP: Learn to swivel Operating the i-mop Lite is very intuitive and like steering a bicycle. The i-mop Lite is ® ® designed to move forward. To turn, stop walking and use your inside hand (the hand in the direction you want to go to) to turn the handle. The i-mop Lite can swivel 360 degrees ®...
-
Page 27: Eco Mode
6.2.3 ECO mode solution. 1. Turn on the ECO mode by pushing the ECO button (Figure 19, pos 1). 2. Turn off ECO mode by pushing the ECO mode again. 3. To start normal cleaning mode push button (Figure 19,pos2) Figure 19 6.2.4 Turning off the i-mop Lite... -
Page 28: Cleaning And Storage
6.3. Cleaning and storage 6.3.1 Flushing the system Be sure to flush the tanks out completely to discard any remaining solution in the lines and valves: 1. Refill the solution tank with 2 to 4 cups / 0.5 to 1 liter of clean water. 2. -
Page 29: Removing The Battery
Figure 22 1. Put the i-mop Lite in store position, see section 4.2. ® 2. Remove the recovery tank. 3. Release the blue suction filter (Figure 22, pos 1) from beneath the rubber holder by tilting it slightly and pulling it out. 4. -
Page 30: Store In An Upright Position
6.3.6 Store in an upright position 1. Please ensure that the i-mop Lite is ® stored in a place where nobody can bump into it. 2. Put the i-mop Lite in store position, see ® section 4.2. 3. Store the i-mop Lite close to a wall ®... -
Page 31: Maintenance
7. Maintenance C C AUTION Remove the battery before executing any cleaning or maintenance task. C C AUTION Always keep the body of the i-mop® Lite in an upright position when replacing the brushes or the squeegee. 7.1. Brush replacement Figure 25 The brushes are attached to the scrub deck with a bayonet fitting. -
Page 32: Squeegee Replacement
7.2. Squeegee replacement The squeegee blades come in pairs and wear out over time. When you notice the floor is no longer being dried properly, replace the squeegee blades. 7.2.1 Detaching the squeegee 1. Put the i-mop Lite in store position, see ®... -
Page 33: Attaching The Squeegee
7.2.3 Attaching the squeegee Figure 27 To attach the squeegee: 1. Hold the scrub deck firmly with one hand. 2. Align the pins on the scrub deck (Figure 27, pos 2) with the holes on the squeegee (Figure 27, pos 1). 3. -
Page 34: Troubleshooting
8. Troubleshooting P P roblem C C ause S S olution N N o power No battery Insert battery Empty battery Charge battery Battery incorrectly placed Remove and reinstall battery I I nsufficient/no Wrong program Check the operating mode on the control panel w w ater flow Eco mode on... -
Page 35: Decommissioning And Disposal
9. Decommissioning and disposal A A TTENTION It is the responsibility of the i-mop Lite owner to dispose of the product ® responsibly. After decommissioning, the i-mop Lite still contains valuable resources and needs to be ® disposed of according to your local laws and regulations regarding recycling of electrical equipment. - Page 36 Tennant Company 10400 Clean Street, Eden, Prairie, MN 55344-2650 Telephone: (800) 553-8033 Internet: www.tennantco.com Model: i-mop Lite ®...
Need help?
Do you have a question about the i-mop Lite and is the answer not in the manual?
Questions and answers