Table of Contents
Advertisement
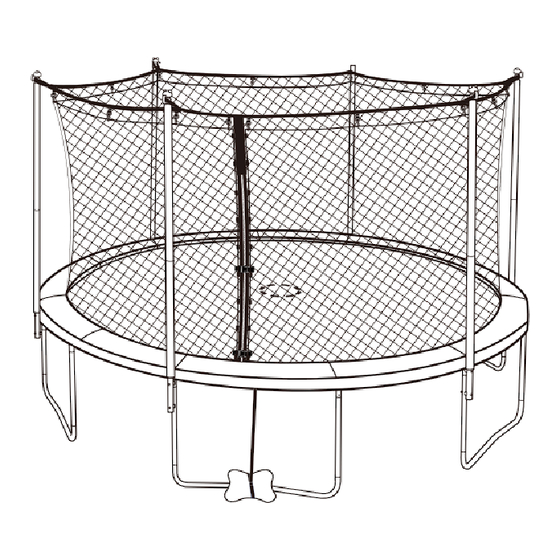
12ft Trampoline and Enclosure Combo
with Spin N Light and Water Anchor
Assembly, Installation, Care, Maintenance and User Instructions
DO NOT attempt somersaults or flips. Paralysis or death can result if you land on your head or neck!
No more than one person on the trampoline at a time. Multiple users increase the risk of injury.
Use trampoline only with mature, knowledgeable supervision.
These instructions are important to minimize chances of injury. Please read each of them thoroughly before
you assemble and use this trampoline. Retain this manual for future reference.
Maximum weight of the user shall NOT exceed 220 lb/ 100 kg for this product.
Trampoline must be used with enclosure that is properly installed and maintained.
Water anchors are highly recommended to be installed together with the trampoline.
For Customer Service, please call 1-888-965-0565 MON-FRI 9AM – 5PM Eastern Time
STR-12FT
or email customerservice@trujumpusa.com
STRON USA Inc.
848 N. Rainbow Blvd. #1793, Las Vegas, NV 89107-1103
www.trujumpusa.com
Advertisement
Table of Contents

Related Manuals for Tru-Jump STR-12FT


Summary of Contents for Tru-Jump STR-12FT
- Page 1 12ft Trampoline and Enclosure Combo with Spin N Light and Water Anchor Assembly, Installation, Care, Maintenance and User Instructions STR-12FT DO NOT attempt somersaults or flips. Paralysis or death can result if you land on your head or neck! ...
- Page 2 No more than ONE user at a time NO SOMERSAULTS OR FLIPS – (maximum weight - 220 lb/ 100 kg). PARALYSIS OR DEATH can result if you land on your head or neck! Do not allow Remove all hard Do not use Do not use if in a children less than or sharp objects...
- Page 3 INTRODUCTION Thank you for purchasing a TruJump product! This trampoline was designed and manufactured with quality materials and craftsmanship, providing fun and exercise at your backyard. It is very important that the owners and users of this trampoline have adequate knowledge of techniques and rules for proper use.
-
Page 4: Table Of Contents
TABLE OF CONTENTS Use trampoline only with mature, knowledgeable adult supervision. Do not attempt or allow somersaults. Landing on the head or neck can cause serious injury, paralysis, or death, even when landing in the middle of the mat. ... -
Page 5: Before You Start To Assemble
BEFORE STARTING… Use trampoline only with mature, knowledgeable adult supervision. Do not attempt or allow somersaults. Landing on the head or neck can cause serious injury, paralysis, or death, even when landing in the middle of the mat. ... -
Page 6: Important Warnings
IMPORTANT SAFETY INSTRUCTIONS Use trampoline only with mature, knowledgeable adult supervision. Do not attempt or allow somersaults. Landing on the head or neck can cause serious injury, paralysis, or death, even when landing in the middle of the mat. ... - Page 7 IMPORTANT SAFETY INSTRUCTIONS Use trampoline only with mature, knowledgeable adult supervision. Do not attempt or allow somersaults. Landing on the head or neck can cause serious injury, paralysis, or death, even when landing in the middle of the mat. ...
- Page 8 IMPORTANT SAFETY INSTRUCTIONS Use trampoline only with mature, knowledgeable adult supervision. Do not attempt or allow somersaults. Landing on the head or neck can cause serious injury, paralysis, or death, even when landing in the middle of the mat. ...
- Page 9 IMPORTANT SAFETY INSTRUCTIONS Use trampoline only with mature, knowledgeable adult supervision. Do not attempt or allow somersaults. Landing on the head or neck can cause serious injury, paralysis, or death, even when landing in the middle of the mat. ...
-
Page 10: Important Instructions For Enclosure Netting And Mat
Important Instructions for Enclosure Netting and Jump Mat Failure to follow these instructions to ensure proper operational condition of your trampoline may lead to serious injury or death. 1. Maintenance of Trampoline Enclosure Net, Mat and Pad Enclosure netting and padding are prone to wear and tear like tires on a car. Gradual deterioration of the material will occur;... - Page 11 How to Inspect the Trampoline Net for Proper Use Always check the enclosure netting for signs of UV damage, deterioration, brittleness, cracking, and tearing every time before using the trampoline and enclosure. Step1 - Inspect the enclosure netting before EACH use for wear or tear by pinching and pulling a section of the netting between fingers and pulling downward.
-
Page 12: Trampoline And Enclosure Parts List
Trampoline and Enclosure Parts List Trampoline Part Number Part Picture Description Quantity Number Trampoline Mat, stitched with TM-12-72-28 Triangle-Rings TFP-12-28-PE Frame Pad TRLS-12-72-38.1 Top Rail with Leg Sockets TR-12-72-38.1 Top Rail TLB-12-38.1 Leg Base TVL-12-38.1 Vertical Leg Extensions Vertical Leg Extension with TVLH-12-38.1 Indented Hole T28N... -
Page 13: Hardware Parts List
Hardware Parts List Part Number Part Picture Description Quantity Number Self-Locking Screw ESLS-M4-12 (M4x12mm) ESLW-D10 Small Spring Lock Washer Allen Wrench EEC-31.8 End Cap Wrench EGS-12-38.1 Gap Spacer EB-M8-87 Bolt ESLW-D13 Larger Spring Lock Washer Cap Nut Arc Washer (M8) Tube Cap Cord SFLZ... -
Page 14: Water Anchor Parts List
Water Anchor Parts list Part Number Description Part Picture Quantity Water Anchor Strap Button Repair Kit... -
Page 15: Assembly And Installation Instructions
Assembly and Installation Instructions Review all steps before assembly and read all precautions before using this product. Failure to do so can result in serious injury or death. During periods of non-use, this trampoline and trampoline enclosure can be easily disassembled and stored by reversing the order of installation. -
Page 16: Trampoline Frame Assembly
Trampoline Frame Assembly BEFORE YOU BEGIN: Review all steps before assembly and read all precautions before using the trampoline. At least two adults are required to assemble this trampoline. Protective gloves should be used during assembly to avoid injuries during installation. Goggles should be worn to avoid injuries to the eyes. Step 1 –... - Page 17 Step 2 – Leg Support Assembly At this point, two people will be needed to assemble the trampoline. Connect Vertical Leg Extensions (#6A and #6B) to Leg Base (#5) as shown below (the assembled parts will be hereinafter referred to as “Leg Support”). ...
- Page 18 Step 3 – Top Rail Assembly Complete the trampoline frame by inserting all of the Top Rails (#4) in between Top Rail with Leg Sockets (#3) as shown below. DO NOT PLACE HANDS NEAR THE OPENING WHEN CONNECTING THE TUBES. WEAR PROTECTIVE GLOVES TO PROTECT FROM INJURIES DURING ASSEMBLY.
- Page 19 Step 4 – Secure the Leg Support to the Top Rail Secure Vertical Leg Extension (#6A) to the frame using Self-Locking Screw (#A), Small Spring Lock Washer (#B) using Allen Wrench (#C) as shown below. If the holes do not match up, rotate Vertical Leg Extension back and forth until the holes are aligned.
-
Page 20: Trampoline Mat Assembly
Trampoline Mat Assembly When attaching the springs, do not place your hands, arms, legs or any other body part close to the connector points (i.e. joints connecting the steel tubes). The connector points can become pinch points as the trampoline springs tighten up. - Page 21 Step 6 – Spring Assembly Continue to attach springs in the same manner. For even distribution of tension and ease of assembly, the springs must be placed on opposite sides of the mat in an alternating manner, i.e. 10 then 46, 28 then 64, etc. In addition to the previously installed springs, you should now have springs at 10, 28, 46 and 64 as shown below.
- Page 22 Step 7 – Spring Assembly Continue to attach springs in the same manner. For even distribution of tension and ease of assembly, the springs must be placed on opposite sides of the mat in an alternating manner, i.e. 5 then 41, 14 then 50, 23 then 59, 32 then 68, etc.
- Page 23 Step 8 – Spring Assembly Continue to attach the remaining springs in the same manner as the previous step, i.e. the springs must be placed on opposite sides of the mat in an alternating manner to ensure even distribution of tension. IMPORTANT: Once all the springs are properly installed, you must go back to Step 4 and now tighten the screws on all Leg Supports.
-
Page 24: Frame Pad Assembly
Frame Pad Assembly Never use the trampoline without the Frame Pad, the Frame Pad reduces the risk of getting injured by hitting the metal frame or springs. Inspect the Frame Pad before each and every use to ensure all exposed metal parts are fully covered by the Frame Pad! Step 9 ... -
Page 25: Trampoline Enclosure Assembly
Trampoline Enclosure Assembly BEFORE YOU BEGIN: This trampoline must only be used when the enclosure netting is properly assembled. The trampoline netting must be checked thoroughly before each use to ensure there are no tears or damages. Please carefully read all the Important Warnings contained in this manual and all warnings on the product before use. - Page 26 Step 11 – Connect the Enclosure Upper Frame to the Lower Frame Attach Tube Cap (#K) to Upper Frame Tube with Foam (#10) with Self-Locking Screw (#A) using Allen Wrench (#C) as shown below. Repeat this step for all six #10 upper frame tubes. ...
- Page 27 Step 12 – Connect Enclosure Upper Frame to Lower Frame Tubes Connect all six Upper Frame Tube with Foam (#10) to Lower Frame Tube with Foam (#11). Secure with Self- Locking Screw (#A) using Allen Wrench (#C) as shown below. Helpful Tips: One person should stand inside the trampoline to hold the netting in place while another person installs all the frame tubes from the outside.
- Page 28 Step 13 – Tie the Enclosure to the Mat Secure the trampoline netting to the trampoline frame using the Cords (#L). Lift up the frame pad and tie one end of the cord to any one of the triangle-rings on the trampoline mat as shown below. ...
- Page 29 Step 14 – Secure the Frame Pad Wrap and tie the inner elastic straps on the frame pad around the triangle-rings and the outer straps around the trampoline frame as shown below. Diagram 14-1 TRIANGLE-RING INNER ELASTIC-STRAP...
- Page 30 For the elastic straps near the leg sockets, wrap them BEHIND the leg sockets and then tie a one-sided bow in front as shown below. Diagram 14-2 OUTER ELASTIC STRAP Make sure that the knots and bows are tight for all elastic straps. ...
- Page 31 Step 15 – Close the Enclosure and Attach the Safety Instruction Placard Close the zipper and secure the entrance by attaching the buckles as shown below. Attach Trampoline Safety Instruction Placard (#8) to the trampoline frame as shown. The zipper and buckles should be closed during use to avoid users falling out of the trampoline, as well as during periods of non-use to restrict access by unauthorized users.
-
Page 32: Spin-N-Light Assembly
Spin-N-Light Assembly The Spin-N-Light (#S) is a trampoline accessory which is installed underneath the trampoline mat. It flashes a bright light on every bounce to help guide the user to the center of the mat. Protective gloves should be used during assembly to avoid pinching by the springs and protective goggles should be worn to avoid injuries to the eyes. - Page 33 Foam Assembling Instruction 1. Locate the crossed straps located at the bottom of the Spin-N-Light unit. Pull the center of the straps downward. 2. Insert the foam through the straps and attach it to the base of the unit. The foam should be placed with the four grooves aligned with the straps and pull the straps from the top until the foam is tightened to the base of the unit.
- Page 34 Protective gloves should be used during assembly to avoid injuries during installation and protective goggles should be worn to avoid injuries to the eyes. WARNING! The bungee cord can snap back with force when not handled with care and can cause serious injuries.
- Page 35 Step C Connect another hook in the same manner onto the triangle-ring on the opposite side of the trampoline mat. Step D Repeat until all four hooks are secured as shown below. Note: You may need to adjust the length of the elastic cord on the Spin-N-Light to ensure that it hangs close to the center of the trampoline mat.
-
Page 36: Water Anchor Assembly
Water Anchor Assembly Step A: Place the water anchor on the trampoline leg base and strand the strap on the bottom side as shown in the enlarged diagram. NOTE: If your water hose is not within reach, you will need to fill the anchor first with water and carry them to the trampoline by two persons. - Page 37 Step C: Loop the strap around the filled water anchor and then through the button as shown. Step D: Wrap the strap around the trampoline frame and secure the end through the button as shown. Repeat in the same manner to secure all four water anchors.
- Page 38 Repair Instructions Should you find a leak in the water anchor, you can repair minor damages using the repair kit provided. Identify the location of the puncture or leak. Deflate the product and gently clean the damaged area with a damp cloth. Allow area to dry thoroughly.
-
Page 39: Disassembly Of The Trampoline And Enclosure
DISASSEMBLY OF THE TRAMPOLINE AND ENCLOSURE IMPORTANT Once you have finished the assembly of the trampoline, go back over all of the nuts and bolts and properly tighten all of them before using. Read this entire manual and make sure all jumpers completely understand all of the safety rules printed in the manual and on the various warning signs. -
Page 40: Care And Maintenance
CARE AND MAINTENANCE Care and Maintenance Failure to follow these instructions to ensure proper operational condition of your trampoline may lead to serious injury or death. The springs, trampoline legs and enclosure netting must be inspected prior to every use. The legs should be locked securely into place, all the springs attached to the frame and there should be no tears in the enclosure netting. -
Page 41: Proper Use Instructions
PROPER USE INSTRUCTIONS Proper Use Instructions Read and understand the use instructions in this manual prior to using this product. Failure to do so can result in serious injury or death. Responsibilities of the user The key here is to stay in control of your jumps. DO NOT move onto more complicated, more difficult maneuvers until you have mastered the basic, fundamental bounce. - Page 42 PROPER USE INSTRUCTIONS Do not intentionally rebound off the enclosure barrier. Read and understand the use instructions in this manual prior to using this product. Failure to do so can result in serious injury or death. Read all instructions before using the trampoline. Warnings and instructions for the care, maintenance and use of this trampoline are included to promote proper and enjoyable use of this equipment.
-
Page 43: Learning The Fundamental Trampoline Skills
USE INSTRUCTIONS Learning the fundamental trampoline skills The following lessons are suggested for you to learn basic steps and bounces. Before using the trampoline, you should read and understand all warnings. A complete discussion and demonstration of body mechanics and trampoline guidelines should occur between the supervisor and student as well. - Page 44 USE INSTRUCTIONS BASIC TRAMPOLINE BOUNCES THE BASIC BOUNCE 1. Start from the standing position, with your feet having shoulder width apart and with head up and eyes on mat 2. Swing arms forward and up in a circular motion 3. Bring feet together while in mid-air and point toes downwards.
-
Page 45: Product Warranty
PRODUCT WARRANTY Product Warranty TruJump warrants its products to be free from defects in material and workmanship under normal use and service conditions for one (1) year after the date of purchase. The steel frame on trampolines is warranted for seven (7) years after the date of purchase. All warranty coverage extends only to the original purchaser of the product and is not assignable or transferable. - Page 46 PARTS OR ASSEMBLY INSTRUCTIONS. STORES ARE NOT EQUIPPED TO PROVIDE CUSTOMER SERVICE FOR THIS PRODUCT. For Customer Service, please call 1-888-965-0565 or send email to customerservice@trujumpusa.com Monday – Friday 9:00 AM – 5:00 PM Eastern Time STRON USA Inc. 848 N. Rainbow Blvd. #1793, Las Vegas, NV 89107-1103 www.trujumpusa.com ST-29-STR-12FT–21001...
Need help?
Do you have a question about the STR-12FT and is the answer not in the manual?
Questions and answers