
Related Manuals for Minibar Systems SMART CUBE SC40T


Summary of Contents for Minibar Systems SMART CUBE SC40T
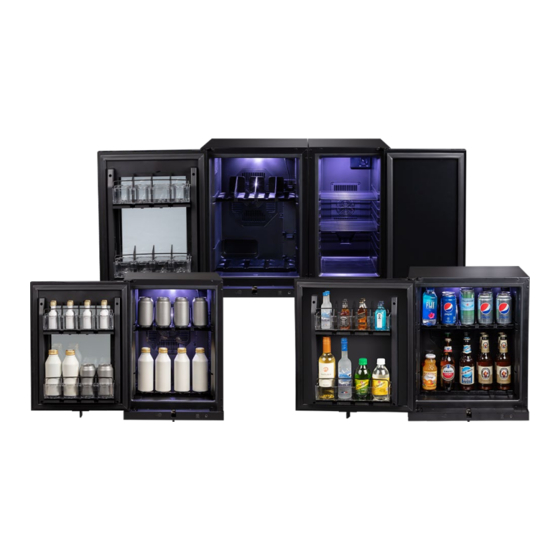
- Page 1 User Manual Models: SC40T, SC40TNF, SC60T, and SC60TNF MINIBAR SYSTEMS USER MANUAL Operating Instructions and Safety Precautions Models: SC40T, SC40TNF, SC60T, and SC60TNF 2023 Page 1...
-
Page 2: Table Of Contents
Cube Shelf Installation Console Box Replacement Console Box Installation Lock Override Enabled (when electronics malfunctions) Lock Override Disabled (when electronics functions) DualBar Anti-Tilt Bracket Installation SmartCube Anti-Tilt Bracket Installation Use, Safety, Recycling and Disposal Minibar Systems Global Offices 2023 Page 2... - Page 3 When positioning the appliance, ensure the supply cord is not trapped or damaged. • If the mains power cord is damaged, at any time, it must be replaced by Minibar Systems, its service agent or similarly qualified person in order to avoid a hazard.
-
Page 4: Unpacking The Smartcube
Make sure the mains power cord or any other cables are not trapped under the unit. • If the mains power cord is damaged, at any time, it must be replaced by Minibar Systems, its service agent or similarly qualified person in order to avoid a hazard. -
Page 5: Temperature Regulation
User Manual Models: SC40T, SC40TNF, SC60T, and SC60TNF Temperature Regulation • The operating temperature of the SmartCube is subject to many factors: the correct and level installation, proper ventilation, the internal product load, etc. • The temperature control box is factory set for optimum performance for the SmartCube. •... -
Page 6: Enabling And Disabling Optional Lighting
This will also be automatically communicated to the server. • The communications within the hotel will be set up by the Minibar Systems installation team in coordination with the hotel and their network management team. The appropriate training will be provided to the hotel personnel. -
Page 7: Installation Instructions
User Manual Models: SC40T, SC40TNF, SC60T, and SC60TNF Installation Instructions These Installation Instructions are for guidance for all SmartCube models SC40T, SC40TNF, SC60T, and SC60TNF units available. Door Shelf Replacement To remove the door-mounted shelf you will need to first remove the rubber plug on the left side of the door shelf column that is protecting the un- used backplane connector. - Page 8 User Manual Models: SC40T, SC40TNF, SC60T, and SC60TNF The door rack will now be loose and able to slide out the upper and lower door rack kit. Un-screw the right side door shelf column using a Philips head screw driver and remove the shelf column.
- Page 9 User Manual Models: SC40T, SC40TNF, SC60T, and SC60TNF Disconnect door sensor shelf from the backplane board and the release engagement feature by sliding door sensor shelf to the right. Remove the sensor shelves for replacement. 2023 Page 9...
-
Page 10: Door Shelf Installation
User Manual Models: SC40T, SC40TNF, SC60T, and SC60TNF Door Shelf Installation Slide the door sensor shelf (MB-MA-0035) into the bottom support and connect it to the backpane Screw the right side door shelf column using a Philips head screw driver to secure the sensor shelves. - Page 11 User Manual Models: SC40T, SC40TNF, SC60T, and SC60TNF Slide the rack kit between the two door shelf columns and engage into the side wall locking tabs. Install the rubber plug back to cover the un-used backplane connector. 2023 Page 11...
-
Page 12: Smartcube Shelf Replacement
User Manual Models: SC40T, SC40TNF, SC60T, and SC60TNF SmartCube Shelf Replacement Locate the lock bar located on the right side inner wall of the minibar. Lift up on the locking bar to unlock the sensor shelves from the backplane. Slide out sensor shelves carefully and disconnect from the backplane connectors to replace. -
Page 13: Cube Shelf Installation
User Manual Models: SC40T, SC40TNF, SC60T, and SC60TNF Cube Shelf Installation Connect dividers (MB-PP-0005 and PULF0015) to the sensor shelves. Once assembled onto sensor shelf (MB-MA-0034) slide the sensor shelves in the slots of the cube to connect onto the backplane connectors. -
Page 14: Console Box Replacement
User Manual Models: SC40T, SC40TNF, SC60T, and SC60TNF Console Box Replacement Switch off the Console Box power supply unit and then disconnect all cables from it. Un-Screw the Console Box from the back of the SmartCube by removing three Philips head machine screws. -
Page 15: Console Box Installation
User Manual Models: SC40T, SC40TNF, SC60T, and SC60TNF Console Box Installation Mount the Console Box to the SmartCube back using 2 Round Philips Head screws (MB-NP-0027) and 1 Flat Philips Head screw(MB-NP-0029). Connect all cables back according to the wiring diagram and then swith on the power supply unit. -
Page 16: Lock Override Enabled (When Electronics Malfunctions)
User Manual Models: SC40T, SC40TNF, SC60T, and SC60TNF Lock Override Enabled (when electronics malfunctions) Open the lock cover by removing the Philips Head screw using a screw driver. Press the override pusher head down and rotate by 90 degrees in a clockwise direction to release the E-lock function. -
Page 17: Lock Override Disabled (When Electronics Functions)
User Manual Models: SC40T, SC40TNF, SC60T, and SC60TNF Lock Override Disabled (when electronics functions) Press the override head down and rotate it by 90 derees in the counter clockwise direction to release the locking bar to resume E-lock function. Screw the anti-tamper cover back ono the SmartCubes lock override to prevent unauthorized access. -
Page 18: Dualbar Anti-Tilt Bracket Installation
User Manual Models: SC40T, SC40TNF, SC60T, and SC60TNF DualBar Anti-Tilt Bracket Installation Make a case good per the specified dimensional drawing for proper ventilation. (Reference to the dimensional drawings). Fix the rear anchor bracket onto the case good using the gauge template or refer to the dimensional drawing for mounting locations. - Page 19 User Manual Models: SC40T, SC40TNF, SC60T, and SC60TNF Make sure the IEC power cord is connected to the SmartCube and then push the SmartCube SC-40T into the cabinet against the rear anchor bracket. Connect the other end of the IEC power cord (MB- CA-0016) to the SmartCube GuestFridge 27L.
- Page 20 User Manual Models: SC40T, SC40TNF, SC60T, and SC60TNF Adjust both the SmartCube and the GuestFridge unit’s locations to align with the center of the case good and then fix the units onto the casegood using two screws. To mount the units to case good, open doors and the bracket is located on the bottom lip of the cold...
- Page 21 User Manual Models: SC40T, SC40TNF, SC60T, and SC60TNF SmartCube SC-40 Anti-Tilt Bracket Installation Make a case good per the specified dimensional drawing for proper ventilation. (Reference to the dimensional drawings). Fix the rear anchor bracket onto the case good using the gauge template or refer to the dimensional drawing for mounting locations.
- Page 22 User Manual Models: SC40T, SC40TNF, SC60T, and SC60TNF Insert the SmartCube SC-40T into the cabinet ensuring that it is pressed correctly into the rear anchor bracket. Adjust the SmartCube to align with the center of the case good. Open the door to screw the bottom of the SmartCube to the case good.
-
Page 23: Smartcube Anti-Tilt Bracket Installation
User Manual Models: SC40T, SC40TNF, SC60T, and SC60TNF SmartCube SC-60 Anti-Tilt Bracket Installation Make a case good per the specified dimensional drawing for proper ventilation. (Reference to the dimensional drawings). Fix the rear anchor bracket onto the case good using the gauge template or refer to the dimensional drawing for mounting locations. -
Page 24: Use, Safety, Recycling And Disposal
User Manual Models: SC40T, SC40TNF, SC60T, and SC60TNF Insert the SmartCube SC-60T into the cabinet ensuring that it is pressed correctly into the rear anchor bracket. Adjust the SmartCube to align with the center of the case good. Open the door to screw the bottom of the SmartCube to the case good. -
Page 25: Minibar Systems Global Offices
To return your used device, please use the return and collection systems or contact the retailer where the product was purchased. They can take this product for environmental safe recycling. Minibar Systems Global Offices United States Baltics Mexico Switzerland &...
Need help?
Do you have a question about the SMART CUBE SC40T and is the answer not in the manual?
Questions and answers