Advertisement
Compatibility Alert:
Drawer part numbers 97-741 and
97-742 can only be installed in
Module part numbers 24-2xx-085
with ABS Doors.
Drawer part numbers 06-073 and
06-074 can only be installed in
Module numbers 24-3xx-085 with
Steel Doors.
Please verify you have the
correct service kit before
proceeding with installation!
1
Make sure the Module power cord is
disconnected from wall power supply
before proceeding.
Unlock the module and open the doors.
NOTE: the Module power cord acts
as the connect/disconnect device
switching power off and on.
888-97-300-G-00 rev A • 11/12
Tablet Management Cart / Module
USB Slideout Drawer Replacement Kit
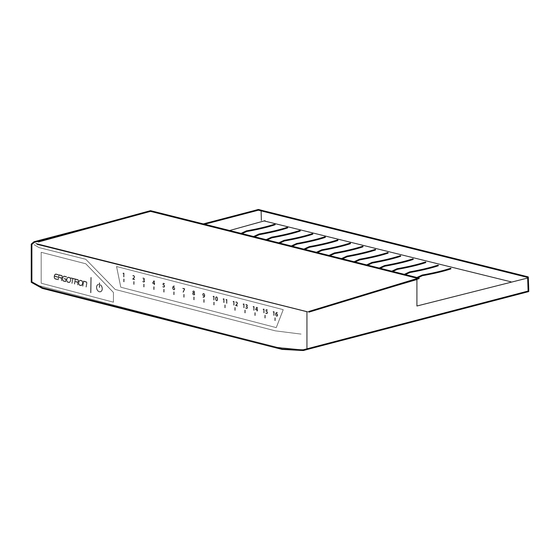
Drawers 97-742 and 06-074 are without LEDs
OR
Drawers 97-741 and 06-073 include LEDs
Service Manual
1 of 5
Advertisement
Table of Contents

Related Manuals for Ergotron 97-742


Summary of Contents for Ergotron 97-742
- Page 1 Tablet Management Cart / Module USB Slideout Drawer Replacement Kit Compatibility Alert: Drawer part numbers 97-741 and Drawers 97-742 and 06-074 are without LEDs 97-742 can only be installed in Module part numbers 24-2xx-085 with ABS Doors. Drawer part numbers 06-073 and...
- Page 2 Use a Phillips screwdriver to remove the two screws located on the interior sides of the module; save screws to reinsert later. Partially slide out the module drawer. You’ll need to unplug two cables before sliding the drawer completely out. Open the strap to access the two cables.
- Page 3 Remove cables and re-install on new drawer. For Kits 97-741 and 97-742 only: a. Remove USB box from existing drawer by removing the 4 screws. b. Replace with new USB box and replace the 4 screws. Place the new drawer up-side-down on the cart/module top.
- Page 4 Route the replacement USB cable through the front slot to the back of the new drawer maintaining the slack measured in previous step. Connect the replacement USB cable to the corresponding USB port of the new drawer. Repeat USB cabling steps 7 through 8 for the rest of the portable devices going into this module.
- Page 5 Slide the new drawer completely into the module. Insert the screws removed in step 2 and tighten. Insert portable devices into the module. Connect the tablet USB charging cables to the portable devices. 5 of 5 888-97-300-G-00 rev A • 11/12...
Need help?
Do you have a question about the 97-742 and is the answer not in the manual?
Questions and answers