Table of Contents
Advertisement
Available languages
Available languages
Quick Links
Advertisement
Chapters
Table of Contents

Related Manuals for Canvas GALIANO 188-0399-6


Summary of Contents for Canvas GALIANO 188-0399-6
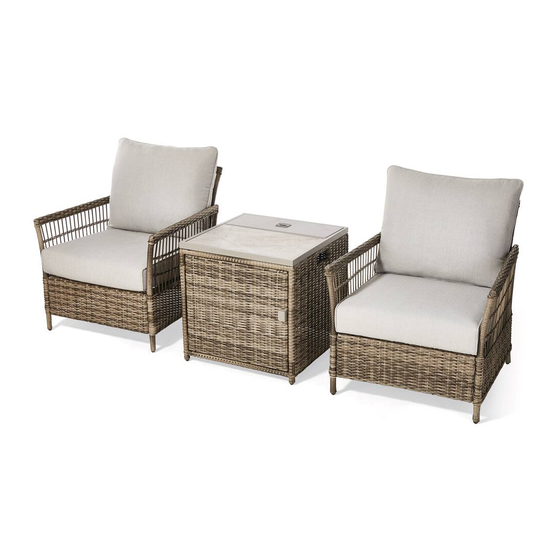
- Page 1 GALIANO 3-PIECE FIRE CHAT SET - CHAIR PRODUCT NO. 188-0399-6 ASSEMBLY INSTRUCTIONS HAVING TROUBLE? TOLL-FREE: 1-888-670-6684 IMPORTANT: Please read this manual carefully before beginning assembly of this product. Keep this manual for future reference.
- Page 2 To the trend seekers and design mavens, CANVAS™ is the furniture and décor brand that helps you imagine and create a space you can be proud of. That’s because CANVAS™ ease with products that are made for real life and Canadian inspired.
-
Page 3: Table Of Contents
TABLE OF CONTENTS Tools Required Parts List Before You Begin Assembly Step-by-step Guide Caring for Your Item Warranty WARNING! TO REDUCE THE RISK OF SERIOUS INJURY, READ THE FOLLOWING SAFETY INSTRUCTIONS BEFORE ASSEMBLING AND USING THE PRODUCT. • The maximum weight capacity for the chair is 225 lb (102 kg). Maximum weight capacity for table is 44 lb (20 kg). -
Page 4: Parts List
PARTS LIST ITEM DESCRIPTION THUMBNAIL QUANTITY Chair back Chair seat panel Right arm Left arm Seat cushion Back cushion GALIANO 3-PIECE FIRE CHAT SET... - Page 5 EXPLODED PARTS HARDWARE LIST ITEM DESCRIPTION THUMBNAIL QUANTITY Screw M6*20 Screw M6*40 Washer M6 Hex key GALIANO 3-PIECE FIRE CHAT SET...
-
Page 6: Before You Begin Assembly
Place packing materials back in the box. Do not dispose of packaging materials until assembly is complete. READ EACH STEP CAREFULLY Make sure you understand each step. If you have any questions, contact CANVAS™ customer service at 1-888-670-6684 (toll free). GALIANO 3-PIECE FIRE CHAT SET... -
Page 7: Step-By-Step Guide
STEP-BY-STEP GUIDE STEP 1 Place the right arm onto a non-abrasive surface, such as a carpet, with its inside facing upwards. Attach seat panel to right arm with screws and washers using hex key . Do not tighten completely. NOTE: Do not fully tighten screws until you have assembled the chair. - Page 8 STEP 2 Place the chair back onto a non-abrasive surface, such as a carpet, with its inside facing upwards. Attach seat panel to chair back with screws and washers using hex key . Do not tighten completely NOTE: Do not fully tighten screws until you have assembled the chair.
- Page 9 STEP-BY-STEP GUIDE STEP 3 Place the left arm onto a non-abrasive surface, such as a carprt, with its inside facing upwards. Attach seat panel to left arm with screws and washers using hex key . Do not tighten completely. NOTE: Do not fully tighten screws until you have assembled the chair.
- Page 10 STEP 4 Attach chair back to right arm and left arm with screws and washers . When assembled, tighten all screws with hex key . Repeat steps for second chair. GALIANO 3-PIECE FIRE CHAT SET...
- Page 11 STEP-BY-STEP GUIDE STEP 5 Put the seat cushion and back cushion on the chair. GALIANO 3-PIECE FIRE CHAT SET...
-
Page 12: Caring For Your Item
OFF SEASON: Clean and dry before storing in a dry, sheltered area. WARRANTY INFORMATION This CANVAS® product carries a one (1) year warranty against defects in workmanship and materials. Trileaf Distribution agrees to replace the defective product free of charge within the stated warranty period, when returned by the original purchaser with proof of purchase. - Page 14 GALIANO ENSEMBLE DE DÉTENTE AU COIN DU FEU DE 3 PIÈCES — CHAISE Nº DE MODÈLE 188-0399-6 INSTRUCTIONS D’ASSEMBLAGE DES DIFFICULTÉS? NUMÉRO SANS FRAIS : 1 888 670-6684 IMPORTANT : Veuillez lire attentivement ce guide avant de procéder à l’assemblage de ce produit.
- Page 15 à nous faire part de vos commentaires. Visitez notre site Web à l’adresse canadiantire.ca pour nous faire part de votre expérience et partagez vos photos en utilisant le mot-clic #MonStyleCANVAS. Montrez-nous comment vous donnez vie aux produits CANVAS . Nous avons hâte de les voir!
- Page 16 TABLE DES MATIÈRES Outils requis Liste des pièces Avant de commencer l’assemblage Guide étape par étape Entretien de votre article Garantie AVERTISSEMENT! VEUILLEZ LIRE LES CONSIGNES DE SÉCURITÉ SUIVANTES AVANT D’ASSEMBLER ET D’UTILISER L’ARTICLE AFIN DE RÉDUIRE LE RISQUE DE BLESSURES GRAVES.
-
Page 17: Liste Des Pièces
LISTE DES PIÈCES RÉFÉRENCE DESCRIPTION ILLUSTRATION QUANTITÉ Dossier Panneau de siège Bras droit Accoudoir gauche Coussin de siège Coussin de dossier ENSEMBLE DE DÉTENTE AU COIN DU FEU DE 3 PIÈCES GALIANO... - Page 18 VUE ÉCLATÉE LISTE DE LA QUINCAILLERIE RÉFÉRENCE DESCRIPTION ILLUSTRATION QUANTITÉ Boulon avec rondelle M6*20 Boulon avec rondelle M6*40 Rondelle M6 Clé hexagonale ENSEMBLE DE DÉTENTE AU COIN DU FEU DE 3 PIÈCES GALIANO...
-
Page 19: Avant De Commencer L'assemblage
LIRE ATTENTIVEMENT CHAQUE ÉTAPE Assurez-vous de bien comprendre chaque étape. Si vous avez des questions, contactez le service à la clientèle CANVAS au 1 888 670-6684 (sans frais). ENSEMBLE DE DÉTENTE AU COIN DU FEU DE 3 PIÈCES GALIANO... -
Page 20: Guide Étape Par Étape
GUIDE ÉTAPE PAR ÉTAPE ÉTAPE 1 Placez l’accoudoir droit sur une surface non abrasive, telle qu’un tapis, avec sa face intérieure tournée vers le haut. Fixez le panneau du siège à l’accoudoir droit au moyen des vis et des rondelles à... - Page 21 ÉTAPE 2 Placez le dossier sur une surface non abrasive, telle qu’un tapis, avec son intérieur orienté vers le haut. Fixez le panneau du siège au dossier du fauteuil au moyen des vis et des rondelles à l’aide de la clé...
- Page 22 GUIDE ÉTAPE PAR ÉTAPE ÉTAPE 3 Placez l’accoudoir gauche sur une surface non abrasive, telle qu’un tapis, avec sa face intérieure tournée vers le haut. Fixez le panneau du siège à l’accoudoir gauche au moyen des vis et des rondelles à...
- Page 23 ÉTAPE 4 Fixez le dossier de la chaise à l’accoudoir droit et à l’accoudoir gauche au moyen des vis et des rondelles . Une fois l’article assemblé, serrez toutes les vis à l’aide de la clé hexagonale . Répétez les étapes à...
- Page 24 GUIDE ÉTAPE PAR ÉTAPE ÉTAPE 5 Mettez le coussin de siège et le coussin de dossier sur la chaise. ENSEMBLE DE DÉTENTE AU COIN DU FEU DE 3 PIÈCES GALIANO...
-
Page 25: Entretien De Votre Article
GARANTIE GARANTIE LIMITÉE D’UNE DURÉE DE 1 AN Cet article CANVAS comprend une garantie d’un (1) an contre les défauts de fabrication et de matériaux. Distribution Trifeuil consent à remplacer l’article défectueux lorsqu’il est retourné par l’acheteur original, accompagné de la preuve d’achat, au cours de la période de garantie convenue. - Page 26 INSPIRÉE DU CANADA...
- Page 27 ENSEMBLE DE DÉTENTE AU COIN DU FEU DE 3 PIÈCES — TABLE Nº DE MODÈLE 188-0399-6 INSTRUCTIONS D’ASSEMBLAGE DES DIFFICULTÉS? NUMÉRO SANS FRAIS : 1 888 670-6684 IMPORTANT : Veuillez lire attentivement ce guide avant de procéder à l’assemblage de ce produit.
- Page 28 DANGER AVERTISSEMENT RISQUE D’INCENDIE OU D’EXPLOSION N’entreposez pas et n’utilisez pas d’essence ou d’autres gaz Si vous sentez du gaz : Coupez l’alimentation en gaz de l’appareil. ou liquides inflammables à Éteignez toute flamme nue. proximité de cet appareil ou Si l’odeur persiste, quittez immédiatement de tout autre appareil.
- Page 29 à nous faire part de vos commentaires. Visitez notre site Web à l’adresse canadiantire.ca pour nous faire part de votre expérience et partagez vos photos en utilisant le mot-clic #MonStyleCANVAS. Montrez-nous comment vous donnez vie aux produits CANVAS . Nous avons hâte de les voir!
- Page 30 TABLE DES MATIÈRES Consignes de sécurité Liste des pièces Avant de commencer l’assemblage Guide étape par étape Consignes d’utilisation Dépannage Entretien de votre article Garantie AVERTISSEMENT! VEUILLEZ LIRE LES CONSIGNES DE SÉCURITÉ SUIVANTES AVANT D’ASSEMBLER ET D’UTILISER L’ARTICLE AFIN DE RÉDUIRE LE RISQUE DE BLESSURES GRAVES.
-
Page 31: Consignes De Sécurité
CONSIGNES DE SÉCURITÉ Avant d’assembler ou d’utiliser ce foyer, veuillez lire ce guide entièrement et attentivement. L’omission de se conformer à cette consigne pourrait entraîner un incendie, une explosion, des blessures corporelles ou la mort. AVERTISSEMENT L’installation de ce foyer doit être conforme aux codes locaux ou au National Fuel Gas Code, ANSIZ223.1/NEPA54 ou au Code d’installation du gaz naturel et du propane CAN/CGA-B149.1. - Page 32 CONSIGNES DE SÉCURITÉ Maintenez tous les cordons électriques et les tuyaux d’alimentation en carburant éloignés des surfaces chaudes. Les matériaux combustibles ne doivent pas être à 72 po (182,9 cm) de la partie supérieure du foyer, ou à 48 po (121,9 cm) autour de l’ensemble de l’appareil. Gardez la zone de l’appareil dégagée et exempte de matériaux combustibles, d’essence et d’autres vapeurs et liquides inflammables.
- Page 33 CONSIGNES DE SÉCURITÉ LE CAS ÉCHÉANT : Laissez le foyer refroidir complètement avant de remettre le couvercle. N’utilisez PAS le foyer tandis que le couvercle est fermé. Enlevez toujours le couvercle tandis que le foyer est en cours d’utilisation. REMARQUE : Vous devez suivre toutes les étapes pour assembler adéquatement ce foyer.
-
Page 34: Liste Des Pièces
LISTE DES PIÈCES RÉFÉRENCE DESCRIPTION ILLUSTRATION QUANTITÉ Couvercle du brûleur Carreau de céramique Dessus de table Panneau arrière Panneau latéral de gauche Porte Panneau latéral de droite Tube de support Base en métal Verre granulé 1 Box ENSEMBLE DE DÉTENTE AU COIN DU FEU DE 3 PIÈCES GALIANO... - Page 35 PIÈCES ENSEMBLE DE DÉTENTE AU COIN DU FEU DE 3 PIÈCES GALIANO...
- Page 36 LISTE D’IDENTIFICATION DU BRÛLEUR Référence Description Quantité Référence Description Quantité Brûleur Déflecteur de brûleur Protecteur Aiguille d’allumage Boutons de commande Thermocouple Soupape de sécurité Boîtier de commande Sou ets Allumeur Orifice Foyer Régulateur ENSEMBLE DE DÉTENTE AU COIN DU FEU DE 3 PIÈCES GALIANO...
- Page 37 LISTE DE LA QUINCAILLERIE RÉFÉRENCE DESCRIPTION ILLUSTRATION QUANTITÉ Capuchon de vis Vis M6*25 Vis M6*30 Rondelle Clé hexagonale ENSEMBLE DE DÉTENTE AU COIN DU FEU DE 3 PIÈCES GALIANO...
-
Page 38: Avant De Commencer L'assemblage
LIRE ATTENTIVEMENT CHAQUE ÉTAPE Assurez-vous de bien comprendre chaque étape. Si vous avez des questions, contactez le service à la clientèle CANVAS au 1 888 670-6684 (sans frais). ENSEMBLE DE DÉTENTE AU COIN DU FEU DE 3 PIÈCES GALIANO... -
Page 39: Guide Étape Par Étape
GUIDE ÉTAPE PAR ÉTAPE Vérifiez que la molette de commande du système d’alimentation en gaz est tournée vers la position d’arrêt avant de commencer tout montage. ÉTAPE 1 Placez le dessus de table à l’envers sur une surface molle et plane, tel qu’un tapis. Fixez le panneau latéral gauche et le panneau de droite au dessus de la table au moyen... - Page 40 ÉTAPE 2 Fixez la porte et le panneau arrière vers le panneau latéral gauche et le panneau de droite au moyen de huit vis M6 x 30 , huit rondelles à l’aide de la clé hexagonale . Ne serrez pas complètement. REMARQUE : Ne serrez pas complètement les vis avant d’avoir assemblé...
- Page 41 GUIDE ÉTAPE PAR ÉTAPE ÉTAPE 3 Fixez la base en métal et le panneau de gauche et le panneau de droite au moyen de quatre vis M6 x 25 , quatre rondelles à l’aide de la clé hexagonale . Ne serrez pas complètement. NOTE: Do not tighten screws all the way until you have...
- Page 42 ÉTAPE 4 Fixez le dossier de la chaise à l’accoudoir droit à l’accoudoir gauche au moyen des vis et des rondelles . Une fois l’article assemblé, serrez toutes les vis à l’aide de la clé hexagonale . Répétez les étapes à...
- Page 43 STEP-BY-STEP GUIDE ÉTAPE 5 Redressez le foyer et placez tous les bouchons de quincaillerie ENSEMBLE DE DÉTENTE AU COIN DU FEU DE 3 PIÈCES GALIANO...
- Page 44 ÉTAPE 6 Placez le carreau de céramique à l’intérieur du dessus de table ÉTAPE 7 Tournez le robinet de la bouteille dans le sens horaire pour fermer la bouteille de propane. Fixez le régulateur préassemblé du dessus de table à la soupape de bouteille en faisant tourner l’écrou-raccord du régulateur dans le sens horaire.
- Page 45 GUIDE ÉTAPE PAR ÉTAPE ÉTAPE 8 Installez une bouteille de propane (non incluse) sur la base en métal . Assurez-vous que la bouteille de propane repose complètement sur la base en métal . Tournez la vis à oreilles préassemblée sur la partie extérieure de la base en métal dans le sens horaire pour bien fixer la bouteille de propane.
- Page 46 ÉTAPE 10 Sortez le verre granulé de sa boîte et placez-le dans le foyer ÉTAPE 11 Placez le couvercle du brûleur sur le bol du foyer. ENSEMBLE DE DÉTENTE AU COIN DU FEU DE 3 PIÈCES GALIANO...
-
Page 47: Consignes D'utilisation
CONSIGNES D’UTILISATION FONCTIONNEMENT Avant d’e ectuer un test d’étanchéité, assurez-vous qu’aucune étincelle ne peut se produire et que vous vous trouvez dans un vaste espace extérieur. Raccordez la bouteille de propane au régulateur et tournez la soupape sur l’unité vers la position « OFF » (arrêt). Versez un mélange d’eau et de savon sur toutes les connexions. -
Page 48: Dépannage
DÉPANNAGE DES DIFFICULTÉS? LAISSEZ-NOUS VOUS AIDER! ARRÊT NUMÉRO SANS FRAIS : 1-888-670-6684 AVANT DE RETOURNER APPELEZ-NOUS, VOTRE PRODUIT NOUS POUVONS Si vous avez des questions concernant votre article VOUS AIDER ou avez besoin d’une assistance au titre de la garantie, veuillez appeler notre service d’assistance à... -
Page 49: Entretien De Votre Article
GARANTIE GARANTIE LIMITÉE D’UNE DURÉE DE 1 AN Cet article CANVAS comprend une garantie d’un (1) an contre les défauts de fabrication et de matériaux. Distribution Trifeuil consent à remplacer l’article défectueux lorsqu’il est retourné par l’acheteur original, accompagné de la preuve d’achat, au cours de la période de garantie convenue. - Page 50 INSPIRÉE DU CANADA...
- Page 51 GALIANO 3-PIECE FIRE CHAT SET - TABLE PRODUCT NO. 188-0399-6 ASSEMBLY INSTRUCTIONS HAVING TROUBLE? TOLL-FREE: 1-888-670-6684 IMPORTANT: Please read this manual carefully before beginning assembly of this product. Keep this manual for future reference.
- Page 52 DANGER WARNING FIRE OR EXPLOSION HAZARD Do not store or use gasoline or other flammable liquids or If you smell gas: Shut o gas to the appliance. vapours in the vicinity of this or Extinguish any open flame. any other appliance. If odour continues, leave the area immediately.
- Page 53 To the trend seekers and design mavens, CANVAS™ is the furniture and décor brand that helps you imagine and create a space you can be proud of. That’s because CANVAS™ ease with products that are made for real life and Canadian inspired.
- Page 54 TABLE OF CONTENTS Safety Information Parts List Before You Begin Assembly Step-by-step Guide Instructions for Use Troubleshooting Caring for Your Item Warranty WARNING! TO REDUCE THE RISK OF SERIOUS INJURY, READ THE FOLLOWING SAFETY INSTRUCTIONS BEFORE ASSEMBLING AND USING THE PRODUCT. •...
-
Page 55: Safety Information
SAFETY INFORMATION Before you assemble or operate this unit, please carefully read this entire manual. Failure to do so may result in a fire, explosion, injury or death. WARNING The installation of this unit must adhere to local codes or either the National Fuel Gas Code, ANSIZ223.1/NEPA54, or CAN/CGA-B149.1, National Gas and Propane Installation Code. - Page 56 SAFETY INFORMATION Keep all electrical cords and fuel supply hoses away from heated surfaces. Combustible material should not be within 72" (182.9 cm) of the top of the unit, or within 48" (121.9 cm) around the entire unit. Keep the appliance area clear and free from combustible material, gasoline and other flammable vapours and liquids.
- Page 57 SAFETY INFORMATION IF APPLICABLE: Allow heating item to cool completely before replacing lid. DO NOT use heating item while lid is installed. Always remove the lid while heating item in use. NOTE: You must follow all steps to properly assemble this heating item. Make sure the gas valve is turned "OFF"...
-
Page 58: Parts List
PARTS LIST ITEM DESCRIPTION QUANTITY Burner Lid Ceramic Tile Table Top Back Panel Left Side Panel Door Right Side Panel Support Tube Metal Stand Lava Rocks 1 Box GALIANO 3-PIECE FIRE CHAT SET... - Page 59 PARTS GALIANO 3-PIECE FIRE CHAT SET...
- Page 60 BURNER IDENTIFICATION LIST Item Description Item Description Burner Burner Ba e Ignition Needle Guard Orifice Thermocouple Bellows Fire Pit Igniter Safety Valve Control Knob Control Box Regulator GALIANO 3-PIECE FIRE CHAT SET...
- Page 61 HARDWARE LIST ITEM DESCRIPTION QUANTITY Screw Cap Screw M6*25 Screw M6*30 Washer Hex Key GALIANO 3-PIECE FIRE CHAT SET...
-
Page 62: Before You Begin Assembly
Place packing materials back in the box. Do not dispose of packaging materials until assembly is complete. READ EACH STEP CAREFULLY Make sure you understand each step. If you have any questions, contact CANVAS™ customer service at 1-888-670-6684 (toll free). GALIANO 3-PIECE FIRE CHAT SET... -
Page 63: Step-By-Step Guide
STEP-BY-STEP GUIDE Check that the control knob for the gas supply system is turned to the "OFF" position before starting any assembly. STEP 1 Place the table top upside down on a soft surface, such as a carpet. Attach the left side panel and the right side panel to the table top... - Page 64 STEP 2 Attach the door and back panel to the left side panel and the right side panel using eight M6 x 30 screws , eight washers , and eand hex key . Do not tighten completely. NOTE: Do not tighten screws all the way until you have assembled the table.
- Page 65 STEP-BY-STEP GUIDE STEP 3 Attach the metal stand to the left side panel right side panel using four M6 x 25 screws , four washers , and hex key . Do not tighten completely. NOTE: Do not tighten screws all the way until you have assembled the table.
- Page 66 STEP 4 Attach the support tube to the metal stand using two M6 x 25 screws , two washers and hex key Tighten all screws using hex key GALIANO 3-PIECE FIRE CHAT SET...
- Page 67 STEP-BY-STEP GUIDE STEP 5 Turn over the fire table and place all hardware caps GALIANO 3-PIECE FIRE CHAT SET...
- Page 68 STEP 6 Place the ceramic tile inside the table top STEP 7 Turn the cylinder valve on the tank clockwise to close the propane tank. Attach the pre-assembled regulator from the table top to the cylinder valve by turning the regulator coupling nut clockwise.
- Page 69 STEP-BY-STEP GUIDE STEP 8 Install a propane gas tank (not included) into the metal stand . Make sure the gas tank sits on the metal stand completely. Turn the preassembled wing screw on the outer part of metal stand clockwise to secure the propane gas tank tightly. STEP 9 Remove the rubber cap on the electronic igniter by unscrewing and slide...
- Page 70 STEP 10 Remove the glass fill from its box and place into the fire pit STEP 11 Place the burner lid onto the fire bowl. GALIANO 3-PIECE FIRE CHAT SET...
-
Page 71: Instructions For Use
INSTRUCTIONS FOR USE OPERATION Before performing a leak test, be sure that no sparks can occur and you are in a spacious outdoor area. Connect the propane gas tank to the regulator and turn the valve on the unit to the "OFF" position. Brush a soap and water mixture on all connections. Turn the gas supply on;... -
Page 72: Troubleshooting
TROUBLESHOOTING HAVING TROUBLE? LET US HELP YOU! TOLL-FREE: 1-888-670-6684 BEFORE RETURNING CALL US, YOUR PRODUCT WE CAN HELP If you have questions regarding your product or require warranty assistance, please call our customer service helpline. PROBLEM POSSIBLE CAUSES SOLUTION Check that all burner ports are free of Flame is obstructed at Heating unit any small lava rocks/pumice stones/... -
Page 73: Caring For Your Item
OFF SEASON: Clean and dry before storing in a dry, sheltered area. WARRANTY INFORMATION This CANVAS product carries a one (1) year warranty against defects in workmanship and materials. Trileaf Distribution agrees to replace the defective product free of charge within the stated warranty period, when returned by the original purchaser with proof of purchase. - Page 74 INSPIRÉE DU CANADA...
Need help?
Do you have a question about the GALIANO 188-0399-6 and is the answer not in the manual?
Questions and answers