Table of Contents
Advertisement
Quick Links
Advertisement
Table of Contents

Related Manuals for Brandt BOP7568LX


Summary of Contents for Brandt BOP7568LX
- Page 1 USER INSTRUCTIONS EN OVEN...
- Page 2 Visit our website www.brandt.com as well as useful and complementary information. BRANDT is delighted to assist you every day and hopes you get the most out of your purchase. The label "Origine France Garantie" assures the consumer the traceabi- lity of a product by giving a clear and objective indication of the source.
-
Page 3: Table Of Contents
Table of Contents SAFETY INSTRUCTIONS ..............4 ENVIRONMENT ................6 Environment ..................6 Energy saving councils ..............6 INSTALLATION ................7 ............7 Electrical connection ................. 8 DESCRIPTION OF THE OVEN ............9 Presentation of the oven ..............9 Display and buttons ................9 Accessories .................. -
Page 4: Safety Instructions
Safety instructions IMPORTANT - READ CAREFULLY AND RETAIN FOR FUTURE USE. This user guide is available for download on the brand’s web- site. When you receive the appliance, careful not to touch the heating unpack it or have it unpacked elements inside the oven. - Page 5 Safety instructions applications such as: The electrical plug must offices and other professional rem a in a cces si bl e af ter premises; Farms; Use by clients installation. of hotels, motels and other — It must be possible to residential type establishments;...
-
Page 6: Environment
Installation Environment CARE FOR THE ENVIRONMENT - This appliance’s packing materials are recyclable. Please recycle them and help protect the environ- ment by depositing them in municipal containers provided for this purpose. - Your appliance also contains many recyclable materials. It is therefore marked with this logo to with other waste. - Page 7 Environment Installation CHOICE OF LOCATION AND FITTING The diagrams show the dimensions of a cabinet that will be able to hold your oven. To be certain that you have properly in- This appliance may be installed either under a stalled your appliance, do not hesitate to worktop (A) or in a column (B).
-
Page 8: Electrical Connection
Description of the oven Installation ELECTRICAL CONNECTION Your oven must be connected with a (standard) power cable with 3 conductors of 1.5mm (1 live bleu + 1 neutral + earth) which must be connected to Neutral a 220-240V ~ single-phase grid by means of a 1 live + 1 neutral + earth CEI 60083 standard power ance with the installation rules. -
Page 9: Description Of The Oven
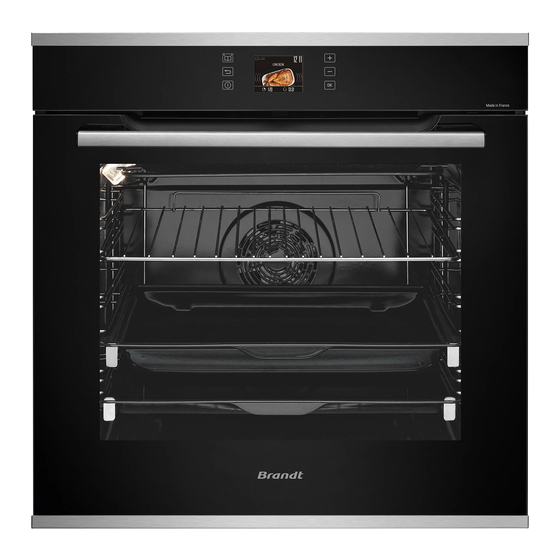
Installation Description of the oven PRESENTATION OF THE OVEN Control panel Light Door Handle This oven has 6 positions for the accessories: shelf supports 1 to 6. DISPLAY AND BUTTONS Settings + (in French only) Automatic steam function" button Settings Back/unlock key Enter key Start/Stop"... -
Page 10: Accessories
Description of the oven ACCESSORIES • Anti-tip safety grid The grid can be used to hold all dishes and moulds can be used for barbecues (to be placed directly on the grid). Insert the anti-tip safety grid towards the back of the oven. - Page 11 Description of the oven INSTALLING AND REMOVING THE SLIDING RAILS After removing the 2 shelf runners, choose the Snap the left rail against the left shelf runner by applying enough pressure to the front and back of the rail so that the 2 tabs on the side of the rail slot into the shelf runner.
-
Page 12: How To Use Your Appliance
How to use your appliance How to use your appliance SETTING • Setting the clock When switching on When switching on + or - • Changing the clock • Timer Press the OK button. Use the + and - buttons to navigate through the various settings, select "Timer" and starts counting down. - Page 13 How to use your appliance • Keypad locking Press the until the symbol is displayed on the screen. To unlock it, press the until the symbol disappears from the screen. SETTING You can change various parameters of your oven: Select "CONFIGURATION" to access the setting mode. below: TIME : Allows the time to be set or changed.
-
Page 14: Firing Modes
How to use your appliance COOKING MODES (depending on model) MANUAL FUNCTIONS : TRADITIONAL PULSE preferably in a clay dish CIRCULATING HEAT* vegetables moist. For cooking multiple items on KEEPING WARM up to three levels. AUTOMATIC FUNCTIONS : TRADITIONAL Recommended for slow, gentle cooking: rich game, automatically combine two cooking modes: etc. -
Page 15: Starting A Cooking Process
How to use your appliance STARTING COOKING • Immediate cooking Press the OK OK key. The oven offers you to set the other cooking parameters: The temperature Cooking time The end of cooking OK button. • Changing the temperature Depending on the type of cooking you have already selected, the oven recommends the ideal cooking temperature. - Page 16 How to use your appliance COOKING "Smart Assist" TIME MODE Your oven has the “SMART ASSIST” function which, when programming a cooking time, will suggest a cooking time which can be modified depending on the selected cooking mode. See the table opposite: The cooking time is saved automatically after a few seconds.
-
Page 17: Recipe Function
How to use your appliance THE "RECIPES" FUNCTION The "RECIPES" function selects the appropriate cooking parameters for you depending on the food to be prepared and its weight. - Salmon - Beef, medium rare - Pizza - Pink shoulder of lamb - Roast pork - Chicken - Quiche... -
Page 18: Autocook Mode
How to use your appliance "AUTOCOOK" COOKING MODE The "AUTOCOOK" cooking mode will make your work completely easier, as the oven will automati- cally calculate all the cooking parameters according to the selected dish (temperature, cooking time, type of cooking) thanks to electronic sensors placed in the oven that constantly measure the degree of humidity and the temperature variation. -
Page 19: Steam Guide Function
How to use your appliance THE "STEAM GUIDE" FUNCTION Press the "Steam Guide" button button. You do not need to set anything else, the temperature and cooking time are calculated automatically. again. Your cooking starts immediately. TABLE OF COMBINED FUNCTIONS AUTOMATIC WITH VAPOR ASSOCIATION Chicken 500 ml lukewarm water in the multipurpose tray... -
Page 20: Maintenance Of Your Appliance
Cleaning Cleaning CLEANING INSIDE - OUTSIDE • Self-cleaning of the cavity by pyrolysis Warning Remove the accessories and wire tiers from the oven before starting a pyrolysis cleaning. occurred. Remove excess grease from the door with a damp sponge. For safety reasons, the pyrolysis cleaning operation is only carried out after the door has been automati- cally locked, the door cannot be unlocked. -
Page 21: Cleaning The Interior And Exterior
Cleaning • Cleaning the outer surfaces Use a window washing product applied to a soft cloth. Do not use abrasive creams or scouring sponges. • Cleaning the shelf supports Lift the front part of the wire shelf support upwards. Press the entire shelf support and release the front hook from its housing. - Page 22 Cleaning Depending on the model, the door consists of two additional glass panels, with a black rubber spacer at each corner. If necessary, remove them to clean. • Re-assembling the door After cleaning, reposition the four rubber stops with the arrow upwards. Reposition all of the glass panels.
-
Page 23: Faults And Solutions
Cleaning Anomalies and solutions ANOMALIES AND SOLUTIONS The oven is not heating. Check that the oven is correctly connected and that your installation’s fuse is not out of service. Increase the selected temperature. The oven light is not working. Replace the bulb or the fuse. -
Page 24: Servicing
Service Calls SERVICE CALLS Any repairs made to your appliance must be carried out by a qualified professional authorised to work on the brand. When calling, please provide the complete references of your appliance (commercial reference, service reference, serial number), so that we can handle your call better. -
Page 25: Cooking Aids
DISHES Pastries Madeleines 5-10 Choux pastry 30-40 Flaky pastry hors d’oeuvres 5-10 Savarin cake 30-35 Shortcrust tart 30-40 20-25 Tart made with yeast-based 10-30 pastry Other Skewers 10-15 Terrine pâté 80-100 Shortcrust pizza 30-40 Dough-based pizza 15-18 Quiches 35-40 Pies 40-45 Bread 30-40... - Page 26 DISHES Meat Roast pork (1kg) Roast veal (1kg) 60-70 Roast beef 30-40 Lamb (leg, shoulder, 2.5kg) Poultry (1kg) Large pieces of poultry 60-90 Chicken thighs 20-30 Pork/veal chops 20-30 Beef ribs (1kg) 20-30 Lamb chops 20-30 Fish 15-20 30-35 Fish in papillotte 15-20 Vegetables Gratins (cooked foods)
-
Page 27: Recipes With Yeast
Recipe with yeast (depending on model) Ingredients • Flour 2 kg • Water 1240 ml • Salt 40 g • 4 packets of dehydrated baker’s yeast Mix the dough in a mixer and allow to rise in the oven Method: For yeast-based pastry recipes. Pour the dough into a heat-resistant dish. Remove the wire shelf supports and put the dish on the bottom. -
Page 28: Functionality Tests
BRANDT FRANCE, Etablissement de CERGY, 5/7 avenue des Béthunes, 95310 SAINT OUEN L’AUMÔNE. SAS au capital social de 100.000.000 euros RCS NANTERRE 801 250 531.
Need help?
Do you have a question about the BOP7568LX and is the answer not in the manual?
Questions and answers