Table of Contents
Advertisement
Available languages
Available languages
Quick Links
Use & Care Guide
Manual de Uso y Cuidado
English / Español
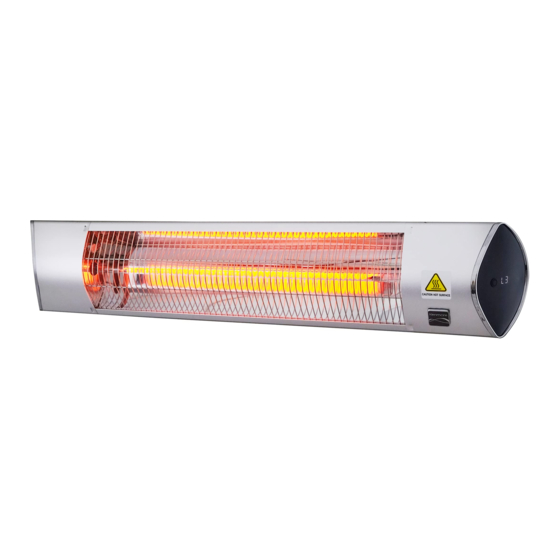
Carbon Infrared Heater
CALENTADOR INFRARROJO DE CARBONO
Models / Modelos :
If you have any questions, please call 1-888-287-0735,
between 8:00 a.m. to 5:00 p.m. PST, or visit us at Kenmoreheaters.com
Si tiene alguna pregunta, llame al 1-888-287-0735,
de 8:00 a. m. a 5:00 p. m. PST, o visítenos en Kenmoreheaters.com
KH-7E01-SS & KH-7E01-BK
Kenmore and the Kenmore logo are registered trademarks of Transform SR Brands LLC and are used under license
by Permasteel, 100 Exchange Place, Pomona, CA 91768.
Kenmore y el logotipo de Kenmore son marcas comerciales registradas de Transform SR Brands LLC y se usan
bajo licencia de Permasteel, 100 Exchange Place, Pomona, CA 91768.
Advertisement
Chapters
Table of Contents

Related Manuals for Kenmore KH-7E01-SS


Summary of Contents for Kenmore KH-7E01-SS
- Page 1 Si tiene alguna pregunta, llame al 1-888-287-0735, de 8:00 a. m. a 5:00 p. m. PST, o visítenos en Kenmoreheaters.com Kenmore and the Kenmore logo are registered trademarks of Transform SR Brands LLC and are used under license by Permasteel, 100 Exchange Place, Pomona, CA 91768.
-
Page 2: Table Of Contents
TABLE OF CONTENTS Product Warranty ............. . Important Safety Instructions . - Page 3 This warranty gives you specific legal rights, and you may also have other rights which varies from state to state. The Kenmore brand is used under license. Direct all claims for warranty service to: 1-888-287-0735. Exclusions for commercial use.
-
Page 4: Important Safety Instructions
IMPORTANT SAFETY INSTRUCTIONS WARNING THESE INSTRUCTIONS SHOULD BE READ CAREFULLY AND RETAINED FOR FUTURE REFERENCE. We cannot be liable for any damage caused by the failure to observe these instructions. READ CAREFULLY – This infrared heater has been designed for safe operation. However, if it is not installed, maintained, or operated correctly, it may be dangerous and cause injury. - Page 5 IMPORTANT SAFETY INSTRUCTIONS Do not operate any heater with a damaged cord or plug or if the heater malfunctions, has been dropped or damaged in any manner. Disconnect power from the service panel and have the heater inspected by a reputable electrician before reusing. If you have any reason to believe that the electrical cord or plug on your heater is damaged, do not attempt to operate the heater.
-
Page 6: Product Specifications
INTRODUCTION The carbon infrared heater produces instant and comfortable heat like the sun. These robust and weatherproof heaters are designed for domestic heating applications within indoor and outdoor areas. Model KH-7E01-SS / KH-7E01-BK Voltage (V) 120V AC Wattage (W) 1500... -
Page 7: Warning Incorrect Placement
WARNING INCORRECT PLACEMENT WARNING: To reduce the risk of fire Caution: Keep combustible Caution: Do NOT use with an materials, such as furniture, pillows, extension cord or relocatable curtains at least 3 feet (0.9m) from power tap (outlet/power strip). the front of the heater and keep them away from the sides and rear. - Page 8 WARNING INCORRECT PLACEMENT Correct Installation Position - 01 Note: Mounted angle with 30°- 45°...
- Page 9 WARNING INCORRECT PLACEMENT Correct Installation Position - 02 WALL WALL Note: Heater should be wall or ceiling mounted under wall protected environments, keep at least 3 feet (0.9 m) away from any combustible objects. WALL WALL Note: Do not cover.
-
Page 10: Parts List
PARTS LIST Please make sure you have all parts Description Part Number before beginning assembly. Heater (SS) KH-7E01-01 If you are missing hardware or have damaged parts after unpacking heater, Not Pictured call 1-888-287-0735. Manual KH-7E01-M Or Visit us at Kenmoreheaters.com 1. - Page 11 PARTS LIST NOTE: Please make sure you have all parts before beginning assembly. INSTALLATION HARDWARE: 1) L-Shaped Bracket 4) M6mm Nut Qty: 4 pcs Qty: 2 pcs 2) Plastic Anchor 5) M6mm x 12mm Screw Qty: 4 pcs Qty: 2 pcs 3) PA5mm x 25mm Mounting Screw Qty: 4 pcs If you are missing hardware or have damaged parts after unpacking heater, call 1-888-287-0735.
-
Page 12: Assembly & Installation Instructions
ASSEMBLY & INSTALLATION INSTRUCTION TOOLS NEEDED: (not provided) 1. Pencil 2. Hammer 3. Level 4. Screwdriver 5. Power drill and drill bits A mounting bracket is provided with the heater which has been specifically designed to allow this product to be fitted to a ceiling or wall. - Page 13 L-Shaped Bracket Installation Fasten the L-shaped brackets (1) using 2 pieces of M6mm x 12mm screws (5) and 2 pieces of M6mm nuts (4). M6mm Nut M6mm x 12mm Screw Qty: 2 pcs Qty: 2 pcs With a pencil, mark the hole locations on the wall where the heater will be mounted according to measurements below.
- Page 14 Plastic Anchor Installation Drill holes for the plastic anchors using a 1/8 - 5/32 in. drill bit. WALL Insert the point end of plastic anchor (2) into the holes. Tap the plastic anchor with a hammer until the plastic anchor is flush. Plastic Anchor Qty: 4 pcs WALL...
- Page 15 Mounting Bracket Installation Use 4 pieces of PA5mm x 25mm screws (3) to attach the mounting brackets to the wall, making sure they go into the plastic anchors, tighten them with the screwdriver. Note: if the mounting surface is solid like wood, no need for plastic anchors. PA5mm x 25mm Mounting Screw Qty: 4 pcs WALL...
- Page 16 ASSEMBLY & INSTALLATION INSTRUCTION The heater must be installed at least 2.4 m (8 ft) above the floor grade. Attention: The cable should not pass through the heater. Ceiling Ceiling Min:0.5M(19.7")
- Page 17 ASSEMBLY & INSTALLATION INSTRUCTION The heater must be installed at least 2.4 m (8 ft) above the floor grade. Attention: The cable should not pass through the rear of the heater. Ceiling Min: 0.5m (19.7") Ceiling Min: 0.5m (19.7")
-
Page 18: Operating Instructions
OPERATING INSTRUCTIONS PRODUCT KEY FUNCTION LED Display: 1. Turn on the power button, the product is in standby mode display (- -). 2. Press heating level button: Select the heating level (L1 - L2 - L3 - standby - off). 3. - Page 19 OPERATING INSTRUCTIONS INSERTING BATTERIES (not included) Insert 2 AAA/ Alkaline type batteries into your remote control. Flip the backside of your remote control and pull out the battery cover. Insert the batteries in accordance with the instructions and polarity of the batteries. Change the batteries in the same way depicted above.
-
Page 20: Troubleshooting
TROUBLESHOOTING TROUBLESHOOTING Check if the power cord is plugged into an electrical outlet; if not, plug in. Check if electricity to the main fuse is working. Error code shows on display: E1 Error on display: Control unit overheat. Check installation clearances. a) Pull the plug out. -
Page 21: Cleaning & Maintenance
CLEANING & MAINTENANCE MAINTENANCE ATTENTION: Careful and regular maintenance is important to insure long term efficient operation of this appliance. Check the cleanliness of the Reflector and IR-Filament at least once a month. If necessary, apply cleaning and maintenance instructions” to “see cleaning instructions below. The number of checks may be increased considering the amount of the dust in the environment. - Page 22 TABLA DE CONTENIDO La garantía del product ............Instrucciones de seguridad importantes .
- Page 23 Esta garantía le otorga derechos legales específicos y también puede tener otros derechos que varían de un estado a otro. La marca Kenmore se utiliza bajo licencia. Dirija todos los reclamos por el servicio de garantía al: 1-888-287-0735. Exclusiones para uso comercial.
-
Page 24: Instrucciones De Seguridad Importantes
INSTRUCCIONES DE SEGURIDAD IMPORTANTES ADVERTENCIA ESTAS INSTRUCCIONES DEBEN LEERSE DETENIDAMENTE Y CONSERVARSE PARA FUTURAS CONSULTAS. No podemos ser responsables de ningún daño causado por el incumplimiento de estas instrucciones. LEA CUIDADOSAMENTE – Este calentador de infrarrojos ha sido diseñado para una seguridad operación. Sin embargo, si no está... - Page 25 INSTRUCCIONES DE SEGURIDAD IMPORTANTES No opere ningún calefactor con un cable o enchufe dañado o si el calefactor funciona mal, se ha caído o dañado de alguna manera. Desconecte la alimentación del panel de servicio y haga que un electricista acreditado inspeccione el calentador antes de volver a utilizarlo. Si tiene alguna razón para creer que el cable eléctrico o el enchufe de su calentador están dañados, no intente operar el calentador.
-
Page 26: Especificaciones Del Product
El calentador infrarrojo de carbón produce calor instantáneo y confortable como el sol. Estos calefactores robustos y resistentes a la intemperie están diseñados para aplicaciones de calefacción doméstica en áreas interiores y exteriores. Modelo KH-7E01-SS / KH-7E01-BK Voltaje (V) 120V AC Potencia (W) -
Page 27: Advertencia Colocación Incorrecta
ADVERTENCIA COLOCACIÓN INCORRECTA ADVERTENCIA: Para reducir el riesgo de incendio Precaución: Mantenga los Precaución: NO lo use con un materiales combustibles, como cable de extensión o toma de muebles, almohadas, cortinas a corriente reubicable una distancia mínima de 3 pies (tomacorriente/regleta). - Page 28 ADVERTENCIA COLOCACIÓN INCORRECTA Posición de instalación correcta - 01 Nota: Ángulo montado con 30°- 45°...
- Page 29 ADVERTENCIA COLOCACIÓN INCORRECTA Posición de instalación correcta - 02 PARED PARED Nota: El calentador debe montarse en la pared o el techo debajo de ambientes protegidos por la pared, manténgase al menos a 0,9 m (3 pies) de distancia de cualquier objeto combustible.
-
Page 30: Lista De Partes
LISTA DE PARTES Asegúrese de tener todas las piezas Descripción Cant. Número de parte antes de comenzar el montaje. Calentador (SS) KH-7E01-01 Si le falta hardware o tiene partes dañadas después de desempacar el No en la foto calentador, llame al 1-888-287-0735. Manual KH-7E01-M O visítenos en Kenmoreheaters.com... - Page 31 LISTA DE PARTES NOTA: Asegúrese de tener todas las piezas antes de comenzar el montaje. HERRAJES DE INSTALACIÓN: 1) Soporte en forma de L 4) Tuerca M6 mm Cantidad: 4 piezas Cantidad: 2 piezas 2) Anclaje de plástico 5) Tornillo M6 mm x 12 mm Cantidad: 4 piezas Cantidad: 2 piezas 3) Tornillo de montaje PA5 mm x 25 mm...
-
Page 32: Instrucciones De Montaje E Instalación
INSTRUCCIONES DE MONTAJE E INSTALACIÓN HERRAMIENTAS NECESARIAS: (no provistas) 1. Lápiz 2. Martillo 3. Nivel 4. Destornillador 5. Taladro eléctrico y brocas Se proporciona un soporte de montaje con el calentador que ha sido diseñado específicamente para permitir que este producto se instale en un techo o pared. Asegúrese de que no haya tuberías de agua o cables eléctricos antes de taladrar. - Page 33 Instalación del soporte en forma de L Fije los soportes en forma de L (1) con 2 piezas de tornillos M6 mm x 12 mm (5) y 2 piezas de tuercas M6 mm (4). Tuerca M6 mm Tornillo M6 mm x 12 mm Cantidad: 2 piezas Cantidad: 2 piezas ...
- Page 34 Instalación de anclaje de plástico Taladre orificios para los anclajes de plástico con una broca de 1/8 - 5/32 pulg. PARED Inserte el extremo en punta del anclaje de plástico (2) en los orificios. Golpee el anclaje de plástico con un martillo hasta que el anclaje de plástico quede al ras.
- Page 35 Instalación del soporte de montaje Utilice 4 piezas de tornillos PA5 mm x 25 mm (3) para fijar los soportes de montaje a la pared, asegurándose de que entren en los anclajes de plástico, apriételos con el destornillador. Nota: si la superficie de montaje es sólida como la madera, no se necesitan anclajes de plástico. Tornillo de montaje PA5 mm x 25 mm Cantidad: 4 piezas PARED...
- Page 36 INSTRUCCIONES DE MONTAJE E INSTALACIÓN El calefactor debe instalarse al menos a 2,4 m (8 pies) por encima del nivel del suelo. Atención: El cable no debe pasar por el calentador.
- Page 37 INSTRUCCIONES DE MONTAJE E INSTALACIÓN El calefactor debe instalarse al menos a 2,4 m (8 pies) por encima del nivel del suelo. Atención: El cable no debe pasar por la parte trasera del calentador. Ceiling TECHO Min: 0.5m (19.7") TECHO Ceiling Min: 0.5m (19.7")
-
Page 38: Instrucciones De Operación
INSTRUCCIONES DE OPERACIÓN FUNCIÓN CLAVE DEL PRODUCTO Pantalla LED: 1. Encienda el botón de encendido, el producto está en pantalla de modo de espera (- -). 2. Presione el botón de nivel de calefacción: seleccione el nivel de calefacción (L1 - L2 - L3 - en espera - apagado). - Page 39 INSTRUCCIONES DE OPERACIÓN INSERCIÓN DE BATERÍAS (no incluidas) Inserte 2 pilas tipo AAA/alcalinas en su control remoto. Voltee la parte trasera de su control remoto y extraiga la tapa de la batería. Inserte las pilas de acuerdo con las instrucciones y la polaridad de las pilas. Cambie las baterías de la misma manera que se muestra arriba.
-
Page 40: Solución De Problemas
SOLUCIÓN DE PROBLEMAS SOLUCIÓN DE PROBLEMAS Compruebe si el cable de alimentación está enchufado a una toma de corriente; si no, enchúfelo. Verifique si la electricidad al fusible principal está funcionando. El código de error se muestra en la pantalla: E1 Error en pantalla: Sobrecalentamiento de la unidad de control. -
Page 41: Limpieza Y Mantenimiento
LIMPIEZA Y MANTENIMIENTO MANTENIMIENTO ATENCIÓN: El mantenimiento cuidadoso y regular es importante para asegurar el funcionamiento eficiente a largo plazo de este aparato. Compruebe la limpieza del reflector y del filamento IR al menos una vez al mes. Si es necesario, aplique las instrucciones de limpieza y mantenimiento”...
Need help?
Do you have a question about the KH-7E01-SS and is the answer not in the manual?
Questions and answers