
Related Manuals for Procolored A4 DTF


Summary of Contents for Procolored A4 DTF
- Page 1 A4 Dtf Printer manual *Due to occasional product upgrades, this manual is for reference only.
-
Page 2: Table Of Contents
Table of Contents Safety Instructions ..................... 2 Machine Views ....................3 Introduction of printer buttons ................4 1. check the machine performance and add inks ...........5 2. Install the driver and PRO RIP Software .............6 3. print your image ..................... 7 4.Maintenance ....................8 *Due to occasional product upgrades, this manual is for reference only. -
Page 3: Safety Instructions
6. Close supervision is necessary for any DTF printer being used by or near children. Do not leave equipment unattended while connected. 7. The A4 DTF Printer needs routine maintenance, please refer to the included manual. *Due to occasional product upgrades, this manual is for reference only. -
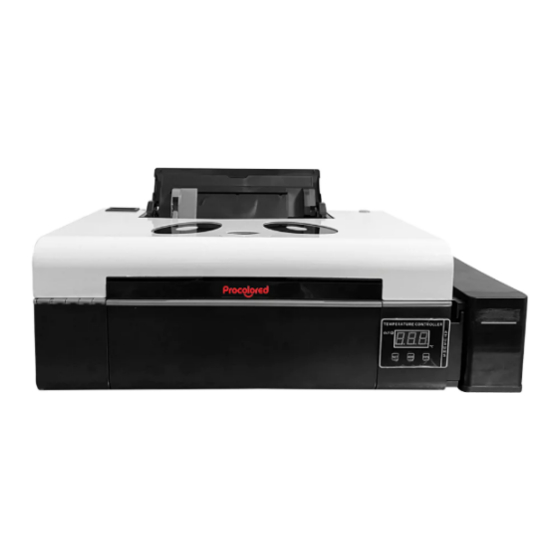
Page 4: Machine Views
Machine Views Film feed position Temperature and humidity display Nozzle position Ink position printer panel buttons Film exit position *Due to occasional product upgrades, this manual is for reference only. -
Page 5: Introduction Of Printer Buttons
Introduction of printer buttons start Press this button to open and close the printer power button Press this button to move the print head to the cartridge change location. When detecting the service life of the cartridge market, press this button to print the head to the ink check position. -
Page 6: Check The Machine Performance And Add Inks
1. check the machine performance and add inks Video :https://www.youtube.com/watch?v=7p09Z7PBslM 1.1 Install the waste ink bottle 1.2 Plug in the power cord 111.3 Turn on the power switch and wait for the 1.4 Use one film to test and print. Note startup self-test that the side with more powder is the printing side. -
Page 7: Install The Driver And Pro Rip Software
2. Install the driver and PRO RIP Software Video:https://www.youtube.com/watch?v=tSQJETK8zkk 2.1 Install Driver 2.2 Select USB connection 2.2 Insert USB dongle 2.4 Install PRO RIP software 2.5 Set Print Area Size 2.6 Select the correct printer driver 2.7.Installation curve 2.8.Installation L805 curve *Due to occasional product upgrades, this manual is for reference only. -
Page 8: Print Your Image
3. print your image Video:https://www.youtube.com/watch?v=h00PBRGjz4w 3.1 Load pictures into rip software 3.2 Select Mirror Print 3.3 Coat the printed PET film with hot melt 3.4 Bake at 120 ℃ for 200 seconds adhesive powder 3.5 Press the clothes to be printed at 160 ℃ 3.6 Press the baked PET film at 160 ℃... -
Page 9: Maintenance
4.Maintenance Video:https://youtu.be/TNGzaoccE70 4.1 Open the software to select print 4.2.Print test strip head maintenance 4.3.Clean the raster strip 4.4.Clean the guide rail 7.4.Clean the waste ink pump 7.5.Clean the ink cart sensor *Due to occasional product upgrades, this manual is for reference only. - Page 10 Notice: 1. The print head and waste ink pump are not covered by the warranty. Due to the characteristics of DTF ink, if the print head is not used for a long time, the print head is easily blocked. Please carefully maintain the print head. If you do not use it for more than three days, please install the print head moisturizing solution.
Need help?
Do you have a question about the A4 DTF and is the answer not in the manual?
Questions and answers