Advertisement
V1.0
2/2020
PN: 21-11037
Step 1 - Unpack QuickLIFT system and verify contents.
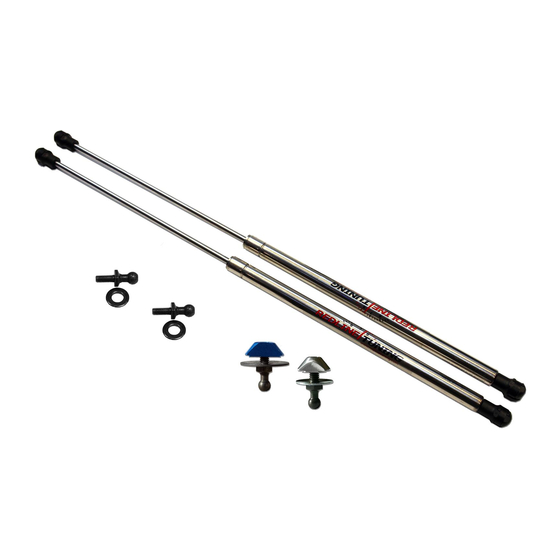
Remove all items from the packing tube. You should have the following components before beginning:
* (2) Gas springs (RT-QL-200-4A)
* (1) Silver hood-insert assembly (RIGHT SIDE) - 55-00011
* (1) Blue hood-insert assembly (LEFT SIDE) - 55-00013
* (2) Shock tower ball-studs/washers - 55-00030
* Printed Color Instructions
Step 2 - Gather the required tools.
Please gather the following tools before you begin the installation:
* Socket wrench with 13mm & 10mm sockets.
Step 3 - Install hood ball-stud system (Blue - LEFT SIDE & Silver - RIGHT SIDE)
A. Thread ball-stud approximately half-way into ball-stud retainer leaving 4-5 visible threads between retainer and
the conical washer. Feed BLUE retainer into LEFT hole, located on LEFT side mid-way up the hood's frame (Left is
driver's side in North America). Retainer should be inserted
B. Tighten ball-stud by hand (clockwise rotation) while lightly pulling on conical washer to keep from spinning.
C. Tighten ball-stud using 13mm socket wrench to 15 ft/lbs. Repeat steps 3 (A-C) for smaller silver insert on RIGHT
side.
1 - Insert retainer aligned
vertically
2 - Hand tighten stud while
pulling down on washer
RIGHT SIDE
SILVER
retainer
2020+ Ford Escape - STOCK HOOD
QuickLIFT Installation Guide
Body
Rod
QT Y 1
55-00013
LEFT Side
BLUE
vertically
and centered.
3 - Tighten with 13mm
socket
LEFT SIDE
BLUE
BLUE
retainer
Bolt in system
QTY 2
QT Y 1
55-00030
55-00011
Right Side
SILVER
Advertisement
Table of Contents

Related Manuals for Redline Tuning 21-11037


Summary of Contents for Redline Tuning 21-11037
- Page 1 V1.0 2/2020 PN: 21-11037 Bolt in system 2020+ Ford Escape - STOCK HOOD QuickLIFT Installation Guide Step 1 - Unpack QuickLIFT system and verify contents. Remove all items from the packing tube. You should have the following components before beginning:...
- Page 2 Step 4 - Install ball-studs as shown A. Remove the fender bolt closest to cowl using 10mm socket. B. Securely tighten the supplied ball-stud & washer in this location using 13mm socket. C. Repeat on RIGHT side of vehicle. Step 5 - Install gas springs onto lower ball studs. A.
Need help?
Do you have a question about the 21-11037 and is the answer not in the manual?
Questions and answers