TESTO 417 Instruction Manual
Digital vane anemometer
Hide thumbs
Also See for 417:
- Instruction manual (48 pages) ,
- Instruction manual (15 pages) ,
- Instruction manual (36 pages)
Table of Contents
Advertisement
Quick Links
Advertisement
Table of Contents

Related Manuals for TESTO 417


Summary of Contents for TESTO 417
- Page 1 417 - Digital vane anemometer 0560 0417 Instruction manual...
-
Page 2: Table Of Contents
® Establishing a Bluetooth connection ............. 9 ® Establishing a Bluetooth connection to the testo Smart App ....10 Using the product ................11 Controls on the measuring instrument ..........11 Implementing settings ................12 Opening configuration mode ..............13 Setting the unit .................. - Page 3 PDF Export ..................29 Maintaining the product ..............30 Inserting / changing batteries ............... 30 Cleaning the instrument ............... 30 Technical data for testo 417 ............. 31 Tips and assistance ................32 Questions and answers ............... 32 Accessories and spare parts ............... 33...
-
Page 4: About This Document
Only perform maintenance and repair work on this instrument that is described in this documentation. Follow the prescribed steps exactly when doing the work. Use only original spare parts from Testo. Batteries Improper use of batteries may cause the batteries to be destroyed, or lead to injury due to current surges, fire or escaping chemicals. -
Page 5: Disposal
At the end of its useful life, deliver the product to the separate collection point for electric and electronic devices (observe local regulations) or return the product to Testo for disposal. WEEE Reg. No. DE 75334352... -
Page 6: Product-Specific Information
Intended use The testo 417 is a compact instrument for measuring flow velocities and temperature by means of an integrated 100 mm vane with temperature sensor. The product is designed for the following tasks/areas: ... -
Page 7: Product Description
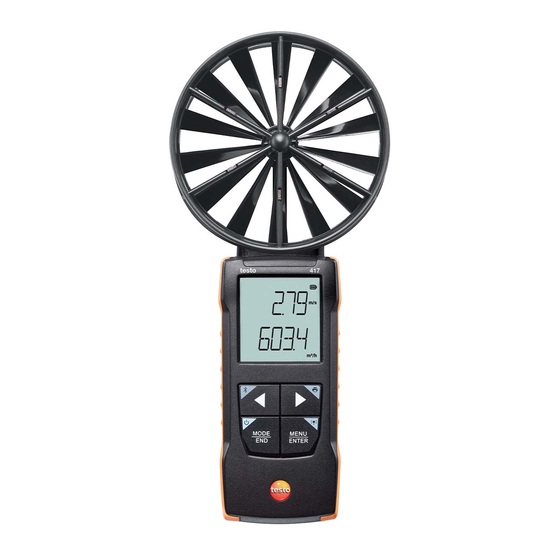
5 Product description Product description Instrument overview 1 Control keys 2 Display 3 Probe 4 Battery compartment Explanation of icons Refer to instruction manual... -
Page 8: First Steps
6 First steps First steps Inserting / changing batteries The instrument is switched off. Open the battery compartment (on the back of the instrument) via the snap lock. Insert or replace batteries (3 x AA batteries). + - + Observe the polarity! Close the battery compartment. -
Page 9: Getting To Know The Product
6 First steps Getting to know the product Connecting probes The required probes are permanently connected or integrated. It is not possible to connect any additional sensors. Switching the instrument on and off Switching on Press and hold down (2 sec) the On/Off key. -
Page 10: Establishing A Bluetooth Connection
6 First steps ® Establishing a Bluetooth connection The instrument can be connected to the testo Smart App via ® Bluetooth connection The measuring instrument is switched on. ® To enable the Bluetooth connection for the first time, press and hold ◄... -
Page 11: Establishing A Bluetooth Connection To The Testo Smart App
If necessary, switch the instrument to be connected off and on again to restart the connection module. When the testo Smart App is connected to the measuring instrument, icon appears on the measuring instrument display. The measuring instrument automatically synchronizes its date and time settings with the testo Smart App. -
Page 12: Using The Product
7 Using the product Using the product Controls on the measuring instrument The instrument is switched on. The testo Smart App is installed on the smartphone and connected ® to the instrument via Bluetooth Settings and controls are implemented either on the instrument or via the app. -
Page 13: Implementing Settings
7 Using the product Parameter 2 selected unit ► Print Illumination MENU/ENTER Implementing settings Selecting, opening and setting functions Press the relevant key to select the functions Secondary assignment (long press) All keys with a grey corner have a secondary assignment, which can be selected by pressing and holding the key for a longer time (2 sec). -
Page 14: Opening Configuration Mode
7 Using the product Function Setting options/comments MENU/ENTER Open configuration mode Start continuous measurement / record multi-point readings (Operation also possible directly on measuring instrument if it is connected to the app) In configuration mode: Confirm input Print (long press) Output readings via external printer Arrow right Change second measurement... -
Page 15: Setting The Funnel Factor "F.fact
MENU/ENTER: NO: Do not carry out reset. YES: Carry out reset. All concealed menus that were hidden via the testo Smart App are displayed again. The instrument returns to measurement view. -
Page 16: Carrying Out A Reset Of The Measuring Instrument
7 Using the product Carrying out a reset of the measuring instrument Configuration mode is open, “RESET” is displayed. ◄ ► Press to select the required option and confirm with MENU/ENTER: NO: Do not carry out reset. YES: Carry out reset. The instrument is reset to the factory settings. -
Page 17: Resetting Maximum/Minimum Values
7 Using the product The following are displayed in turn: Hold: frozen measured value Max: Maximum value Min: Minimum value Current measuring value Resetting maximum/minimum values The maximum/minimum values of all channels can be reset to the current reading. ◄... -
Page 18: Carrying Out Continuous Mean Calculation
A testo Bluetooth /IRDA printer (order no. 0554 0621) is connected via Bluetooth and switched on. When first setting up a connection between the testo measuring ® instrument and the testo Bluetooth /IRDA printer, the initialization phase can last up to 30 seconds. -
Page 19: Controls Via Testo Smart App
8 Controls via testo Smart App Controls via testo Smart App If the measuring instrument is connected to the testo Smart App, it is primarily operated via the app. The measuring instrument remains in the measurement view and settings menus cannot be opened on the measuring instrument. - Page 20 8 Controls via testo Smart App Additional symbols on the user interface of the app (not numbered) One level back Exit view Share measurement data/report Searching Favourite Deleting Further information Display report Multiple selection Main menu can be accessed via the icon at top left.
-
Page 21: App Options
Information. Select Instrument information. The version number of the app and the ID are displayed. Displaying the tutorial The tutorial guides you through the first steps in operating the testo Smart App. Click on Select Help and Information. ... -
Page 22: Application Menus
8 Controls via testo Smart App Application menus Selecting an application menu Click on A selection of menus for various applications is displayed. Select the required application. Your selected application is displayed. Setting favourites Click on A selection of menus for various applications is displayed. -
Page 23: Making Measuring Instrument Settings
8 Controls via testo Smart App Making measuring instrument settings The measuring instrument is connected to the testo Smart App. Click on The main menu opens. Click on Sensors. Sensors menu opens. Click on the required measuring instrument. - Page 24 8 Controls via testo Smart App Click on the blue text under a setting heading to activate or disable settings or to open an input window to enter a specific value or select a unit. For details on the settings options, see the following sub-sections.
-
Page 25: Configuring The Measuring Instrument Menu
8 Controls via testo Smart App Configuring the measuring instrument menu The testo Smart App can be used to set which settings menus should be available or hidden on the measuring instrument itself. Settings tab in the Sensors menu is open. -
Page 26: Setting Auto Off
8 Controls via testo Smart App Deactivate the checkboxes for the measuring instrument menus that are no longer to be displayed on the measuring instrument itself. The menus belonging to the deactivated entries will no longer be... -
Page 27: Setting The Correction Factor
For example: If 20% of the area is covered, the correction factor must be set to 0.8 (80% free space). The correction factor can only be set via the testo Smart App and not directly on the measuring instrument. Settings tab is open. -
Page 28: Display Of The Readings
8 Controls via testo Smart App The changes are transferred to the measuring instrument and synchronization with the app is confirmed on the measuring instrument via “SYNC DONE”. Display of the readings The available readings can be displayed in different views. -
Page 29: Exporting Readings
8 Controls via testo Smart App Exporting readings Export Report Delete Click on Select Memory. Click on Select measurement. -
Page 30: Excel (Csv) Export
Create PDF with all readings is only possible up to 30 pages, due to the resulting file size and number of pages. In the testo DataControl software, however, PDF reports can be created for all measurements without any restrictions. ... -
Page 31: Maintaining The Product
9 Maintaining the product Maintaining the product Inserting / changing batteries The instrument is switched off. Open the battery compartment (on the back of the instrument) via the snap lock. Insert or replace batteries (3 x AA batteries). + - + Observe the polarity! Close the battery compartment. -
Page 32: Technical Data For Testo 417
10 Technical data for testo 417 Technical data for testo 417 Adjustment conditions for flow probes: Adjustment in free jet Ø 350 mm, reference pressure 1013 hPa, based on testo reference Laser Doppler Anemometer (LDA). Feature Value Measurement parameters m/s, fpm °C, °F... -
Page 33: Tips And Assistance
Display responds Ambient temperature is Increase ambient sluggishly very low temperature Display: ---- Sensor error Please contact your dealer or Testo Customer Service. Display: OOOO Permissible measuring Keep within the range has been permissible measuring exceeded range Display: UUUU... -
Page 34: Accessories And Spare Parts
Bluetooth connection. If we have not been able to answer your question: please contact your local dealer or Testo Customer Service. See the back of this document or the www.testo.com/service-contact web page for contact details. Accessories and spare parts Description Order no. - Page 35 Testo SE & Co. KGaA Celsiusstr. 2 79822 Titisee-Neustadt Germany Phone: +49 (0)7653 681-0 E-mail: info@testo.de www.testo.com 0970 9417 en 01 - 10.2022...
Need help?
Do you have a question about the 417 and is the answer not in the manual?
Questions and answers