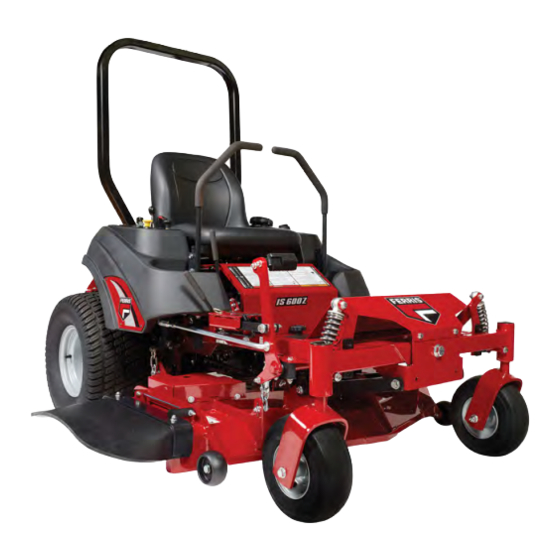
Do you have a question about the IS600Z Series and is the answer not in the manual?
Questions and answers
John Denning
May 4, 2025
My mower drive will not engage to go forward or backwards. My two hydraulic cups r full. My cutting blades work just fine all of my drive belts r on . Was just driving along cutting and it just stopped moving. Mower only has 37 hrs on it . 48 inch cut ferris is600 is there something else that controls the movement of the mower.
1 comments:
Mr. Anderson
May 17, 2025
Possible causes for the drive not engaging on a Ferris IS600Z Series mower include:
- Drive belt slipping - Brake not fully released - Mower drive belt broken - Electrical wiring damage - Battery voltage too low - Pulleys or belt greasy or oily - Tension too loose - Belt stretched or worn
Each issue should be inspected and resolved according to its specific remedy, such as replacing belts, adjusting tension, recharging the battery, or repairing damaged wiring.
This answer is automatically generated
Bobby
March 18, 2025
Where is the solenoid in IS600z mower? I need to identify the part number and replace the failed one. Thanks.
1 comments:
Mr. Anderson
May 14, 2025
The exact location of the solenoid on the Ferris IS600Z mower is not specified in the provided information. However, it is identified as part number 1724815, a 4-pole 12-volt DC solenoid, and should be located using the appropriate parts diagram for the model.
Table of Contents: Seat Adjustment............. 35 Ground Speed Control Lever Adjustment...... 35 General Information.............. 3 Speed Balancing Adjustment......... 35 Identifying Your Unit ............3 Checking Tire Pressures..........36 Operator Safety..............3 Cutting Height Adjustment..........36 Safety Alert Symbol and Signal Words......3 Foot Pedal Adjustment...........
Your unit may vary from the images displayed. LEFT and RIGHT are as seen from the operator's PRODUCT REFERENCE DATA position. Unit Model Number: Ferris is a registered trademark of Briggs & Stratton. Unit Serial Number: Mower Deck Model Number (if Identifying Your Unit applicable):...
Read the Manual CAUTION indicates a hazard which, if not avoided, could result in minor or moderate injury. NOTICE indicates information considered important but not hazard-related. California Proposition 65 WARNING This product can expose you to chemicals including gasoline engine exhaust, which is known to the State of The operator’s manual contains important safety information California to cause cancer and carbon monoxide, which you need to be aware of BEFORE you operate your unit as...
Page 5
operate on a slope greater than 15 degrees (a 5.4 foot rise attempt to alter or bypass the system. See your dealer over a 20 foot length). immediately if the system does not pass all the safety interlock system tests found in this manual. Avoid turning down slopes;...
Give yourself a minimum of two mower widths of clearance exposure in an enclosed area can result in serious injury or around these hazards and hand-trim with a walk behind death. mower or string trimmer. Wheels dropping over retaining Slope Identification Guide walls, edges, ditches, embankments, or into water can cause rollovers, which may result in serious injury, death, or drowning. ...
Safety Rules and Information • Slow down and use extra care on hillsides. Be sure to travel in the recommended direction on hillsides. Turf Training conditions can affect the machines stability. Use caution when operating near drop-offs. • Read, understand, and follow all instructions in the manual and on the unit before starting.
Page 8
• Avoid starting, stopping, or turning on a slope. Do NOT WARNING make sudden changes in speed or direction, which could It is a violation of California Public Resource Code, Section cause the mower to rollover. 4442, to use or operate the engine on any forest-covered, •...
Page 9
Service and Maintenance wire. Wait for all movement to stop before adjusting, cleaning or repairing. To avoid personal injury or property damage, use extreme • Clean grass and debris from cutting units, drives, care in handling gasoline. Gasoline is extremely flammable mufflers, and engine to prevent fires.
Page 10
• Do not exceed the machine weight rating of the roll bar. • Read and follow all of the instructions shown below WARNING regarding the inspection and maintenance of the roll bar Units with hydraulic pumps, hoses, or motors: Hydraulic structure and the seat belt. fluid escaping under pressure may have sufficient force to penetrate skin and cause serious injury.
9) That the ROLL BAR on-product warning labels are still NORTH AMERICAN MODELS WITH RIGID ROLL BARS: on the ROLL BAR and are readable. • If there is any doubt as to the condition of the ROLL BAR, remove the machine from service and contact your dealer for assistance.
Page 12
A. Part Number: 84008252 - Decal, Main Safety A. Part Number: 5106565 - Decal, Main Safety B. Part Number: 84008200 - Decal, Warning B. Part Number: 5061042 - Decal, Warning C. Part Number: 84007896 - Decal, Danger C. Part Number: 7106109 - Decal, Danger D.
Page 13
WARNING DANGER Avoid serious injury or death. Loss of control and roll-over hazard. • Read operator's manual before using this product. • Do NOT operate this machine unless you are trained. Operating on slopes can be hazardous and cause loss •...
Page 14
WARNING WARNING Amputation and Pinch Point Hazard. Avoid serious injury or death from roll over. To avoid injury from rotating parts, stay • Do not jump off if mower tips. clear of parts and keep all shields and • Read and follow all operating instructions guards in place.
Page 15
5106565 - Decal, Main Safety Warning: Read and understand the Operator’s Manual before using this unit. Know the location and function Safety alert triangle. of all controls. Do not operate this machine unless you are trained. Warning: Consult technical literature before performing technical repairs WARNING or maintenance.
Page 16
Battery Safety Decal *This limit was determined per International Standard ISO 5395-3:2013, Section 4.6 and is based on the ISO 5395-3 Stability Test procedure described in Annex A. The 15 degree “limit of stability” is equal to 60% of the angle at which machine lift-off occurred in static tests. Actual dynamic stability may vary depending on operating conditions.
2.) Crushing Hazard, Mower: (1.) Park machine on flat level ground and engage the parking brake; (2.) Stop the engine and remove the ignition key; (3.) Properly jack the machine and secure with jack stands before working under the machine. Safety Interlock System This unit is equipped with safety interlock switches.
Zero-Turn Rider Controls Cutting Height Storage Hole for Deck Lift Lock Adjustment Pin Cutting Height Lever Adjustment Pin A. Deck Lift Pedal B. Cutting Height Adjustment Pin C. Deck Lift Lock Lever D. Parking Brake Parking Brake: Pull the parking brake lever up E.
Removable Floor Plate: The floor plate can be removed for easy access to the mower deck. To remove the plate, remove the retainer hardware and tilt the floor pan up and then remove from the unit. Reverse the process for re-installation. Transmission Oil Fill: Transmission oil is added through the hydraulic oil tanks.
"C" - Time Display - This is the number of hours that are recorded. PTO (Power Take Off) Switch: The PTO switch The default display of the hour meter is engine hours. The engages and disengages the mower blades. Pull UP on the mode icon will display a "E"...
1. While sitting in the operator's seat, engage the parking WARNING brake, make sure the PTO switch is disengaged, and • Never allow passengers to ride on the unit. the ground speed control levers are locked in the neutral • Before leaving the operator’s position for any reason, position.
Page 22
You must release the parking brake prior to moving the control levers inward. Smooth Travel The ground speed control levers of the zero-turn riding mower are responsive. The BEST method of handling the ground speed control levers is in three steps — as shown in Figure 11. Gradually move both ground speed control levers —...
Your zero-turn riding mower's unique ability to turn in place While traveling forward allow one ground speed control lever allows you to turn around at the end of a cutting row rather to gradually return back toward neutral. Repeat several times. than having to stop and Y-turn before starting a new row.
Page 24
Height of Grass Often cutting height is a matter of personal preference. Typically, you should mow the grass when it is between three and five inches high. The proper cutting height range for a specific lawn will depend upon several factors, including the type of grass, the amount of rainfall, the prevailing temperature, and the lawn’s overall condition.
Mulching Mulching consists of a mower deck which cuts and re-cuts clippings into tiny particles and which then blows them down INTO the lawn. These tiny particles decompose rapidly into by-products your lawn can use. UNDER PROPER CONDITIONS, your mulching mower will virtually eliminate noticeable clippings on the lawn surface.
rear wheels on the transmission cradle (B). There is To lower the roll bar: one transmission release lever on each transmission. 1. Pull the hair pin clips (A, Figure 22) out of the retainer The transmission release levers open and close the pins (B).
safe place. Be sure the spark plug openings are protected from foreign objects with a suitable cover. • If the unit can’t be stored on a reasonably level surface, chock the wheels. • Clean all grass and dirt from the mower. Long Term Storage (Longer Than 30 Days) Before you store your unit for the off-season, read the Fuel and Maintenance instructions in the OPERATOR...
Service and Maintenance Safety 5. See engine operator's manual and follow all instructions for preparing engine after storage. 6. Check crankcase oil level and add proper oil if necessary. WARNING If any condensation has developed during storage, drain Amputation and crushing hazard crankcase oil and refill.
Replacing the Fuel Filter WARNING Fuel and its vapors are extremely flammable and explosive. Fire or explosion can cause severe burns or death. Do NOT remove the fuel filter when the engine is hot, as spilled gasoline may ignite. Do NOT spread hose clamps further than necessary.
The maximum air pressure for cleaning purposes must be below 205 kPa (30 psi). The maximum water pressure for cleaning purposes must be below 275 kPa (40 psi). Engine Maintenance For engine maintenance schedules and procedures, please refer to the engine operator's manual. Containing Spilled Fluids and Proper Disposal of Waste Make sure that fluids are contained when performing...
• If your unit has hydraulic hoses that connect to the top of the transmissions then the port is located on the side of the transmission. See Figure 28 for a reference to the port location. 7. Using a hex bit swivel socket or a modified allen wrench remove the top port plug from the transmissions. ...
6. Repeat the process detailed above but with the unit's drive wheels on the ground. The procedure should be performed in an area free of any objects or bystanders. It may be necessary to repeat the process detailed above until all the air is completely purged from the system. When the transaxles/transmissions operate at normal noise levels and move smoothly forward and reverse at normal speeds, then the transaxles/transmissions are considered purged.
Lubricating the Front Casters Interval: Front caster wheel axles (A, Figure 32) - Every 25 hours. Interval: Front caster yoke axles - Yearly. 1. Remove the 1/4-28 bolt (B, Figure 32) screwed into the caster and install a 1/4-28 grease fitting. 2.
Page 34
7. The mower blade should have a maximum of 1/64" (0,40 • More than .5" (12,7 mm) of the mower blade metal mm) cutting edge (B) or less. has been removed from previous sharpening or wear (A). • The air lifts are excessively eroded (B) and the notch CAUTION (C) is .25"...
Loosen the mount bolts (A, Figure 39) and pivot the control lever(s) (C) to align with each other. To Adjust the Control Lever Placement Loosen the jam nuts and adjust the placement bolt (B) in or 2. Wedge a wooden block (D) between the mower blade out to properly adjust the control lever end spacing.
4. Slowly release the deck lift foot pedal until it comes to rest against the stationary pin (E) in the 1-1/2” (3,37 cm) WARNING cutting height hole. Unsafe Operation Hazard. 5. Place the cutting height adjustment pin in the storage DO NOT adjust the unit for a faster overall speed forward or hole (F). ...
4. Reinstall the foot pedal on the pedal mount tab in the Determining if Adjustment is Necessary: If the unit proper orientation as shown in Figure 42. "creeps" while the ground speed control levers are locked in the NEUTRAL LOCKOUT position, then it may be necessary Floor Pan Removal &...
3. Position the set collar along the neutral return rod until it contacts and very lightly compresses the neutral return spring (C). 4. Move the ground speed control levers into the operating position, pull rearward, and release. 5. Move the ground speed control levers out towards the NEUTRAL LOCKOUT position.
3. If the measurements for the rods are equal, no further adjustment is required. If the measurements are not equal (greater than 1/8" (3.17 mm) difference), adjustment is required, continue with Adjusting the Deck Lift Rod Timing. Adjusting the Deck Lift Rod Timing 4.
7. Measure the rear tip (A) of the blade from the cutting edge to the ground. 8. Repeat the process on the other side of the machine. • the front measurements should equal 4" (10,2 cm). • the rear measurements should equal 4-1/4" (10,8 cm) If the measurements do not equal the measurements as listed above, adjust the deck leveling.
Mower Deck Drive Belt Replacement NOTICE To avoid damaging belt, do not pry over WARNING pulleys. Use extreme caution when rotating the idler arm with the breaker bar, due to the increased tension in the spring 1. Park the unit on a smooth level surface such as a as the idler arm is being rotated.
Spring Length 52" 11" (27,9 cm) 14. Measure the coil-to-coil length (A, Figure 55 & 56) of the deck belt tensioning spring (B). The measurement should equal the measurement as indicated in the chart. If not, continue with step #15. • 44" Mower Deck 1.
11. Reinstall the PTO belt. See Mower Drive Belt 5. Reinstall the rear drive tires. Torque the lug bolts to 85-95 Replacement for instructions. ft/lbs. (115-129 Nm). Remove the jackstands from under the machine. Rear Suspension Adjustment NOTE: Spanner wrench is located under the seat on the The shock assembly can be adjusted in two ways to allow the right-hand side of the machine. ...
If there is any doubt about the cause of the problem, see Ground speed control levers not in Move ground speed control levers to your authorized Ferris servicing dealer. If you need to replace "NEUTRAL" position. the "NEUTRAL" position. the battery, follow the steps under Cleaning the Battery and Out of fuel.
Problem: Engine starts hard or runs poorly. Problem: Mower will not raise. Cause Remedy Lift linkage not properly attached or See authorized dealer. damaged. Fuel mixture too rich. Clean air filter. Check choke adjustment. Problem: Engine stalls easily with mower engaged. Spark plug(s) faulty, fouled, or Clean and gap, or replace.
Problem: Streaking Problem: Uneven Cutting Not overlapping enough when When turning your effective cutting Blades are installed incorrectly. Reinstall the blades correctly. turning. width decreases–overlap more when Tires are not properly inflated. Check and inflate the tires. turning. Problem: Stringers Problem: Scalping Stringers are sparse patches of uncut grass left behind the mower.
Page 47
Briggs & Stratton® CXi 44T977 Reverse (Models with 44" Mower 0-4 MPH (0-6,4 km/h) Decks) Electrical System 12 volt, 16 amp. alternator; Battery: Reverse (Models with 48" Mower 0-5 MPH (0-8 km/h) 350 CCA Decks) CHASSIS Reverse (Models with 52" Mower 0-5 MPH (0-8 km/h) Decks) Fuel Tank Capacity...
Unless required under Australian Consumer Law, Ferris shall not be liable under this Warranty to the Customer or any other person in connection with this Warranty, for consequential, direct or indirect damages, loss or costs incurred or suffered by the Customer or any other person;...
Page 49
ABOUT YOUR WARRANTY Warranty service is available only through Ferris Authorized Service Dealers. This warranty only covers defects in materials or workmanship. It does not cover damage caused by improper use or abuse, improper maintenance or repair, normal wear and tear, or stale or unapproved fuel.
Need help?
Do you have a question about the IS600Z Series and is the answer not in the manual?
Questions and answers
My mower drive will not engage to go forward or backwards. My two hydraulic cups r full. My cutting blades work just fine all of my drive belts r on . Was just driving along cutting and it just stopped moving. Mower only has 37 hrs on it . 48 inch cut ferris is600 is there something else that controls the movement of the mower.
Possible causes for the drive not engaging on a Ferris IS600Z Series mower include:
- Drive belt slipping
- Brake not fully released
- Mower drive belt broken
- Electrical wiring damage
- Battery voltage too low
- Pulleys or belt greasy or oily
- Tension too loose
- Belt stretched or worn
Each issue should be inspected and resolved according to its specific remedy, such as replacing belts, adjusting tension, recharging the battery, or repairing damaged wiring.
This answer is automatically generated
Where is the solenoid in IS600z mower? I need to identify the part number and replace the failed one. Thanks.
The exact location of the solenoid on the Ferris IS600Z mower is not specified in the provided information. However, it is identified as part number 1724815, a 4-pole 12-volt DC solenoid, and should be located using the appropriate parts diagram for the model.
This answer is automatically generated