Table of Contents
Advertisement
Advertisement
Table of Contents
Troubleshooting

Related Manuals for Ferris IS600ZB2544


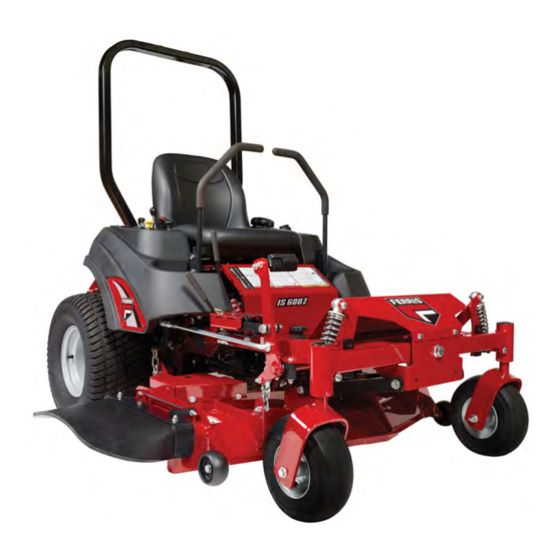
Summary of Contents for Ferris IS600ZB2544
-
Page 2: Table Of Contents
Foot Pedal Adjustment...........28 Table of Contents: Floor Pan Removal & Installation........29 Products Covered by This Manual........3 Neutral Adjustment............29 Product Identification Tag............3 Return-to-Neutral Adjustment.........29 Operator Safety..............3 Neutral Lockout Adjustment..........30 Operating Safely...............3 Parking Brake Adjustment..........30 Slope Identification Guide..........6 Deck Lift Rod Timing Adjustment ........31 Safety Rules and Information...........6 Deck Leveling Adjustment..........32 Safety Decals..............10... -
Page 3: Products Covered By This Manual
Zero Turn Mower. We’re pleased that you’ve placed your Unit Model Number: confidence in the Ferris brand. When operated and maintained Unit Serial Number: according to the manuals, your Ferris product will provide many Mower Deck Model Number (if years of dependable service. applicable):... - Page 4 Do not operate this machine unless you have been trained. Slope Operation Reading and understanding this operator’s manual is a way to train yourself. Power equipment is only as safe as the operator. If it is misused, or not properly maintained, it can be dangerous! Remember, you are responsible for your safety and that of those around you.
- Page 5 Moving Parts behind mower or string trimmer. Wheels dropping over retaining walls, edges, ditches, embankments, or into water can cause rollovers, which may result in serious injury, death, or drowning. Overhead Obstacles This equipment has many moving parts that can injure you or someone else.
-
Page 6: Slope Identification Guide
Slope Identification Guide Safety Rules and Information Training • Read, understand, and follow all instructions in the manual and on the unit before starting. If the operator(s) or mechanic(s) can not read English it is the owner’s responsibility to explain this material to them. •... - Page 7 • Be sure of your footing while using pedestrian controlled equipment, especially when backing up. Walk, don’t run. WARNING Reduced footing could cause slipping. It is a violation of California Public Resource Code, Section • Slow down and use extra care on hillsides. Be sure to travel 4442, to use or operate the engine on any forest-covered, in the recommended direction on hillsides.
- Page 8 • Look for the relevant Emissions Durability Period and Air • Avoid starting, stopping, or turning on a slope. If tires lose Index information on the engine emissions label. traction (i.e. machine stops forward motion on a slope), disengage the blade(s) (PTO) and drive slow off the slope. Service and Maintenance •...
- Page 9 • Never tamper with safety devices. Check their proper • WARNING: Stored energy device. Improper release of operation regularly. springs can result in serious personal injury. Springs should be removed by an authorized technician. • Disengage drives, lower implement, set parking brake, stop engine and remove key or disconnect spark plug wire.
-
Page 10: Safety Decals
2) Make sure there isn’t any missing, damaged, or loose • BEFORE EACH USE – Conduct the following mounting hardware. inspections/maintenance of the seat belt and retraction mechanism: 3) Make sure the ROLL BAR has been correctly and 1) Check for dirt or debris in the retraction mechanism. If completely installed. -
Page 11: Safety Icons
Safety Icons Part Number: 5103184 - Decal, Warning Part Number: 7101665 - Decal, Danger Callout Description Alert Read the Manual Amputation - Rotating Parts Part Number: 5100935 - Decal, Part Number: 5100405 - Decal, Warning & Caution, Roll Bar Warning, ROPS Thrown Objects Fire Hazard Amputation - Hand in Blade... -
Page 12: Safety Alert Symbol And Signal Words
2.) Crushing Hazard, Mower: (1.) Engage the parking brake; (2.) Stop the engine and remove the ignition key; (3.) Properly WARNING jack the machine and secure with jack stands before working If the unit does not pass a safety test, do not operate it. See under the machine. - Page 13 Deck Lift Pedal, Cutting Height Adjustment Pin & Deck Lift Lock Lever: These control the cutting height of the mower deck. Depress the deck lift pedal (A, Figure 6) until it locks into the 4-1/2” (11,4 cm) position. Place the adjustment pin (B) in the desired cutting height and release the lift lock lever (C).
-
Page 14: Instrument Control Panel
the retainer hardware and tilt the floor pan up and then remove from the machine. Reverse the process for re-installation. PTO (Power Take Off) Switch: The PTO switch engages and disengages the mower blades. Pull UP on the switch to Transmission Oil Fill: Transmission oil is added through the engage, and push DOWN to disengage. -
Page 15: Operation
To begin recording PTO hours, pull the PTO switch up to engage the PTO clutch. The unit's engine must be running. The mode WARNING icon will display a "P" and the hour glass icon will flash. Do NOT load this zero-turn rider on a trailer or truck using two While recording PTO hours, the hour meter also records engine separate ramps. -
Page 16: Stopping The Rider
a minute before engaging the PTO switch or driving the rider. 5. After warming the engine always operate the unit at FULL throttle when mowing. In the event of an emergency the engine can be stopped by simply turning the ignition switch to STOP. Use this method only in emergency situations. - Page 17 Adjustment in the Adjustments section near the back of this manual. Reverse Travel Practice To turn in place, “Zero Turn,” gradually move one ground speed control lever forward from neutral and one lever back from neutral simultaneously. Repeat several times. NOTE: Changing the amount each lever is pulled—forward or LOOK DOWN &...
-
Page 18: Mowing
As you become more familiar and experienced with operating the Zero Turn rider, you will learn more maneuvers that will make your mowing time easier and more enjoyable. Remember, the more you practice, the better your control of the Zero Turn will be! Mowing 1. - Page 19 • Avoid mowing after rain or even heavy dew, and never The remainder of the mowing should be done in the opposite mulch when the grass is wet (moist grass does not mulch direction so that the clippings are dispersed OUT onto the area well, and clumps beneath the mower deck).
-
Page 20: Pushing The Rider By Hand
clippings which decompose properly (much more quickly than Attaching a Trailer longer clippings). The ideal cutting height will vary with climate, The maximum weight of a towed trailer should be less than 200 time of year, and quality of your lawn. We recommend that you lbs (91kg). -
Page 21: Maintenance Schedule
• Keep the unit in an area away from where children may 1. Remove any blocks from under the unit. come into contact with it. If there’s any chance of 2. Install the battery if it was removed. unauthorized use, remove the spark plug (s) and put in a 3. -
Page 22: Maintenance Procedures
ENGINE MAINTENANCE Check/Replace Spark Plugs Check/Replace Fuel Filter *More often in hot (over 85°F, 30°C) weather or dusty operating conditions. **If equipped, replace if damaged. Maintenance Procedures Service and Maintenance Safety WARNING Amputation and crushing hazard Specific steps must be taken in order to perform service and maintenance procedures safely. -
Page 23: Check Engine Oil Level
7. Reconnect the negative battery cable when finished. Engine Maintenance For engine maintenance schedules and procedures, please Check Engine Oil Level refer to the engine operator's manual. Interval: Before Each Use Inspect Muffler and Spark Arrester Refer to the engine owners manual for dipstick and oil fill Inspect the muffler for cracks, corrosion, or other damage. -
Page 24: Transmission Oil Filter Change
3. Before removing the tank caps (C), make sure the area 7. Remove the transmission expansion tank cap and fill with around the tank cap and fill neck of the tank is free of dust, oil until oil appears at the bottom of the transmission’s top dirt, or other debris. -
Page 25: Lubrication
Lubrication Lubricate the unit at the locations shown in figures 25, 26, and 27 as well as the following lubrication points. Grease Front caster wheel axles & yokes Transmission cradle pivots Deck lift pivot blocks Mower deck spindles Mower deck idler arm Use grease fittings when present. -
Page 26: Servicing The Mower Blades
4. Repeat the process for the other side of the machine. 1. Remove the mower blade from the unit. See Removing the Servicing the Mower Blades Mower Blades. 2. Inspect the mower blade (Figures 30 and 31). Discard the mower blade if it has any of the following conditions: Removing the Mower Blades •... -
Page 27: Seat Adjustment
3. Keep the original bevel (A, Figure 32) when grinding. DO NOT change the mower blade bevel. 4. The mower blade should have a maximum of 1/64" (0,40 mm) cutting edge (B) or less. Balancing the Mower Blades CAUTION Thrown objects hazard An unbalanced mower blade can create excessive vibration and damage the unit, or cause mower blade failure resulting in thrown debris. -
Page 28: Speed Balancing Adjustment
WARNING DO NOT adjust the tractor for a faster overall speed forward or reverse than it was designed for. Checking Tire Pressures Tire pressure should be checked periodically, and maintained at the levels shown in the Specifications chart. Note that these pressures may differ slightly from the "Max Inflation"... -
Page 29: Floor Pan Removal & Installation
Neutral Adjustment 1. Remove the foot pedal (A, Figure 39) from the pedal mount The neutral system for this mower consists of two neutral linkage tab (B). rods and a pivot that connects the ground speed control lever to the transmission. The lower rod that connects the transmission to the pivot is factory preset and should not be changed for neutral adjustment purposes. -
Page 30: Neutral Lockout Adjustment
1. Park the unit on a flat, level surface such as a concrete WARNING floor. Disengage the PTO, engage the parking brake, turn To avoid serious injury, perform adjustments only with engine the ignition switch to OFF, and remove the ignition key. stopped, key removed, and tractor parked on level ground. -
Page 31: Deck Lift Rod Timing Adjustment
3. If the measurements for the rods are equal, no further adjustment is required. If the measurements are not equal (greater than 1/8" (3.17 mm) difference), adjustment is required, continue with Adjusting the Deck Lift Rod Timing. Adjusting the Deck Lift Rod Timing 4. -
Page 32: Deck Leveling Adjustment
6. Measure the front tip (A, Figure 48) of the blade from the cutting edge to the ground. 7. Measure the rear tip (A) of the blade from the cutting edge to the ground. 8. Repeat the process on the other side of the machine. •... -
Page 33: Mower Deck Drive Belt Replacement
10. Repeat the process for the other side of the unit. Mower Deck Drive Belt Replacement WARNING Use extreme caution when rotating the idler arm with the NOTICE To avoid damaging belt, do not pry over pulleys. breaker bar, due to the increased tension in the spring as the idler arm is being rotated. -
Page 34: Transmission Drive Belt Replacement
Spring Length 52" 11" (27,9 cm) 14. Measure the coil-to-coil length (A, Figure 52 & 53) of the deck belt tensioning spring (B). The measurement should equal the measurement as indicated in the chart. If not, continue with step #15. •... -
Page 35: Rear Suspension Adjustment
NOTE: Spanner wrench is located under the seat on the Rear Suspension Adjustment right-hand side of the machine. The shock assembly can be adjusted in two ways to allow the operator to customize the ride according to operator’s weight To Adjust the Upper Mounting Position: and/or operating conditions. -
Page 36: Battery Service
1. Be aware of all the safety precautions you should observe during the charging operation. If you are unfamiliar with the use of a battery charger and hydrometer, have the battery serviced by your dealer. 2. Add distilled water sufficient to cover the plate (fill to the proper level near the end of the charge). -
Page 37: Troubleshooting
remove the other end of the same cable from the booster battery. 11. Remove the other cable by disconnecting at the discharged battery first and then disconnect the opposite end from the booster battery. 12. Discard the damp cloths that were placed over the battery vent caps. - Page 38 Problem: Engine will not turn over or start. Problem: Rider drive belt slips. PTO (electric clutch) switch in ON Place in OFF position. Cause Remedy position. Pulleys or belt is greasy or oily. Clean as required. Ground speed control levers not in Move ground speed control levers to Tension too loose.
-
Page 39: Troubleshooting Common Cutting Problems
Problem: Mower does not engage. Problem: Stepped Cutting Electrical wiring damage. Locate and repair damaged wire. Deck is not leveled correctly. Level the deck correctly. Battery voltage too low. Recharge battery and check alternator. Tires are not properly inflated. Check and inflate the tires. See Battery Maintenance. -
Page 40: Warranty
18.5 HP Kawasaki Models with 48" Mower Decks Model FS600V-DS00-S Overall Length 80" (203 cm) Electrical System 12 volt, 15 amp charging coil; Battery: Overall Width (with discharge chute 63" (160 cm) 340 cca down) Overall Width (with discharge chute 51"... - Page 41 Briggs & Stratton products. ABOUT YOUR WARRANTY Warranty service is available only through Ferris Authorized Service Dealers. This warranty only covers defects in materials or workmanship. It does not cover damage caused by improper...
- Page 42 Notes...
- Page 43 Notes...
Need help?
Do you have a question about the IS600ZB2544 and is the answer not in the manual?
Questions and answers