
Related Manuals for Garland INT10G12MSFE-5


Summary of Contents for Garland INT10G12MSFE-5
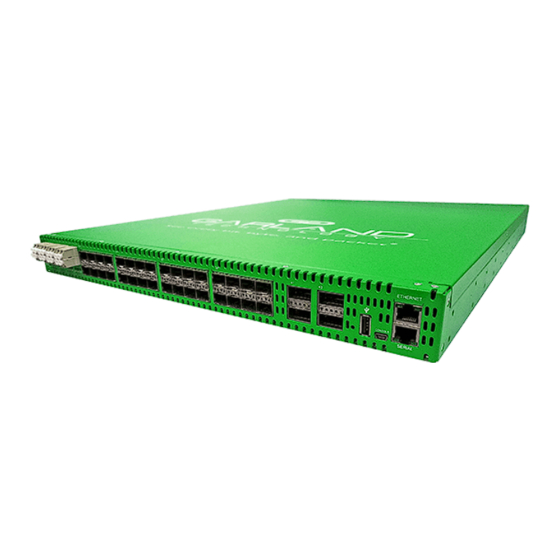
- Page 1 User Guide INT10G12MSFE-5, INT10G12MSFE-6 INT10G12MSFE-7, INT10G12MSFE-8, INT10G12MSFE-9 INT10G12SSFE-5, INT10G12SSFE-6 INT10G12SSFE-7, INT10G12SSFE-8 INT10G12SSFE-9 12/2022 Release Version: 4.22.1...
- Page 2 The Garland Technology trademarks, service marks ("Marks") and other Garland Technology trademarks are the property of Garland Technology, LLC. PacketMAX Series products of marks are trademarks or registered trademarks of Garland Technology, LLC. You are not permitted to use these Marks without the prior written consent of Garland Technology.
-
Page 3: Table Of Contents
Disable Using Uploaded SSL Certificate Date & Time Timezone Manually Set Date & Time NTP No Authentication (Symmetric) NTP Authentication (Symmetric) Syslog Syslog Test SNMP SNMP Test Export Configuration Garland Technology | 716.242.8500 | www.garlandtechnology.com Copyright © 2022 Garland Technology, LLC. All rights reserved. - Page 4 Method 2 Enable/Disable Config Map Disable Config Map Enable Config Map 4. Port Info Port Configuration Set Speed Mode Port Statistics VLAN Tag VLAN Strip Garland Technology | 716.242.8500 | www.garlandtechnology.com Copyright © 2022 Garland Technology, LLC. All rights reserved.
-
Page 5: Dashboard
(GREEN). However, on the faceplate, the Ethernet Interface has LEDs to indicate link and activity while there are no Serial Interface LEDs. Dashboard Panel LED Indications Garland Technology | 716.242.8500 | www.garlandtechnology.com Copyright © 2022 Garland Technology, LLC. All rights reserved. -
Page 6: Packet Broker
* The right up/down arrows for ports 3 through 12 are activity LEDs. These LEDs are N/A in the GUI. * The L/A1 and L/A2 LEDs only indicate link in the GUI. Garland Technology | 716.242.8500 | www.garlandtechnology.com Copyright © 2022 Garland Technology, LLC. All rights reserved. -
Page 7: System
System Info SNMP General Export Configuration Admin Import Configuration Network Settings Software Upgrade Date & Time Reboot Syslog 1. Select System on the Dashboard Menu bar. Garland Technology | 716.242.8500 | www.garlandtechnology.com Copyright © 2022 Garland Technology, LLC. All rights reserved. -
Page 8: System Info
The following configuration options may be displayed, modified, enabled or disabled. Users Groups Authentication Local TACACS Primary TACACS Secondary 1. Select Admin. The Admin Settings panel will displayed. Garland Technology | 716.242.8500 | www.garlandtechnology.com Copyright © 2022 Garland Technology, LLC. All rights reserved. -
Page 9: Users
6. Modify the group privileges by selecting the pencil. 7. Deleted the group by selecting the Red X. If a group has at least one user assigned it cannot be deleted. Garland Technology | 716.242.8500 | www.garlandtechnology.com Copyright © 2022 Garland Technology, LLC. All rights reserved. -
Page 10: Authentication
The TACACS Test option will be active only if TACACS authentication has previously been enabled. 1. Select TACACS Test. The TACACS Test panel will appear. 2. Select Primary. 3. Enter the Username. Garland Technology | 716.242.8500 | www.garlandtechnology.com Copyright © 2022 Garland Technology, LLC. All rights reserved. -
Page 11: Tacacs Ping Test
4. Enter the Password. 5. Select Test. The GUI will display the results of the test, “Authentication Test Successful”. As well as messages for “authentication:Success”, authorization:Success” and “authorization:group:abcdef. Garland Technology | 716.242.8500 | www.garlandtechnology.com Copyright © 2022 Garland Technology, LLC. All rights reserved. -
Page 12: Tacacs Ping Test
If the IPv6 management interface has not been enabled the GUI will display a message “Disabling IPv4 and IPv6, GUI will disconnect. Are you sure? 3. Select OK. Garland Technology | 716.242.8500 | www.garlandtechnology.com Copyright © 2022 Garland Technology, LLC. All rights reserved. -
Page 13: Ipv4 Enable
6. Select the desired key.pem file. 7. Select Open. 8. Select Upload. The GUI message will be displayed, “Please wait. Browser will refresh after 90 seconds”. Garland Technology | 716.242.8500 | www.garlandtechnology.com Copyright © 2022 Garland Technology, LLC. All rights reserved. -
Page 14: Disable Using Uploaded Ssl Certificate
2. Select the desired Timezone using the pull down panel. 3. Select Save. 4. Select Cancel to return to the Date & Time Settings panel. 1. Select Edit Settings. Garland Technology | 716.242.8500 | www.garlandtechnology.com Copyright © 2022 Garland Technology, LLC. All rights reserved. -
Page 15: Manually Set Date & Time
The system allows for an IPv4 and IPv6 management interface to be assigned simultaneously. 1. Select Edit Settings. 2. Select NTP timing. 3. Enter the IPv4 or IPv6 Address. Garland Technology | 716.242.8500 | www.garlandtechnology.com Copyright © 2022 Garland Technology, LLC. All rights reserved. -
Page 16: Syslog
The system supports an IPv4 or IPv6 address for SNMP. If IPv4 is desired, then an IPv4 management interface must be assigned. If IPv6 is desired, then an IPv6 management interface Garland Technology | 716.242.8500 | www.garlandtechnology.com Copyright © 2022 Garland Technology, LLC. All rights reserved. -
Page 17: Snmp Test
This option creates a configuration file (exportCfg.json) that may be used to recover a unit. The exportCfg.json file may be renamed if desired. The exportCfg.json file does not contain Usernames, Passwords, Groups or Network Settings. Garland Technology | 716.242.8500 | www.garlandtechnology.com Copyright © 2022 Garland Technology, LLC. All rights reserved. -
Page 18: Import Configuration
The unit will present an “Are you sure?” message. 3. Select OK. The GUI will display a “rebooting” as well as a “Session timed out. Go to Login screen” message. Garland Technology | 716.242.8500 | www.garlandtechnology.com Copyright © 2022 Garland Technology, LLC. All rights reserved. -
Page 19: Packet Broker
The following configuration options may be displayed, modified, enabled or disabled under the Packet Broker panel. Configuration Maps Load Balance Policy Filter Templates Load Balance Groups Garland Technology | 716.242.8500 | www.garlandtechnology.com Copyright © 2022 Garland Technology, LLC. All rights reserved. -
Page 20: Filter Template
1. Select Filter Templates on the Packet Broker Configurations panel. The Filter Templates panel will be displayed. 2. Select Create Template. The Create New Filter Template panel will be displayed. Garland Technology | 716.242.8500 | www.garlandtechnology.com Copyright © 2022 Garland Technology, LLC. All rights reserved. -
Page 21: Load Balancing Group
Previously created load balancing groups will appear on the Create Config Map panel. 1. Select Load Balancing Groups. The Load Balancing Groups panel will be displayed. 2. Select Create Group. Garland Technology | 716.242.8500 | www.garlandtechnology.com Copyright © 2022 Garland Technology, LLC. All rights reserved. -
Page 22: Load Balancing Policy
3. Select Save to save updates. 4. Select Cancel to disregard changes. Config Map Config maps are unidirectional connections between ingress port(s) to egress port(s) and/or a load balancing group. Garland Technology | 716.242.8500 | www.garlandtechnology.com Copyright © 2022 Garland Technology, LLC. All rights reserved. -
Page 23: Ingress
Ingress panel and release. Ports may be added in any combination. If multiple ports are added, then the traffic from all ingress ports will be aggregated. Figure 1 Ingress Garland Technology | 716.242.8500 | www.garlandtechnology.com Copyright © 2022 Garland Technology, LLC. All rights reserved. -
Page 24: Filter
3. Enter the filter name, optional. If no name is entered the system will automatically apply a name to the filter as follows, iFlt, iFlt(2), iFlt(3) etc. 4. Select Accept once all desired options have been modified. Garland Technology | 716.242.8500 | www.garlandtechnology.com Copyright © 2022 Garland Technology, LLC. All rights reserved. -
Page 25: Egress
100% of the traffic will be sent to each of the separate port(s). Figure 6 Egress Load Balancing Group and Port(s) Garland Technology | 716.242.8500 | www.garlandtechnology.com Copyright © 2022 Garland Technology, LLC. All rights reserved. -
Page 26: Egress Filter
The filters are considered from top to bottom. A filter may be selected and moved up or down depending on priority preference. Figure 8 Port XX Egress Filters Figure 9 Egress Filter System Considerations Garland Technology | 716.242.8500 | www.garlandtechnology.com Copyright © 2022 Garland Technology, LLC. All rights reserved. -
Page 27: Config Map Save
3. Select Cancel to disregard. Modify a Config Map 1. Modify a config map by selecting the Edit icon. Modifications may be made using the create sections previously discussed. Garland Technology | 716.242.8500 | www.garlandtechnology.com Copyright © 2022 Garland Technology, LLC. All rights reserved. -
Page 28: Config Map Statistics
8. Select Clear Counts to clear and refresh the statistics. Delete Config Map 1. Select the Delete in the Delete column for the desired config map(s). Garland Technology | 716.242.8500 | www.garlandtechnology.com Copyright © 2022 Garland Technology, LLC. All rights reserved. -
Page 29: Config Map Priority
2. Select Save to save updates. Method 2 1. Select Set. The Set Priority panel will be displayed. 2. Enter the priority in the Set New Priority panel. Garland Technology | 716.242.8500 | www.garlandtechnology.com Copyright © 2022 Garland Technology, LLC. All rights reserved. -
Page 30: Enable/Disable Config Map
1. Select the red dash for the config map in the Enable column. The red dash will change to a green check. 2. Select Save. Garland Technology | 716.242.8500 | www.garlandtechnology.com Copyright © 2022 Garland Technology, LLC. All rights reserved. -
Page 31: Port Info
SFP Data Link VLAN Tag Set Speed VLAN Strip Speed 1. Select Port Info on the Dashboard menu bar. The Port Configuration panel will be displayed. Garland Technology | 716.242.8500 | www.garlandtechnology.com Copyright © 2022 Garland Technology, LLC. All rights reserved. -
Page 32: Port Configuration
Transmit Discards 1. Select Port Statistics on the Port Configuration panel. The Port Statistics panel will be displayed. 2. Update the statistics by selecting Refresh. Garland Technology | 716.242.8500 | www.garlandtechnology.com Copyright © 2022 Garland Technology, LLC. All rights reserved. -
Page 33: Vlan Tag
1. Select the VLAN Strip option for the desired port. 2. Select Save. 3. Disable by deselecting the VLAN Strip option for the desired port. 4. Select Save. Garland Technology | 716.242.8500 | www.garlandtechnology.com Copyright © 2022 Garland Technology, LLC. All rights reserved.
Need help?
Do you have a question about the INT10G12MSFE-5 and is the answer not in the manual?
Questions and answers