
Related Manuals for Elko Smart


Summary of Contents for Elko Smart
- Page 1 ELKO Smart System User Guide Commissioning instructions for the ELKO Smart system, devices and app. 11/2022 www.elko.no...
- Page 2 Legal Information The ELKO brand and any trademarks of ELKO AS and its subsidiaries referred to in this guide are the property of ELKO AS or its subsidiaries. All other brands may be trademarks of their respective owners. This guide and its content are protected under applicable copyright laws and furnished for informational use only.
-
Page 3: Table Of Contents
Moments and Automations ..............7 The ELKO Smart app..................7 ELKO Smart app account ..............7 Homes ....................8 Access levels in the app ................8 System requirements for the ELKO Smart app ........10 Supported devices..................10 Smart hub ..................10 Light switches..................11 Dimmers ....................12 Shutter controls ..................13 Connected sockets ................14... - Page 4 Alarms and Notifications................40 Resetting the ELKO SmartHUB ..............41 Resetting ELKO Smart devices..............41 Restoring device factory defaults using the ELKO Smart app .......42 Checking for device firmware upgrades ............43 Checking a specific device for a firmware upgrade.........43 Checking for any device requiring a firmware upgrade ......43 Additional information for supported devices ........44...
-
Page 5: Safety Information
Safety information Safety information Important information Read these instructions carefully and look at the equipment to become familiar with the device before trying to install, operate, service, or maintain it. The following special messages may appear throughout this manual or on the equipment to warn of potential hazards or to call attention to information that clarifies or simplifies a procedure. -
Page 6: Getting To Know The System
The ELKO SmartHUB (see A) is the center of the system, processing control requests and status reports for connected ELKO Smart devices. With a personal account and the ELKO Smart app on a smartphone (see B), users can control ELKO Smart devices in their home from any location where the Internet is available. -
Page 7: Moments And Automations
The ELKO Smart app The ELKO Smart app is the primary tool for setting up the ELKO Smart system. Use the app to commission the ELKO SmartHUB and devices, organize devices into groups by room, and add user accounts. -
Page 8: Homes
ELKO Smart devices located in another part of the dwelling. An ELKO Smart device can be added to only one Home at a time. Once a device is added, only members of that Home can control the device. - Page 9 Getting to know the system There are 3 access levels in the app: • Home owner NOTE: For each Home, only one Home member can be set as the Home owner. • Administrator • Common member Function Supported Features Home owner Administrators Common members...
-
Page 10: System Requirements For The Elko Smart App
Supported devices A wide range of devices is available for use in the ELKO Smart system. Follow the resource links to access the device user manuals. IMPORTANT: These devices must not be used in safety applications and are only for general residential use. -
Page 11: Light Switches
Control the lights in a room, or automatically switch lights On or Off in View user manual response to a specified condition or event. SmartMove Relay 10A Enjoy the benefits of a smart push-button switch with the added View user manual convenience of an integrated motion sensor. SmartRelay puck 10AX... -
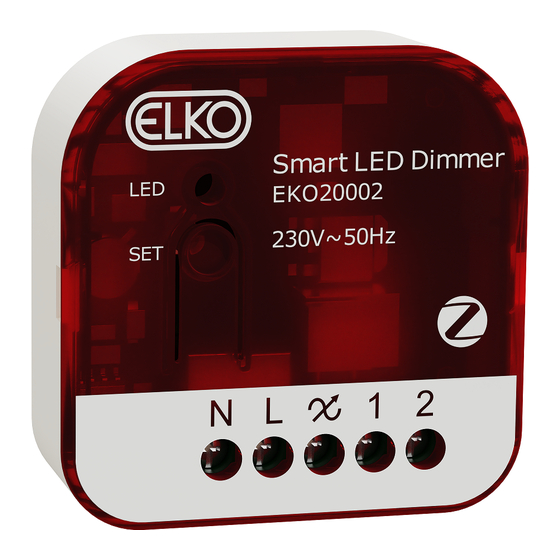
Page 12: Dimmers
Control the lighting level in a room, or automatically set lighting to a desired level in response to a specified condition or event. Room control: Create a group of SmartDim Universal devices for remote control operation without the ELKO Smart app. See Room Control, page... -
Page 13: Shutter Controls
Getting to know the system SmartMove Dim Push Enjoy the benefits of a smart push-button dimmer with the added View user manual convenience of an integrated motion sensor. SmartDim puck Uni Combine the advantages of smart dimmer functionality with ordinary View user manual mechanical push-button switches. -
Page 14: Connected Sockets
View user manual of energy consumption. View user manual SmartSocket Double 16A Consists of a standard and smart outlet. The upper smart socket controls and monitors the plugged-in power. The lower standard socket provides uncontrolled and unmonitored power. SmartSocket Single 16A... -
Page 15: Sensors
Detects when windows or doors are opened or closed and send the View user manual status to the ELKO SmartHUB. SmartSensor PIR Wireless Detects movement and luminance in a room and control ELKO Smart View user manual devices through the ELKO SmartHUB to configure the room for a desired effect. -
Page 16: Cameras
The target temperature and switching times are set in the ELKO App. Smart ZB Thermostat 16 A The Smart ZB Thermostat 16 A is mainly used for electrical heating View user manual applications like electrical underfloor heating and electrical radiators / Device User Guide heating panels. -
Page 17: Support For Battery-Powered Devices
This provides maximum hosting capacity prior to adding the battery-powered devices. ELKO Smart system limits Be aware of the system limits with one hub in system, such as maximum number of supported devices, when commissioning an ELKO Smart system. System component Limits Devices Max. -
Page 18: Commissioning The System
Installing and testing devices Install and test light switches, dimmers, sensors and other devices before using the ELKO Smart app to configure the ELKO Smart system. 1. Follow the instructions in the user manual supplied with each device. (See Supported devices, page 10.) -
Page 19: Wi-Fi Network Requirements
Consider this when deciding where to locate the hub. Wi-Fi network requirements The ELKO Smart system needs a Wi-Fi network with Internet access. The Wi-Fi network router must meet certain requirements for the system to work. Router requirements... -
Page 20: Ap Mode Connection (Wi-Fi)
Commissioning the system 1. (See A) Locate the Ethernet port on the ELKO SmartHUB. 2. Connect an Ethernet cable between the Hub and the router to suit the installation method used for the hub: • (See B) Wall box installation •... -
Page 21: Downloading The Elko Smart App
Commissioning the system Downloading the ELKO Smart app Install the ELKO Smart app on a smartphone to commission and work with the ELKO Smart system and devices. 1. Perform one of the following: – For Apple smartphones: Visit https://apps.apple.com/no/app/elkosmart/ id1488583685?l=nb&ls=1. -
Page 22: Working With Homes
Access levels in the app, page Working with Homes Create a Home, add Rooms to represent the areas with ELKO Smart devices, and add Home members. Adding a Home Add a Home from the Home Management menu in the app. Rooms can also be added during this task. -
Page 23: Adding Home Members
Home settings. See Access levels in the app, page Once ELKO Smart devices are added to the Home, each device can be assigned to one of the Rooms created in this task. Adding Home members Add members to the Home so that they can operate the devices in the Home using their smartphone and the ELKO Smart app. -
Page 24: Commissioning The Hub (Ethernet Mode)
The AP mode is supported in the smartHub. The date code must be 2035 and above when it is moved from out of the box. To update the latest firmware, connect the hub to the Ethernet (see Ethernet mode connection- Smart Hub, page 19). - Page 25 No devices. Please add a device. Add Device Home Automations 3. On the Add device page, tap Add manually (See C). Then select ELKO Hub under the listed devices. NOTE: Do not tap Auto Scan as the ELKO Hub is not visible under Auto Scan.
- Page 26 Commissioning the system 4. Upon selecting ELKO Hub, you will receive option to select the modes of commissioning theELKO Hub . Select AP Mode for commissioning (See D). Cancel Mode Selection Elko Hub Ethernet Mode Use a network cable to connect the device to a router.
-
Page 27: Adding The Hub To The Home
Tap Done to finish. Adding the hub to the Home Add an ELKO SmartHUB to a Home using the ELKO Smart app. 1. Log in to the app. 2. (See A) Select the Home to which the hub will be added. -
Page 28: Switching The Hub Ethernet Connection To Wi-Fi (Optional)
1. In the app, select the Hub to the same Wi-Fi network. NOTE: At this stage, the Ethernet cable should be still connected. 2. (See A) Tap the Settings (gear) icon. Back ELKO Staging Hub ELKO Smart Hub Device Number: 56 PowerTag E 8 Double Socket Outlet PowerTag E 7... -
Page 29: Commissioning Devices
5. Once the Wi-Fi connection is successful, remove the Ethernet cable from the hub. Commissioning devices Add ELKO Smart devices to a Home, assign each device to a Room and configure device settings. Adding a device to the Home Add an ELKO Smart device to a Home using the ELKO Smart app. -
Page 30: Assigning A Device To A Room
PowerTag E 2 PowerTag E Assigning a device to a Room Organize ELKO Smart devices into Rooms to represent their physical location in the home. 1. (See A, B) On the Home page, tap the Menu icon (A), then tap Home Management (B). -
Page 31: Configuring A Device
Save Room Living Room Living Room 20.5 Master Bedroom Add devices Double Socket Outlet (DSO) Master Bedroom Smart Plug Dining Room IRTV Kitchen Second Bedroom Hue white candle 1 Hue ambiance lamp 2 Add New Room Philips RGBW Light 1... -
Page 32: Setting Lux Level For Motion Sensor
Commissioning the system ELKO Smart devices can be configured in various ways, depending on the device type. In the ELKO Smart app, device settings are grouped into the Device Details and Settings pages. 1. In the Home page, tap a device to open the device control page. -
Page 33: Smart Ip Camera Indoor
IMPORTANT: Do not use the shutter while the calibration is in process to avoid any interruption. Smart IP Camera Indoor The IP camera is connected to the system via the network router. To pair the camera with the app, see... -
Page 34: Making Devices Work Together
Making devices work together Moments and Automations You can combine the settings of one or more ELKO Smart devices together to form a Moment or an Automation. A Moment is operated manually by tapping the Moment button (or triggered by voice control where enabled). -
Page 35: Creating An Automation
7. Once all the actions are set, tap Save. Creating an automation Automation allows you to group multiple actions that are usually done together, triggered automatically or at scheduled times. Using the ELKO Smart app, you can create automations based on your needs. To create an automation: 1. - Page 36 Commissioning the system 3. Tap to enter the name of automation (A) and tap Save. TIP: You can choose the cover image that represents your automation by tapping Automation settings Automation settings Cancel Cancel Save Save My Automation Any condition is met Any condition is met (0/10) (0/10)
- Page 37 Commissioning the system 6. In the Add Condition menu, you can do either or all of the following options (C): – When weather changes - Select the various weather settings. – Schedule - Set the time and day. – When device status changes - Select the device and it’s function. Note: You can add one or more conditions using Automation settings Automation settings...
- Page 38 Commissioning the system 9. In the Add task menu, you can do either or all of the following options (F): – Run the device - Select the devices that you want to be triggered. – Moment or Automation - Select the moment which you want to trigger or select the automation that you want to enable or disable.
-
Page 39: Configuring Voice Control
Commissioning the system Configuring voice control Integrate third-party voice control such as Alexa or Google Assistant into the ELKO Smart app for increased functionality. 1. (See A) From the Home page, tap the Menu icon. 2. (See B) Tap More Services. -
Page 40: Additional Information For Commissioning
Additional information for commissioning Additional information for commissioning Alarms and Notifications The ELKO Smart app provides alarms for significant system events that require urgent attention (such as water leakage) and notifications for non-urgent events such as system access and device management. -
Page 41: Resetting The Elko Smarthub
Resetting the ELKO SmartHUB Delete existing settings from an ELKO SmartHUB for commissioning or to remove a hub from the ELKO Smart system. It may also be necessary to restore the firmware in a hub to fix a problem. The reset tool supplied with the hub is required. -
Page 42: Restoring Device Factory Defaults Using The Elko Smart App
Additional information for commissioning Restoring device factory defaults using the ELKO Smart Restore a device to factory default settings in order to solve a problem with a device or remove it from the system for use elsewhere. NOTE: After restoring factory defaults, the device is removed from the system and all configuration settings made to the device will be lost. -
Page 43: Checking For Device Firmware Upgrades
Additional information for commissioning Checking for device firmware upgrades Keep ELKO Smart devices up-to-date with the latest firmware releases. Checking a specific device for a firmware upgrade 1. (See A) Tap the device in the Home page. 2. (See B) Tap the Edit (pencil) icon. -
Page 44: Additional Information For Supported Devices
Additional information for supported devices Additional information for supported devices Socket outlets Power consumption This shows the data about the power consumed in kWh and Watt units. When the device is On for a while, this feature records the power consumed on a particular time dimension. -
Page 45: Pairing To Other Devices
Pairing to other devices Pairing to other devices You can combine compatible devices into a group so that when one device in the group is operated, the other devices also operate. This can be done independently of the Hub and app. NOTE: You can only operate paired devices from the physical buttons on a device and not from the app. -
Page 46: Room Control Network Limits
Pairing to other devices Shutter control devices NOTE: Shutter control devices can only be combined with other shutter control devices. Do not mix shutter and lighting applications. Device name Commercial reference number(s) SmartBlinds push EKO09691, EKO09692, EKO09694, EKO09695 SmartBlinds puck (as a Receiver only) EKO07145 Control devices Device name... -
Page 47: Creating A Room Control Group
Pairing to other devices Creating a Room Control network and adding devices Creating a Room Control group Create Room Control groups by assigning one or more devices as Receivers and Senders. Important information for puck devices: WARNING DANGER DUE TO ELECTRIC SHOCK •... -
Page 48: Removing A Room Control Group
Pairing to other devices 2. Select each device that you want to control (Receiver). Short-press each Receiver device button 3 times. While the Zigbee network is open in Room Control: – connected lighting load blinks On/Off. – connected shutter moves slightly up/down or its slats briefly open/close (based on your selection for the shutter control setting). -
Page 49: Adding A Wireless Switch To A Room Control Network
OPEN state first. In a Room Control network the Wireless Switch works as a Sender but not as a Receiver. NOTE: When the wireless switch is paired to an ELKO SmartHUB, it is automatically set to 2-channel mode. Further setup of the device is done in the ELKO Smart App. - Page 50 Pairing to other devices NOTE: The Wireless Switch cannot be used to create a network. Perform this task to assign device controls to a push button on the Wireless Switch for remote control operation • The devices to be paired to the Wireless Switch must be added to a Room Control network.
-
Page 51: Removing A Wireless Switch From A Room Control Group
Pairing to other devices 3. (See C, D) Short press the push button (C) or (D) that you want to control the devices. For creating bindings between Switches and other device, you must push the up button. This creates a pairing between the Wireless Switch and the compatible devices. -
Page 52: Device Led Behavior
Device LED behavior Device LED behavior Devices have LEDs to indicate their operating status and to confirm actions such as resetting or joining a network. SmartHUB Status LED Indication LED Indication Duration Switching On/Restarting All 3 LEDs display solid white 40 s Connected to router (Wi-Fi) WLAN LED displays solid white... - Page 53 User Action LED Indication Status SmartPlug No action LED displays solid red. SmartPlug power is On. Resetting smart devices Device User Action LED Indication Status Sensors, Pucks, Dimmers, Press the push button 3 times After 10 s, the LED starts The device is in reset mode.
- Page 54 Device LED behavior Head calibration State User action Left LED Centre LED Right LED Duration Start up Insert the batteries Single quick flash Opening the valve Automatic upon Not active Not active Solid until the valve inserting batteries is open OR Twist and hold the cap in + direction...
- Page 55 Device LED behavior Resetting User Action LED Indication Status Press the Setup/Reset button 3 times and After 10 s, the LED starts blinking red. The device is in reset mode. It is reset to the hold it down once for > 10 s. factory settings after 10 seconds.
- Page 56 Device LED behavior Behavior Communication indicator light Occasional loss of communication. Loss of communication with the smartHub. Internal error detected. Smart ZB Thermostat 16 A Pairing the device Status User Interaction Description Pairing in progress The thermostat matrix display flashes " Jn AP"...
- Page 57 Device LED behavior Wi-Fi ® Thermostat 16 A Pairing the device Status User Interaction Description Pairing in progress The thermostat matrix display flashes "JnAP" to indicate joining is initiated when the thermostat O touch button is pressed and held for > 3 s. Successful joining network The thermostat matrix display flashes a green...
-
Page 58: Troubleshooting
Troubleshooting Troubleshooting Find solutions to problems with the ELKO Smart system, devices and configuration settings. For your safety DANGER HAZARD OF ELECTRIC SHOCK, EXPLOSION, OR ARC FLASH Safe electrical installation must be carried out only by qualified electrical personnel. Qualified electrical personnel must prove profound knowledge in the following areas: •... -
Page 59: Sensors
Troubleshooting Wi-Fi devices Symptom Solution The system cannot find a Wi-Fi device when commissioning. Check if your phone is connected to VPN by checking in the phone settings. If this is the case, disconnect the VPN while commissioning the Wi-Fi device. NOTE: Some VPN connections are automatically reconnected after a few minutes if disconnected (for security reasons), so you may need to disconnect it several times, for example if you... -
Page 60: Dimmers
Troubleshooting Dimmers Symptom Solution Dimming up not possible. • Reduce/increase load. • Allow the dimmer module to cool in case of overheating. Switching on not possible. • Allow the dimmer module to cool in case of overheating. • Reduce load. •... -
Page 61: Connected Sockets
Turn the thermostat On and Off. Using the ELKO Smart app FAQ & feedback page Find information about the ELKO Smart app and working with ELKO Smart devices. The FAQ & feedback page provides a list of Frequently Asked Questions (FAQ) and answers, information about using the app, device-specific help, and a way to report issues with the app and the ELKO Smart system. - Page 62 Firmware Upgrade 20.5 What's New How do I know if I am using a 2.4 GHz or 5 GHz Wi-Fi network band? No devices. Please add a device. SMART ZB Thermo... Rate Us Add Device Settings ITRV 2 Feedback Version 9.88.0...
-
Page 63: Glossary
ELKO Smart app, either from within the Home or from any location with an Internet connection. Home: In the ELKO Smart app, a Home defines a group of people, rooms and ELKO Smart devices as a unit. Moment: Operate one or more ELKO Smart devices with a single tap. You can specify multiple devices and actions for a Moment and then trigger those actions manually using the app. - Page 64 Trademarks This guide makes reference to system and brand names that are trademarks of their relevant owners. • Zigbee ® is a registered trademark of the Connectivity Standards Alliance. • Apple ® and App Store ® are brand names or registered trademarks of Apple Inc. •...
- Page 66 ELKO AS Sandstuveien 68 0680 Oslo Norway +47 67 80 73 00 elko@elko.no www.elko.no As standards, specifications, and design change from time to time, please ask for confirmation of the information given in this publication. © 2022 – ELKO AS. All rights reserved.
Need help?
Do you have a question about the Smart and is the answer not in the manual?
Questions and answers