Table of Contents
Advertisement
Available languages
Available languages
Quick Links
EN
Caravan water heater
(CPVB-10)
Technical description,
installation, operation and
maintenance instructions,
warranty conditions
IT
Boiler per caravan
(CPVB-10)
Descrizione tecnica,
istruzioni per montaggio, fun-
zionamento e manutenzione,
condizioni di garanzia
DE
Caravan Boiler
(CPVB-10)
Technische Beschreibung,
Montage-, Betriebs- und
Wartungsanleitung, Gewähr-
leistungsbedingungen
NL
Caravan Boiler
(CPVB-10)
Technische omschrijving,
installatie, bediening en
onderhoud instructies,
garantievoorwaarden
FR
Chauffe-eau de
caravane (CPVB-10)
Description technique,
instructions de montage,
de fonctionnement et
d'entretien, conditions
de garantie
Advertisement
Table of Contents

Related Manuals for fothermo CPVB-10


Summary of Contents for fothermo CPVB-10
- Page 1 Caravan water heater Caravan Boiler Chauffe-eau de caravane (CPVB-10) (CPVB-10) (CPVB-10) Description technique, Technical description, Technische Beschreibung, instructions de montage, installation, operation and Montage-, Betriebs- und de fonctionnement et maintenance instructions, Wartungsanleitung, Gewähr- d’entretien, conditions warranty conditions leistungsbedingungen de garantie...
-
Page 2: Table Of Contents
Table of contents Inhaltsverzeichnis / Table de matières / Contenuto / Inhoudsopgave Specifications Assembly Water connection Drainage Current source Connecting the current source to the boiler Settings – User interface Further information General warnings Safety instructions Further important notes Technical data Assembly Connection to the water supply Maintenance... - Page 3 Paramètres – Interface d’utilisateur Plus de renseignements Avertissements généraux Instructions de sécurité Autres renseignements techniques importants Caractéristiques techniques Montage Raccordement à l’alimentation en eau Entretien Perturbation du fonctionnement Protection environnementale Garantie Specificazioni Montaggio Connessione alla rete idrica Drenaggio Fonte di corrente Collegamento della fonte di corrente al boiler Impostazioni –...
- Page 4 Veuillez lire attentivement ces instructions d’utili- sation avant de procéder au montage et à la mise en service du chauffe-eau ! Contact Kontakt / Contact / Contatto / Contact fothermo System AG Beim Mühlbach 3 89171 Illerkirchberg Germany +49 (0)1520 439 058 9 contact@fothermo.com...
-
Page 5: Specifications
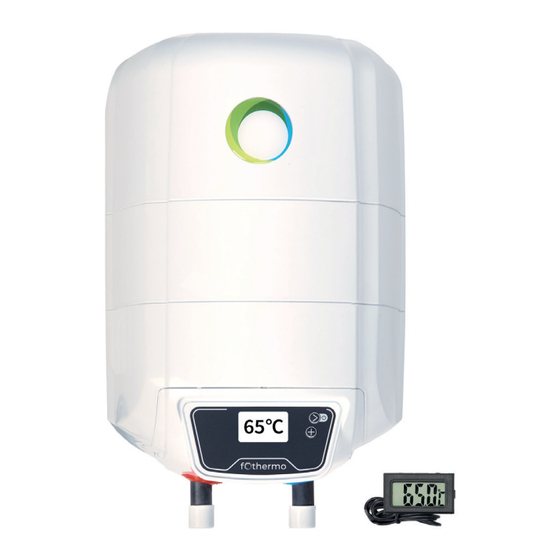
EN Specifications Specifications Unit Value Water Heater Product name CPVB-10 Volume Rated pressure IP Class Gross weight (± 3 %) Max. water temperature °C Integrated MPP tracker Integrated reverse polarity protection Digital display Boiler made of steel with enamel coating... - Page 6 EN Assembly The caravan boiler must be mounted on a solid base plate with four screws. Use suitable screws or other mounting systems for your base plate. Optionally, the boiler can also be mounted vertically on a stable wall. Horizontal vertical installation of the photovoltaic boiler is possible.
-
Page 7: Water Connection
EN Water connection For safety reasons the non-return/overpressure valve supplied must be connected to the cold water inlet of the boiler. The supplied drain plug can be connected to enable draining. This can be done using the T-piece provided as shown in Figure 1. We recommend integrating the caravan boiler into a water system as shown in figure 2. -
Page 8: Current Source
EN Drainage The water in the boiler must not freeze. Frozen • Open the drain plug using the vent key water in the boiler can cause damage or a defect provided. of the appliance. If necessary, the contents of the boiler can be drained via the non-return/overpres- •... -
Page 9: Connecting The Current Source To The Boiler
EN Connecting the current source to the boiler Heating times depending on the input power and source Source Power Temperature increase / hour 100 W 9 °C / h PV module 300 W 27 °C / h 550 W 47 °C / h 12 V (ca. -
Page 10: Settings - User Interface
EN Settings – User interface Briefly pressing the button takes you to the next option page (see figure 1). A long press turns the boiler on or off. Figure 1 To change possible settings on an option page, such as the minimum temperature or the operating mode, briefly press the button (see figure 2). -
Page 11: Further Information
EN Select operating mode Modes Energy source Description 1: PV Home PV module/ The boiler is heated with photovoltaic electricity. This mode External energy should be selected if a PV module is connected or if there is an management external energy management system (e.g. solar charge control- ler with deep discharge protection) that releases the current for the boiler. -
Page 12: Further Important Notes
EN IMPORTANT! Be sure to fill the water heater with vice water, in particular: chloride content up to 250 water before connecting it to the electrical sup- mg/l; electrical conductivity more than 100 µS/cm, ply! Failure to comply with the electrical connec- pH value 6.5 - 8 for hot water tanks with enamelled tion conditions affects the safety of the appliance, water tank. -
Page 13: Connection To The Water Supply
EN must be selected according to the nature of the floor. of the steps to be performed is: Only with the right screws is it possible to safely install the boiler. • Fully open the hot water tap at the furthest point of use. - Page 14 Serial connection will damage the unit! on the climatic conditions: The electrical connection to the hot water boiler is Climatic conditions CPVB-10 made via the connection cable. After completing the electrical connection, be sure to check the func- Sun-poor countries tionality of the device.
-
Page 15: Maintenance
EN OTHER IMPORTANT NOTES tank. The inspection and renewal of the anode are not part of the warranty obligations of the manu- Water leakage facturer and dealer. Regular cleaning of the water The non-return and pressure relief valve can drip tank from accumulated limestone is recommended during normal operation of the water heater due for safe operation. -
Page 16: Environmental Protection
EN Environmental protection • Improper electrical voltage which deviates from the rated voltage This device is marked according to the Waste Elec- trical and Electronic Equipment (WEEE) Directive. • Freezing of water By ensuring that the device is taken to an appro- priate disposal center at the end of its life, you are •... -
Page 17: Spezifikationen
Spezifikationen Spezifikationen Einheit Wert Boiler Produktmodell CPVB-10 Volumen Nenndruck IP-Schutzklasse Gewicht (± 3 %) Max. Wassertemperatur °C Integrierter MPP-Tracker Integrierter Verpolungsschutz Digitales Display Boiler aus Stahl mit Emaillebeschichtung Boilermaße (Länge, Breite, Höhe) 40 x 30 x 33 Min. Einbaumaße (Länge, Breite, Höhe) -
Page 18: Montage
Montage Der Caravan Boiler muss mit vier Schrauben auf einer festen Boden- platte montiert werden. Nutzen Sie dafür für ihre Bodenplatte geeig- nete Schrauben oder andere Halterungssysteme. Optional kann der Boiler auch senkrecht an einer stabilen Wand montiert werden. Waagrechte senkrechte Montage des photovoltaischen Boilers ist möglich. -
Page 19: Wasseranschluss
Wasseranschluss Aus Sicherheitsgründen muss am Kaltwassereingang der Boilers das mitgelieferte Rückschlag-/Überdruckventil an- geschlossen werden. Um eine Entleerung zu ermöglichen, kann der mitgelieferte Entlee- rungsstopfen angeschlossen werden. Dies kann mithilfe des beiliegen- den T-Stücks, wie in Abbildung 1 erfolgen. Die Einbindung des Caravan Boilers in ein Wassersystem empfehlen wir wie in Abbildung 2. -
Page 20: Entleerung
Entleerung Das Wasser im Boiler darf nicht einfrieren. Gefrore- • Unterbrechen Sie die Kaltwasserzufuhr. nes Wasser im Boiler kann zu Schäden oder einem Defekt des Gerätes führen. Bei Bedarf kann der Inhalt • Öffnen Sie mithilfe des beiliegenden Entlüf- des Boilers über das Rückschlag-/Überdruckventil tungsschlüssels den Entleerungsstopfen. -
Page 21: Anschluss Der Stromquelle An Den Boiler
Anschluss der Stromquelle an den Boiler Heizzeiten in Abhängigkeit der Eingangsleistung und -quelle Quelle Leistung Temperaturerhöhung / Stunde 100 W 9 °C / h PV-Modul 300 W 27 °C / h 550 W 47 °C / h 12 V (ca. 90 W) max. ~8 °C / h Akku 24 V (ca. -
Page 22: Einstellungen - Benutzeroberfläche
Einstellungen – Benutzeroberfläche Durch kurzes Drücken der -Taste gelangen Sie auf die nächste Menü-Seite (siehe Abbildung 1). Durch langes Drücken schalten Sie den Boiler aus bzw. ein. Abbildung 1 Um mögliche Einstellungen, wie die Mindesttemperatur oder den Betriebsmodus, auf einer Menü-Seite zu ändern, drücken Sie kurz die -Taste (siehe Abbildung 2). -
Page 23: Weitere Informationen
Betriebsmodus auswählen Modus Energiequelle Beschreibung 1: PV Home PV-Module / Der Boiler wird mit Photovolatikstrom aufgeheizt. Externes Energie Dieser Modus sollte gewählt werden, wenn ein PV-Modul an- Management geschlossen ist oder ein externes Energiemanagement (z.B. Solarladeregler mit Tiefentladeschutz) existiert, welcher den Strom für den Boiler freigibt. -
Page 24: Weitere Wichtige Hinweise
WICHTIG! Vor Anschluss an die elektrische Ener- mehrere Verbraucher gleichzeitig bereitstellen. gieversorgung ist der Warmwasserspeicher unbe- Das zur Erwärmung verwendete Wasser muss der dingt mit Wasser zu befüllen! Die Nichteinhaltung Anforderungen in den normativen Dokumenten für der Anforderungen für den elektrischen Anschluss Brauchwasser entsprechen, insbesondere: Chlorid- beeinträchtigt die Gerätesicherheit, sodass der gehalt bis 250 mg/l;... -
Page 25: Anschluss An Die Wasserleitung
WARNUNG! Der Aufstellungsort muss mit den Anforderungen Die Montage jeglicher Absperr- oder der Wasser- und Elektroinstallation übereinstim- Rückschlagarmaturen zwischen dem kombinier- men. Bei der Montage ist ausreichend Platz für die ten Ventil und dem Warmwasserspeicher sowie das Wasseranschlüsse vorzusehen. Versperren der seitlichen Öffnung des kombinier- ten Ventils und / oder Arretieren seines Hebels ist Der Boiler wird mit Hilfe der befestigten Montage- verboten! - Page 26 Nur ein paralleler PV-Modulanschluss ist erlaubt! Auslegung der Photovoltaikleistung in Abhängigkeit Ein serieller Anschluss führt zur Beschädigung des der klimatischen Verhältnisse: Geräts. Klimatische Verhältnisse CPVB-10 Der elektrische Verbindung zum Warmwasserboilers erfolgt über das Anschlusskabel. Nach Ausführung Sonnenarme Länder des elektrischen Anschlusses die Funktionsfähig- 300 W ᵖ...
-
Page 27: Wartung Und Instandhaltung
Wartung und Instandhaltung Verlängerung der Photovoltaikkabel Bei einer Verlängerung der Photovoltaikkabel sind Korrosionsschutz die MC4-Kontaktstecker ordnungsgemäß zu befesti- gen, um die Funktion und Sicherheit zu gewährleis- In jedem Warmwasserspeicher mit emailliertem ten. Grundsätzlich ist das PV-Kabel so kurz wie mög- Wasserbehälter ist ein zusätzlicher Korrosions- lich halten. -
Page 28: Störungen
Möglicherweise liegt eine Verunreinigung der Was- • Das Gerät wird nur zweckgemäß und nach Maß- serleitung vor. Vor Inbetriebnahme ist der Fehler gabe der Montage- und Gebrauchsanleitungen zu beheben. verwendet. Reinigung Die Gewährleistung umfasst die Behebung sämt- Die Außenhülle und die Kunststoffteile des Warm- licher Fabrikationsfehler, die während der Ge- wasserspeichers sind nur mit leicht feuchtem Baum- währleistungszeit auftreten können. - Page 29 BEDINGUNGEN. JEGLICHE, VOM BENUTZER ODER VON DEN VON IHM BEVOLLMÄCHTIGTEN PERSONEN VORGENOMMENE ÄNDERUNGEN UND UMBAUTEN AN DER KONSTRUKTION DES PRODUKTS SIND STRENG VERBOTEN. WERDEN DERARTIGE HAND- LUNGEN ODER VERSUCHE FESTGESTELLT, DANN SIND DIE GEWÄHRLEISTUNGSPFLICHTEN DES HERSTELLERS ODER DES HÄNDLERS UNWIRKSAM. DER HERSTELLER BEHÄLT SICH DAS RECHT VOR, STRUKTURVERÄNDERUNGEN OHNE ANKÜNDIGUNG VORZUNEHMEN, SOFERN DIE SICHERHEIT DES PRO-...
-
Page 30: Spécifications
Spécifications spécifications unité valeur chauffe-eau nom du produit CPVB-10 volume pression nominale classe IP poids brut (± 3 %) température maximale de l’eau °C traqueur MPP intégré protection d’inversion de polarité intégrée affichage numérique chauffe-eau en acier et revêtement émaillé... -
Page 31: Montage
Montage Le chauff e-eau de caravane est monté sur une plaque de base solide avec quatre vis. Utiliser des vis appropriées ou d’autres systèmes de montage pour la plaque de base. À souhait, il est possible que le chauff e-eau soit monté verticalement sur un mur stable. horizontal vertical Possibilité... -
Page 32: Mode De Raccordement Des Tuyaux D'eau
Mode de raccordement des tuyaux d’eau Pour des raisons de sécurité la valve anti-retour/surpression fournie doit être raccordée au tuyau de l’arrivée d’eau froide du chauffe-eau. Pour rendre possible le drainage peut être branché le bouchon de vidange fourni. Il faut procéder à l’aide du raccord à trois voies fourni, comme c’est représenté... -
Page 33: Vidange
Vidange L’eau dans le chauffe-eau ne doit pas geler. L’eau ge- • Couper l’alimentation en eau froide. lée dans le chauffe-eau peut causer des dommages ou détériorer l’appareil. Si nécessaire, le contenu • Ouvrir le bouchon de vidange à l’aide de la clé du chauffe-eau est vidangé... -
Page 34: Raccordement Du Chauffe-Eau À La Source De Courant
Raccordement du chauffe-eau à la source de courant Le temps de réchauffement est en fonction de la puissance d’entrée et du type de la source source tension augmentation/heure de la température 100 W 9 °C / h module photovoltaïque 300 W 27 °C / h 550 W 47 °C / h... -
Page 35: Paramètres - Interface D'utilisateur
Paramètres – Interface d’utilisateur Pour passer à la page d’option suivante appuyer briève- ment sur le bouton (voir figure 1). En le maintenant longtemps le chauffe-eau est allumé ou éteint. Figure 1 Pour modifier les paramètres possibles sur une page d’options, tels que la température minimale ou le mode de fonctionnement, il faut appuyer brièvement sur le bouton... -
Page 36: Plus De Renseignements
Sélection de mode de fonctionnement modes source d'énergie description 1: PV Home Module PV / Le chauffe-eau est réchauffé par électricité photovoltaïque. Gestion de Ce mode est sélectionné si le module PV est connecté ou s’il l’énergie externe existe un système de gestion de l’énergie externe (par exemple régulateur de charge solaire avec protection contre la décharge profonde) qui débranche le courant pour le chauffe-eau. -
Page 37: Autres Renseignements Techniques Importants
IMPORTANT ! S’assurer de remplir le chauffe-eau venant du réseau de distribution d’eau à plusieurs avec de l’eau avant de connecter l’alimentation élec- consommateurs à la fois. L’eau utilisée pour le chauf- trique ! L’inobservance des conditions de raccorde- fage doit satisfaire aux exigences des documents ment électrique affecte la sécurité... -
Page 38: Raccordement À L'alimentation En Eau
• Le degré de protection contre les éclaboussures monter à l’entrée et à la sortie du chauffe-eau des d’eau. raccords non métalliques (raccords diélectriques). ATTENTION! Le local d’installation doit satisfaire les exigences Il est interdit de monter n’importe d’installations des systèmes d’approvisionnement quel élément de fermeture ou raccords anti-retour en eau et en électricité. - Page 39 ! en fonction des conditions climatiques : Le raccordement électrique du chauffe-eau est ef- conditions climatiques CPVB-10 fectué par l’intermédiaire de câble de raccordement. Une fois la connexion électrique complété, ne pas Pays moins ensoleillés, par exem- manquer à vérifier la fonctionnalité de l’appareil.
-
Page 40: Entretien
voltaïque peut s’écarter des valeurs citées. • Si l’appareil n’est pas utilisé pendant plus d’un mois, il est recommandé de changer l’eau. Extension de la ligne photovoltaïque Si le câble photovoltaïque est rallongé, les fiches Entretien de raccordement MC4 doivent être correctement fixées pour assurer la fonctionnalité... -
Page 41: Perturbation Du Fonctionnement
la valve ne coule aucune eau ou seulement un mince • L’appareil est installé conformément aux ins- filet d’eau, cela indique que le fonctionnement est tructions de montage et d’utilisation. incorrecte. Il peut y avoir une contamination dans la conduite d’eau. Le problème doit être éliminé avant •... - Page 42 ET FAIT PARTIE DES CONDITIONS DE LA GARAN- TIE. TOUTE MODIFICATION OU ALTÉRATION À LA CONCEPTION DU PRODUIT, FAITES PAR L’UTILISA- TEUR OU PAR DES PERSONNES AUTORISÉES PAR L’UTILISATEUR, SONT STRICTEMENT INTERDITES. TOUS CES ACTES OU TENTATIVES ANNULENT LES OBLIGATIONS DE GARANTIE DU FABRICANT OU DU DISTRIBUTEUR.
-
Page 43: Specificazioni
Specificazioni specificazioni unità valore boiler denominazione del prodotto CPVB-10 volume pressione nominale IP classe peso lordo (± 3 %) max. temperatura dell’acqua °C tracker MPP integrato protezione integrata da polarità inversa display digitale boiler in acciaio con rivestimento smaltato dimensioni del boiler (lunghezza, larghezza, altezza) -
Page 44: Montaggio
Montaggio Il boiler per caravan deve essere montato su una base stabile con quattro viti. Utilizzare viti o altri sistemi di montaggio appropriati per la piastra di base. Se lo si desidera, il boiler può essere installato anche verticalmente su una parete stabile. orizzontale verticale È... -
Page 45: Connessione Alla Rete Idrica
Connessione alla rete idrica Per motivi di sicurezza, la valvola di non ritorno/valvola di sovrappressione in dotazione deve essere collegata all'ingres- so dell'acqua fredda del boiler. Il tappo di scarico in dotazione può essere collegato per consentire lo scarico. Questo può essere fatto usando l’elemento a T fornito come mostrato nella Figura 1. -
Page 46: Drenaggio
Drenaggio L'acqua nel boiler non deve congelare. L'acqua con- • Chiudere l'alimentazione dell'acqua fredda. gelata nel bagno può causare danni o malfunziona- menti dell'apparecchio. Se necessario, il contenuto • Aprire il tappo di drenaggio utilizzando la chia- del boiler può essere scaricato attraverso la valvola ve di sfiato in dotazione. -
Page 47: Collegamento Della Fonte Di Corrente Al Boiler
Collegamento della fonte di corrente al boiler Tempo di riscaldamento secondo la potenza in ingresso e la sorgente fonte potenza aumento della temperatura/ora 100 W 9 °C / h modulo (PV) fotovoltaico 300 W 27 °C / h 550 W 47 °C / h 12 V (ca. -
Page 48: Impostazioni - Interfaccia D'utente
Impostazioni – interfaccia d’utente Una breve pressione del pulsante porta alla pagina successiva di opzioni (vedi figura 1). Se premuto a lungo, il boiler si accende o si spegne. Figura 1 Per modificare le possibili impostazioni nella pagina delle opzioni, come la temperatura minima o il regime di funzionamento, premere brevemente il pulsante (vedi figura 2). -
Page 49: Informazioni Aggiuntive
Selezione di regime di funzionamento regimi fonte d’energia descrizione 1: PV Home Modulo fotovol- Il boiler viene riscaldato con energia fotovoltaica. Questo taico/ Gestione regime deve essere selezionato se è collegato un modulo foto- esterna dell’ voltaico o se è presente un sistema esterno di gestione dell'e- energia nergia (es. -
Page 50: Altre Note Importanti
Dati tecnici protezione forniti o consigliati dal produttore, così come tutti gli altri gruppi, devono essere installati IMMEDIATAMENTE! Questo boiler può fornire acqua calda dalla rete idrica o da altro rifornimento d’acqua, funzionan- IMPORTANTE! Obbligatoriamente riempire il boi- te sotto pressione, a più utenze contemporanea- ler con acqua, prima di collegarlo alla rete elettrica! mente. -
Page 51: Connessione Alla Rete Idrica
AVVERTIMENTO! • e il grado di protezione contro gli spruzzi È vietato installare raccordi di d'acqua. intercettazione o non ritorno tra la valvola di scarico e il boiler, nonché bloccare l'apertura laterale della Il luogo di montaggio deve soddisfare i requisiti per valvola di scarico e/o bloccare la leva! l'installazione idrica e elettrica. - Page 52 I fili del cavo di col- condizioni climatiche CPVB-10 legamento sono numerati e devono essere collegati alla fonte di alimentazione come segue: paesi con scarso soleggiamento, come l'Europa Settentrionale 300 W ᵖ...
-
Page 53: Manutenzione
I valori indicati sono indicativi. Secondo le condizioni • Frequente riscaldamento dell'acqua ad almeno locali e le condizioni specifiche di consumo, la co- 60 °C. struzione adeguata della potenza fotovoltaica può • Si consiglia di cambiare l'acqua dopo che differire dai valori descritti. l'apparecchio non è... -
Page 54: Guasto
Garanzia questo scopo, sollevare la leva e attendere circa 30-60 secondi fino a quando un forte flusso d'acqua scorre dall'apertura laterale della valvola. Tale controllo La garanzia dell'apparecchio è valida solo alle se- deve essere effettuato dopo che il serbatoio è sta- guenti condizioni: to riempito d'acqua, ad intervalli di 2 settimane e dopo che l'erogazione dell'acqua è... - Page 55 IL RISPETTO DEI REQUISITI SPECIFICATI NEL MANUA- LE È PRESUPPOSTO PER IL FUNZIONAMENTO SICU- RO DEL PRODOTTO ACQUISTATO ED È COMPRESO NELLE CONDIZIONI DI GARANZIA. È ASSOLUTAMENTE VIETATA QUALSIASI MODIFICA O TRASFORMAZIONE NELLA COSTRUZIONE DEL PRODOTTO, EFFETTUATA DALL'UTENTE O DA PERSONE DA LUI AUTORIZZATE. TALI AZIONI O ESPERIMENTI PORTANO A RIMUOVERE GLI OBBLIGHI DI GARANZIA DEL PRODUTTORE O DEL DISTRIBUTORE.
-
Page 56: Specificatie
Specificatie specificatie eenheid waarde water boiler productnaam CPVB-10 volume nominale druk IP Class bruto gewicht (± 3 %) max. water temperatuur °C geïntegreerde MPP tracker geïntegreerde bescherming tegen omgekeerde polariteit digitaal display boiler van staal met email bekleding boiler afmetingen (lengte, breedte, hoogte) 40 x 30 x 33 min. -
Page 57: Montage
Montage De caravan boiler dient met vier schroeven op een stevige oppervlakte gemonteerd worden. Gebruik geschikte schroeven of andere beves- tigingssystemen voor uw grondplaat. Optioneel kan de boiler ook verticaal op een stabiele wand worden gemonteerd Horizontale verticale montage van de fotovoltaïsche boiler is mogelijk. -
Page 58: Water Aansluiting
Water aansluiting Om veiligheidsredenen moet de meegeleverde terugslag-/ overdrukklep worden aangesloten op de koudwaterinlaat van de boiler De meegeleverde aftapplug kan worden aangesloten om aftappen mogelijk te maken. Dit kan worden gedaan met behulp van het mee- geleverde T-stuk zoals weergegeven op figuur 1. We raden aan om de caravanboiler in een watersysteem te integreren zoals op figuur 2. -
Page 59: Aftappen
Aftappen Het water in de boiler mag niet bevriezen. Bevro- • Open de aftapplug met behulp van de meegele- ren water in de boiler kan schade of een defect aan verde ontluchtingssleutel. het toestel veroorzaken. Indien nodig, de inhoud van de ketel kan worden afgetapt via de terugslag-/ •... -
Page 60: Stroombron Aansluiten Tot De Boiler
Stroombron aansluiten tot de boiler Opwarmtijd afhankelijk van stroomingang en bron bron vermogen opwarmtijd per uur 100 W 9 °C / h PV module 300 W 27 °C / h 550 W 47 °C / h 12 V (ca. 90 W) max. ~8 °C / h batterij 24 V (ca. -
Page 61: Instellingen - Gebruikersinterface
Instellingen – Gebruikersinterface Door kort op de knop te drukken gaat u naar de volgende optie (zie figuur 1). Door lang in te drukken schakelt u boiler in of uit. Figuur 1 Om beschikbare instellingen op een optiepagina te wijzi- gen, zoals de minimumtemperatuur of de bedrijfsmodus, drukt kort op de knoop (zie figuur 2). -
Page 62: Verdere Informatie
Bedrijfsmodus selecteren modus energiebron omschrijving 1: PV Home PV module/ De boiler wordt opgewarmd door fotovoltaïsche elektriciteit. Externe energie Deze modus moet worden geselecteerd als een PV-module is management aangesloten of als er een extern energiemanagement systeem (bijv. solar laadregelaar met diepontlading bescherming) is die de stroom voor de boiler vrijgeeft. -
Page 63: Verdere Belangrijke Opmerkingen
Technische gegevens stellingen, moeten ONVOORWAARDELIJK worden gemonteerd! Deze boiler kan meerdere verbruikers tegelijk van BELANGRIJK! Zorg ervoor dat u de boiler met warm water voorzien via het waterleidingnet of een water vult voordat u deze op het elektriciteitsnet andere drukgestuurde watervoorziening. Het water aansluit! Het niet naleven van de elektrische aanslui- dat wordt gebruikt voor verwarming moet voldoen tingsvoorwaarden tast de veiligheid van het toestel... - Page 64 De plaats van montage moet voldoen aan de eisen ning van de gecombineerde klep te blokkeren en / van de water- en elektrische installatie. Tijdens mon- of het hendel ervan te vergrendelen! tage moet er voldoende ruimte voor de wateraan- sluitingen worden voorzien.
- Page 65 Controleer na het vol- tooien van de elektrische aansluiting de functionali- klimatologische CPVB-10 teit van het toestel. De draden van de aansluitkabel omstandigheden zijn genummerd en moeten als volgt op de stroom- Zonarme landen bijv. Noord- en bron worden aangesloten: 300 W ᵖ...
- Page 66 tieve gebruiksomstandigheden kan het verstandige • Ververs het water als het toestel langer dan een ontwerp van het fotovoltaïsche vermogen afwijken maand niet in gebruik was. van de beschreven waarden. Onderhoud Verlenging van de fotovoltaïsche lijn Als de fotovoltaïsche kabel wordt verlengd, moe- Corrosiebescherming ten de MC4-contactstekkers correct worden vast- gemaakt om de functionaliteit en veiligheid te...
- Page 67 en na uitval en herstel van de watervoorziening. Als • Het toestel wordt alleen gebruikt voor de voor- er geen water of slechts een dunne stroom uit de ziene toepassing en in overeenstemming met klepopening stroomt, duidt dit op een defect. There de installatie- en bedieningsinstructies.
- Page 68 VAN HET PRODUCT DOOR DE EIGENAAR OF ZIJN GEAUTORISEERDE VERTEGENWOORDIGERS ZIJN TEN STRENGSTE VERBODEN. IN GEVAL VAN DER- GELIJKE HANDELING OF POGING VERVALLEN DE GARANTIEVERPLICHTINGEN VAN DE FABRIKANT OF DISTRIBUTEUR. DE FABRIKANT BEHOUDT ZICH HET RECHT VOOR OM STRUCTURELE WIJZIGINGEN AAN TE BRENGEN ZONDER KENNISGEVING, MITS DE VEI- LIGHEID VAN HET PRODUCT NIET IN HET GEDRANG KOMT.
Need help?
Do you have a question about the CPVB-10 and is the answer not in the manual?
Questions and answers