Table of Contents
Advertisement
Available languages
Available languages
Quick Links
ME8113ST
فرن امليكروويف
دليل املستخدم
.% 100 مت إنتاج هذا الدليل باستخدام ورق م ُ عاد تدويره بنسبة
هائلة
إمكانيات
العربية
.Samsung نشكرك على شرائك هذا املنتج من
، ً للحصول على خدمة أكثر تكام ال
الرجاء تسجيل املنتج اخلاص بك على
www.samsung.com/register
ME8113ST-ZAM_AR.indd 1
2/1/2012 3:32:11 PM
Advertisement
Table of Contents

Related Manuals for Samsung ME8113ST


Summary of Contents for Samsung ME8113ST
- Page 1 .% 100 مت إنتاج هذا الدليل باستخدام ورق م ُ عاد تدويره بنسبة هائلة إمكانيات العربية .Samsung نشكرك على شرائك هذا املنتج من ، ً للحصول على خدمة أكثر تكام ال الرجاء تسجيل املنتج اخلاص بك على www.samsung.com/register ME8113ST-ZAM_AR.indd 1...
- Page 2 استخدام كتيب اإلرشادات . تتضمن إرشادات املالك الكثير من املعلومات املفيدة املتعلقة بالطهيSAMSUNG لقد حصلت اآلن على فرن ميكروويف :باستخدام فرن امليكروويف • احتياطات السالمة • األدوات اإلضافية وأدوات الطهي املناسبة • تلميحات مفيدة للطهي .ستجد في صدر الكتيب رسومات توضيحية للفرن، وخصوص ً ا للوحة التحكم، حتى ميكنك التعرف على األزرار بسهولة...
- Page 3 ال تقم بتركيب اجلهاز في مكان رطب أو ملوث بالزيت أو مليء باألتربة، أو في مكان م ُ عرض ألشعة الشمس املباشرة .)واملاء (قطرات املطر .ال تقم بتركيب اجلهاز في مكان قد يتسرب فيه الغاز .- فقد يؤدي ذلك إلى حدوث صدمة كهربية أو نشوب حريق 3_ إرداداا هامة تتعله بالسالمة ME8113ST-ZAM_AR.indd 3 2/1/2012 3:32:13 PM...
- Page 4 .- قم بفصل قابس التيار الكهربي عن طريق اإلمساك بالقابس .- قد يؤدي عدم االلتزام بذلك إلى حدوث صدمة كهربية أو نشوب حريق .عند تلف اجلهاز أو السلك، اتصل بأقرب مركز خدمة 4_ إرداداا هامة تتعله بالسالمة ME8113ST-ZAM_AR.indd 4 2/1/2012 3:32:14 PM...
- Page 5 .اخلبرة واملعلومات إال إذا خضعوا لإلشراف أو مت تزويدهم باإلرشادات .حتذير: قد تسخن األجزاء الظاهرة أثناء االستخدام. يجب إبعاد األطفال عن اجلهاز لتجنب إصابتهم بحروق .حتذير: تأكد من إيقاف تشغيل اجلهاز قبل استبدال املصباح لتجنب التعرض لصدمة كهربية 5_ إرداداا هامة تتعله بالسالمة ME8113ST-ZAM_AR.indd 5 2/1/2012 3:32:14 PM...
- Page 6 .ال تقم أب د ً ا بتسخني زجاجات الرضاعة والسدادة املطاطية عليها، حيث أنها قد تنفجر إذا تعرضت للتسخني الزائد .يحظر ملس أجزاء التسخني أو اجلدران الداخلية للفرن قبل أن يبرد .ال تقم بوضع كبل الطاقة أو املقبس في املاء، واحرص على إبعاد كبل الطاقة عن األسطح الساخنة 6_ إرداداا هامة تتعله بالسالمة ME8113ST-ZAM_AR.indd 6 2/1/2012 3:32:14 PM...
- Page 7 .- قد يؤدي عدم االلتزام بذلك إلى حدوث صدمة كهربية أو نشوب حريق في حالة مالحظة تصاعد دخان، قم بإيقاف تشغيل الفرن أو فصله عن التيار الكهربي واجعل باب الفرن مغلقً ا إلخماد أي اشتعال؛ 7_ إرداداا هامة تتعله بالسالمة ME8113ST-ZAM_AR.indd 7 2/1/2012 3:32:15 PM...
- Page 8 .عند حدوث شرخ للسطح، قم بفصل التيار الكهربي عن اجلهاز .- قد يؤدي عدم االلتزام بذلك إلى حدوث صدمة كهربية .ال تخدش زجاج باب الفرن بأداة حادة .- قد يؤدي ذلك إلى تلف أو كسر الزجاج 8_ إرداداا هامة تتعله بالسالمة ME8113ST-ZAM_AR.indd 8 2/1/2012 3:32:15 PM...
- Page 9 .- قد يؤدي هذا إلى حدوث تلف باجلهاز. قد يؤدي البخار أو رذاذ املاء إلى حدوث حروق أو إصابة .ال ينبغي تشغيل األجهزة بواسطة وسائل للتوقيت اخلارجي أو نظام منفصل للتحكم عن ب ُ عد 9_ إرداداا هامة تتعله بالسالمة ME8113ST-ZAM_AR.indd 9 2/1/2012 3:32:15 PM...
- Page 10 ويتمثل االختالف الوحيد في متطلبات الرفع واملقطع العرضي وال يؤثر ذلك على السالمة، في حني أنه ال يفضل من الناحية . ً العملية تغيير سلك الكهرباء نظر ً ا لصغر حجم احليز اخملصص للسلك مث ال 01_ إرداداا هامة تتعله بالسالمة ME8113ST-ZAM_AR.indd 10 2/1/2012 3:32:15 PM...
- Page 11 فهي أجهزة مناسبة لالستخدامB ملعاجلة املواد وأجهزة تفريغ الشحن وأجهزة اللحام. أما أجهزة الفئة باملؤسسات احمللية واملؤسسات التي تتصل مباشرة بشبكة إمداد الطاقة منخفضة الفولطية التي تقوم بتزويد .املباني املستخدمة لألغراض احمللية 11_ إرداداا هامة تتعله بالسالمة ME8113ST-ZAM_AR.indd 11 2/1/2012 3:32:15 PM...
- Page 12 التشغيل وحتديد الوزن إرداداا الطهي أواني الطهي اختبار أواني الطهي أساليب الطهي تلميحات عامة "دليل "التذويب التلقائي دليل الطهي وصفات الطهي دليل أواني الطهي دليل أواني الطهي ملحه دليل استكشاف املشكالت وحلها العناية والتنظيف املواصفات 21_ احملتوياا ME8113ST-ZAM_AR.indd 12 2/1/2012 3:32:15 PM...
- Page 13 أو مدفئة. يجب االلتزام باملواصفات اخلاصة مبصدر الطاقة اخلاص بالفرن، وأي كبل آخر يتم استخدامه يجب أن يكون بنفس مقاييس كبل الطاقة الذي يتم توفيره مع الفرن. امسح اجلدران الداخلية وقفل الباب بقطعة قماش مبللة .قبل استخدام فرن امليكروويف للمرة األولى 13_ فرن امليكروويف اجلديد ME8113ST-ZAM_AR.indd 13 2/1/2012 3:32:17 PM...
- Page 14 معلوماا حول الضمان والصيانة ، الرجاء توفير طراز الفرن والرقم التسلسلي اخلاص به املوجود عاد ة ً على اجلزء اخللفي أوSamsung عند االتصال بشركة السفلي من املنتج. الرجاء تسجيل األرقام أدناه، مع املعلومات املطلوبة األخرى. احتفظ بهذه املعلومات في مكان آمن...
- Page 15 .4. ضع احللقة اجملم َّ عة مسبقً ا في منتصف الفرن 5. ضع الصينية الزجاجية فوق احللقة بحيث تتالءم النتوءات الثالثة املوجودة .في وسط الصينية مع الفتحات املوجودة في أرضية الفرن 15_ فرن امليكروويف اجلديد ME8113ST-ZAM_AR.indd 15 2/1/2012 3:32:19 PM...
- Page 16 أزرار لوحة التحكم .راجع الصفحة التالية ملزيد من املعلومات • 61_ فرن امليكروويف اجلديد ME8113ST-ZAM_AR.indd 16 2/1/2012 3:32:19 PM...
- Page 17 ) (أ ثر/أقلMore/Less )23 (صفحة رقم .زيادة مدة الطهي أو خفضها ) (مؤقت املطبخKitchen Timer )24 (صفحة رقم ) (الصواSound زر )23 (صفحة رقم ) (تشغيلStart .اضغط هذا الزر لبدء عملية الطهي 17_ فرن امليكروويف اجلديد ME8113ST-ZAM_AR.indd 17 2/1/2012 3:32:20 PM...
- Page 18 . (توفير الطاقة)، يتم إيقاف تشغيل "وضع توفير الطاقة" وشاشة العرض مع ً اPower saving ) ( مبجرد ملس زر .نظر ً ا ألن الساعة الداخلية تظل قيد التشغيل، ففي حالة ملس هذا الرمز مرة أخرى، سوف ترى الوقت احلقيقي 81_ التشغيل ME8113ST-ZAM_AR.indd 18 2/1/2012 3:32:23 PM...
- Page 19 )(فطور مجمد • ضع اخلضراوات في طاجن وأضف كمية قليلة من املاء (ملعقتني كمية تكفي 3 أشخاص .)إلى 4 صغيرة كمية تكفي 4 أشخاص • .قم بتغطية اإلناء أثناء الطهي وقلبه قبل مدة االنتظار 19_ التشغيل ME8113ST-ZAM_AR.indd 19 2/1/2012 3:32:24 PM...
- Page 20 2. استخدم أزرار األرقام لزيادة حجم التقدمي. على سبيل املثال، بالنسبة لكمية تكفي 3 أشخاص، اضغط على الزر "3" (راجع جدول "التسخني التلقائي" املوجود أدناه :واخلاص بأحجام التقدمي). تعرض الشاشة عدد األطباق التي قمت بتحديدها ." (تشغيل). ستعرض الشاشة "مدة الطهيStart 3. اضغط على زر 02_ التشغيل ME8113ST-ZAM_AR.indd 20 2/1/2012 3:32:24 PM...
- Page 21 . (توق ّ ف/إلغاء)، وافتح باب الفرن واقلب الطعامPause/Cancel 3. اضغط على الزر . (تشغيل) الستئناف فك التجميدStart 4. اضغط على الزر .في حالة انقطاع التيار الكهربي، ستحتاج إعادة ضبط الساعة مرة أخرى ."راجع الصفحة رقم 92 لالطالع على دليل "التذويب التلقائي 21_ التشغيل ME8113ST-ZAM_AR.indd 21 2/1/2012 3:32:25 PM...
- Page 22 . (تشغيل)، ثم قم بإعادة إدخال كافة التعليماتStart (توق ّ ف/إلغاء) قبل الضغط على الزرPause/Cancel .النتيجة : يبدأ الطهي وينتهي في احلال .يصدر الفرن أربعة أصوات للتنبيه )يصدر صوت يدل على انتهاء العملية 3 مرات. (مرة واحدة في الدقيقة 22_ التشغيل ME8113ST-ZAM_AR.indd 22 2/1/2012 3:32:25 PM...
- Page 23 : (الصوت) املوجود بامليكروويف ضبط مستوى صوت جرس امليكروويف. لتغيير مستوى الصوتSound يتيح لك زر )" (تشغيلON" : (الصوا). تعرض الشاشةSound 1. اضغط على الزر . (الصوا) مرة أخرى إليقاف تشغيل الصوتSound 2. اضغط على زر . (تشغيل) لتعود الشاشة إلى عرض الوقتStart 3. اضغط على الزر 23_ التشغيل ME8113ST-ZAM_AR.indd 23 2/1/2012 3:32:25 PM...
- Page 24 " (جم)، ستحتاج إلى فصل امليكروويف عن التيار الكهربي ثم إعادة توصيله مرة أخرى حتى يتم التغيير إلىGr" إذا لم تعرض الشاشة .حتديد الوزن :2. اضغط 0 بشكل متكرر لتحديد نظام الوزن الذي ترغب في استخدامه . (توق ّ ف/إلغاء) إلنهاء هذا اإلجراءPAUSE/CANCEL عند حتديد نظام الوزن الذي ترغب في استخدامه، اضغط الزر 42_ التشغيل ME8113ST-ZAM_AR.indd 24 2/1/2012 3:32:26 PM...
- Page 25 " (مسموح باستخدامها مع امليكروويف). قدMicrowave Safe" البالستيك - ميكنك استخدمها إذا كانت حتمل عالمة • .تنصهر األواني البالستيكية األخرى .األواني املصنوعة من القش واخلوص واخلشت - تستخدم للتسخني ملدد قصيرة فقط، حيث أنها قابلة لالشتعال • 25_ إرداداا الطهي ME8113ST-ZAM_AR.indd 25 2/1/2012 3:32:26 PM...
- Page 26 علم ً ا بأنه يجب أن تكون املياه دافئة والطبق املراد اختباره داف ئ ً ا أيض ً ا ً . إذا أصبح الطبق بار د ً ا، دل ذلك على أنه ال ميتص .طاقة امليكروويف وال يصلح لالستخدام في امليكروويف 62_ إرداداا الطهي ME8113ST-ZAM_AR.indd 26 2/1/2012 3:32:26 PM...
- Page 27 ٍ تنجذب طاقة امليكروويف إلى ذرات املاء. لذا يجب تغطية األطعمة التي ال تكون السوائل موزعة داخلها بشكل متساو أو تركها ملدة من الوقت ليتم توزيع احلرارة بشكل متساو ٍ . أضف كمية قليلة من املاء لألطعمة اجلافة لتساعد في .عملية الطهي 27_ إرداداا الطهي ME8113ST-ZAM_AR.indd 27 2/1/2012 3:32:26 PM...
- Page 28 .على الرغم من أن أشعة امليكروويف ال تقوم بتسخني أواني الطهي، إال أن احلرارة غالب ا ً ما تنتقل إلى أدوات الطهي • .استخدم دوم ا ً ماسك ا ً لألواني عند إخراج الطعام من امليكروويف ووجه األطفال إلى القيام باملثل 82_ إرداداا الطهي ME8113ST-ZAM_AR.indd 28 2/1/2012 3:32:26 PM...
- Page 29 قطع اللحم واألسماك بشرائح صغيرة من ورق األملونيوم إلى منع نضج األطراف قبل فك التجميد عن الطعام من املنتصف. لذلك، استخدم شرائح رفيعة ومسطحة وناعمة من ورق األملونيوم لتغطية األطراف واألجزاء الرفيعة من .الطعام 29_ إرداداا الطهي ME8113ST-ZAM_AR.indd 29 2/1/2012 3:32:27 PM...
- Page 30 استخدم غطاء م ُ حكم اإلغالق ليتم طهي األسماك بالبخار. إذا استخدمت غطاء من الورق الشمعي أو ورق املائدة .سيقل احتفاظ الغطاء بالبخار .ال تدع األسماك تتعرض للنضج الزائد؛ وتأكد من درجة نضجها عند مرور احلد األدنى من مدة الطهي • 03_ إرداداا الطهي ME8113ST-ZAM_AR.indd 30 2/1/2012 3:32:27 PM...
- Page 31 ذات الكثافة العالية واألطعمة كبيرة احلجم ليتم نضجها بعد خروجها من الفرن.) ميكن ترك البطاطس املشوية على .ً املنضدة ملدة خمس دقائق حتى يكتمل طهيها، بينما ميكن تقدمي طبق من البازالء مباشر ة 31_ إرداداا الطهي ME8113ST-ZAM_AR.indd 31 2/1/2012 3:32:27 PM...
- Page 32 4. أضف البروكلي واملكرونة، وقلبها جي د ً ا مع اخلليط. وقم بوضع الغطاء. وقم بالطهي ملدة من 4 إلى 6 دقائق في .املستوى العالي حتى تتم عملية التسخني، ثم قم بالتقليب مرة واحدة. وقم بتقليبه قبل التقدمي .تكفي هذه الكمية 6 أدخاص 23_ إرداداا الطهي ME8113ST-ZAM_AR.indd 32 2/1/2012 3:32:27 PM...
- Page 33 3. وقم بطهي الطعام دون وضع الغطاء في املستوى املرتفع ملدة 01 دقائق؛ وقلبه. اخفض مستوى الطاقة إلى . (متوسط) واتركه ملدة 5 دقائق. قم بالتقليب قبل التقدميMedium .تكفي لنصف جالون تقري ب ً ا 33_ إرداداا الطهي ME8113ST-ZAM_AR.indd 33 2/1/2012 3:32:27 PM...
- Page 34 .الزجاج الرقيق للكسر أو الشرخ بسبب التسخني املفاجئ .يجب إزالة الغطاء. مناسب للتدفئة فقط البرطمانات الزجاجية • املعادن • .قد تتسبب في حدوث ماس كهربائي أو نشوب حريق األطباق أربطة أكياس الفريزر • 43_ دليل أواني الطهي ME8113ST-ZAM_AR.indd 34 2/1/2012 3:32:27 PM...
- Page 35 لالستخدام في الفرن. ال يجب أن تكون محكمة اإلغالق. عند .الضرورة، اثقبها بشوكة الورق الشمعي أو الدهني .ميكن استخدامه لالحتفاظ بالرطوبة ومنع تناثر الطعام : موصى به : يستخدم بحذر : غير آمن 35_ دليل أواني الطهي ME8113ST-ZAM_AR.indd 35 2/1/2012 3:32:27 PM...
- Page 36 أخرج أي أدوات أو أواني طهي أو أربطة معدنية من الفرن. إذا كنت تستخدم ورق األملونيوم، استخدم فقط شرائط صغيرة • .واترك مسافة بوصة واحدة على األقل بني ورق األملونيوم واجلدران الداخلية للفرن 63_ ملحه ME8113ST-ZAM_AR.indd 36 2/1/2012 3:32:28 PM...
- Page 37 ال تقم أب د ً ا بتشغيل الفرن دون وجود طعام بداخله، فقد يعرض ذلك أنبوبة املاجنترون أو الصينية الزجاجية للتلف. قد ترغب في ترك فنجان من املاء داخل الفرن أثناء عدم استخدامه لتجنب التلف الذي قد يحدث في حالة تشغيل الفرن .عن طريق اخلطأ 37_ ملحه ME8113ST-ZAM_AR.indd 37 2/1/2012 3:32:28 PM...
- Page 38 األبعاد اخلارجية )815 مم (عرض) × 792 مم (ارتفاع) × 514 مم (عمق )433 مم (عرض) × 5.252 مم (ارتفاع) × 5.753 مم (عمق أبعاد جتويف الفرن الوزن الصافي/امجمالي 41 / 5.51 كجم 83_ ملحه ME8113ST-ZAM_AR.indd 38 2/1/2012 3:32:28 PM...
- Page 39 مذكرة ME8113ST-ZAM_AR.indd 39 2/1/2012 3:32:28 PM...
- Page 40 800-SAMSUNG (726-7864) U.A.E 800-SAMSUNG(726-7864) OMAN 183-2255 KUWAIT 8000-4726 BAHRAIN 08000-726786 EGYPT www.samsung.com 800-22273 JORDAN 080 100 2255 MOROCCO 9200-21230 SAUDO ARABIA 444 77 11 TURKEY 021-8255 IRAN 0800-726-7864 NIGERIA 0860-SAMSUNG(726-7864 SOUTH AFRICA DE68-03717B :رقم الكود ME8113ST-ZAM_AR.indd 40 2/1/2012 3:32:29 PM...
- Page 41 ME8113ST Microwave Oven user manual This manual is made with 100% recycled paper. imagine the possibilities ENGLISH Thank you for purchasing this Samsung product. To receive more complete service, please register your product at www.samsung.com/register ME8113ST_ZAM_DE68-03717B_EN.indd 1 2012-02-01 1:51:20...
- Page 42 Using this instruction booklet You have just purchased a SAMSUNG microwave oven. Your Owner’s Instructions contain much valuable information on cooking with your microwave oven: • Safety precautions • Suitable accessories and cookware • Useful cooking tips At the front of the booklet you will find illustrations of the oven, and more importantly the control panel, so that you can find the buttons more easily.
- Page 43 To reduce the risk of fire, explosion, electric shock, or personal injury when using your microwave oven, follow these basic safety cauTIon precaution. Do NOT attempt. Do NOT disassemble. Do NOT touch. Follow directions explicitly. Unplug the power plug from the wall socket. Make sure the machine is grounded to prevent electric shock.
- Page 44 Do not install this appliance in a location where gas may leak. - This may result in electric shock or fire. The appliance is not intended for installing in road vehicles, caravans and similar vehicles etc. This appliance must be properly grounded. Do not ground the appliance to a gas pipe, plastic water pipe, or telephone line.
- Page 45 When the appliance or the cord is damaged, contact your nearest service centre. Caution signs for electric cauTIon Unplug the power plug when the appliance is not being used for long periods of time or during a thunder/lightning storm. - Failure to do so may result in electric shock or fire. Severe warning signs for using WarnInG In the event of a gas leak (such as propane gas, LP gas, etc.), ventilate immediately...
- Page 46 Appliance is not to be used by children or persons with reduced physical, sensory or mental capabilities, or lack of experience and knowledge, unless they have been given supervision or instruction. WARNING : Accessible parts may become hot during use. To avoid burns young children should be kept away.
- Page 47 Do not open the door when the food in the cooking compartment is burning. - If you open the door, an inflow of oxygen occurs and this may result in fire. Do not insert fingers, foreign substances or metal objects such as pins or needles into the inlet, outlet and holes.
- Page 48 If any foreign substance such as water has entered the appliance, unplug the power plug and contact your nearest service centre. - Failure to do so may result in electric shock or fire. If smoke is observed, switch off or unplug the appliance and keep the door closed in order to stifle any flames;...
- Page 49 Do not stand on top of the appliance or place objects (such as laundry, oven cover, lighted candles, lighted cigarettes, dishes, chemicals, metal objects, etc.) on the appliance. - Items, such as a cloth, may be caught in the door. - This may result in electric shock, fire, problems with the product, or injury.
- Page 50 Severe warning signs for cleaning WarnInG Do not clean the appliance by spraying water directly onto it. Do not use benzene, thinner or alcohol to clean the appliance. - This may result in discoloration, deformation, damage, electric shock or fire. Before cleaning or performing maintenance, unplug the appliance from the wall socket and remove food waste from the door and cooking compartment.
- Page 51 prEcauTIonS To aVoId poSSIblE EXpoSurE To EXcESSIVE MIcroWaVE EnErGy Failure to observe the following safety precautions may result in harmful exposure to microwave energy. (a) Under no circumstances should any attempt be made to operate the oven with the door open or to tamper with the safety interlocks (door latches) or to insert anything into the safety interlock holes.
-
Page 52: Table Of Contents
contents youR NeW mIcRoWAve oveN Checking Parts Warranty and Service Information Setting Up Your Microwave Oven Control Panel Buttons opeRATIoN Setting the Clock Using the Pause/Cancel Button Using the power saving Button Using the Instant Cook Buttons Using the +30 Sec. Button Reheating Automatically Defrosting Automatically Setting Cooking Times &... -
Page 53: Your New Microwave Oven
your new microwave oven Place the oven on a flat level surface 85 cm above the floor. The surface should be strong enough to safely bear the weight of the oven. 1. When you install your oven, make sure there is 20 cm 10 cm adequate ventilation for your oven by leaving at least 10... -
Page 54: Checking Parts
4. CS e-mail: cs@tsm.com.sa 5. Online support Center :http://www.samsung.com/sa_en/ Warranty service can only be performed by a Samsung Authorized Service Center. If you should require warranty service, provide the above information with a copy of your sales receipt to the Samsung Authorized Service Center. -
Page 55: Setting Up Your Microwave Oven
SETTInG up your MIcroWaVE oVEn 1. Place the oven on a flat, sturdy surface and plug the cord into a grounded outlet. Once plugged in, the display on your oven will show: If oven left untouched for about 10 seconds, display will show : Make sure there is adequate ventilation for your oven by leaving at least four inches of space behind, above, and to the side of the oven. -
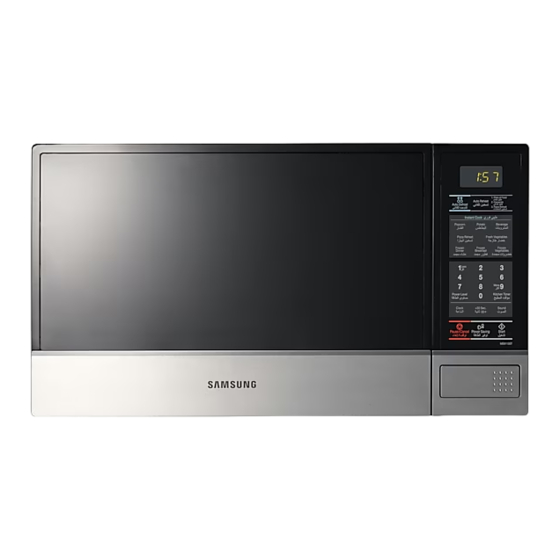
Page 56: Control Panel Buttons
conTrol panEl buTTonS • See next for more information. 16_ your new microwave oven ME8113ST_ZAM_DE68-03717B_EN.indd 16 2012-02-01 1:51:23... - Page 57 Auto Reheat (p. 20) Selects type of dish to be reheated. Auto defrost (p. 21) Sets weight of food to be defrosted. Instant cook Buttons (p. 19) Instant settings to cook popular foods. Number Buttons Set cooking times or amounts and power levels other than high. power Level (p.
-
Page 58: Operation
operation SETTInG ThE clock 1. Press the clock button. The display will show: 2. Use the Number buttons to enter the current time. You must On Lock Demo press at least three numbers to set the clock. If the current time is 5:00 enter 5,0,0. -
Page 59: Using The Instant Cook Buttons
uSInG ThE InSTanT cook buTTonS 1. Press the Instant cook button corresponding to the food you are cooking (popcorn, for example). The display shows the first serving size: 2. Press the button repeatedly to select the serving size you want. The display will cycle through all available serving sizes. -
Page 60: Using The +30 Sec. Button
uSInG ThE +30 SEc. buTTon This button offers a convenient way to heat food in 30 seconds increments at the High power level. 1. Press the +30 sec. button once for each 30 seconds you wish to cook the food. For example, press it twice for one minute. -
Page 61: Defrosting Automatically
auto reheat chart Item Weight Remarks plate of food 1 serving • Cover plate with vented plastic wrap or wax paper. • Contents - 3 - 4 oz. meat, poultry or fish (up to 6 oz. With bone) - ½ cup starch (potatoes, pasta, rice, etc.) - ½... -
Page 62: Setting Cooking Times & Power Levels
SETTInG cookInG TIMES & poWEr lEVElS Your microwave allows you to set up to two different stages of cooking, each with its own time length and power level. The power level lets you control the heating intensity from Warm (1) to High (0). onE-STaGE cookInG For simple one-stage cooking, you only need to set a cooking time. -
Page 63: Multi-Stage Cooking
MulTI-STaGE cookInG Some recipes require different stages of cooking at different temperatures. You can set multiple stages of cooking with your microwave. 1. Follow steps 1 and 2 in the “One-Stage Cooking” section on this page. When entering more than one cooking stage, the power Level button must be pressed before the second cooking stage can be entered. - Page 64 uSInG ThE kITchEn TIMEr 1. Press the Kitchen Timer button. 2. Use the Number buttons to set the length of time you want the timer to run. 3. Press the Start button . 4. The display counts down and beeps when the time has elapsed. dEMonSTraTIon ModE You can use the Demonstration Mode to see how your microwave oven operates without the oven heating.
- Page 65 cooking Instructions cookInG uTEnSIlS recommended use Glass and glass-ceramic bowls and dishes - Use for heating or cooking. • microwave grilling dish - Use to grill the exterior of small items such as steaks, • chops, or pancakes. Follow the directions provided with your grilling dish. •...
- Page 66 not recommended • Glass jars and bottles - Regular glass is too thin to be used in a microwave, and can shatter. paper bags - These are a fire hazard, except for popcorn bags that are designed for • microwave use. •...
- Page 67 cookInG TEchnIquES Stirring Stir foods such as casseroles and vegetables while cooking to distribute heat evenly. Food at the outside of the dish absorbs more energy and heats more quickly, so stir from the outside to the center. The oven will turn off when you open the door to stir your food.
- Page 68 GEnEral TIpS • Dense foods, such as potatoes, take longer to heat than lighter foods. Foods with a delicate texture should be heated at a low power level to avoid becoming tough. • Altitude and the type of cookware you are using can affect cooking time. When using a new recipe, use the minimum cooking time and check the food occasionally to prevent overcooking.
- Page 69 auTo dEfroSTInG GuIdE • Follow the instructions below when defrosting different types of food. Food standard Amount procedure roast 2.5-6.0 lbs. Start with the food placed fat side down. After each stage, turn the food over and shield any beef, pork. warm portions with narrow strips of aluminum foil.
- Page 70 cookInG GuIdE GuIdE for cooking Meat in your Microwave • Place meat on a microwave-safe roasting rack in a microwave-safe dish. • Start meat fat-side down. Use narrow strips of aluminum foil to shield any bone tips or thin meat areas. •...
- Page 71 Food cook Time/power Level directions cooking Time: Steaks Arrange steaks on roasting rack with meaty 6-10 min. / lbs. portions towards the outside of rack. Cover Up to 1.5 lbs. Power Level: Medium-High(7). with wax paper. Turn over and rearrange when cooking time is half up.
- Page 72 rEcIpES beef and barley Stew 1½ lbs. beef stew cubes, cut into ½-inch pieces ½ cup chopped onion 2 Tbs. all-purpose flour 1 Tbs. Worcestershire sauce 1 can (13.75-14.5 oz.) beef broth 2 medium carrots, cut into ½-inch (12.7mm) slices (about 1 cup) ½...
- Page 73 Warm potato Salad 2 lbs. small red potatoes, cut into ½-inch pieces 4 slices bacon (uncooked), cut into ½-inch pieces ¼ cup chopped onion 2 tsp. sugar 1 tsp. salt 1 tsp. flour ½ tsp. celery seed tsp. pepper 2½ Tbs. apple cider vinegar 1.
- Page 74 cookware guide To cook food in the microwave oven, the microwaves must be able to penetrate the food, without being reflected or absorbed by the dish used.Care must therefore be taken when choosing the cookware. If the cookware is marked microwave-safe, you do not need to worry.The following table lists various types of cookware and indicates whether and how they should be used in a microwave oven.
- Page 75 cookware microwave- comments safe paper • Plates, cups, napkins and For short cooking times and warming. Also Kitchen paper to absorb excess moisture. • Recycled paper May cause arcing. plastic • Containers Particularly if heat-resistant thermoplastic. Some other plastics may warp or discolour at high temperatures.
- Page 76 appendix TroublEShooTInG GuIdE Before you call a repair person for your oven, check this list of possible problems and solutions. neither the oven’s display nor the oven operate. • Properly insert the plug into a grounded outlet. • If the outlet is controlled by a wall switch, make sure the wall switch is turned on. •...
- Page 77 If the oven is set more than 25 minutes at 80, 90 or 100 percent power level, after the first 25 minutes the power level will automatically adjust itself to 70 percent power to avoid overcooking. carE and clEanInG Follow these instructions to clean and care for your oven. •...
- Page 78 SpEcIfIcaTIonS model Number me8113sT 32 liter oven cavity controls 10 power levels, including defrost Timer 99 minutes, 99 seconds 220 VAC, 50 Hz / 60 Hz power Source output power 850 Watts outside dimensions 518mm (W) X 297mm (H) X 415mm (D) 334mm (W) X 252.5mm (H) X 357.5mm (D)
- Page 79 memo ME8113ST_ZAM_DE68-03717B_EN.indd 39 2012-02-01 1:51:25...
- Page 80 U.A.E 800-SAMSUNG (726-7864) OMAN 800-SAMSUNG (726-7864) KUWAIT 183-2255 BAHRAIN 8000-4726 EGYPT 08000-726786 JORDAN 800-22273 www.samsung.com MOROCCO 080 100 2255 SAUDI ARABIA 9200-21230 TURKEY 444 77 11 IRAN 021-8255 NIGERIA 0800-726-7864 SOUTH AFRICA 0860-SAMSUNG(726-7864) Code No.: DE68-03717B ME8113ST_ZAM_DE68-03717B_EN.indd 40 2012-02-01 1:51:25...
Need help?
Do you have a question about the ME8113ST and is the answer not in the manual?
Questions and answers