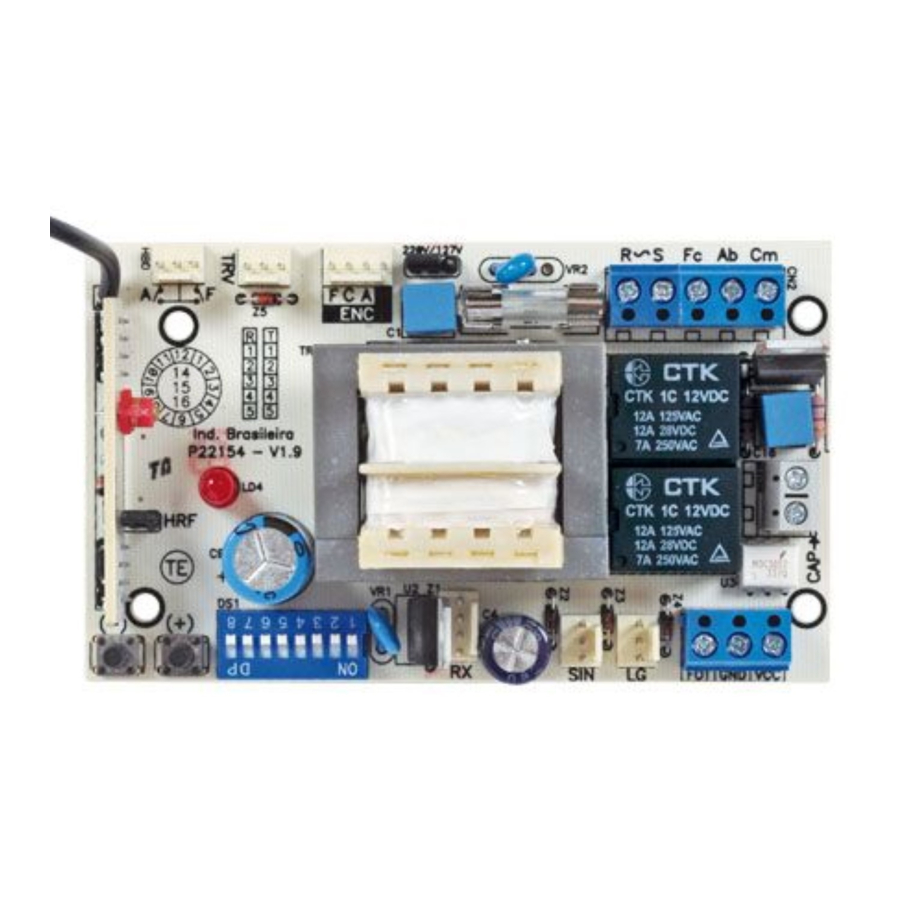
PPA FACILITY TOP - Control Board Manual
- Technical manual (2 pages) ,
- Technical manual (2 pages)
Advertisement
- 1 OVERVIEW
- 2 MAIN FEATURES
- 3 SN LED FUNCTIONS
- 4 ELECTRONIC LOCK INPUT
- 5 FUNCTIONS OF "+" AND "-" BUTTONS
- 6 FACTORY DEFAULT SETTINGS
- 7 SELECTING THE END-OF-STROKE TYPE
- 8 SELECTING HYBRID END-OF-STROKE
- 9 SELECTING THE APPLICATION TYPE
- 10 AUTOMATIC / SEMIAUTOMATIC MODE
- 11 COURTESY LIGHT TIMING
- 12 TRAFFIC LIGHT TIMING
- 13 SOFT START TIMING
- 14 BRAKE TIME
- 15 MANDATORY AUTOMATIC ACQUIRING OF THE OPENING / CLOSING TIMING
- 16 OPENING RAMP
- 17 CLOSING RAMP
- 18 GAP BETWEEN THE GATE AND THE OPENING STOPPER
- 19 GAP BETWEEN THE GATE AND THE CLOSING STOPPER
- 20 STRENGTH (ELECTRONIC CLUTCH)
- 21 TORQUE CONTROL STRENGTH DURING OPENING RAMP
- 22 TORQUE CONTROL STRENGTH DURING CLOSING RAMP
- 23 TORQUE CONTROL STRENGTH WHEN ACQUIRING THE PATH (CLOSING)
- 24 TORQUE CONTROL STRENGTH WHEN ACQUIRING THE PATH (OPENING)
- 25 ADDING REMOTE CONTROLS
- 26 ERASING ALL REMOTE CONTROLS
- 27 ENABLING OR DISABLING A COMMAND ON OPENING CYCLE / DELAY WHEN OPENING
- 28 PROGRAMMING INDEX CHART
- 29 GENERAL TERMS AND CONDITIONS OF WARRANTY
- 30 Documents / Resources
OVERVIEW

MAIN FEATURES
- It can be used with either digital end-of-stroke (encoder hall) or magneticend-of-stroke (analog).
- RF 433.92 Mhz Receiver Module
- Code learning – up to 160 different and button-independent remote controls.
- Inputs:
- Photocell.
- Loose RF Receiver Module.
- RS-485 Serial Module.
- Outputs:
- Traffic Light Module.
- Electronic lock module.
- Courtesy light module.
- Control of the motor:
- Soft start.
- Electronic clutch.
- Electronic brake.
- Torque control.
- Opening delay timing (used in conjunction with a traffic light).
SN LED FUNCTIONS
This procedure will reset the memory (erases old information / prepares the memory to receive new remote controls).
- Flashes once (60-Hz power source).
- Flashes twice (50-Hz power source).
- Flashes normally* 3 times (Opening cycle).
- Flashes normally* 4 times (Closing cycle).
- Flashes inversely** 3 times (Opening cycle with encoder failure).
- Flashes inversely** 4 times (Closing cycle with encoder failure).
- Flashes normally* 5 times (Gate path reset).
- Flashes in 'clock mode' every one second (counting the time for automatic closing).
- Continuously lit (photocell input activated).
ELECTRONIC LOCK INPUT
The ECU will enable or disable the electromagnetic lock automatically when a relay module is connected or disconnected to the TRV connector.
An electromagnetic lock installation results in a 1-second delay on the opening command. The electromagnetic lock activation time is 3 seconds.
FUNCTIONS OF "+" AND "-" BUTTONS
- In access operations, i.e., when the levers of the DIP Switch are off, they are used as opening / closing commands.
- When programming the ECU (any lever(s) of the DIP Switch on) or adding a remote control, they are used as an input to the memory update.
FACTORY DEFAULT SETTINGS
- The gate must be still.
- Turn lever 1 on.
- SN LED remains off.
- Press and release the (+) button.
- SN LED rapidly flashes once.
- In order to finish, turn the lever 1 off.
- Analog end-of-stroke.
 After resetting it to the default factory setting, if the operator uses a digital end-of-stroke system (encoder sensor hall), a new path acquiring is necessary for a proper operation. |
DEFAULT FACTORY SETTINGS:
- Strength = maximum.
- Soft start = disabled.
- Semiautomatic mode (Push-to-close).
- Opening / Closing time = 4 minutes
- Brake strength = level 1.
- Brake activation time= 400 milliseconds.
- Courtesy light time = 60 seconds.
- Traffic light = continuous.
- End-of-stroke = digital.
- Accept a command when opening = enabled.
- Direction movement reversion through a command = enabled.
- Strength of torque control when opening = level 5.
- Strength of torque control when closing = level 5.
- Strength of torque control when opening (path acquiring) = level 9.
- Strength of torque control when closing (path acquiring) = level 9.
- Limit of opening end of stroke = path – 16 pulses.
- Limit of opening end of stroke = path – 16 pulses.
- FCF (Closing end-of-stroke) adjustment = 0-pulse setback.
- FCA (Opening end-of-stroke) adjustment = 0-pulse setback.
SELECTING THE END-OF-STROKE TYPE
(ANALOG OR DIGITAL)
- The gate must be still.
- Turn the lever 3 on.
- SN LED remains off.
- Choose the type of end-of-stroke:
- Digital end-of-stroke = (+) button.
- Analog end-of-stroke = (–) button.
| The SN LED rapidly flashes for the selected option. |
- In order to change the type of end-of-stroke, go back to step 4.
- In order to finish, turn the lever 3 off.
- The SN LED will keep flashing 5 times, indicating that the path is reset (digital end-of-stroke).
Whenever a new type of end-of-stroke is chosen, the opening / closing time is reset to the 4-minute default factory setting (analog end-of-stroke) or the path is reset (digital end-of-stroke). For applications with a digital end-ofstroke, in order to have a proper operation, a new path acquiring is mandatory.
SELECTING HYBRID END-OF-STROKE
| The encoder cable (Reed digital) must be connected to the ENC and the analog end-of-stroke must be connected to the HBD. |
The ECU will automatically enable or disable the electromagnetic lock functions whenever a relay module is connected or disconnected to the TRV connector.
- The gate must be still.
- Turn the levers 3 and 8 on.
- SN LED remains off.
- Press the (+) button.
| SN LED flashes once. |
- In order to finish, turn the levers 3 and 8 off.
| When using a hybrid system, there is no need to acquire the path. On the first command, the ECU automatically does it, in normal speed. |
SELECTING THE APPLICATION TYPE
- The gate must be still.
- Turn the lever 4 on.
- SN LED remains off.
- Choose the type of application:
- Sliding = Press the (+) button once.
- Vertical Swing = Press the (+) button twice.
- Wait three seconds.
- If the SN LED flashes rapidly, the application is valid. If it flashes slowly, the application is invalid.
- In order to choose a new application, go back to step 4.
- In order to finish, turn lever 4 off.
- The SN LED will keep flashing 5 times, indicating that the path is reset (digital end-of-stroke).
| Whenever a new application is chosen, the opening / closing time is reset to the 2-minute default factory setting (analog end-of-stroke) or the path is reset (digital end-of-stroke). For applications with a digital end-of-stroke, in order to have a proper operation, a new path acquiring is mandatory. |
AUTOMATIC / SEMIAUTOMATIC MODE
- The ECU must not be counting the time for an automatic closing (pause time).
- Turn the lever 5 on.
- SN LED remains off.
- Set the closing mode, as follows:
SETTING AUTOMATIC MODE (PAUSE TIME):
- Press and hold the (+) button.
- SN LED starts operating in 'clock mode'.
- Count the desired time interval through the SN LED.
| The maximum time interval is 255 seconds (4.25 minutes). During the time counting, when it reaches the 255-second limit time, the counting is reset to 1 second. |
- Release the (+) button.
- SN LED ceases operating in 'clock mode'.
- In order to add a new pause time, go back to step 5.
- In order to set it in semiautomatic mode, go to step 13.
- In order to finish, turn the lever 5 off.
SEMIAUTOMATIC MODE (PUSH-TO-CLOSE):
- Press the (–) button.
- SN LED flashes for 2 seconds.
- In order to set it in automatic mode, go back to step 5.
- In order to finish, turn the lever 5 off.
COURTESY LIGHT TIMING
- Turn the levers 5 and 1 on.
- SN LED remains off.
- Use the (+) and (–) buttons to increase or decrease the time interval.
- Check the SN LED:
0 = does not count the time, it turns itself off immediately after the gate reaches the closing end-of-stroke.
1 = 10 seconds.
24 = 240 seconds (4 minutes). - In order to finish, turn the levers 5 and 1 off.
TRAFFIC LIGHT TIMING
- Turn the levers 5 and 2 on.
- SN LED remains off.
- Use the (+) and (–) buttons to increase or decrease the time interval.
- Check the SN LED:
0 = continuous mode.
1 = oscillating mode (50 milliseconds).
20 = oscillating mode (1000 milliseconds). - In order to finish, turn the levers 5 and 2 off.
SOFT START TIMING
- Turn the levers 5 and 3 on.
- SN LED remains off.
- Use the (+) and (–) buttons to increase or decrease the time interval.
- Check the SN LED:
60 Hz:
0 = Soft start disabled (motor starts with network rated voltage).
1 = Soft start enabled (120 milliseconds).
30 = Soft start enabled (3.6 seconds).
50 Hz:
0 = Soft start disabled (motor starts with network rated voltage).
1 = Soft start enabled (160 milliseconds). 30 = Soft start enabled (4.8 seconds).
- In order to finish, turn the levers 5 and 3 off.
BRAKE TIME
- Turn the levers 5 and 4 on.
- SN LED remains off.
- Use the (+) and (–) buttons to increase or decrease the time interval.
- Check the SN LED:
0 = brake disabled.
1 = 200 milliseconds.
12 = 2.4 seconds. - In order to finish, turn the levers 5 and 4 off.
MANDATORY AUTOMATIC ACQUIRING OF THE OPENING / CLOSING TIMING
(ANALOG END-OF-STROKE) OR PATH (DIGITAL END-OFSTROKE)
- The gate must be still.
- Turn the lever 6 on.
- SN LED remains off.
- Press and release the (+) button. The motor will be activated for the closing cycle up to the Closing End-of-stroke. After one second, the motor will be activated for the opening cycle, acquiring the path through the opening / closing time (analog end-of-stroke) or through the pulses of the digital encoder (digital endof-stroke). Three seconds are added to the opening and closing time (analog end-of-stroke).
- In order to finish, turn the lever 6 off.
- In order to perform a new path acquiring, go back to step 2.
| The remote control can be used to cancel and restart the path acquiring process. During the acquiring path, one can cancel the process turning the lever 6 off or through a remote control command. |
OPENING RAMP
(LIMIT OF THE OPENING END-OF-STROKE AREA TO DECELERATE THE GATE)
It is the distance between the opening mechanical stop plate and the point on the path where the ECU enters the torque control mode to decrease the speed of the gate and turn it off on the acquired path.
- Turn the levers 6 and 1 on.
- SN LED remains off.
- Use the (+) and (–) buttons to increase or decrease the end-of-stroke limit.
- Check the SN LED.
- In order to finish, turn the levers 6 and 1 off.
CLOSING RAMP
(LIMIT OF THE CLOSING END-OF-STROKE AREA TO DECELERATE THE GATE)
It is the distance between the closing mechanical stop plate and the point on the path where the ECU enters the torque control mode to decrease the speed of the gate and turn it off on the 0 (zero) position.
- Turn the levers 6 and 2 on.
- SN LED remains off.
- Use the (+) and (–) buttons to increase or decrease the end-of-stroke limit.
- In order to finish, turn the levers 6 and 2 off.
GAP BETWEEN THE GATE AND THE OPENING STOPPER
(END-OF-STROKE SETBACK ADJUSTMENT) FOR REED DIGITAL
It is the adjustment of the setback (1 pulse) or of the stepping ahead (1 pulse) of the opening end-of-stroke.
- Turn the levers 6 and 3 on.
- SN LED remains off.
- Use the (+) and (–) buttons to increase or decrease the end-of-stroke position.
- Check the SN LED.
- In order to finish, turn the levers 6 and 3 off.
GAP BETWEEN THE GATE AND THE CLOSING STOPPER
(END-OF-STROKE SETBACK ADJUSTMENT) FOR REED DIGITAL
It is the adjustment of the setback (1 pulse) or of the stepping ahead (1 pulse) of the closing end-of-stroke.
- Turn the levers 6 and 4 on.
- SN LED remains off.
- Use the (+) and (–) buttons to increase or decrease the end-of-stroke position.
- Check the SN LED.
- In order to finish, turn the levers 6 and 4 off.
STRENGTH (ELECTRONIC CLUTCH)
In order to have a proper utilization of this security sensor device, proceed as follows:
- After properly installing the gate opener on the gate, adjust the electronic clutch so that the minimum strength is needed to move the gate leaf on its entire path, for both opening and closing.
- This adjustment can be performed with the gate either moving or still
- Turn the lever 7 on.
- SN LED turns itself off.
- Use the (+) and (–) buttons to increase or decrease the strength.
- Check the SN LED. The adjustment levels variations are:
60 Hz = 0 up to 13 pulses.
50 Hz = 0 up to 17 pulses. - In order to finish, turn the lever 7 off.
TORQUE CONTROL STRENGTH DURING OPENING RAMP
- Turn the levers 7 and 1 on.
- SN LED remains off.
- Use the (+) and (–) buttons to increase or decrease the torque control strength.
- Check the SN LED.
- In order to finish, turn the levers 7 and 1 off.
TORQUE CONTROL STRENGTH DURING CLOSING RAMP
- Turn levers the 7 and 2 on.
- SN LED remains off.
- Use the (+) and (–) buttons to increase or decrease the torque control strength.
- Check the SN LED.
- In order to finish, turn the levers 7 and 2 off.
TORQUE CONTROL STRENGTH WHEN ACQUIRING THE PATH (CLOSING)
- Turn the levers 7 and 3 on.
- SN LED remains off.
- Use the (+) and (–) buttons to increase or decrease the torque control strength.
- Check the SN LED.
- In order to finish, turn the levers 7 and 3 off.
TORQUE CONTROL STRENGTH WHEN ACQUIRING THE PATH (OPENING)
- Turn the levers 7 and 4 on.
- SN LED remains off.
- Use the (+) and (–) buttons to increase or decrease the torque control strength.
- Check the SN LED.
- In order to finish, turn the levers 7 and 4 off.
ADDING REMOTE CONTROLS
Code learning up to 160 remote controls, independently from the fact that either one button or two buttons per remote control have been added.
- The gate must be still and must not be counting the pause time for automatically closing.
- Turn the lever 8 on.
- Press the button of the remote control ne wants to add.
- SN LED must flash rapidly.
- Press and release the (+) button.
- Check the SN LED: If it flashes once, the button has been successfully added; if it flashes twice, the button is already added to the memory; if it flashes three times, the memory is full.
- Release the button of the remote control.
- In order to add other remote control, go back to step 3.
- In order to finish, turn the lever 8 off.
ERASING ALL REMOTE CONTROLS
- The gate must be still and must not be counting the pause time for automatically closing.
- Turn the lever 8 on.
- Press and release the (–) button.
- The SN LED lights up.
- Press and release the the (+) button to confirm the exclusion of all remote controls (the SN LED flashes four times) or press and release the (–) button to cancel the exclusion process.
- In order to finish, turn the lever 8 off.
ENABLING OR DISABLING A COMMAND ON OPENING CYCLE / DELAY WHEN OPENING
It is a permission for a pushbutton / remote control command to be accepted during the opening cycle.
It also has the function of programming the pushbutton / remote control operation mode when the ECU is counting the time for delaying an opening with the traffic light switched on.
The gate opening delay time interval can be cancelled through a pushbutton or a remote control.
Partial opening – When the gate is totally closed and it receives an opening command, the traffic light will be switched on through the programmed time and then the opening cycle of the gate will start. If during the delay time interval it receives a new command, the traffic light will be switched off and the time will be reset. Only during the opening cycle a command is ignored.
Total opening – When the gate is totally closed and it receives an opening command, the traffic light will be switched on through the programmed time and then the opening cycle of the gate will start. During the delay time interval and the opening cycle, a command will be ignored.
SETTINGS:
0 = command when opening enabled.
1 = command in partial opening, opening delay time interval with traffic light on = 5 seconds.
2 = command in partial opening, opening delay time interval with traffic light on = 10 seconds.
3 = command in partial opening, opening delay time interval with traffic light on = 15 seconds.
4 = command in total opening, opening delay time interval with traffic light on = 5 seconds.
5 = command in total opening, opening delay time interval with traffic light on = 10 seconds.
6 = command in total opening, opening delay time interval with traffic light on = 15 seconds.
Instructions:
- The gate must be still;
- Turn the levers 8 and 2 on;
- SN LED remains off;
- Press the (+) button to increase the value; SN LED rapidly flashes once;
- Press the (-) button to decrease the value; SN LED rapidly flashes once;
- In order to finish, turn the levers 8 and 2 off.
PROGRAMMING INDEX CHART
| Lever(s) | Function | (+) Button | (–) Button |
| 8 | Adds remote controls | Adds | |
| 8 | Erases remote controls | 2nd Confirms | 1st Erases |
| 8+1 | Enables or disables direction movement reversion through a command (Pushbutton and remote control) | Enables | Disables |
| 8+2 | Enables or disables a command in opening / Delay in opening | Increases | Decreases |
| 7 | Strength (Electronic clutch) | + Strength | – Strength |
| 7+4 | Torque control strength on the closing end-of-stroke area (Acquiring) | + Torque | – Torque |
| 7+3 | Torque control strength on the opening end-of-stroke area (Acquiring) | + Torque | – Torque |
| 7+2 | Torque control strength on the closing end-of-stroke area | + Torque | – Torque |
| 7+1 | Torque control strength on the opening end-of-stroke area | + Torque | – Torque |
| 6 | Path acquiring (Digital end-of-stroke) or opening / closing time (Analog end-of-stroke) | Starts reading the path | |
| 6+4 | Closing end-of-stroke setback adjustment (difference between the gate and the stopper) | Larger setback Lesser setback | |
| 6+3 | Opening end-of-stroke setback adjustment (difference between the gate and the stopper) | Larger setback Lesser setback | |
| 6+2 | Limit of the closing end-of-stroke area | Larger space | Lesser space |
| 6+1 | Limit of the closing end-of-stroke area | Larger space | Lesser space |
| 5 | Automatic or semiautomatic mode (hold the button pressed for the desired time) | Pause time (automatic) | Semiautomatic |
| 5+4 | Electronic brake activation time | + Brake | – Brake |
| 5+3 | Soft start time (120 milliseconds per pulse) | Higher | Lesser |
| 5+2 | Traffic light time (50 milliseconds per pulse) | Higher | Lesser |
| 5+1 | Courtesy light time (10 seconds per pulse) | Higher | Lesser |
GENERAL TERMS AND CONDITIONS OF WARRANTY
| MOTOPPAR, Industry and Commerce of Automatic Gate Operators Ltd., registered with the CNPJ (National Registry of Legal Entities) under Number 52.605.821/0001-55, located at 3526 Dr. Labieno da Costa Machado Avenue, Industrial District, Garça – SP – Brazil, Zip Code 17400-000, manufacturer of PPA Products, hereby guarantees this product against design, manufacturing or assembly defects and/or supportively as a result of material quality flaws that could make its intended use improper or inadequate, within a legal period of ninety days from time of acquisition, provided that the installation instructions described in the instruction manual are observed. Due to the credibility and trust placed on PPA products, we will add 275 more days to the period mentioned above, reaching a warranty period of one year, likewise counted from the time of acquisition proven by consumer through proof of purchase (Customer Receipt). Recommendation: |

Documents / ResourcesDownload manual
Here you can download full pdf version of manual, it may contain additional safety instructions, warranty information, FCC rules, etc.
Advertisement


Need help?
Do you have a question about the FACILITY TOP and is the answer not in the manual?
Questions and answers