
Related Manuals for Sharkoon RUSH POWER M


Summary of Contents for Sharkoon RUSH POWER M
- Page 1 Handbuch Manual Manuel d‘utilisation Guia usario 使用手冊 Manuale d´istruzioni Gebruiksaanwijzing Guia usário Instukcja obstugi...
-
Page 2: Table Of Contents
The connectors at a glance 5.2.2 Connecting mainboard and graphics card(s) 5.2.3 Connecting optical drives and other peripheral devices 5.2.4 Connecting the cables to the PSU 5.2.5 Checking all connections 6. Troubleshooting Cable diagrams and pin assignments RUSH POWER M... -
Page 3: Features
Dear customer! Congratulations for purchasing one premium quality SHARKOON product. For a long life time and to take full advantage of this product we recommend that you read this manual completely. Have a good time with our product! SHARKOON Technologies GmbH 1. -
Page 4: Specifications
To prevent the risk of electric shock, do not open the power supply housing. No user-exchangeable parts inside. For service and maintenance refer to authorized SHARKOON personnel. Warranty is void under unauthorized attempt to open the power supply housing. Suitable for indoor or office use only. -
Page 5: Temperature Range And Humidity
The power supply provides a latch mode against over current, as defined below: Model No. Limit value (min.) Limit value (max.) Unit SHA-R400M +12 V SHA-R500M 1, 2 SHA-R600M 2.4 Safety standards Our power supply has been certified to comply with CB, FCC, BSMI and CE safety regulations. RUSH POWER M... -
Page 6: Parts And Accessory
• Set with screws (H) • Cable bag (I) Note: If you are missing any of the items listed above, please contact customer service via e-mail at support@sharkoon.com or call + 49 (0) 6403 – 775 6100. RUSH POWER M... -
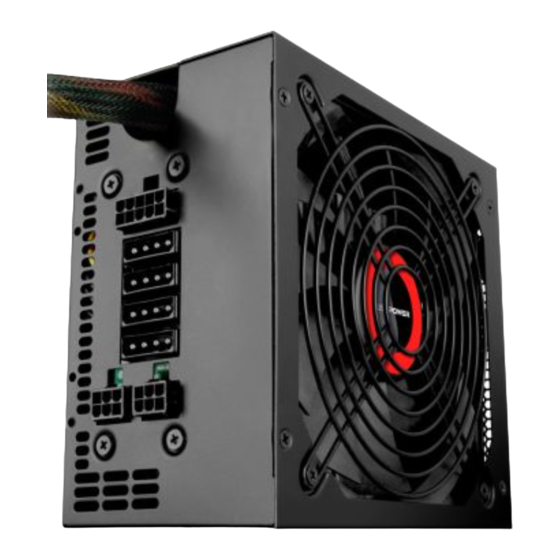
Page 7: The Modular System Of The Rush Power
Besides the 20+4-pin ATX connector cable and a 4+4-pin P8 connector cable – both soldered to the PSU – the Rush Power is delivered with an extensive set of modular cables: 1x/2x PCIe connector cable (6-pin PSU connector) for graphics cards (2x 6-pin + 2x 6+2-pin connectors). RUSH POWER M... -
Page 8: Installation
1. Insert the Rush Power into the PC case and put it against the PSU bracket on the case’s back side. 2. Screw the PSU to the case from the outside using the included screws. Pay attention not to cover the fan/air intake of the built-in PSU. RUSH POWER M... -
Page 9: Connecting The Pc Components To The Psu
2x modular 6-pin PCIe power connector 1x modular 2x modular 6+2-pin PCIe power connector 6x modular 6x modular SATA power connector 5x modular 5x modular 4-pin connector for peripheral devices 1x modular 1x modular 4-pin floppy connector RUSH POWER M... -
Page 10: Connecting Mainboard And Graphics Card(S)
Do not force to plug the female connector into the male connector in wrong orien- tation, nor modify any of the components, as this will damage the PSU and your hard- ware. SHARKOON warranty does not cover damage caused by incorrect handling. 5.2.2 Connecting mainboard and graphics card(s) 1. -
Page 11: Connecting Optical Drives And Other Peripheral Devices
4.). 5.2.5 Checking all connections Make sure that all devices are connected properly then plug the PSU’s power cord to a wall outlet and switch the power supply on. This ends the installation of the PSU. RUSH POWER M... -
Page 12: Troubleshooting
PSU. 5. Turn the power supply off and back on after at least 5 seconds. Repeat this procedure several times. 6. In case the PSU still does not start, contact support@sharkoon.com. 7. Cable diagrams and pin assignments +3.3V ORANGE +3.3V... - Page 13 YELLOW BLACK BLACK +12V1 YELLOW BLACK BLACK YELLOW +12V1 4-pin power connector for peripherals YELLOW +12V1 BLACK BLACK BLACK BLACK +12V1 YELLOW BLACK BLACK +12V1 YELLOW 4-pin power connector for peripherals + 4-pin power connector for floppy RUSH POWER M...
- Page 14 ORANGE 15-pin power connectors for SATA devices Attention: As a continuing policy of product improvement at SHARKOON, the design and specifications are subject to change without prior notice. National product speci- fications may vary. All rights reserved especially (also in extracts) for translation, reprinting, reproduction by copying or other technical means.
Need help?
Do you have a question about the RUSH POWER M and is the answer not in the manual?
Questions and answers