Table of Contents
Advertisement
Quick Links
. . . . . . . . . . . . . . . . . . . . . . . . .
. . . . . . .
Decathlon 850
. . . . . . . . . . . . . . . . . . . . . . . . .
. . . .
ATA Interface Drive
. . . . . . . . . . . . . . . . . . . . . . . . .
. . . . .
. . . . . . . . . . . . . . . . . . . . . . . . .
. . . . .
. . . . . . . . . . . . . . . . . . . . . . . . .
. . . . .
Installation Guide
. . . . . . . . . . . . . . . . . . . . . . . . .
. . . . . . . .
Advertisement
Table of Contents
Troubleshooting

Related Manuals for Seagate Decathlon 850


Summary of Contents for Seagate Decathlon 850
- Page 1 ....... . Decathlon 850 ......
-
Page 2: Table Of Contents
Publication Number: 36313-001, Rev. A, July 1995 Supersedes Publication Numbers 36296- and 36290- Seagate, Seagate Technology and the Seagate logo are registered trademarks of Seagate Technology, Inc. Decathlon, SeaFAX, SeaFONE, SeaBOARD and and Maximum SeaTDD are trademarks of Seagate Technology, Inc. EZ-Drive Overdrive are trademarks of Micro House International, Inc. -
Page 3: Read Before You Begin
Decathlon 850 Installation Guide, July 1995 Read before you begin... ® Application. Your Seagate drive is designed for IBM AT and compatible personal computers. It uses the ATA interface. It is intended for use with UL-listed computers or similar products. -
Page 4: Installation And 32-Bit Disk Access Software
In no event will Seagate be liable to you, your customers or other users in any way based on loss of data or use of the software or indirect, incidental, consequential, special, or exemplary damages arising out of or in connec- tion with the use or inability to use the software. -
Page 5: Quick Software Transfer For Experienced Users
FCC and agency compliance Your Seagate drive is intended to be contained solely within a personal computer or similar enclosure (not attached to an exter- nal device). As such, the drive is considered a subassembly and no Federal Communications Commission authorization, verifica- tion or certification of the device is required. - Page 6 Decathlon 850 Installation Guide, July 1995 Radio and television interference. This equipment generates and uses radio frequency energy and, if not installed and used in strict accordance with the manufacturer’s instructions, may cause interference to radio and television reception. This equipment is designed to provide reasonable protection against such interference in a residential installation.
- Page 7 Decathlon 850 Installation Guide, July 1995 Le présent appareil numérique n′émet pas de bruits radioélectri- ques dépassant les limites applicables aux appareils numériques de Classe B prescrites dans le règlement sur le brouillage ra- dioélectrique édicté par le Ministère des Communications du Canada.
-
Page 8: Drive Capacity
Decathlon 850 Installation Guide, July 1995 Drive capacity The BIOS your computer uses can limit the effective capacity of your disc drive. (This document assumes you are using a DOS operating system. If you are using another operating system, refer to its user’s guide regarding disc drive installation and parameters.) It creates a representation of the drive’s surface that... -
Page 9: Installing The Drive
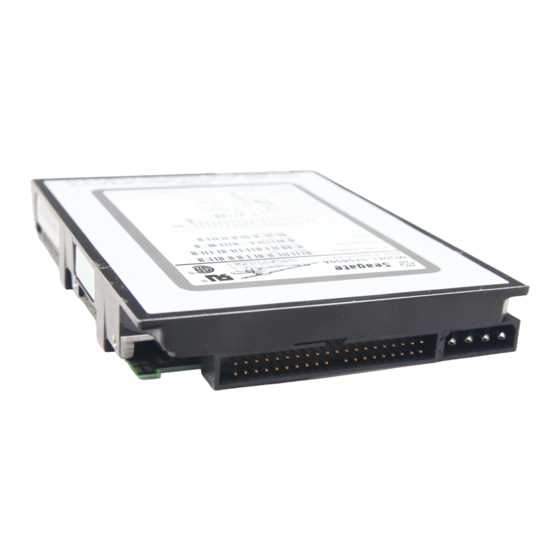
Decathlon 850 Installation Guide, July 1995 Installing the drive Note. Throughout this manual the Decathlon 850 is referred to by its model number, ST5850A. This instruction guides you through the two stages of drive installation. The first stage involves configuring the drive and attaching it to the computer. - Page 10 Decathlon 850 Installation Guide, July 1995 Options jumper block (J8) pin 1 J4 pin 1 J4. Interface connector J3. Standard power connector Circuit board +5V return +12V return +12V Figure 1. Type A connectors and jumper block...
- Page 11 Decathlon 850 Installation Guide, July 1995 Options jumper block (J8) Circuit board side up Spares One drive only Drive is master; slave is present Drive is slave when another drive is present; Master/slave timing protocol. Makes drive compatible with some drives as a slave.
- Page 12 Decathlon 850 Installation Guide, July 1995 1. Turn the computer off. Warning. Installing or removing the drive or adapter cards while the computer is powered on can damage your drive, adapter and computer. 2. Remove the computer’s cover. Caution. Special training or tools may be required to service laptop computers.
- Page 13 ATA-standard mas- ter/slave timing protocol. This setting allows the Seagate drive in the slave position to respond to some drives that use a different protocol. Try using this setting if the slave is not identified after power-on.
- Page 14 Decathlon 850 Installation Guide, July 1995 Options jumper block pin 1 J4 pin 1 J4. Interface connector J3. Standard power connector Circuit board +5V return +12V return +12V Figure 3. Type B connectors and jumper block...
- Page 15 Decathlon 850 Installation Guide, July 1995 Options jumper block Circuit board side up Spares One drive only Drive is master; slave is present Drive is slave Cable select Remote LED connection pin 9 (–), pin 10 (+) Dual-drive emulation Note. All other pins are reserved.
-
Page 16: Attaching Cables
Decathlon 850 Installation Guide, July 1995 Attaching cables This section refers to Figure 1 on page 8 for Type A drives and Figure 3 on page 12 for Type B drives for the connector locations. 1. Attach a remote LED cable. If your computer’s drive-activity LED uses a cable, place the connector end attached to the ground wire, usually the black wire, to the (–) pin and the other... -
Page 17: Mounting The Drive
Decathlon 850 Installation Guide, July 1995 The interface cable must be designed for two drives. Attach a cable connector to each drive’s 40-pin ATA interface connec- tor. Align the cable’s edge-stripe with pin 1 of the drive. Attach the other end of the cable to the host adapter card or to the hard-drive connector located on the motherboard. - Page 18 Decathlon 850 Installation Guide, July 1995 Figure 5. Mounting holes...
-
Page 19: Transferring The Free Installation Software
Before you configure the computer and partition and format the drive, transfer the installation software and the 32-bit disk access software driver from the Seagate drive to a bootable diskette in Drive A. The files stored on the drive include: •... - Page 20 5. 3. Find the hard disc configuration in the System Setup screen. 4. Select drive type 2 for your new Seagate drive. If your com- puter does not offer drive type 2, use the following values: 615 cylinders, 4 heads and 17 sectors.
-
Page 21: Configuring The Computer
Decathlon 850 Installation Guide, July 1995 Configuring the computer Your computer maintains a record of the hardware inside it. The record is stored in the CMOS memory chip and is used by the BIOS. When you boot your computer, a test is run comparing the record to the hardware. - Page 22 The capacities your computer reports may vary slightly. If none of the standard drive types offered in System Setup match the translation geometry of your Seagate drive, select the user-defined or custom drive type, if available, and enter your drive’s translation geometry.
-
Page 23: Dual-Drive Emulation Installation
4. Partition and format both drives. Partitioning and formatting the drive Before you can use your Seagate drive, you must partition and high-level format it. In this guide we discuss formatting your drive with DOS—refer to your DOS user’s guide for assistance. If you are using another operating system, consult your operating sys- tem user’s guide for formatting instructions. - Page 24 Decathlon 850 Installation Guide, July 1995 partition on the drive. Only the first two cylinders are formatted by the factory to store the software files. You must partition and format the entire drive to make its full capacity available. Partitioning the drive erases all files on the drive.
- Page 25 Decathlon 850 Installation Guide, July 1995 4. Select create primary DOS partition . Use the maximum avail- able size for your primary partition, and make the partition active for Drive C. This puts the entire drive on one partition and allows you to load the DOS boot information on the drive.
-
Page 26: Using The Installation Software
The EZ-Drive installation software allows your computer to ac- cess your Seagate drive’s full capacity. It bypasses the BIOS during the boot sequence and uses information it creates on Drive C to identify the drive before DOS is loaded. During the installa- tion, EZ-Drive: •... - Page 27 Do not use these programs. Note. The Seagate version of EZ-Drive cannot install a non-Sea- gate drive without a Seagate drive present. 1. Boot your computer with the EZ-Drive diskette. This is a...
- Page 28 Decathlon 850 Installation Guide, July 1995 master, Drive 1 is the slave) is incorrect or there is a drive not identified message, make sure the master and slave jumpers are set correctly on the drives and the I/O and power cables are properly connected.
- Page 29 Decathlon 850 Installation Guide, July 1995 Booting with a diskette after EZ-Drive is installed Because EZ-Drive bypasses the BIOS to install your drive, the computer does not recognize the drive when you boot directly to a diskette. To boot your computer with a diskette: 1.
- Page 30 Decathlon 850 Installation Guide, July 1995 Note. EZ-Drive puts a volume label on the partition it creates. You must enter the label name to delete the partition. 5. Repartition the drive with the partitions in the sizes you want. Refer to your DOS manual if you need assistance creating extended partitions.
- Page 31 7. Select OK. Follow the screen instructions to reboot. You can re-establish the 32-bit disk access capability using the SEG32BIT program on the Seagate software diskette as follows: 1. Load Windows. 2. Open the Program Manager menu and select File.
- Page 32 Decathlon 850 Installation Guide, July 1995 7. The next screen lists the features the SEG32BIT.386 driver supports. If your computer supports these features, they will be active in 32-bit disk access mode with SEG32BIT.386 for all drives that support them. Select Install Driver to continue.
-
Page 33: Basic Troubleshooting
Decathlon 850 Installation Guide, July 1995 Basic troubleshooting Warning. Always turn off the computer before changing jumpers or unplugging cables and cards. Caution. Your drive and computer contain static-sensitive de- vices. Wear a ground strap or take other antistatic precaution while handling your drive. -
Page 34: Advanced Troubleshooting
Decathlon 850 Installation Guide, July 1995 • Check the power-supply specifications. If new devices are installed, your computer’s power supply may not support the new total power requirement. Consult your dealer. • Verify the drive type setting in System Setup. The drive type stored in CMOS memory by your System Setup program must not exceed the physical specifications of your drive. - Page 35 Decathlon 850 Installation Guide, July 1995 If the drive is recognized after the warm boot, the computer BIOS’ setup test may be completing before the drive is ready. One possible solution is to slow your computer’s processor speed during startup. If your computer has a turbo switch, set it to slow speed before turning the computer on.
- Page 36 • If the computer does not recognize the slave drive following power-on, the slave may not be communicating with the master during the boot cycle. Try making the Seagate drive the slave and using the master/slave timing-protocol jumper configuration discussed on page 11.
- Page 37 Decathlon 850 Installation Guide, July 1995 adapter. If the screen turns on after you reboot, the host adapter may be incompatible or defective. If so, see your dealer. The system hangs in FDISK or fails to create or save the partition record.
- Page 38 Decathlon 850 Installation Guide, July 1995 • Check all cables. • Make sure the power supply is adequate for system needs. • Reboot the computer and make sure the drive spins up. • Verify the System Setup drive type values.
- Page 39 Decathlon 850 Installation Guide, July 1995 Setup and partition and format each logical drive separately. You cannot use a second, physical drive with dual-drive emulation. • You can use the EZ-Drive software to install the drive. DOS messages “Disk Boot Failure,” “Non-System Disk,” or “No ROM Basic - SYSTEM HALTED,”...
- Page 40 Decathlon 850 Installation Guide, July 1995 Note. Before you disable EZ-Drive, back up your data files. 1. Turn the computer off. 2. Insert a bootable diskette into Drive A and turn the com- puter on. Your computer must boot to Drive A without loading EZ-Drive into the system memory.
- Page 41 Decathlon 850 Installation Guide, July 1995 3. Press until the Select Installation Type dialog box ENTER appears. 4. Select Installation Options and press ENTER 5. Select Change Installed Features and press ENTER 6. Select Maximum Overdrive. Press to change the ENTER status.
-
Page 42: Technical Support Services
Your dealer is familiar with system configurations and can help you with system conflicts and other technical issues. If you need additional assistance with your Seagate drive or other Seagate products, you can call SeaBOARD™, SeaFAX ™, Sea- gate Technical Support FAX, SeaFONE™ or SeaTDD™. Seagate technical support is also available on CompuServe. - Page 43 (Pacific time) Monday through Friday. A.M. P.M. SeaFONE provides recorded technical information on se- lected Seagate products while you are on hold. You can access the recordings 24 hours daily. Before calling, note your system configuration and drive model number (ST xxxx ).
- Page 44 (Pacific time) Monday through Friday A.M. P.M. SeaBOARD CompuServe forum Online technical support for Seagate products is available on CompuServe. To access our technical support forum, type go seagate. This forum provides information similar to that found on SeaBOARD. Seagate’s Internet connections Technical information for Seagate drives is available on the internet from Seagate’s World Wide Web home page...
-
Page 45: Storing And Shipping Your Drive
Storing and shipping your drive Keep your original box and packing materials for storing or shipping your drive. The box has a Seagate Approved Package label. Shipping a drive in an unapproved container voids the warranty. Call your authorized Seagate distributor to purchase additional boxes. - Page 48 Seagate Technology, Inc. 920 Disc Drive, Scotts Valley, CA 95066, USA Publication Number: 36313-001, July 1995, Printed in USA...
Need help?
Do you have a question about the Decathlon 850 and is the answer not in the manual?
Questions and answers