
Related Manuals for Kicker PXA Mono


Summary of Contents for Kicker PXA Mono
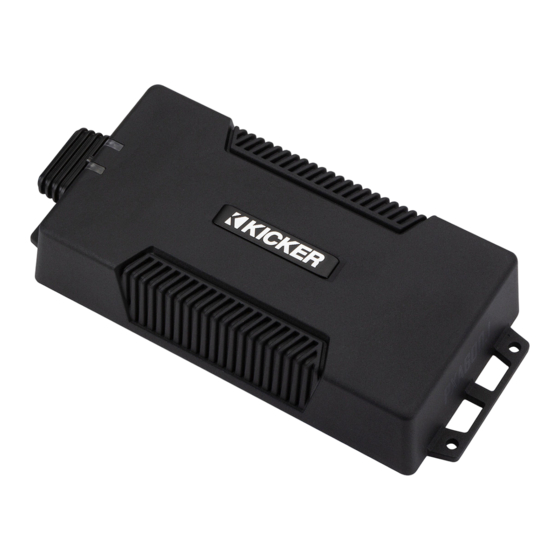
- Page 1 Owner’s Manual Manual del Propietario Manuel d’utilisatio Benutzerhandbuch PXA Amplifiers select language seleccione el idioma choisir la langue sprache auswählen...
-
Page 2: Table Of Contents
Contents Overview ........3 Specifications ..........4 Warranty ........40 Garantía | Garantie ..... 42 PXA Mono Installation ........5 Mounting ............5 Wiring ............6 Operation ........9 Features ............9 Troubleshooting ......14 PXA 4-CH Installation ......... 15 Mounting ............. -
Page 3: Overview
VENTILATION. SUBWOOFERS SHOULD BE MOUNTED WITH AT LEAST 1 INCH (2.5CM) CLEARANCE BETWEEN THE FRONT OF THE SPEAKER AND ANY SURFACE. KICKER PRODUCTS ARE CAPABLE OF PRODUCING SOUND LEVELS THAT CAN PERMANENTLY DAMAGE YOUR HEARING! TURNING UP A SYSTEM TO A LEVEL THAT HAS AUDIBLE DISTORTION IS MORE DAMAGING TO YOUR EARS THAN LISTENING TO AN UNDISTORTED SYSTEM AT THE SAME VOLUME LEVEL. -
Page 4: Specifications
Please allow two weeks of break-in time for the speakers to reach optimum performance. Pro Tip: You’re a KICKER amplifier and a few cables away from a full system upgrade that will dominate any factory system! KICKER line of amplifiers make it easy to upgrade to solid bass with your existing or stock source unit. -
Page 5: Installation
PXA300.1 | PXA600.1 Installation Mounting Choose a structurally sound location to mount your KICKER amplifier. Make sure there are no items behind the area where the screws will be driven. Choose a location that allows at least 4” (10cm) of open ventilation for the amplifier. -
Page 6: Wiring
Wiring Click Here for Amplifier Install Kits Model External Fuse (sold separately) Power/Ground Wire KICKER Wiring Kit PXA300.1 1 x 40 Ampere 8 Gauge KMPK8, PK8, CK8 PXA600.1 1 x 80 Ampere 4 Gauge KMPK4, PK4, CK4 Disconnect the vehicle’s battery to avoid an electrical short. - Page 7 If you ever need to remove the amplifier from the vehicle after it has been installed, the ground wire should be the last wire disconnected from the amplifier; just the opposite as when you installed it. sub input remote bass power wire adapters...
- Page 8 For multiple amplifier installations where distribution blocks are used, each amplifier should have its proper-rated fuse, or breaker, installed between the amplifier and the distribution block within eighteen inches of the block, or on the distribution block if it provides for fusing. The primary power wire should also be fused between the battery and distribution block, within eighteen inches of the battery’s positive terminal, with...
-
Page 9: Operation
Operation Features Automatic Turn-On: The PXA-series offers two different automatic turn-on modes; +12V and DC Offset. • Remote Turn-On: Run 18 gauge wire from the Remote Turn-On Lead on your source unit to the blue REM wire on the PXA amplifier’s wiring harness. •... - Page 10 Input Level Input Gain Control Crossover & Bass Boost Switches Input Level: The RCA inputs on KICKER PXA amplifiers are capable of receiving either Hi or Low-level signals from your source unit. When using a Hi-Level signal, simply set the Input Level switch on the amplifier to HI.
- Page 11 0dB sine wave through your source unit and increase the volume to about 3/4 of maximum. Sine wave tracks can be downloaded for free from KICKER.com under the “Support” tab. Use the 50Hz sine wave to set the gain for a subwoofer and the 1kHz sine wave for full-range speakers.
- Page 12 Set your voltmeter or oscilloscope to measure AC voltage. Place the voltmeter’s probes on the amplifier’s speaker output terminals. With the sine wave playing, slowly turn the gain knob clockwise and watch the AC voltage on the voltmeter increase. When the desired voltage is shown (reference power chart insert), or you start to see the waveform square off stop increasing...
- Page 13 KICK EQ Bass Boost: The bass boost is designed to give you increased output, +6dB, at 40Hz. If you turn it on, you must readjust the input gain control to avoid clipping the amplifier. LO-PASS: Use the LO-PASS switches to set the internal crossover. Choose a cutoff of 60Hz, 80Hz, 100Hz, or 120Hz, depending on the configuration of switches.
-
Page 14: Troubleshooting
There is a Power Protection LED on the side power panel of your Kicker PXA series amplifier. Depending on the state of the amplifier and the vehicle’s charging system, the LED will glow either Red or Blue. -
Page 15: Installation
PXA400.4 Installation Mounting Choose a structurally sound location to mount your KICKER amplifier. Make sure there are no items behind the area where the screws will be driven. Choose a location that allows at least 4” (10cm) of open ventilation for the amplifier. Drill four holes using a 7/64”... -
Page 16: Power Wiring
Power Wiring Click Here for Amplifier Install Kits Model External Fuse (sold separately) Power/Ground Wire KICKER Wiring Kit PXA400.4 1 x 60 Ampere 8 Gauge KMPK8, PK8, CK8 Disconnect the vehicle’s battery to avoid an electrical short. A good ground connection is important. - Page 17 If you ever need to remove the amplifier from the vehicle after it has been installed, the ground wire should be the last wire disconnected from the amplifier; just the opposite as when you installed it. amp1 & amp2 inputs remote bass power wire...
- Page 18 For multiple amplifier installations where distribution blocks are used, each amplifier should have its proper-rated fuse, or breaker, installed between the amplifier and the distribution block within eighteen inches of the block, or on the distribution block if it provides for fusing. The primary power wire should also be fused between the battery and distribution block, within eighteen inches of the battery’s positive terminal, with...
-
Page 19: Speaker Wiring
Speaker Wiring (4-Channel Operation) AMP1 left (white) AMP2 right (purple) AMP1 right (grey) AMP2 left (green) English... - Page 20 (Bridged Operation) AMP1 left (white) positive AMP2 left (green) positive AMP1 right (grey) negative AMP2 right (purple negative You may use a combination of stereo and bridged operation (eg AMP1 Left & Right, and AMP 2 Bridged subwoofer) English...
-
Page 21: Operation
Operation Features Automatic Turn-On: The PXA-series offers two different automatic turn-on modes; +12V and DC Offset. • Remote Turn-On: Run 18 gauge wire from the Remote Turn-On Lead on your source unit to the blue REM wire on the PXA amplifier’s wiring harness. •... - Page 22 Input Gain Controls Crossover, Fader & Input Level Switches Input Gain Controls: The input gain control is not a volume control. It matches the output of the source unit to the input level of the amplifier. Maximum power out of the amplifier is possible with the gain in the lowest position.
- Page 23 3/4 of maximum. Sine wave tracks can be downloaded for free from KICKER.com under the “Support” tab. Use the 50Hz sine wave to set the gain for a subwoofer and the 1kHz sine wave for full-range speakers.
- Page 24 When the desired voltage is shown (reference power chart insert), or you start to see the waveform square off stop increasing the gain, turn the amplifier off, reconnect all speakers and set the crossovers to your desired setting. Your gain is now set for maximum unclipped power from the amplifier.
- Page 25 Never change the switches with the audio system on! Input Level: Choose whether to receive a HI or LO-level signal from your source unit. Fader Switch: Turn the fader switch ON if you are running two sets of inputs (front and rear for example) to the amplifier.
-
Page 26: Troubleshooting
There is a Power Protection LED on the side power panel of your Kicker PXA series amplifier. Depending on the state of the amplifier and the vehicle’s charging system, the LED will glow either Red or Blue. -
Page 27: Installation
PXA1000.5 Installation Mounting Choose a structurally sound location to mount your KICKER amplifier. Make sure there are no items behind the area where the screws will be driven. Choose a location that allows at least 4” (10cm) of open ventilation for the amplifier. Drill four holes using a 7/64”... -
Page 28: Power Wiring
Power Wiring Click Here for Amplifier Install Kits Model External Fuse (sold separately) Power/Ground Wire KICKER Wiring Kit PXA1000.5 1 x 150 Ampere 1/0 Gauge PKD1 Disconnect the vehicle’s battery to avoid an electrical short. A good ground connection is important. If the PXA is mounted in the... - Page 29 If you ever need to remove the amplifier from the vehicle after it has been installed, the ground wire should be the last wire disconnected from the amplifier; just the opposite as when you installed it. amp1, amp2 & sub inputs remote bass power...
- Page 30 For multiple amplifier installations where distribution blocks are used, each amplifier should have its proper-rated fuse, or breaker, installed between the amplifier and the distribution block within eighteen inches of the block, or on the distribution block if it provides for fusing. The primary power wire should also be fused between the battery and distribution block, within eighteen inches of the battery’s positive terminal, with...
-
Page 31: Speaker Wiring
Speaker Wiring (4-Channel Operation) AMP1 left (white) AMP2 right (purple) AMP1 right (grey) AMP2 left (green) English... - Page 32 (Bridged Operation) AMP1 left (white) positive AMP2 left (green) positive AMP1 right (grey) negative AMP2 right (purple negative You may use a combination of stereo and bridged operation (eg AMP1 Left & Right, and AMP 2 Bridged subwoofer) English...
-
Page 33: Operation
Operation Features Automatic Turn-On: The PXA-series offers two different automatic turn-on modes; +12V and DC Offset. • Remote Turn-On: Run 18 gauge wire from the Remote Turn-On Lead on your source unit to the blue REM wire on the PXA amplifier’s wiring harness. •... - Page 34 Input Gain Controls Input Level, Fader, Sub Input, & Crossover Switches Input Gain Controls: The input gain control is not a volume control. It matches the output of the source unit to the input level of the amplifier. Maximum power out of the amplifier is possible with the gain in the lowest position.
- Page 35 0dB sine wave through your source unit and increase the volume to about 3/4 of maximum. Sine wave tracks can be downloaded for free from KICKER.com under the “Support” tab. Use the 50Hz sine wave to set the gain for a subwoofer and the 1kHz sine wave for full-range speakers.
- Page 36 When the desired voltage is shown (reference power chart insert), or you start to see the waveform square off stop increasing the gain, turn the amplifier off, reconnect all speakers and set the crossovers to your desired setting. Your gain is now set for maximum unclipped power from the amplifier.
- Page 37 S U B B A S S F A D E R B O O S T H I- P A S S F ILT E R L O - P A S S F ILT E R +6 d B S U B I N P U T IN P U T L E V E L O F F...
- Page 38 LO-PASS: Use the LO-PASS switches to set the internal crossover. Choose a cutoff of 60Hz, 80Hz, 100Hz, or 120Hz depending on the configuration of switches. KICK EQ Bass Boost: The bass boost is designed to give you increased output, +6dB, at 40Hz. If you turn it on, you must readjust the input gain control to avoid clipping the amplifier.
-
Page 39: Troubleshooting
There is a Power Protection LED on the side power panel of your Kicker PXA series amplifier. Depending on the state of the amplifier and the vehicle’s charging system, the LED will glow either Red or Blue. -
Page 40: Warranty
Should service be necessary under this warranty for any reason due to manufacturing defect or malfunction during the warranty period, KICKER will repair or replace (at its discretion) the defective merchandise with equivalent merchandise. Warranty replacements may have cosmetic scratches and blemishes. - Page 41 Service performed by anyone other than KICKER HOW LONG WILL IT TAKE? KICKER strives to maintain a goal of one week turnaround for all electronics (amplifiers, crossovers, equalizers, etc.) returns. Delays may be incurred if lack of replacement inventory or parts is encountered.
-
Page 42: Garantía | Garantie
(“a todo volumen”) en todo sentido. La línea de altavoces y amplificadores KICKER es la mejor del mercado de audio de automóviles y por lo tanto representa el “combustible” para vivir a todo volumen en el área de “estéreos de automóvil” de la vida de nuestros clientes.
Need help?
Do you have a question about the PXA Mono and is the answer not in the manual?
Questions and answers