Table of Contents
Advertisement
Available languages
Available languages
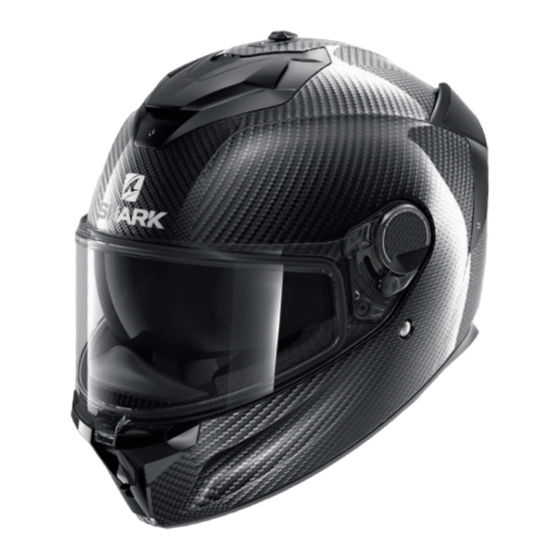
SPARTAN GT PRO - SPARTAN GT PRO CARBON
OWNER'S MANUAL - MANUEL D'UTILISATION - BENUTZERHANDBUCH - LIBRETTO ISTRUZIONI - MANUAL DEL USUARIO
WARNING!
Carefully read, understand and follow the instructions
provided in this manual, and keep it in a safe place for
future reference. If you have any doubt whatsoever
regarding the use or care of your helmet, please see
your retailer for assistance or advice. Failure to follow
the warnings and instructions provided herein can
result in the failure of the helmet to protect you in an
accident, resulting in a head injury or death.
ATTENTION !
Veuillez lire avec attention, comprendre et suivre les
instructions fournies dans ce manuel, et veuillez le
garder en lieu sûr pour vous en servir ultérieurement.
En cas de doute concernant l'utilisation ou l'entretien
du casque, veuillez demander l'aide ou l'avis de
votre revendeur. Tout non respect des précautions
et recommandations fournies dans ce manuel peut
entraîner une défaillance dans l'efficacité du casque
à vous protéger en cas d'accident, provoquant une
blessure grave ou la mort.
WARNUNG!
Lesen Sie diese Anleitung aufmerksam durch und
bewahren Sie sie sorgfältig auf. Bei Fragen zur
Verwendung oder Pflege Ihres Helms wenden Sie sich
"This user's manual and its images can not be considered as
contractual. SHARK reserves the right to improve the quality of pro-
duction. The images contained in this document are SHARK's exclusive
property. Any reproduction is forbidden".
"Ce manuel d'utilisation ainsi que les images contenues ne peuvent
être considérés comme contractuels. SHARK se réserve le droit d'amé-
liorer la qualité de la production. Les images contenues dans ce docu-
ment sont la propriété exclusive de SHARK. Toute reproduction est
interdite".
"Diese Bedienungsanleitung und seine Bilder sind nicht Vertragsbes-
tandteil. SHARK behält sich das Recht vor, die Qualität der Herstellung
zu verbessern.
an Ihren Einzelhändler. Falls Sie die Warnungen und
Hinweise dieser Anleitung nicht befolgen, kann das
die Schutzwirkung des Helms im Falle eines Unfalls
beeinträchtigen, was zu einer schweren oder tödlichen
Kopfverletzung führen kann.
ATTENZIONE!
Leggere con attenzione, capire e seguire le istruzioni
fornite in questo libretto e conservarlo in luogo sicuro
per potersene servire ulteriormente. In caso di dubbio
riguardo l'utilizzo o la manutenzione del casco, chiedere
l'aiuto o l'avviso del proprio rivenditore. Il non rispetto
delle precauzioni e raccomandazioni fornite in questo
libretto può provocare una mancanza dell'efficacità del
casco a proteggere in caso d'incidente, provocando una
ferita grave o la morte.
ATENCIÓN!
Lea atentamente, siga las instrucciones de este manual
y guárdelo en lugar seguro para futuras referencias. Si
tuviera cualquier duda sobre la utilización o cuidado
de su casco por favor diríjase a su establecimiento
habitual. No seguir los avisos y consejos de utilización
presentes en este manuscrito podría disminuir la
protección para la cual este casco esta diseñado,
pudiendo causar traumatismos craneales o incluso la
muerte en caso de accidente.
Die in diesem Dokument enthaltenen Bilder sind der alleinige Besitz von
SHARK. Jede Vervielfältigung ist untersagt".
"Questo manuale d'uso e le immagini in esso contenute non posso-
no essere considerati come contrattuali. SHARK si riserva il diritto di ot-
timizzare la qualità della produzione. Le immagini riportate nel presente
documento sono di proprietà esclusiva di SHARK. Riproduzione vietata".
"Este manual del usuario y sus imágenes no pueden ser considerados
como contractuales. SHARK se reserva el derecho de mejorar la calidad de
la producción. Las imágenes contenidas en este documento son propiedad
exclusiva de SHARK. Prohibida toda reproducción».
Advertisement
Chapters
Table of Contents

Related Manuals for Shark SPARTAN GT PRO


Summary of Contents for Shark SPARTAN GT PRO
- Page 1 “Questo manuale d’uso e le immagini in esso contenute non posso- property. Any reproduction is forbidden“. no essere considerati come contrattuali. SHARK si riserva il diritto di ot- “Ce manuel d’utilisation ainsi que les images contenues ne peuvent timizzare la qualità della produzione. Le immagini riportate nel presente être considérés comme contractuels.
- Page 2 6. Never use gasoline, petroleum products, SHARK Company of all liability, up to the chemicals or any solvent when cleaning the maximum limit allowable under the law, for helmet, the shell or the visor.
-
Page 3: Table Of Contents
• Warning and instructions ............................2 • Anatomy of helmet ..............................3 • A helmet in your size ............................4 - 5 • The chin strap ................................6 - 7 • Emergency system ..............................8 - 9 • Textile parts ...............................10 - 14 •... - Page 4 WARNING! helmet Keep in mind that due to the wide fully protect users variation in skull shapes, these against all possible high or references merely serve to guide low-speed shocks. To ensure you to the size best adapted to an efficient level of protection your particular head.
- Page 5 You should feel your skin stretch hair inside the helmet. Do not place anything in or on around the head and face when your hair inside the helmet. Avoid adjusting the helmet. Should this adding anything inside the helmet not be the case, the selected to adjust its position on your head.
- Page 6 CHIN STRAP Slip on your Spartan GT Pro - Spartan GT Pro Carbon helmet and activate the Depending on the various versions and locking system. When the «Precise Lock» the country concerned, yourSpartan GT is set in intermediate position, the chin...
-
Page 7: The Chin Strap
WARNING! Never use the loop as properly closed chin strap the sole means for closing the chin the double-D buckles. If so, repeat steps described opposite. strap. To ensure adequate tightening, Never ride with the chin strap open, the chin strap must be inserted into the inadequately closed or poorly positioned. - Page 8 OF AN ACCIDENT helmet to begin releasing the wrap- Your Spartan GT Pro Carbon / Spartan around neck roll. GT Pro model has been equipped with a system that allows effortlessly remo-...
- Page 9 3- Separate the 2 ends of the neck Locate cheek pad’s roll by unfastening the plastic parts; «Emergency» tabs. Remove the next, spread apart each side to provi- cheek pads by pulling forward in a de access to the cheek pads and chin diagonal motion.
-
Page 10: Textile Parts
CLEANING THE INTERIOR THE TEXTILE PARTS All interior fabric materials are The Spartan GT Pro Carbon - washable; to avoid their deterio- Spartan GT Pro comfort fabrics and ration, it is necessary to strictly foams will help you better appre- adhere to the following guidelines: ciate your helmet’s performance. - Page 11 DISASSEMBLING THE HELMET INTERIOR 1- Separate the 2 parts of the chin strap. Remove the anti-fog breath guard(s). 3- Detach the cheek pads by pulling on the «Emergency» tabs diagonally toward the front and bottom of the helmet. 2- Extract the wrap-around neck roll starting from the front by using the «Emergency»...
- Page 12 REASSEMBLING THE HELMET Unfasten the snaps at the back of INTERIOR the peak and then withdraw the front plastic part from its slot. Remove the 1 - Reposition the peak. Begin by peak. sliding the front part into its slot. All 3 clips must be firmly inserted into their guide.
- Page 13 3 - Put the cheeks back on by pla- cing the studs at the beginning of their slots, taking care not to jam the «Emergency» tab, then lock by sliding them backwards. Begin with the front part. Rescratch the velcro. 5 - Then reinstall the sides.
- Page 14 7- Next, place the main anti-fog breath guard into its rightful place by sliding the plastic parts between the shell and the wrap-around neck roll. WARNING! interior padding is critical to maintain the correct fit of the helmet on your head. If you have any doubt whatsoever regarding the removal or replacement of the interior padding, DO NOT USE YOUR...
- Page 15 REMOVAL OF THE SCREEN WARNING! If you are not sure 1- Slightly open the visor by pressing that you properly replaced the the button, then lift. The circle on the visor, do not use the helmet. The visor visor must be aligned with the circle on could suddenly and without warning the shell.
-
Page 16: Sun Visor
INSTALLATION OF THE SCREEN WARNING! If you are not sure that properly replaced 1 - Introduce the visor into its slot the visor, do not use the helmet. The visor could suddenly and without war- in a slightly inclined position. Fully ning become detached from the helmet insert the visor into its slot and keep while riding, causing you to lose control... - Page 17 WARNING! Do not try to and lengthen its lifespan, the exter- raise lower or adjust your sun nal surface of the Spartan GT Pro shield while riding. You could lose Carbon / Spartan GT Pro sun shield control of your motorcycle, resul-...
- Page 18 REPLACEMENT Carry out the above operation in reverse order: - Move the handling button to the low position; - Clip the sun shield on at one side and then the other (Fig. D). - Using a screwdriver or similar pointed instrument, apply pressure to the central fixing button and then clip the sun shield back on by lifting it slightly (Fig.
-
Page 19: Air Stream
3- To completely close the visor, AIR STREAM lower it until reaching the locking position. 1- Slightly open the visor by pressing the locking button to release it. LOWER VENTILATION 1 - To use the lower ventilation, place the arrow in the low position. Reposition the arrow in the high position to close this ventilation. - Page 20 UPPER VENTILATION SPOILER 1 - To use the upper ventilation, shift 1 - To extract hot air, open the vent the button toward the front (closed) by shifting the arrow toward the or back (open). bottom. Close the vent by placing the arrow once again in the upper position.
-
Page 21: Easy Fit /Sharktooth Prime
EASY FIT allows you to communicate via Your SHARK Spartan GT Pro Carbon Bluetooth as simply and easily as - Spartan GT Pro has been designed to possible. provide additional «comfort» to riders For riders on city streets, highways wearing glasses thanks to the SHARK or the open road who’d like to... - Page 22 11. Pour tout commentaire ou question Même si le casque n’est pas endommagé ou concernant le casque, veuillez contacter la détérioré, il est recommandé de le changer société SHARK ou votre fournisseur le plus cinq ans après son achat. proche. 4. N’apporter aucune modification ATTENTION ! Nous ne garantissons pas le casque.
- Page 23 • Précautions et recommandations ..... . . • Sommaire / Anatomie du casque ..... . . •...
- Page 24 ATTENTION ! Aucun casque est nécessaire de vérifier que le ne peut protéger entièrement casque correspond bien à votre tête. l’utilisateur tous chocs Lorsque que vous choisissez un possibles à haute ou basse vitesse. nouveau casque, vérifier que votre Toutefois, pour protection tête soit...
- Page 25 3. Avec la jugulaire serrée, attraper Pour toute question concernant le choix l’arrière du casque par la base et essayer de la bonne taille de casque, demandez de le retirer de votre tête dans un conseil à votre revendeur. mouvement rotationnel. Ensuite essayer Chacune de ces étapes doit être répétée d’enlever le casque en le saisissant par la pendant toute la durée de vie du casque,...
- Page 26 à l’aide de la boucle de réglage (Fig. A, B, chute. C, D). Chausser votre casque Spartan GT Pro Carbon - Spartan GT Pro et attacher le sys- Ne jamais appliquer de produits lubrifiant tème de rétention. Lorsque le « Precise Lock»...
- Page 27 ATTENTION ! Ne jamais utiliser le correctement fermé la jugulaire dans passant comme seule fermeture de la les boucles double-D. Répétez alors les étapes décrites ci-contre. jugulaire . Afin d’être correctement serrée, Ne jamais rouler avec la jugulaire ouverte, la jugulaire doit passer selon les instructions mal fermée ou mal positionnée.
- Page 28 “Emergency“ et la tirer vers le bas du casque pour commencer à libérer le Votre Spartan GT Pro Carbon / tour de cou. Spartan GT Pro est équipé d’un sys- tème permettant de retirer le casque en cas d’accident, sans effort pour évi- ter d’agraver les blessures.
- Page 29 3 - Dissocier les 2 extrémités du tour Repérer languettes de cou en déclipsant les parties plas- “Emergency“ des coussinets de joues. tiques, puis écarter chaque côté pour Dégager les joues en tirant vers libérer l’accès aux joues et à la jugu- l’avant, en diagonale.
- Page 30 NETTOYAGE DE L’INTÉRIEUR LES TEXTILES Les parties textiles internes sont Les textiles et mousses de confort du Spartan GT Pro Carbon - Spartan GT lavables, il est important, afin de ne Pro permettront d’apprécier au mieux pas les détériorer, de suivre scru- puleusement les conseils ci-des- les performances de votre casque.
- Page 31 DÉMONTAGE DE L’INTÉRIEUR 1 - Séparer les 2 parties de la jugulaire. Retirer la/les bavettes anti-remous. 3 - Détacher les joues en tirant sur les languettes “Emergency”, en diagonale vers l’avant et le bas du casque. 2 - Extraire le tour de cou en commen- çant par l’avant à...
- Page 32 REMONTAGE DE L’INTÉRIEUR 4 - Dégraffer les pressions à l’arrière de la coiffe, puis sortir la partie plastique 1 - Replacer la coiffe. Commencer avant de son logement. Enlever la coiffe. par glisser la partie frontale dans son logement. Les 3 clips doivent bien être engagés dans leur guide.
- Page 33 3 - Remettre les joues en plaçant les têtons au début de leurs logements, en prenant garde de ne pas coin- cer la languette “Emergency“, puis verrouiller en les faisant glisser vers l’arrière.Commencer par la partie avant. Rescratcher les velcros. 5 - Continuer en replacant les cotés.
- Page 34 7 - Replacer la bavette anti-remous principale en glissant les parties plastiques entre la calotte et le tour de cou. l’habillage intérieur sont soumises à une usure normale en fonction du soin et de l’en- tretien, du temps d’utilisation, mais aussi des caractéristiques d’acidité...
- Page 35 DÉPOSE DE L’ÉCRAN ATTENTION ! Si vous n’êtes 1 - Entrouvrir l’écran en appuyant sur pas sûr d’avoir bien remonté le bouton, puis soulever. Le cercle sur votre écran, n’utilisez pas le casque. En l’écran doit être aligné avec le cercle de roulant l’écran pourrait se détacher du la calotte.
- Page 36 MONTAGE DE L’ÉCRAN ATTENTION ! Si vous n’êtes pas sûr d’avoir bien remonté votre écran, 1 - Présenter l’écran légèrement n’utilisez pas le casque. En roulant l’écran incliné devant son logement. Insérer pourrait se détacher du casque soudaine- l’écran dans son logement et pousser ment et sans prévenir, causant ainsi une perte de contrôle de votre moto, puis jusqu’au “clic”.
- Page 37 ATTENTION ! Ne pas manipuler - Spartan GT Pro est traitée le pare-soleil en conduisant. Vous anti-rayures. Pour son entretien et pourriez perdre le contrôle du véhicule, son nettoyage, veuillez suivre les causant ainsi un accident, des blessure mêmes conseils préconisés pour ou la mort.
- Page 38 - déclipsez le pare-soleil latéra- lement (Fig. C). MISE EN PLACE Effectuez les mêmes opérations en sens inverse : - Amenez le bouton de manipu- lation du pare-soleil en position basse ; - clipsez le pare-soleil latéralement d’un côté puis de l’autre (Fig. D). - à...
- Page 39 FILET D’AIR 3 - Pour fermer entièrement l’écran, 1 - Entrouvrir l’écran en appuyant le descendre jusqu’au verrouillage. sur le bouton de verrouillage pour le libérer. VENTILATION INFÉRIEURE 1 - Pour utiliser la ventilation infé- rieure, placer le curseur en position basse.
- Page 40 VENTILATION SUPÉRIEURE SPOILER 1 - Pour utiliser la ventilation supé- 1 - Pour extraire l’air chaud, ouvrir rieure, déplacer le bouton vers l’avant l’aération en déplaçant le curseur vers (fermé) ou l’arrière (ouvert). le bas. Fermer en replaçant le curseur en position haute.
- Page 41 EASY FIT Bluetooth en toute simplicité. Votre SHARK Spartan GT Pro Carbon Pour les conducteurs urbains, rou- - Spartan GT Pro a été conçu pour tiers ou Touring qui souhaitent apporter un “confort“ supplémentaire communiquer en roulant, le kit aux porteurs de lunettes avec le SHARK Sharktooth Prime Bluetooth mains EASY FIT.
- Page 42 Sie sich an Ihren Händler, zu Ihrem Helm, wenden Sie sich bitte direkt bevor Sie den Helm erneut verwenden. an Spartan GT Pro Carbon / Spartan GT Pro 3. Wie alle Produkte unterliegt auch ein oder Ihren nächstgelegenen Händler.
- Page 43 • Warnungen und anweisungen ..........................2 • Aufbau des Helms ..............................3 • Ein Helm in Ihrer Größe ..........................4 - 5 • Kinnriemen ................................6 - 7 • Emergency system ............................. 8 - 9 • Textilien ................................10 - 14 •...
- Page 44 WARNUNG! Kein Helm zwei ganzzahligen Werten liegt, ist in der Lage, den Träger versuchen zunächst sämtlichen denkbaren kleinere Helmgröße. Aufgrund Kollisionen hoher oder der von Mensch zu Mensch geringer Geschwindigkeit unterschiedlichen Kopfformen jeglichen Verletzungen gibt der Kopfumfang jedoch nur zu schützen. Für optimalen einen ungefähren Hinweis.
- Page 45 noch von oben nach unten weit Wickeln Sie keinesfalls Ihr Haar gegenüber dem Kopf verschieben in den Helm und tragen Sie unter lassen. Beim Versuch, den Helm dem Helm keine Gegenstände zu verschieben, sollten Sie an der im Haar. Führen Sie auch keine Haut einen Widerstand spüren.
- Page 46 Riemenlasche richtig ist. Je nach Das Schnappsystem „Precise Lock“ Version und Land kann der Spartan GT bietet Ihnen eine feine und präzise Pro Carbon / Spartan GT Pro mit einem Einstellung dank der ansehnlichen Länge Kinnriemenverschluss mit Doppelring seines gezahnten Teils. Es ist jedoch ausge-stattet sein .
- Page 47 WARNUNG! Schließen Sie den Kinnriemen versuchsweise nach unten. Kinnriemen niemals allein mit Falls er sich dabei zu lösen beginnt, der Halteschlaufe. Um den Kinnriemen Doppel-D-Ring-Verschluss ordnungsgemäß zu schließen, ist es nicht ordnungsgemäß geschlossen. unbedingt erforderlich, durch Wiederholen Sie in diesem Fall die beiden D-Ringe führen.
- Page 48 HELM BEI UNFALL ENTFERNEN 2 - Die mittlere Lasche „Emergency“ ergreifen und nach unten vom Helm Ihr Spartan GT Pro Carbon / Spartan ziehen, um mit der Freigabe des Halses GT Pro ist mit einem System zum müh- zu beginnen.
- Page 49 3 - Die beiden Enden des Halsteils 5 - Die Laschen „Emergency“ der durch Ausrasten der Kunststoffteile Wangenpolster ausfindig machen. voneinander trennen Die Wangenpolster durch diagonales anschließend beide Seiten für den Ziehen nach vorne freigeben. Zugang zu den Wangen und dem Kinnriemen freilegen.
- Page 50 REINIGUNG DES HELMINNEREN HELM BEI UNFALL ENTFERNENDER BEZUG Die Stoffbezüge im Inneren des Helms sind waschbar. Befolgen Die hochwertige Innenausstattung Sie jedoch strikt die folgen- Ihres Spartan GT Pro Carbon / Anweisungen, eine Spartan GT Pro trägt entscheidend Beschädigung vermeiden: einem...
- Page 51 AUSBAU DER INNENAUSSTATTUNG 1 - Die beiden Teile des Kinnriemens voneinander trennen. Den/die Kinndeflektoren entfernen. 3 - Die Wangenpolster durch dia- gonales Ziehen an den Laschen „Emergency“ nach vorne und nach unten vom Helm lösen. 2 - Mithilfe der Lasche „Emergency“ das Halsteil von vorne beginnend heraus- ziehen.
- Page 52 4 - Die Druckknöpfe hinten am EINBAU Innenpolster lösen und dann das vor- DER INNENAUSSTATTUNG dere Kunststoffteil aus der Aufnahme 1 - Das Innenpolster einsetzen. Dazu entfernen. Das Innenpolster heraus- zunächst das Vorderteil in seine nehmen. Aufnahme schieben. Die 3 Klips müssen richtig in die Führungen eingesetzt werden.
- Page 53 3 - Die Wangen wieder aufsetzen, indem die Köpfe am Anfang der Unterkünfte platziert werden, wobei darauf zu achten ist, dass die Zunge “Emergency“ nicht eingeklemmt wird, und die Knöchel durch Ziehen nach hinten zu verriegeln. Mit dem Vorderteil bei Velcros Rescratcher starten.
- Page 54 7 - Den Hauptkinndeflektor ein- setzen. Dazu die Kunststoffteile zwischen Heimzahle und Halsteil schieben. wurden, unterliegen alle Teile der Innenverkleidung normalem Verschleiß, der von der Pflege und Reinigung, der Dauer der Benutzung, aber auch von dem Säuregrad Ihres Schweißes abhängt. Wenn Sie Alterungserscheinungen fest-stellen, empfehlen wir, die Einsätze zu wechseln, um den Helm langfristig voll-kommen sauber zu...
- Page 55 AUSBAU DES VISIERS ACHTUNG! Sie den Helm nicht, 1 - Das Visier durch Drücken auf den wenn Sie nicht sicher sind, ob Knopf und anschließendes Anheben sie das Visier korrekt eingesetzt haben. öffnen. Der Kreis auf dem Visier muss Das Visier könnte sich sonst während mit dem Kreis auf der Helmschale aus- der Fahrt plötzlich und ohne Warnung gerichtet sein.
- Page 56 EINBAU DES VISIERS mit einem Sechskantschlüssel eins- tellen. Zum Straffen anziehen, zum 1 - Das Visier leicht angeschrägt vor Lockern lösen. seine Aufnahme halten. Das Visier ACHTUNG! Verwenden Sie den in die Aufnahme einsetzen und Helm nicht, wenn Sie nicht sicher einschieben, bis es einrastet („Klick“).
- Page 57 ACHTUNG! Versuchen Sie eine lange Lebensdauer trägt auch nicht, Ihr Sonnenschild während die Sonnenblende des Evo-One eine der Fahrt nach unten zu heben oder kratzfeste Beschichtung. Verfahren anzupassen. Falls Sie dadurch die Sie bei der Wartung und Reinigung Kontrolle über das Motorrad verlieren, der Sonnenblende genauso wie kann es zu einem schweren Unfall und beim Visier.
- Page 58 EINBAU Führen Sie die obigen Schritte zur Demontage in umgekehrter Reihenfolge aus: - Bringen Sie den Bedienknopf in die unterste Position. - Rasten Sie die Sonnenblende erst an der einen, dann an der anderen Seite ein (Abb. D). -Drücken einem Schraubenzieher oder spitzen Gegenstand auf den mittleren Befestigungsknopf und rasten Sie...
- Page 59 LUFTSTROM 3 - Zum vollständigen Schließen das 1 - Das Visier durch Drücken auf den Visier bis zur Verriegelung nach unten Verrie-gelungsknopf freigeben und schieben. einen Spaltbreit öffnen. UNTERE BELÜFTUNG 1 - Zum Verwenden der unteren Belüftung den Schieber nach unten schieben.
- Page 60 OBERE BELÜFTUNG SPOILER 1 - Zum Verwenden der oberen 1 - Zum Abführen warmer Luft den Belüftung den Knopf nach hinten Schieber nach unten schieben, um die schieben (offen). Zum Schließen nach Lüftung zu öffnen. Zum Schließen den vorne schieben (geschlossen). Schieber wieder nach oben schieben.
- Page 61 Für Motorradfahrer, die auch während der Fahrt kommunizie- ren möchten, ist die Sharktooth EASY FIT Prime® Freisprechanlage Ihr SHARK Spartan GT Pro Carbon / unentbehrliches Zubehör. Sie ist Spartan GT Pro zeichnet sich durch das mit den meisten Mobiltelefonen EASY SYSTEM...
- Page 62 è da sostituire. Non portare riguardante il casco, si prega di contattare la mai un casco danneggiato. Anche se il casco non società SHARK o il punto vendita più vicino. è danneggiato o deteriorato, si raccomanda di ATTENZIONE! garantiamo sostituirlo cinque anni dopo l’acquisto.
- Page 63 • Precauzioni e raccomandazioni ................2 • Indice/Anatomia del casco ..................3 • Un casco su misura ....................4 - 5 • Cinturino ........................6 - 7 • Emergency system ....................8-9 • Tessuti ........................10 - 14 • Visiera ........................15 - 16 •...
-
Page 64: Un Casco Su Misura
ATTENZIONE! Nessun casco servono solo ad orientare la scelta della può proteggere completamente talgia più adatta alla propria testa. Per l’utilizzatore da tutti gli urti possibili ad una protezione efficace è necessario alta o bassa velocità. Tuttavia, per una verificare che il casco corrisponda bene protezione efficace, il casco dev’essere alla propria testa. - Page 65 3. con il cinturino allacciato, prendere ripetute durante tutta la vita del casco, il casco dalla base posteriore e provare poichè la gommapiuma del comfort può a sfilarlo dalla testa con un movimento evolvere col passare del tempo. Se, nel rotativo.
-
Page 66: Cinturino
CINTURINO Per bloccare il cinturino, è sufficiente infi- lare la linguetta nel punto previsto sull’anel- Il casco Spartan GT Pro Carbon/Spartan GT lo fino a ottenere una tensione perfetta Pro è provvisto, in base alle versioni e ai Pae- (Fig. E). La linguetta s’inserisce e si blocca si, di un cinturino a chiusura rapida «Precise... - Page 67 ATTENZIONE! Non utilizzare mai Provare a tirare sul cinturino con le il passante di plastica come sola dita. Se il cinturino, in un modo o in chiusura cinturino. un altro si allenta significa che non è chiusura corretta il cinturino deve stato chiuso correttamente nel doppio passare come...
- Page 68 IN CASO D’INCIDENTE “Emergency” e tirarla verso il basso del casco per iniziare a li-berare la zona Lo Spartan GT Pro Carbon / Spartan attorno al collo. GT Pro è munito di un sistema che per- mette di ritirare il casco senza sforzo in caso d’incidente, in modo da non...
- Page 69 3 - Separare le due estremità della zona Individuare linguette attorno collo sgancian- “Emergency” delle guancette. parti plastica, Liberare le guancette tirandole in poi diva-ricarle per liberare l’accesso a dia-gonale verso l’avanti. guancette e sottogola. 4 - Liberare la giugulare. 6 - Rimuovere le guancette.
-
Page 70: Tessuti
I TESSUTI I tessuti e la gommapiuma per il comfort Le parti tessili interne sono lavabili ; è del Spartan GT Pro Carbon/Spartan GT importante, al fine di non deteriorarli, Pro permetteranno di apprezzare al di seguire scrupolosamente i consigli meglio le prestazioni del casco. - Page 71 SMONTAGGIO DEL LATO INTERNO 1 - Separare le due parti della giugulare. Ritirare il sottogola anti-turbolenza. 3 - Staccare le guancette tirando le lin- guette “Emergency” in diagonale verso l’avanti e il basso del casco. 2 - Estrarre la zona attorno al collo iniziando dal lato anteriore per mezzo della linguetta “Emergency”.
- Page 72 RIMONTAGGIO Sganciare i bottoni dietro alla cuffia, DEL LATO INTERNO poi nella parte avanti tirare la parte plastificata per sganciarla. Togliere la Rimontare la fodera. Iniziare inse- cuffia. rendo la parte frontale nel suo vano. Le 3 clip devono es-sere infilate bene nella loro guida.
- Page 73 3 - Rimettere le guance posizio- nando le testine all’inizio delle loro abitazioni, facendo attenzione a non intrappolare la linguetta “Emergency”, quindi bloccarle tras- cinandole all’indietro. Inizia con il gioco prima. Rimuovi i velcros. 5 - Continuare ricollocando i lati. 6 - Finire di rimontare la zona attorno al collo fissando la parte posteriore.
- Page 74 7 - Ricollocare il sottogola anti-tur- bolenza inserendo le parti di plastica tra la calotta e la zona attorno al collo. ATTENZIONE! L’interno è un ele- mento essenziale per il buon mantenimento del casco sulla testa. Se persistono dubbi sul montaggio o lo smon- taggio degli interni non utilizzare il casco.
-
Page 75: Visiera
SMONTAGGIO DELLA VISIERA ATTENZIONE! Se non si è sicuri di aver ben rimontato la 1 - Aprire leggermente la visiera premen- visiera , non utilizzare il casco. Durante do il pulsante, poi sollevarla. Il cerchio sulla la guida la visiera potrebbe staccarsi visiera dev’essere allineato con quello improvvisamente e senza avvertimen- della calotta. - Page 76 RIMONTAGGIO DELLA VISIERA ATTENZIONE! Se non si è sicuri di aver ben rimontato la visiera , 1 - Presentare la visiera leggermente non utilizzare il casco. Durante la guida inclinata davanti al suo vano. Inserire la visiera potrebbe staccarsi improvvisa- la visiera nel suo vano e spingere fino mente e senza avvertimento dal casco , causando la perdita di controllo della...
- Page 77 Spartan GT Pro Carbon/Spartan GT Pro è tratta- ta anti-graffio. Per la manutenzione e la pulizia, seguire gli stessi consigli preconizzati per la visiera esterna.
- Page 78 INSTALLAZIONE Effettuare le stesse operazioni in senso inverso : 1 -portare il comando di manipo- lazione del para-sole in posizione abbassata. 2 -agganciare il para-sole lateral- mente prima da un lato poi dall’altro (fig. D). 3 -aiutandosi di un cacciavite o di una punta qualsiasi spingere il gancio di fissaggio centrale, poi reinserire il para-sole sollevandolo...
-
Page 79: Filo D'aria
FILO D’ARIA 3 - Per chiudere completamente la 1 - Aprire leggermente la visiera pre- visiera, farla scendere fino al blocco. mendo il pulsante di blocco per svin- colarla. AERAZIONE INFERIORE 1 - Per utilizzare l’aerazione infe- riore, collocare il cursore in posizione bassa. - Page 80 AERAZIONE SUPERIORE SPOILER 1 - Per utilizzare l’aerazione supe- 1 - Per far uscire l’aria calda, aprire riore, spostare il pulsante in avanti l’aerazione spostando il cursore verso (chiusa) o all’indietro (aperta). il basso. Per chiuderla, rimettendo il cursore in posizione alta. ATTENZIONE ! Non manipolare mai le prese d’aria durante la guida.
- Page 81 Il sistema Sharktooth Prime vi per- EASY FIT mette di comunicare via Bluetooth Il vostro casco Spartan GT Pro Carbon/ in tutta semplicità. Spartan GT Pro è stato concepito in Per tutti i motociclisti urbani, modo da apportare un confort supple- stradali o Touring che desidera- mentare ai portatori d’occhiali, grazie...
- Page 82 5. Trate su casco con cuidado. Nunca se conocimiento acuerda de no encontrar a siente sobre el o deje que se caiga al suelo. SHARK responsable hasta donde la ley lo Nunca conduzca con el casco colgado de permita de cualquier daño que pueda ser ninguna de las partes de su motocicleta.
-
Page 83: Easy Fit - Sharktooth Prime
• Precauciones e instrucciones ....................2 • Anatomía del casco ........................3 • Un casco a su medida ......................4 - 5 • Correa ............................6 - 7 • Emergency system ........................ 8 - 9 • Textiles ..........................10 - 14 •... - Page 84 ¡ATENCION! Ningún casco su cabeza. Cuando nos probamos un puede proteger a su portador casco nuevo, hay que asegurarse de de cualquier impacto bien a alta o que la cabeza entra dentro del casco baja velocidad. Asimismo, para su lo más profundamente posible, con la máxima protección, su casco debe parte frontal justo por encima de sus de estar bien ajustado y la correa...
- Page 85 3. Agarre el casco de su parte trasera almohadillado interior e intente sacárselo de la cabeza. puede desgastarse y así perder sus Siguientemente empuje casco cualidades con el tiempo. Si durante hacia arriba por la parte delantera. la vida del casco, este no mantiene Esta operación debe de hacerse con el ajuste apropiado, usted debe de una fuerza significativa.
-
Page 86: Correa
CORREA Para bloquear la correa, basta con Su casco Spartan GT Pro Carbon / introducir la lengüeta en el emplaza- Spartan GT Pro está equipado, según miento previsto en la hebilla, hasta las versiones y los países, con una cor- que la tensión sea correcta (Fig. - Page 87 ¡ATENCIÓN! Nunca utilice la graves en su cabeza o incluso la muerte. hebilla plástica para asegurar el Tire de la correa de seguridad con sus casco a su cabeza. Para que este bien dedos. S la correa de destensa de seguro, usted debe de entrelazar la cualquier manera, usted no ha ceñido correa por entre los anillos doble-D.
- Page 88 RETIRAR EL CASCO EN CASO 2 - Coger la tira central “Emergency DE ACCIDENTE “y tirar de ella hacia abajo del casco El Spartan GT Pro Carbon/Spartan GT para comenzar a liberar el contorno Pro Pro está equipado de un sistema de cuello.
- Page 89 3 - Separar los 2 extremos del contor- Localizar lengüetas no de cuello abriendo lo clips de las “Emergency “de las almohadillas de partes de plástico, luego separar cada las carrilleras. Retirar las carrilleras lado para acceder a las carrilleras y a tirando hacia adelante, en diagonal.
-
Page 90: Textiles
LIMPIEZA DEL INTERIOR LAS PARTES TEXTILES Las partes interiores de tela del casco Las partes textiles y almohadilladlo que son lavables; es importante seguir las proporcionan comodidad al Evo-GT siguientes instrucciones para evitar hacen que usted aprecie al máximo el dañarlas: rendimiento de su casco. - Page 91 DESMONTAJE DEL INTERIOR 1 - Separar las 2 partes de la yugular. Retirar la/las faldilla (s) antirremolinos. 3 - Desatar las carrilleras tirando de las lengüetas “Emergency”, en diagonal hacia adelante y la parte baja del casco. 2 - Extraer el contorno de cuello comenzando por delante utilizando la lengüeta “Emergency”.
- Page 92 MONTAJE DEL INTERIOR 4 - Desabrochar los broches de presión de la parte posterior de la cofia, luego Volver a colocar la cofia. Comenzar sacar la parte de plástico delantera de por deslizar la parte frontal en su alo- su alojamiento. Retirar la cofia. jamiento.
- Page 93 Poner de nuevo las mejillas colo- cando los pezones al principio de sus viviendas, teniendo cuidado de no atascar la lengüeta “Emergency“ y luego bloquearlos arrastrándolos hacia atrás. Empezar por la parte delantera. Rescribir los velcros. Seguir volviendo a colocar los laterales.
- Page 94 Su concesionario SHARK podrá suminis- trarle las piezas de reemplazo y proponerle opcionalmente almohadillas de grosores y 8 - Volver a cerrar con los clips los densidades diferentes, en caso de que la broches de presión y poner de nuevo...
- Page 95 DESMONTAJE DE LA PANTALLA ¡ATTENCION! Si no tiene la completa seguridad de haber 1 - Entreabrir la pantalla pulsando el montado bien la pantalla, no utilice botón, luego levantar. El círculo de la el casco. La pantalla podría desins- pantalla debe estar alineado con el cír- talarse de repente y sin ningún aviso mientras conduce, causando una pér- culo de la calota.
- Page 96 MONTAJE DE LA PANTALLA ¡ATTENCION! Si no tiene la com- pleta seguridad de haber montado 1 - Presentar la pantalla ligeramente bien la pantalla, no utilice el casco. La inclinada delante de su alojamiento. pantalla podría desinstalarse de repente Insertar la pantalla en su alojamiento y sin ningún aviso mientras conduce, causando una pérdida de control sobre y empujar hasta oír el “clic”.
- Page 97 ¡ATENCION! No manipule el la pantalla solar del Spartan GT parasol mientras conduce. Pro Carbon / Spartan GT Pro ha Podría perder el control del vehícu- sido impregnada con una capa de lo, causando un accidente, heridas tratamiento anti-ralladuras.
- Page 98 MONTAJE DE LA PANTALLA SOLAR Siga las operaciones anteriormente explicadas a la inversa. Sitúe el botón central de sujeción en su posición más baja. Encaje la pantalla solar un lado de cada vez (Fotos D). Utilizando una herramienta con punta (por ejemplo un desator- nillador) aplique presión sobre el botón central de fijación y encaje el botón central en su emplazamiento...
-
Page 99: Flujo De Aire
FLUJO DE AIRE 3 - Para cerrar completamente la pan- 1 - Entreabrir la pantalla pulsando el talla, bajarla hasta el bloqueo. botón de bloqueo para liberarla. VENTILACIÓN INFERIOR 1 - Para utilizar la ventilación inferior, colocar el cursor en posición baja. Poner de nuevo el cursor en posición alta para volverla a cerrar. - Page 100 VENTILACIÓN SUPERIOR SPOILER 1 - Para utilizar la ventilación supe- 1 - Para extraer el aire caliente, abrir rior, desplazar el botón hacia adelante la ventilación desplazando el cursor (cerrado) o hacia atrás (abierto). hacia abajo. Cerrar volviendo a poner el cursor en posición alta.
- Page 101 Su casco SHARK Spartan GT Pro Por los conductores urbanos, Carbon / Spartan GT Pro Pro fue diseña- touring o en rutas que quieren do para proporcionar «comodidad» con comunicar cuando conducen, el kit gafas adicionales empleando el sistema Sharktooth Prime Bluetooth manos SHARK EASY FIT.
-
Page 102: Menciones Legales
Helm verwendet werden, die das Stanzzeichen pieza. Las pantallas con la inscripción “DAYTIME N° E11 060670 und die SHARK Teile Nr. SHARK USE ONLY” no son adecuadas para uso nocturno o VZ300 aufweisen. Das Visier muss sorgfältig be- handelt werden.
Need help?
Do you have a question about the SPARTAN GT PRO and is the answer not in the manual?
Questions and answers