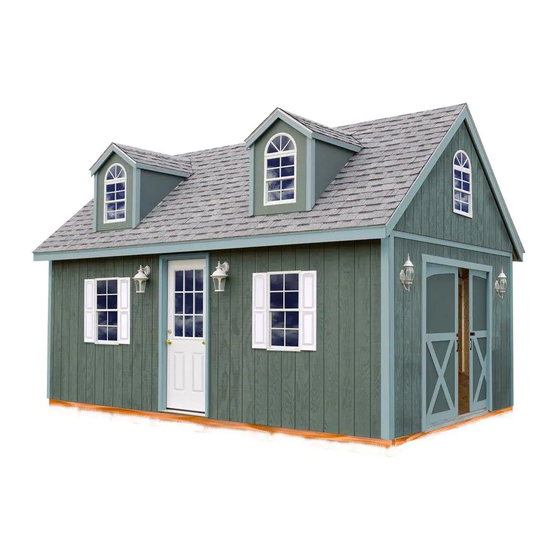
Best Barns Arlington II Assembly Book
Hide thumbs
Also See for Arlington II:
- Assembly book (30 pages) ,
- Assembly book (28 pages) ,
- Assembly book (24 pages)
Advertisement
Quick Links
Best Barns USA
Assembly Book
Revised September 6, 2022
!"#$%#&'()#*+
Arlington II
,-.(/(-0.
Manufactured by RBS Holdings, LLC
205 Arlington Drive
Greenville, PA 16125
12#3(45&"5$(#3(6789:#'2;+%<(=&%+:(;2+(6789:#'2;($5>3?(;2#3(45&"5$
459(&7;(@+(678#+%?(#&(>27$+(7:(#&(85:;?(>#;27";(67&3+&;(A:74
((((((B!)(C7$%#&'3?(DDE (((((F((E789:#'2;(-0--
Advertisement

Related Manuals for Best Barns Arlington II


Summary of Contents for Best Barns Arlington II
- Page 1 Best Barns USA Assembly Book Revised September 6, 2022 !"#$%#&'()#*+ Arlington II ,-.(/(-0. Manufactured by RBS Holdings, LLC 205 Arlington Drive Greenville, PA 16125 12#3(45&"5$(#3(6789:#'2;+%<(=&%+:(;2+(6789:#'2;($5>3?(;2#3(45&"5$ 459(&7;(@+(678#+%?(#&(>27$+(7:(#&(85:;?(>#;27";(67&3+&;(A:74 ((((((B!)(C7$%#&'3?(DDE (((((F((E789:#'2;(-0--...
- Page 2 MPORTANT NFORMATION BOUT 125&O 97" A7: 8":6253#&' 7": O#;< M$+53+ :+5% ;2+ A7$$7>#&' #&A7:45;#7& @+A7:+ @+'#&&#&' 67&3;:"6;#7&< K$>593(62+6O(>#;2(97":($765$(CRK(7:(@"#$%#&'(67%+(7AA#6+(A7:(5&9(:+P"#:+4+&;3(7:(:+3;:#6;#7&3< I$77:S \77%(A$77:#&'(#3(37$%(78;#7&5$$9<(]7"(459(62773+(;7(@"#$%(97":(7>&(7:(87":(5(6+4+&;(85%< Always wear safety glasses when cutting or nailing! 177$3(B+P"#:+%S C5&%(7:(E#:6"$5:()5> D+U+$ )5A+;9(Y$533+3 E7:%$+33(T:#$$ H+53":#&'(158+ T"3;(H53O C544+: V.GJ.(D5%%+:W3X M2#$$#83()6:+>%:#U+: M+&6#$ I:54#&'()P"5:+ K%%#;#7&5$ H5;+:#5$3 G Not included in kit: B+P"#:+%S )2#&'$+3(7:(4+;5$(:77A#&'?(T:#8(N%'+?(B77A#&'(Z5#$3(7:()6:+>3?(M5#&;...
- Page 3 Details for Optional Deluxe Floor System I7"&%5;#7&(3#*+(#3(,-.G0d(/(-0.G0d<((E2+6O($765$(@"#$%#&'(67%+3(#&(97":(5:+5?(;2+(67&3;:"6;#7&(459 25U+(;7(625&'+<((I7:(5(67&6:+;+(3$5@?(#&3;5$$(3#$$(3+5$+:(53(5(47#3;":+(@5::#+:(@+;>++&(;2+(67&6:+;+ 5&%(;2+(>5$$(8$5;+3<((I754(3#$$(3+5$+:(65&(@+(8":6253+%(5;(274+(6+&;+:3(#&(:7$$3(iG,h-d(7:(>#%+:< ,< );5''+: ;2+ _/_ ;#4@+:3 53 327>& @+$7>< E"; W-X ;>7 -/_G J. @75:%3 #&;7 -. $7&' @$76O3 ;7(3+6":+(;2+(_/_3(>2+:+(;2+9(@";;(;7'+;2+:< 15-1/4" 16" 16" -< E";(W-X(;>7(-/_GJ.(;7(5($+&';2(7A(J.(G0d<((12+9 >#$$ @+ "3+% A7: ;2+ a7#3; 2+5%+:3< D597";? A:74 $+A;? A7: ,Vd 7&...
- Page 4 Step 1 Assemble 12' Back Wall Wall Plate ,__d ,< E"; W-X ;>7 -/_G,-. ;7 5 $+&';2 7A ,__d< M73#;#7& ;2+ @75:%3 ;7'+;2+: 5&% #&%#65;+ >#;2 .e. 45:O3 >2+:+ ;2+ 24" >5$$(3;"%3(>#$$(@+($765;+%< 23-1/4" 24" 144" Wall Plate Pre-Cut Wall Studs Depending on your location pre-cut wall studs vary in length from 92-1/4"...
- Page 5 Step 2 Assemble 10' Side Wall Frames ,< E";(W-X(;>7(-/_G,0.(@75:%3(;7(5($+&';2(7A(,,VG,h-d<(M73#;#7&(;2+(@75:%3(;7'+;2+:(5&%(#&%#65;+ >#;2(.e.((45:O3(>2+:+(;2+(>5$$(3;"%3(>#$$(@+($765;+%< -< H5:O(5(.E.(5&9>2+:+(@+;>++&(A#:3;(;>7(3;"%(45:O3<(12#3(#3(:+A+:+&6+%(#&(5($5;+:(3;+8< Wall Plates (,,VG,h-d Top Wall Plate Bottom Plate 24" 24" 19-3/4" Stud Spacing i< b&3;5$$ WVX 3#/ 8:+G6"; >5$$ 3;"%3 @+;>++& ;2+ ;78 ` @7;;74 8$5;+3 >#;2 W-X ;>7 ,0% 3#&O+:3 7& +562(+&%<...
- Page 6 Step 4 Assemble 68-1/2' Side Wall Frames ,< E";(W-X(;>7(-/_GJ.(;7(5($+&';2(7A(VJG,h-d<(M73#;#7&(;2+(@75:%3(;7'+;2+:(5&%(#&%#65;+(>#;2(.e. (45:O3(>2+:+(;2+(>5$$(3;"%3(>#$$(@+($765;+%< -< H5:O(5(.E.(5&9>2+:+(@+;>++&(A#:3;(;>7(3;"%(45:O3<(12#3(#3(:+A+:+&6+%(#&(5($5;+:(3;+8< Wall Plates (VJG,h-d 24" 24" 19-3/4" i< b&3;5$$(W_X(A7":(8:+G6";(>5$$(3;"%3(@+;>++&(;2+(;78(`(@7;;74(8$5;+3(>#;2(,0%(3#&O+:3< Pre-Cut Wall Studs 68-1/2" Wall Plate _< B+8+5;(;7(533+4@$+(5&7;2+:(VJG,h-d($7&'(>5$$(A:54+<(12+(3#%#&'(>#$$(@+(588$#+%(5A;+:(;2+(>5$$3 5:+(3+;(7&(;2+(A$77:<...
- Page 7 Step 5 Assemble 96' Side Wall with Door Refer to door manufacturers specifications for rough opening size. Adjust measurements accordingly. ,< M73#;#7&(W-X(;>7(^Vd($7&'(@75:%3(;7'+;2+:(5&%(#&%#65;+(>#;2(.e.(45:O3(>2+:+(;2+(>5$$ 3;"%3(>#$$(@+($765;+%< 23-1/4" 23-1/4" 37" Door Opening 28" 28" -< b&3;5$$(WVX(3#/(8:+G6";(>5$$(3;"%3(@+;>++&(;2+(>5$$(8$5;+3< B+A+:(;7(;2+(%77:(45&"A56;":+:3(38+6#A#65;#7&3(A7:(67::+6;(:7"'2(78+&#&'(3#*+< i< ";(W-X(;>7(8:+G6";(>5$$(3;"%3(;7(67::+6;($+&';2(W:+4+4@+:(;7(5667"&;(A7:(-/_(@7;;74 8$5;+X 5&% #&3;5$$ 53 2+5%+: 3"887:;3 7& +562 3#%+ 7A ;2+ %77: 78+&#&'? see detail below< Z5#$(;7(3;"%3(>#;2(,0%(3#&O+:3<...
- Page 8 Step 6 Assemble Front Wall Frame ,< E"; W-X ;>7 -/_G,-. @75:%3 ;7 5 $+&';2 7A ,__d A7: >5$$ 8$5;+3< M73#;#7& ;2+ @75:%3 ;7'+;2+: 5&% #&%#65;+(>#;2(.e.(H5:O3(>2+:+(;2+(>5$$(3;"%3(>#$$(@+($765;+%< Install these Studs Centered 33" 33" -< b&3;5$$(WVX(3#/(8:+G6";(>5$$(3;"%3(@+;>++&(;2+(>5$$(8$5;+3(>2+:+(327>&< i< E";(W-X(8:+G6";(3;"%3(;7(5 2x4 Blocks $+&';2(7A(fJG,h-d(5&%(#&3;5$$ nail nail 2x8 Door Header 53(2+5%+:(3"887:;3(>2+:+...
- Page 9 Step 7A Set Walls ,< N:+6;(@56O(>5$$(5&%(,0.(3#%+(>5$$(A:54+3<( b&3;5$$(;2+(3#%+(>5$$(A:54+3(>#;2(;2+ IMPORTANTS( .E.(45:O3(7:#+&;+%(5'5#&3;(;2+(@56O(>5$$(85&+$(5&%(A:7&;(>5$$(67:&+:<()+6":+(>5$$3(;7'+;2+:(5; ;2+(67:&+:<(=3+(W_X(A7":(,0%(3#&O+:3(67:&+:<(!:56+(>5$$3(>#;2(8:+G6";(>5$$(3;"%3(;7(27$%(>5$$3 3+6":+(5&%(8$"4@< -< );5:;#&' 5; :#'2; 67:&+: #&3;5$$ 5 A"$$ >#%;2 3#%#&' 85&+$ >#;2 ;2+ .DKM. +%'+ A$"32 >#;2 ;2+ 3#%#&' 7&(@56O(>5$$<()#%#&'(327"$%(+/;+&%(ih_d(@+$7>(@7;;74(8$5;+<(Z5#$(3#%#&'(;7(@56O(>5$$(5&%(5$$ -/_3("3#&'(V%('5$U<(&5#$3(3856+%(Jd(585:;< Tip: If you are erecting building on a wood floor insert nails between the 3/4"...
- Page 10 Step 7B Set Walls continued _< N:+6; ;2+ A:7&; %77: >5$$ 85&+$ 5&% ;2+ WiX ;2:++ 3#%+ >5$$ A:54+3< IMPORTANTS b&3;5$$ ;2+ VJG,h-d $7&' 3#%+ >5$$ A:54+3 >#;2 ;2+ .E. 45:O3 7:#+&;+% 5'5#&3; ;2+ @56O 5&% A:7&; >5$$ 85&+$3< )+6":+ >5$$3 ;7'+;2+: 5; ;2+ 67:&+:3< =3+ W_X A7": ,0% 3#&O+:3 8+: 67:&+:< !:56+ >5$$3 >#;2 8:+G 6";(>5$$(3;"%3(;7(27$%(>5$$3(3+6":+(5&%(8$"4@<...
- Page 11 Step 8 Install 2x4 Tie Plates ,< b&3;5$$ 5 -/_GJ. 7& ;2+ 3#%+ >5$$ >#;27"; %77:? A$"32 >#;2 ;2+ -/_ 7& ;2+ @56O >5$$< b&3;5$$ 5 -/_G ,-. A$"32 >#;2 ;2+ -/_ 7& ;2+ A:7&; >5$$< E"; $+&';2 ;7 A#;< =3+ ,0% 3#&O+:3 ;7 3+6":+ ;2+ ;#+ 8$5;+3 ;7(A:7&;(5&%(@56O(>5$$3(5&%(5$7&'($+&';2<...
- Page 12 Step 10 Install Loft Floor Important: Before securing the 2x4 floor joists make sure the side walls are plumb. The building width should be 12'-0" measuring from the outside of the 2x4 tie plates. E";(W^X(&#&+(-/_G,-.(@75:%3(;7(5($+&';2(7A(,ifd(5&%(#&3;5$$(#& ;2+(4+;5$(25&'+:3<(=3+(,G,h-d(25&'+:(&5#$3< Step 11A Install Loft Floor Sheathing Before installing floor sheathing consider where to locate the 2' x 4' access opening.
- Page 13 Step 11B Install Loft Floor Sheathing continued ,< D765;+(W_X(A7":(iG,h-d(/(-_d(R)!(A#$$+:3<(b&3;5$$(5;(A:7&;(5&%(@56O(67:&+:3(7&(;78(7A(-/_(;#+ 8$5;+3<(=3+(W_X(A7":(V%(67447&(&5#$3(+562<(b&3":+(;2+(3856+(@+;>++&(A#$$+:3(#3(^Vd< -< b&3;5$$ $7A; A$77:#&' @+;>++& R)! A#$$+:3< N%'+ 7A 32+5;2#&' 327"$% @+ A$"32 >#;2 A:7&; 5&% @56O >5$$ ;#+ 8$5;+3< B+A+: ;7 ;2+ 3"''+3;+% $597"; 7& 8:+U#7"3 85'+< b&3;5$$ A$77:#&' "3#&' V% 67447& &5#$3(3856+%(,-d(585:;<...
- Page 14 Step 13A Assemble Gables ,< Y5;2+:(8:+G@"#$;('5@$+(+&%(A:54+3?(W,X(7&+($+A;(5&%(W,X(:#'2;?(W,X(7&+(_^G,h-d($7&'(-/_(5&%(W-X ;>7(i-G,h-d($7&'(-/_3(>#;2(5&'$+%(+&%3< -< M73#;#7&(;2+3+(67487&+&;3(;7'+;2+:(53(327>&(@+$7><(\2+&(5$#'&+%(67::+6;$9(;2+(@7;;74(-/_3 >#$$(@+(3;:5#'2;(5&%(4+53":+(,-.G0d(A:74(+&%(;7(+&%<(Pre-built gable ends highlighted in gray. i< 1+487:5:#$9(;56O(,/_(@$76O3(;7($7A;(A$77:#&'(5:7"&%(;2+(A:54+(4+4@+:3<(12+3+(@$76O3(>#$$(@+ JdG,-d $7&' 5&% 459 25U+ 5&'$+% +&%3< H5O+ 3":+ W-X ;>7 7A ;2+3+ @$76O3 5:+ 873#;#7&+% #&3#%+ +562(8:+G@"#$;('5@$+(+&%(A:54+(53(327>&<(M73#;#7&(;2+(:+3;(7A(;2+(@$76O3(588:78:#5;+$9(3856+% ;7(27$%(-/_3(#&(8$56+<(12+3+(>#$$(#&3":+(;25;(5$$(;:"33+3(5&%('5@$+3(5:+(@"#$;(+/56;$9(;2+(354+< TR(ZR1(&5#$(@$76O3(;7('5@$+< _< )+6":+(;2+(@7;;74(-/_(;7(;2+('5@$+(3;"%("3#&'(W-X(;>7(-G,h-d(36:+>3< L< D765;+ W-X ;>7 LGih_d/,_d R)! '"33+;3< K;;562 ;2+3+ ;7 ;78 7A +562 '5@$+ 3;"% ;7 3+6":+ A:54+ ;7(i-G,h-d(-/_3<(=3+(V%(67447&(&5#$3<()++(T+;5#$(.K.<...
- Page 15 Step 13B Assemble Gables Continued L< D765;+ W-X ;>7 L0Gih_d $7&' -/_3<b&3;5$$ ;2+3+ +P"5$$9 3856+% A:74 6+&;+: 7A ;2+ '5@$+< )+6":+ ;2+ @7;;74 -/_ ;7(;2+('5@$+(3;"%3("3#&'(W-X(;>7(-G,h-d(36:+>3(+562< 5-1/2"x27-3/4" Gusset V< b&3;5$$ 5 >77% '"33+; 5; 8+5O< Z5#$ "3#&'(W,_X(A7":;++&(V%(67447& &5#$3< f< D765;+(W-X(;>7(LG,h-d/-fGih_d '"33+;3< K;;562 ;2+3+ ;7 ;78 7A +562 '5@$+ 3;"% ;7 3+6":+ ;7 ;2+ i-G,h-d -/_3<(=3+(V%(67447&(&5#$3<...
- Page 16 Step 14B Install Gable Siding continued i< b&3;5$$(6+&;+:(3#%#&'(85&+$<(D765;+(3"&@":3;(>#&%7>?(packed in dormer carton?(5&%(6";(7"; 3#%#&' 5667:%#&' ;7 >#&%7> #&3;:"6;#7&3< b; #3 5%U#35@$+ ;7 #&3;5$$ ;2+ >#&%7> 5A;+: '5@$+ #3 3+;< _< b&3;5$$($53;(3#%#&'(85&+$< Step 15 Install Gable Overhang ,< D765;+(W-X(;>7(ffGihJd($7&'(-/_(:5A;+:3(7&('5@$+<(b&3;5$$(-/_3(A$"32(>#;2(;2+(;78(7A('5@$+ A:54+<(=3+(,0%(3#&O+:3< -< D765;+(W-X(;>7(i0G,h_d($7&'(-/_(:5A;+:3(5&%(#&3;5$$(;7(A# <(-/_3(>#$$(+/;+&%(@+97&%(+&%(7A '5@$+< Do not remove the temporary 1x4 blocks until the roof trusses and back gable are assembled.
- Page 17 Step 16 Set Front Gable Important: Temporarily brace the gables with 2x4s to secure gables until the roof sheathing is installed! ,< b&3;5$$('5@$+(7&(;2+(A:7&;(>5$$<()+6":+(@7;;74(7A '5@$+ ;7 $7A; A$77: 5&% R)! A#$$+:3 "3#&' ,0% 3#&O+:3< -< Z5#$ ;2+ @7;;74 +%'+ 7A ;2+ 3#%#&' #&;7 ;2+ ,/_ ;:#4< =3+(V%('5$U<(&5#$3<...
- Page 18 Step 19A Set Trusses ,< );5:;#&' 5; @56O '5@$+ 3+; 5 ;:"33 @9 3$#%#&' +&%3 7U+: -/_ A$77: a7#3;< 1:"33 +&%3 327"$% 3+; A$5; 5;78(A$77:(a7#3;<()+6":+(>#;2(W,0X(;+&(V%(67447&(&5#$3(7&(@7;2(3#%+3< -< E7&;#&"+(3;5&%#&'(;:"33+3(;7(A:7&;(7A(@"#$%#&'<(H5O+(3":+(;:"33+3(5&%('5@$+3(5:+(8$"4@<(bA &+6+335:9(385&(5(-/_(56:733(;783(5&%(;56O(;7(O++8(8$"4@("&;#$(:77A(32+5;2#&'(#3(#&3;5$$+%< 2x4 Block 1st Truss 2nd Truss Cut to Fit 3rd Truss (!0) ten 6d common nails on both side i<...
- Page 19 Step 19B Set Trusses continued _< E";(;7($+&';2(5&%(#&3;5$$(5&7;2+:(-/_(@+;>++&(;2+(;:"33('"33+;3(>2+:+(327>&(@+$7>< 2x4 Block 7th Truss Cut to Fit 8th Truss Step 20 Install Side Wall Trim It's easier to install the soffit if the corner and side wall trim are installed first. This enables the soffit to rest on the trim where it meets the building. See lower detail. ,<...
- Page 20 Step 21 Install Soffit ,< D765;+ 5 ^Gih_d / _Jd 37AA#; 85&+$< H+53":+ A:74 6+&;+: 7A A#:3; ;:"33 ;7 A56+ 7A ;2+ -/_ #&3;5$$+% 7&(;2+(A:7&;('5@$+<(H5:O(;2#3($+&';2(A:74(;7&'"+(+%'+(3#%+(6";(7AA(.DKM.(+%'+(+&%(7A(85&+$< -< Z5#$(;2+(37AA#;(85&+$(;7(;2+(+&%(7A(;2+(-/_3<()++(Detail 'C'(@+$7>< i< b&3;5$$(WLX(A#U+(^Gih_d(/(_Jd(37AA#;(85&+$3(5$7&'(;2+(3#%+(7A(;2+(@"#$%#&'(6";;#&'(;2+($53;(37AA#; 85&+$(A$"32(>#;2(;2+(-/_(7&(;2+(:+5:('5@$+< _< B+8+5;(;7(#&3;5$$(37AA#;(85&+$3(7&(;2+(78873#;+(3#%+(>5$$< Tongue Edge at Center of Truss LAP Edge is cut off Detail 'C' Soffit 1x3 Trim Board...
- Page 21 Step 22 Install 1x6 Fascia on Side Walls ,< );5:;#&'(5;(;2+(@56O('5@$+?(#&3;5$$(5(fLd($7&'(,/V(;:#4(@75:%(A$"32(>#;2(;2+(A56+(7A(;2+(-/_< b&3;5$$(;2+(,/V(@75:%(37(;2+(;78(7A(;2+(@75:%(#3(5$#'&+%(>#;2(;2+(;78(7A(;2+(;:"33+3<(12+(:77A 32+5;2#&'?(installed later?(327"$%(:+3;(7&(;2+(A536#5<(=3+(5(3;:5#'2;(+%'+(53(327>&(@+$7><(=3+ V%('5$U<(&5#$3< -< b&3;5$$(-iX(;>7(,/VGV.(;:#4(@75:%3(&+/;< i< E"; 5 _Jd $7&' ,/V ;:#4 @75:% A$"32 >#;2 ;2+ 7";3#%+(-/_(7&(;2+(A:7&;('5@$+< _< B+8+5;(7&(78873#;+(3#%+(>5$$< Flush with 2x4 Straight Edge Soffit Step 23A Install Roof Sheathing ,<...
- Page 22 Step 23B Install Roof Sheathing continued _< \2+&(#&3;5$$#&'(32++;3(5;(A:7&;('5@$+(6";(A$"32(>#;2(;2+(-/_3(7&(;2+('5@$+< L< b&3+:;(W-X(;>7(8$9G6$#83(#&;7(;2+(:77A(32+5;2#&'(@+;>++&(+562(;:"33(5;(;2+(;78(:7>? 3++(%:5>#&'(@+$7>< V< E";(5(L^G,h_d(8#+6+(7&(;78(:7>(37(;7(@+(A$"32(>#;2(A:7&;('5@$+(-/_3< f< T+;+:4#&+($765;#7&(A7:(%7:4+:3(5&%(A7$$7>(#&3;:"6;#7&3(#&(%7:4+:(O#;< Insert (2) two ply-clips into the roof sheathing between each truss at the top row Plyclip Cut 59-1/4" to fit 51" 48" x 27" Cut From 48"...
- Page 23 Step 24 Install Door Flashing 3-1/2"x5" Flashing ,< D765;+ W-X ;>7 iG,h-d / Ld 4+;5$ A$532#&' 5&% @+&% 5$7&' >#%;2 ;7 ^0 %+':++3< b&3;5$$ 5; +562 67:&+: 7A ;2+ %77: 78+&#&'< 12+3+ >#$$(@+(67U+:+%(#&(;2+(&+/;(3;+83< -< b&3;5$$ ;2+ '5$U< %77: 3#$$ 7U+: A$532#&' #& ;2+ 6+&;+: 7A ;2+ %77: 78+&#&'<...
- Page 24 Step 26 Install Pocket Doors Track ,< b&3;5$$(5(f-d($7&'(1:56O()"887:;(K33+4@$9(J-Gih_d(A:74(;2+(A$77:<(ImportantS(4+53":+(A:74 ;2+(@7;;74(7A(;2+(-/i(7&(;2+(3"887:;(533+4@$9(;7(;2+(A$77:<(b&3":+(;2+(&7;62+%(+&%(7A(;:56O(#3 6+&;+:(7A(%77:(78+&#&'<(=3+(-G,h-d(36:+>3< 2x3 Track Support Assembly 2x8 Door Header View From Inside 82-3/4" to Floor -< b&3;5$$(;2+(7;2+:(;:56O(3"887:;(533+4@$9< Galv. Sill View From Inside L< b&3;5$$ ;2+ ;:+5;+% %77: 3#$$ @+2#&% ;2+ %77: 78+&#&'< 12+:+ &++%3 ;7 @+ 5 3856+ @+;>++& ;2+ Screw Used ;:+5;+% 3#$$ 5&% ;2+ #&3#%+ >5$$<...
-
Page 25: Install Doors
Step 27A Install Doors ,< )+$+6; ;2+ %77: >#;2 ;2+ 3#%#&' 5&% ;:#4 @75:% +/;+&%#&' 853; ;2+ -/_ A:54+? see detail below< );5&%#&'(7&(;2+(#&3#%+(7A(@"#$%#&'(3$#%+(;2+(:7$$+:3(7&(;2+($+A;(3#%+(;:56O(53(327>&(@+$7>< bA(#;(#3(&+6+335:9(;7(5%a"3;(;2+(%77:(2+#'2;(7&+(7:(@7;2(%77:(65::#+:3(65&(@+(5%a"3;+%<(D773+& 36:+>3(;25;(3+6":+(65::#+:W3X(;7(;2+(%77:<(K%a"3;(%77:(37(;2+(5$"4#&"4(5&'$+?(7&(;2+(@7;;74 7A(;2+(%77:?(%7+3(&7;(:"@(7&(;2+(;:+5;+%(;2:+327$%<(1#'2;+&(;2+(36:+>3< 1#8S(b&3+:;#&'(5(36:+>?(shown below?(>#$$(8:+U+&;(;2+(%77:3(A:74(A5$$#&'(;2:7"'2(;2+(78+&#&' @+;>++&(;2+(;:56O?(#A(;2+(%77:(#3(78+&+%(;77(A5:< T77:(1:56O IMPORTANT: N&%([#+> TR ZR1 #&3;5$$ ;:56O :7$$+:3 #& ;2+ 3856+ @+;>++& ;2+ 1:56O D+'3< )856+ b&3;5$$(;2+(;:56O(:7$$+:3(7&(;2+(#&3#%+(;:56O($+'<... - Page 26 Step 27B Install Doors continued -< C5&'(;2+(7;2+:(%77:<(I:74(;2+(#&3#%+(7A(@"#$%#&'(6$73+(@7;2(%77:3<(R&(;2+(:#'2;(%77:?(#&3;5$$ 5(3$#%#&'(%77:($5;62(5;(;2+(@7;;74(7A(-/_(A:54+<(]7"(>#$$(&++%(;7(%:#$$(5(27$+(#&(;2+(A$77:(A7: ;2+(:7"&%(325A;(;7(%:78(#&;7< i< b&3;5$$(5(4+;5$(8$5;+(;7(;2+($7>+:(@56O(7A(7;2+:(%77:<(12+(5&'$+%(+&%(>#$$(O++8(@7;2(%77:3 5$#'&+%(>2+&(6$73+%< _< I:74(;2+(7";3#%+(#&3;5$$(;2+(%77:(25&%$+3(5&%($76O#&'(%77:(2538(7&(;2+(7";3#%+(7A(;2+(%77:3< Angled Metal Plate Fold Hasp to Cover Screws Drill Hole Install Roofing — Not Supplied in Kit Metal Roof Edge Roof Sheathing ,< b&3;5$$(4+;5$(:77A(+%'#&'(5$7&'(;2+(+&%(>5$$3(5&%(;2+(A:7&;(+%'+(7A(;2+(:77A(32+5;2#&'< -< b&3;5$$(A+$;(858+:(5&%(32#&'$+3(5667:%#&'(;7(45&"A56;":+.3(#&3;:"6;#7&3< Optional Roof Covering @%$<...
- Page 27 H5;+:#5$(D#3;(A7:(\77%(M76O+;(T77:3 Qty. Material Shipped in 4' Extension Kit iVd / f^d \77% T77:3 >h M:#4+% )#%#&' 1:"33(B5A;+:3 -/_ ffGihJd !75:%3(>h(K$"4<(1:56O(K;;562+% 1:#4(!75:%3 1:+5;+%(\77%(12:+327$% 1:#4(!75:%3 Y5$U5&#*+%(T77:()#$$ B#%'+(!$76O -/_ ,JG,h-d T77:(1:#4 J,Gih_d M:+G@"#$;(1:"33(K33+4@$#+3(G($+A;25&% T77:(1:#4 M:+G@"#$;(1:"33(K33+4@$#+3(G(:#'2;25&% T77:(g54@ iGfhJd(/(f-d M:#4+% )7AA#; !75:%3 ihJd / ^Gih_d/ _JGih_d T77:(g54@ iGfhJd(/(f^(G(,h_d R)!()2+5;2#&'(((((((((fh,Vd(/((^Gih_d/(_Jd...
- Page 28 j;9< Material Packaged on Pallet j;9< Material Packaged on Pallet 1:"33(B5A;+:3 ffGihJd fh,Vd _Jd(/(-_d(R)!()2+5;2#&' -(Z7;("3+%(#&(;2#3(47%+$ fh,Vd _Jd(/(L,d(R)!()2+5;2#&' B#%'+(!$76O ,JG,h-d fh,Vd _Jd(/(_Jd(R)!()2+5;2#&' Y5@$+(RU+:25&' i0Gih_d fh,Vd _Jd(/(fLd(R)!()2+5;2#&' -(Z7;("3+%(#&(;2#3(47%+$ fh,Vd ^Gih_d(/(_Jd(R)!()2+5;2#&' Y5@$+(B5A;+:3 i-GihJd fh,Vd ^Gih_d(/(L,d(R)!()2+5;2#&' Y5@$+(M$5;+3 _^G,h-d fh,Vd ^Gih_d / L^G,h_d R)! )2+5;2#&' Y5@$+();"%3 L0Gih_d fh,Vd...
Need help?
Do you have a question about the Arlington II and is the answer not in the manual?
Questions and answers