Advertisement
Quick Links
Best Barns USA
Assembly Book
Revised September 19, 2017
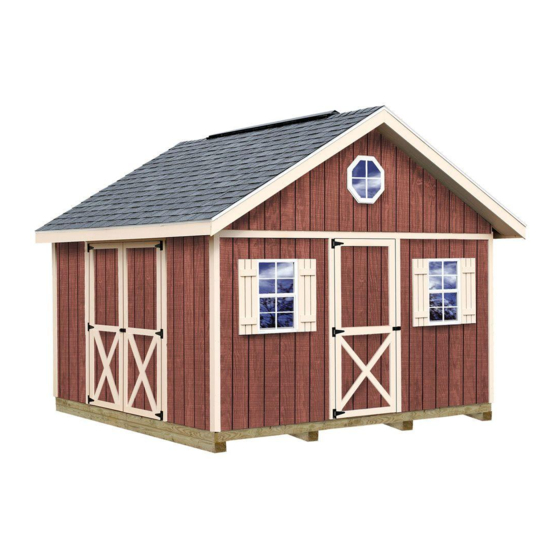
the Fairview
Building Size 12'x12'
Manufactured by Reynolds Building Systems, Inc.
205 Arlington Drive
Greenville, PA 16125
This manual is copyrighted. Under the copyright laws, this manual
may not be copied, in whole or in part, without consent from Reynolds
Building Systems, Inc.
© Copyright 2011
Advertisement

Subscribe to Our Youtube Channel
Related Manuals for Best Barns Fairview 12x12


Summary of Contents for Best Barns Fairview 12x12
- Page 1 Best Barns USA Assembly Book Revised September 19, 2017 the Fairview Building Size 12'x12' Manufactured by Reynolds Building Systems, Inc. 205 Arlington Drive Greenville, PA 16125 This manual is copyrighted. Under the copyright laws, this manual may not be copied, in whole or in part, without consent from Reynolds Building Systems, Inc.
-
Page 2: Tool List
MPORTANT NFORMATION BOUT Download the most current instruction book at www.barnkits.com; use the "manuals" link on the menu bar and then select your building kit and size. If you have any questions about assembling the kit, call 800-245-1577. If you are calling after normal business hours, call 724-866-HELP (4357) or email to help@barnkits.com. - Page 3 Typical Wood Floor System Shown below is a typical wood floor. Depending on your area, the construction may have to be changed to meet local codes. When using a concrete slab, use the same overall foundation measurements. Install foam sill sealer as a moisture barrier between the concrete and the wall plates.
- Page 4 Step 1 Assemble Trusses Building Tip: To aid in the assembly of the trusses, temporarily screw 2x4 blocks to the floor. There are short 2x4s, that may have an angle on one end, supplied in kit. 1. Screw (2) two 2x4 blocks to the 12' wide end of the floor at the top corner, see below. 2.
- Page 5 Step 2 Assemble Roof Gables 1. Butt (2) two 72" long 2x4s together and secure by nailing a 3-1/2" x 31-3/4" long ply- wood gusset across the top where they butt together. Use glue and 6d common nails. 3/4" Plywood Gusset 72"...
- Page 6 Step 3 Install Siding on Gables 1. Select one of the gable frames, Turn the gable over letting the bottom plate overhang the floor so the gable lays flat. 2. Install gable siding using 6d galv. nails across the top of the gable frame. Use 8d galv. nails Edge along the bottom edge.
- Page 7 Step 4 Assemble 12' Long Sidewalls - No Doors 1. Position 2x4-68-1/2" boards together and indicate with 'X' marks, where the wall studs will be located. Mark the ends that will butt together with the letters 'A' and 'B'. 68-1/2" Wall Plate 68-1/2"...
- Page 8 Step 5 Assemble 12' Back Wall 1. Position 2x4-72" boards together and indicate with 'X' marks, where the wall studs will be located. 72" Wall Plate 72" Wall Plate 23-1/4" 24" 23-1/4" 24" 72" Wall Plate 2. Install 72" wall studs between the top and bottom plates. Nail both wall frames together. 3.
- Page 9 Step 6 Assemble Sidewalls - Double Doors 1. Assemble a wall frame using (3) three 72" wall studs and (2) two 34-3/4" long 2x4 wall plates. Use 10d sinkers. 2. Install a 71-1/2" long 2x4 [red end], as a header support, on each wall frame.
- Page 10 Step 7 Assemble Front Wall - Single Door 1. Cut (2) two 58-1/2" long 2x4s to a length of 54-1/4" to be used for top and bottom wall plates. 2. Install (5) five 72" wall studs between the wall plates. 3.
- Page 11 Step 8 Set Walls Panels 35-1/2" Long 2x4 1. Nail (2) two 35-1/2" long 2x4 together with a OSB filler panel between them. Use 10d sinkers. OSB Filler This material is packed in door carton. 2. Secure wall panels together at the corners. Use (4) four 10d coated nails per corner. Nail wall panels to the floor.
- Page 12 Step 9 Install Trim on Front & Back Wall Panels 1. Install 1x4-75 3/4" corner trim boards to the back wall, see Step 8. Install trim flush with the 2x4 top plate and flush with the siding on the sidewalls. Use 8d galv. nails, spaced 12" apart. 2.
- Page 13 Step 11 Install 2x4 Tie Plates & Door Trim 1. Install (2) two 2x4-6' boards as tie plates across the sidewall with the double doors. The second 2x4-6' board will need to be cut to fit against front gable plate. Use 10d sinkers. 2.
- Page 14 Step 12 Layout Roof Trusses 1. Layout the truss spacing from the rear of the building. Measure from the backside of the 2x4 gable frame when marking the location of the first truss. Important: When marking the opposite wall, place the 'X' mark on the same side of the line so your trusses are parallel when they are installed.
- Page 15 Step 13 Set Roof Trusses Set roof trusses. Secure trusses to metal hangers with 1-1/2" hanger nails. Rear Gable Step 14 Install Eave Soffit & Corner Trim 1. Locate a 5" wide x 24" siding panel that has a 'tongue' edge. Install this panel under the truss overhang at the rear of the building.
- Page 16 Step 15 Install Roof Sheathing 1. Starting at the rear of the building, install 4'x6' OSB roof panels and 1x6-6' white pine fascia boards on each side. Install the roof sheathing and the 1x6 fascia boards flush with the face of the siding on the back gable. Install the fascia so the bottom edge of the roof sheathing will rest on the 1x6.
- Page 17 Step 15 Install Roof Sheathing (continued) 1. Install roof sheathing at the front of the building. The roof sheathing will extend past the front gable. Make sure the gable is plumb and the roof sheathing is overhanging the same distance beyond the front gable. 2.
- Page 18 Step 16 Install Front Gable Soffit and Door Trim 1. Install 86-1/4" long 2x4s under the roof sheathing against the front gable. 2. Install 86" long 2x4s under the front edge of the roof sheathing. Hold the 2x4s against the roof sheathing and screw through the sheathing into the 2x4 boards.
- Page 19 Step 17 Install Doors & Hardware 1. Lay the left door with the trim facing up. The siding on the left door extends past the door trim. See detail below. 2. Install 5" hinges to the left side of the door frame. To position the hinge properly, hold the rectangular plate against the frame.
- Page 20 Material Packaged In Component Kit Collar Ties 90" 1 lb. box Sinkers Truss Rafters 86-1/4" 1 lb. box Galv. Wall Studs 72" 1 lb. box Sinkers Door Jacks 71-1/2" 1 lb. box Galv. Wall Plates 68-1/2" 1 lb. box Common Wall Plates 58-1/2"...
Need help?
Do you have a question about the Fairview 12x12 and is the answer not in the manual?
Questions and answers