Table of Contents
Advertisement
Quick Links
Instructions: PermaPRO
WARNING!
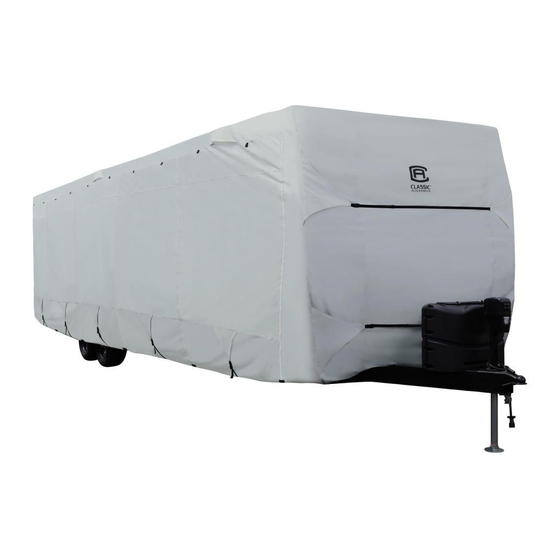
Cover for storage use only.
Do not occupy the RV while cover is on
the RV.
Do not run the RV engine with the
cover on.
WARNING!
Installation is best done with two people
and on most RVs requires working from
the roof of the RV. Never install on a
windy day or when the roof is slippery or
wet. Please take care when you are on a
ladder or the roof.
Be sure that your helper does not pull the
cover while you are on top of the RV.
CAUTION
Installation and removal is safer and
easier when done by two people. Cover
or tape any sharp edges on your RV that
could wear against your RV cover. Be sure
to lower any roof antennas.
Tools
Some radio antennas may need to be
unscrewed; usually with a Phillips head
screwdriver. Your cover will fit over flexible
or flat antennas and AC units.
Installation
1.
With another person lift the cover to
the roof.
2.
Carefully climb up on the roof and take
your cover out of its storage bag (Fig.
1). Place the rolled-up cover at the front
center of the roof and unroll down the
center of the RV toward the back (Fig. 2).
3a.
Starting at the front, unfold your
cover from the center outwards. Continue
unfolding the cover as you work toward
the back, letting it fall over the sides of
your RV (Fig. ). Make sure the corners of
™
the cover are at the corners of your RV.
3b.
For travel trailer, 5th wheel and
toy hauler RVs finish by zipping all the
panels closed on your cover then pull
the elasticized corners down over the
bumper(s) of your RV.
4a. For class A and class C RVs
Your cover is equipped with triple zipper
pulls on the front side panels (Fig. 4).
These extra zipper pulls allow the cover
to fit RVs with mirrors that do not fold
against the RV. Zip all three zipper pulls
down to the mirror height, then zip the
bottom zipper to the bottom of the cover.
Create an opening at the mirror height
by zipping the top zipper up slightly
and the center zipper down slightly. Slip
the opening over the mirror and close
the top and bottom zippers around the
mirror post. Finish by zipping all the
panels closed on your cover then pull
the elasticized corners down over both
bumpers of your RV.
Fig. 3
Fig. 1
Fig. 4
4b. For 5th wheel RVs
Connect and loosely tighten the tension
panel strap across the bottom front of
the nose of your 5th wheel (Fig. 5). Then
connect the rip-and-grip tabs that fold
in on either side just under the nose of
your 5th wheel (Fig. 6). Adjust and tighten
straps as necessary for a snug fit.
Fig. 2
4c. For toy hauler RVs
If your Toy Hauler is a trailer type skip to
step 5. If your Toy Hauler is a 5th wheel
type, Unzip the second zipper from the
front up to the bottom of the overhang on
both sides. Buckle a strap to the upper
tension panel (Fig. 7) (A) on the side of the
overhang and bring it across to the other
side and buckle. Repeat with the lower
tension panels (Fig. 7) (B).
Fig. 5
Fig. 6
Fig. 7
A
B
B
Advertisement
Table of Contents

Subscribe to Our Youtube Channel
Related Manuals for Classic Accessories Overdrive PermaPRO


Summary of Contents for Classic Accessories Overdrive PermaPRO
- Page 1 Instructions: PermaPRO ™ WARNING! the cover are at the corners of your RV. 4b. For 5th wheel RVs Connect and loosely tighten the tension For travel trailer, 5th wheel and Cover for storage use only. panel strap across the bottom front of toy hauler RVs finish by zipping all the Do not occupy the RV while cover is on the nose of your 5th wheel (Fig.
- Page 2 Instructions PermaPRO ™ 5. For all RVs Your cover is equipped with extra long zipper pulls. To secure the zipper pulls so Fig. 8 that they do not drag on the ground bring the ends of the zipper pulls up and tuck them into the rip-and-grip closure located at the base of the zipper along the hem (Fig.
- Page 3 Parts List Before you begin please check that you have all your parts. A. RV Cover Your package should contain one of the following covers. description quantity Class A Class C 5th Wheel Travel Trailer Toy Hauler...
- Page 4 Parts List A. Storage Bag Your package should contain one of the following storage bags. description model quantity part number Class A Class C PRT-80-001 5th Wheel Medium Bag Travel Trailer Toy Hauler...
- Page 5 Parts List A. Toss Bag Your package should contain one of the following toss bags. part number description quantity Class A Class C PRT-80-003 5th Wheel Travel Trailer Toy Hauler...
- Page 6 Parts List A. Straps Locate your cover below for the total quantity of straps included. part number description quantity model Class A Class C PRT-80-004 5th Wheel Travel Trailer Toy Hauler...
Need help?
Do you have a question about the Overdrive PermaPRO and is the answer not in the manual?
Questions and answers