Table of Contents
Advertisement
Quick Links
Advertisement
Table of Contents

Related Manuals for Fröling TM 320-550


Summary of Contents for Fröling TM 320-550
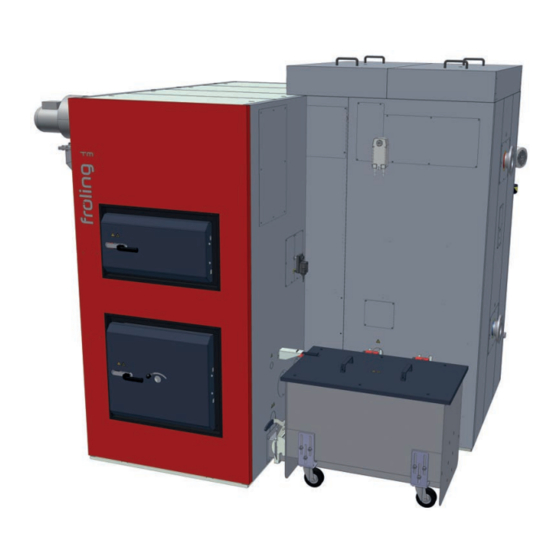
- Page 1 Installation instructions TM 320-550 Translation of original German version of installation instructions for technicians. Read and follow all instructions and safety instructions. All errors and omissions excepted. M0691622_en | Edition 09/01/2023...
-
Page 2: Table Of Contents
5.5.10 Removing the different blanking plugs..................35 5.5.11 Assembling the insulation floor base frame ................36 5.5.12 Assembling the flange for the heat exchanger ash removal system.......... 39 5.5.13 Fitting thermal insulation to the boiler ..................39 M0691622_en | Installation instructions TM 320-550... - Page 3 6.2.2 Non-permitted fuels........................91 6.3 Heating up for the first time ........................91 6.3.1 Screed drying..........................92 7 Decommissioning ............................93 7.1 Out of service for long periods ......................93 7.2 Disassembly............................93 7.3 Disposal ..............................93 M0691622_en | Installation instructions TM 320-550...
-
Page 4: General
Froling. On commissioning by FROLING Customer Service the validity of the delivery certificate will be noted on the customer service record. M0691622_en | Installation instructions TM 320-550... -
Page 5: Safety
The dangerous situation may occur and if measures are not observed it will lead to minor injuries. NOTICE The dangerous situation may occur and if measures are not observed it will lead to damage to property or pollution. M0691622_en | Installation instructions TM 320-550... -
Page 6: Qualification Of Assembly Staff
You must ensure that staff have the protective equipment specified by accident prevention regulations! ▪ During transport, erection and installation: - wear suitable work wear - wear protective gloves - wear safety shoes (min. protection class S1P) M0691622_en | Installation instructions TM 320-550... -
Page 7: Design Information
Water quality for heating, steam, cooling and air conditioning systems (Switzerland) UNI 8065 Technical standard regulating hot water preparation. DM 26.06.2015 (Ministerial Decree specifying the minimum requirements) Follow the instructions of this standard and any related updates. (Italy) M0691622_en | Installation instructions TM 320-550... -
Page 8: Regulations And Standards For Permitted Fuels
▪ Installation at altitude higher than 2000 metres above sea level only after consultation with the manufacturer ▪ The system must be protected against gnawing and nesting by animals (such as rodents) ▪ No flammable materials in proximity to the system M0691622_en | Installation instructions TM 320-550... -
Page 9: Chimney Connection/Chimney System
EN 303-5 specifies that the entire flue gas system must be designed to prevent, wherever possible, damage caused by seepage, insufficient feed pressure and condensation. Please note within the permissible operating range of the boiler flue gas temperatures lower than 160K above room temperature may occur. M0691622_en | Installation instructions TM 320-550... -
Page 10: Connection Line To The Chimney
▪ 1.5 x nominal diameter of connection line for radiation shield with rear ventilation, but at least 200 mm (NM) NOTICE! The minimum distances must be observed in accordance with the standards and guidelines applicable in the region M0691622_en | Installation instructions TM 320-550... -
Page 11: Measuring Port
NOTICE! Install the draught limiter directly under the mouth of the flue line, as the pressure is constantly low at this point. M0691622_en | Installation instructions TM 320-550... -
Page 12: Domestic Hot Water
1. For calculating the specific system volume, the smallest individual heating capacity is to be used for systems with several heat generators. 2. In systems with several heat generators with different specific water contents, the smallest specific water content is decisive in each case. M0691622_en | Installation instructions TM 320-550... -
Page 13: Pressure Maintenance Systems
In principle it is not necessary to use a storage tank for the system to run smoothly. However we recommend that you use the system with a storage tank, as this ensures a continuous supply of fuel in the ideal output range of the boiler. M0691622_en | Installation instructions TM 320-550... -
Page 14: Return Lift
Take the following precautions: r Regulations stipulate the use of a return temperature control. Ä The minimum return temperature is 60 °C. We recommend fitting some kind of control device (e.g. thermometer). M0691622_en | Installation instructions TM 320-550... -
Page 15: Technology
2000 Total width including fittings 2780 2990 Width, boiler including insulation 2195 2495 Width, combustion chamber ash container 1165 Total length including fittings 3340 3595 Length, combustion chamber ash container Length, stoker unit 1050 M0691622_en | Installation instructions TM 320-550... -
Page 16: Components And Connections
Flue gas pipe connection with FGR (flue gas recirculation) 300 mm 350 mm FGR blower fan WOS drive Safety heat exchanger connection 3/4" ET 3/4" ET Air vent heat exchanger connection 1/2“ IT 1/2“ IT Stoker unit Combustion chamber ash removal drive M0691622_en | Installation instructions TM 320-550... -
Page 17: Technical Data
1. Detailed information on the fuel can be found in the operating instructions in the section entitled “Permitted fuels” Regulation (EU) 2015/1189 – ηs in [%] Space heating annual rate of use ηs ≥ 78 M0691622_en | Installation instructions TM 320-550... - Page 18 1. The emissions of dust, gaseous organic compounds, carbon monoxide and nitrogen oxides are stated in a standardised form based on dry flue gas with a oxygen content of 10 % and under standard conditions at 0°C and 1013 millibar M0691622_en | Installation instructions TM 320-550...
-
Page 19: Tm 500-550
2. Detailed information on the fuel can be found in the operating instructions in the section entitled “Permitted fuels” Regulation (EU) 2015/1189 – ηs in [%] Space heating annual rate of use ηs ≥ 78 M0691622_en | Installation instructions TM 320-550... - Page 20 1. The emissions of dust, gaseous organic compounds, carbon monoxide and nitrogen oxides are stated in a standardised form based on dry flue gas with a oxygen content of 10 % and under standard conditions at 0°C and 1013 millibar M0691622_en | Installation instructions TM 320-550...
-
Page 21: Boiler Data For Planning The Flue Gas System
Required feed pressure at outlet of induced draught housing at partial load mbar 0.02 Recommended maximum chimney draught mbar Flue gas pipe diameter FGR pipe diameter 1. TM 500 with 501 kW nominal output is available only in the UK M0691622_en | Installation instructions TM 320-550... -
Page 22: Assembly
Store components at a protected location, which is dry and free from dust Ä Damp conditions and frost can damage components, particularly electric ones! 5.3 Positioning r Secure the slings or chains to the hooking point securely and position the boiler M0691622_en | Installation instructions TM 320-550... -
Page 23: Installing The Heat Exchanger
Remove the blanking plate on the underside of the combustion chamber r Fit the underfloor ash removal system adapter and the seal r Secure the ash duct on the left and right of the combustion chamber using blanking plates M0691622_en | Installation instructions TM 320-550... -
Page 24: Setting Up In The Boiler Room
▪ Observe the applicable standards and regulations when setting up the system! ▪ Comply with additional standards for noise protection! (ÖNORM H 5190 - Noise protection measures) Item 400-550 1000 1000 3100 3300 M0691622_en | Installation instructions TM 320-550... -
Page 25: Installing The Boiler
TM 320. The assembly steps are the same for boiler sizes 320-550. The only differences in installation for the TM 320 and TM 400/500/550 are described separately in the section entitled “Assembling the insulating side panels”. Ü "Installing the insulating side panels" [} 46] M0691622_en | Installation instructions TM 320-550... -
Page 26: Installing The Grate Drive
Ä With the help of a suitable tool, position the crank shaft so that the groove is aligned with the groove of the gears r Slide the key into the groove and fit the shaft retainer M0691622_en | Installation instructions TM 320-550... -
Page 27: Assembling The Stoker Unit
Fit the discharge system (feed screw, etc.) according to the installation instructions enclosed r Position the boiler in line with the discharge system or according to the diagram and connect to the discharge system M0691622_en | Installation instructions TM 320-550... -
Page 28: Installing The Hydraulic Stoker Unit (Optional)
Fit the burn back slide valve with seal to the hydraulic stoker. r Align the burn back slide valve using the adjustable feet. r Fit the discharge (feed screw, etc.) according to the installation instructions enclosed. M0691622_en | Installation instructions TM 320-550... -
Page 29: Bolting Together The Combustion Chamber And Heat Exchanger
Ä Turbomat 320: Marking “320” (A) points to the hole (C) on the ash removal flange which is nearest to the locking bolt (D) Ä Turbomat 400/500/550: Marking “500” (B) points to the hole (C) on the ash removal flange which is nearest to the locking bolt (D) M0691622_en | Installation instructions TM 320-550... - Page 30 Check the distance between the heat exchanger and the combustion chamber Ä A – bottom: 31 mm Ä B – top: 88 mm Ä Maximum permissible deviation: +/- 6 mm r Ensure the entire system is level by adjusting the feet (C) M0691622_en | Installation instructions TM 320-550...
-
Page 31: Assembling The Case Cooling Duct (Optional)
Remove the blanking plate from the combustion chamber and the front of the heat exchanger r Assemble the case cooling duct with the high-temperature hose between the heat exchanger and the combustion chamber M0691622_en | Installation instructions TM 320-550... - Page 32 (D) to the air damper (E) and insert into the duct r Insert the cover plate (F) to the air damper and attach to the duct r Assemble the torque support (G) for the servo-motor on the cover plate M0691622_en | Installation instructions TM 320-550...
-
Page 33: Repositioning The Eos Rods (If Required)
Remove the blanking plug (E) from the opposite side r Rotate the heat-exchanger shaft 180°, reinsert with the washer from the opposite side and push through r Replace the bearing bush and blanking plug that you removed previously on the opposite side M0691622_en | Installation instructions TM 320-550... -
Page 34: Fitting Various Fittings
Attach the spring at the bottom to the clamping bracket on the heat exchanger and at the top to the heat-exchanger lever r Attach the motor mount for the WOS drive to the threaded bolts on the heat exchanger and fix in place using bolts and spacer washers M0691622_en | Installation instructions TM 320-550... -
Page 35: Removing The Different Blanking Plugs
Remove the blanking plug for connecting the slide-on duct cooling (B) from the back of the heat exchanger Where required: r Remove the blanking plug and seal the additional immersion sleeve (C) under the flow temperature sensor on the outside of the heat exchanger M0691622_en | Installation instructions TM 320-550... -
Page 36: Assembling The Insulation Floor Base Frame
(E) 5.5.11 Assembling the insulation floor base frame r Fit the angled elements to the outside of the heat exchanger r Attach the lengthways strut to the angled elements M0691622_en | Installation instructions TM 320-550... - Page 37 Fit the cross-pieces on the front of the lengthways struts Ä Ensure that the lugs on the cross-pieces and lengthways struts on the combustion chamber slot into each other correctly M0691622_en | Installation instructions TM 320-550...
- Page 38 5 | Assembly r Fit hexagonal screws to the entire base frame to provide support r Fit the upper frame element in the middle of the combustion chamber M0691622_en | Installation instructions TM 320-550...
-
Page 39: Assembling The Flange For The Heat Exchanger Ash Removal System
Wrap thermal insulation over ash removal flanges at the front and back and secure with three tension springs r Secure rectangular thermal insulation between the ash removal flanges at the front and back with two tension springs M0691622_en | Installation instructions TM 320-550... - Page 40 Lay the heat insulation mat over the combustion chamber from the front r Lay the heat insulation mat over the back of the combustion chamber and attach to the front heat insulation mat using tension springs M0691622_en | Installation instructions TM 320-550...
- Page 41 (B) but do not remove it Ä Maintenance area under the moving grate r Position the heat insulation mats on the side of the combustion chamber and fix in place using tension springs M0691622_en | Installation instructions TM 320-550...
-
Page 42: Assembling The Fgr Duct
Position the heat insulation mat on the back of the combustion chamber and fix in place using tension springs 5.5.14 Assembling the FGR duct r Remove the blanking plate and align the FGR duct M0691622_en | Installation instructions TM 320-550... -
Page 43: Assembling The Upper Insulation Base Frame
Insert the combustion chamber support elements on both sides into the base frame at the front and back r Attach the outside support elements to the upper lengthways strut at the front and back Ä The lugs must be aligned properly! Ä Partially tighten the screws M0691622_en | Installation instructions TM 320-550... - Page 44 Ä The lugs must be aligned properly! Ä Partially tighten the screws r Fit the cross-pieces on the front and back of the combustion chamber to the lengthways struts Ä Partially tighten the screws M0691622_en | Installation instructions TM 320-550...
- Page 45 Assembly | 5 r Insert the heat exchanger support elements into the base frame M0691622_en | Installation instructions TM 320-550...
-
Page 46: Installing The Insulating Side Panels
The assembly steps are then the same for all boiler sizes from the following chapters. General procedure for mounting the insulating side panels: r Remove the protective film from all of the insulating side panels M0691622_en | Installation instructions TM 320-550... - Page 47 (C) and thermal discharge valve (D) but do not remove. r Cut the pre-punched blanking around the connection to the slide-on duct cooling (E) and drainage (F) from the insulation r Hang the insulating side panel on the back of the heat exchanger M0691622_en | Installation instructions TM 320-550...
- Page 48 Cut into the thermal insulation around the moving grate maintenance opening (G) and tertiary air controller (H) but do not remove the insulating material r Hang the insulating side panels on the outside of the combustion chamber M0691622_en | Installation instructions TM 320-550...
- Page 49 Optional: Cut into the thermal insulation around the jacket cooling air controller (C) but do not remove the insulating material r Hang the insulating side panel at the front of the heat exchanger M0691622_en | Installation instructions TM 320-550...
- Page 50 When you have finished fitting all the side panels, check that they fit correctly and bolt them to the base frame Ä Check that the insulating side panels are flush and check that there are no gaps between them M0691622_en | Installation instructions TM 320-550...
- Page 51 Cut out the pre-punched blanking around the FGR flange insulation Ä Turn the FGR duct insulation 180° when installing the heat exchanger on the left r Fit the insulation for the FGR duct M0691622_en | Installation instructions TM 320-550...
- Page 52 Using the hooks, attach the side cover plates to the back of the boiler r Fit the upper cover plate and screw to the back of the boiler and the side cover plates M0691622_en | Installation instructions TM 320-550...
- Page 53 Ä Caution: there are 8 holes for the fitted screws which are also for when the heat exchanger is installed to the left. Ensure you always use the holes which are closer to the front of the boiler. M0691622_en | Installation instructions TM 320-550...
- Page 54 Cut into the thermal insulation around the tertiary air controller (A) but do not remove the insulating material r Optional: Cut out and remove the thermal insulation around the combustion chamber ash removal (B) r Hang the insulating side panels on the front outside of the combustion chamber M0691622_en | Installation instructions TM 320-550...
- Page 55 Fit the cover plate with STL to the insulating side panel r Run all the cables from the sensors out through the insulation r Hang the insulating side panels on the heat exchanger M0691622_en | Installation instructions TM 320-550...
- Page 56 Ä The angled part must be on the outside of the combustion chamber Ä Turn the plate 180° when installing the heat exchanger on the left M0691622_en | Installation instructions TM 320-550...
- Page 57 Cut out the pre-punched blanking around the slide-on duct flow (A) insulation r Optional: Cut out the pre-punched blanking around the slide-on duct automatic ignition (B) insulation r Fit the insulating side panel above the slide-on duct M0691622_en | Installation instructions TM 320-550...
-
Page 58: Installing The Underpressure Controller
Fix the other end of the silicon hose to the "-" nipple of the underpressure sensor cartridge (D) with the hose clamp (E) and tighten Ä Do not remove the red reduction plug! M0691622_en | Installation instructions TM 320-550... -
Page 59: Assembling Fgr Differential Pressure Control (For Electrostatic Precipitator)
Insert the combustion chamber temperature sensor (F) so that it projects by approx. 40 - 50 mm into the combustion chamber (G) r Fix in position on the counter flange with the clamping screws by hand M0691622_en | Installation instructions TM 320-550... -
Page 60: Installing The Air Flap Actuators
Fit the servo-motor for primary air (A) and secondary air (B) r Fit the servo-motor for tertiary air (C) r Fit the servo-motor for primary air (D) and secondary air (E) for the flue gas recirculation (FGR) M0691622_en | Installation instructions TM 320-550... -
Page 61: Assembling Different Cover Plates
Ä Caution: Fit the servo-motor with the “L” (C) motor side at the front 5.5.21 Assembling different cover plates r Install the cover plates as shown r Cover plate (A) optional for jacket cooling M0691622_en | Installation instructions TM 320-550... -
Page 62: Installing The Heat Exchanger Ash Removal Unit
With the heat exchanger on the right, the chain tensioner (B) points upwards. With the heat exchanger on the left, the chain tensioner points downwards. M0691622_en | Installation instructions TM 320-550... - Page 63 Slide the sprocket key (F) into the groove and fit the shaft retainer (G) r Insert the flange plate with the ash screw into the heat exchanger on the back of the boiler and fix in place with screws M0691622_en | Installation instructions TM 320-550...
- Page 64 Assemble the ash removal unit flange as shown in the figure below: M8x25 hexagonal screw Ash removal unit flange Spring washer Locking lever Bushing M8 toothed washer M8 nut Plastic grip M0691622_en | Installation instructions TM 320-550...
- Page 65 Fit the cover plate under the ash removal unit flanges r Assemble the safety switch on the brackets r Align and fit both safety switches complete with brackets to the insulating side panel Ä Do not fully tighten the screws yet M0691622_en | Installation instructions TM 320-550...
-
Page 66: Fitting The Combustion Chamber Ash Removal Unit (Optional)
If the heat exchanger is mounted on the left, before you start assembly modify the ash removal unit flange as follows: Version with heat exchanger on the left: r Remove the lever from the ash removal unit flange, turn it over and then refit it M0691622_en | Installation instructions TM 320-550... - Page 67 Slide the sensors into the clamping plate Prepare the geared motor: r Remove the shipping clamp from the geared motor r Fit the vent screw (supplied) to the highest point r Fix the washer to the shaft stub M0691622_en | Installation instructions TM 320-550...
-
Page 68: Fitting The Heat-Exchanger Drive
Insert the WOS disc (B) into the geared motor (C) Ä The groove in the WOS disc must be aligned with the groove in the geared motor r Slide the key (D) into the groove and fit the shaft retainer (E) M0691622_en | Installation instructions TM 320-550... -
Page 69: Fitting The Fgr Blower Fan
5.5.25 Fitting the FGR blower fan r Remove the thermal insulation and cover plate from the FGR bracket on the back of the heat exchanger r Fit the FGR bracket and replace the thermal insulation M0691622_en | Installation instructions TM 320-550... - Page 70 For boilers without electrostatic precipitators: Fit flange pipe to FGR duct For boilers with electrostatic precipitators: r Shorten flange pipe by 250 mm (B) r Fit flue gas damper and previously shortened flange pipe to FGR duct M0691622_en | Installation instructions TM 320-550...
- Page 71 Ä Cut out the upper cover plate pre-punched blanking on the side of the heat- exchanger drive NOTICE! The FGR blower fan must be insulated by the customer! Make sure the drive assembly of the FGR blower fan can be removed. M0691622_en | Installation instructions TM 320-550...
-
Page 72: Fitting The Intermediate Piece (When Using An Electrostatic Precipitator)
Fit the flue pipe compensator and screws complete with spring washers and spacer washers to the induced draught fan bracket Ä Also screw on the earthing wire (supplied) with the toothed washer as potential equalisation M0691622_en | Installation instructions TM 320-550... - Page 73 Ä Use spacers to align the induced draught fan and FGR blower fan if necessary Ä Also screw on the earthing wire (supplied) with the toothed washer as potential equalisation NOTICE! The connection between the ID fan and FGR blower fan (T-piece) must be insulated by the customer! M0691622_en | Installation instructions TM 320-550...
- Page 74 Fit the cover plates on each side of the induced draught fan flange to the insulation r Fit the upper induced draught fan flange cover plate in place and fix with screws M0691622_en | Installation instructions TM 320-550...
-
Page 75: Installing The Combustion Air Fan
Slide the sensor (length: 200 mm) into the immersion sleeve and fix in place with screws r Re-attach the heat insulation mat and fit the cover plate r Run the sensor compensating line out through the hole in the cover plate and to the control cabinet M0691622_en | Installation instructions TM 320-550... -
Page 76: Assembling The Automatic Ignition
Fit further double nipples (B) to the elbow (D) r Insert the fibreglass braid (E) and cap (F) into the ignition fan (G) r Insert the ignition fan (G) into the double nipple (B) and fix in place with the cap (F) M0691622_en | Installation instructions TM 320-550... -
Page 77: Assembling The Insulated Doors And Covers
Close the doors and as you are doing so, slide the key plates so that they engage smoothly with the door contact switch r Fix the key plates in position. Open and close the door several times and check that the door contact switch has properly engaged M0691622_en | Installation instructions TM 320-550... - Page 78 Lift the four screws on the outside of the heat exchanger cover and tighten using bolts r Insert a washer into the two central threaded bolts and fix in place using nuts r Fit both heat exchanger insulating covers M0691622_en | Installation instructions TM 320-550...
-
Page 79: Fitting The Pivoting Mechanism For The Oil Burner (Optional)
Mount the blind flange (D) and oil burner flange (E) onto the end hinges (C) using short bolts (F) r Fit the safety switch with the securing plate to the joint next to the oil burner flange M0691622_en | Installation instructions TM 320-550... - Page 80 Fit the safety switch onto the bracket and then the bracket onto the insulation under the opening for the oil burner pivoting mechanism r Place covers on the fitted screws in the insulation M0691622_en | Installation instructions TM 320-550...
-
Page 81: Connect The Electrostatic Precipitator (Optional)
▪ A – Lower flue gas connection: Raw gas inlet (pipe from boiler) ▪ B – Upper flue gas connection: Clean gas outlet (pipe to the induced draught) r Refer to the enclosed instructions for the electrostatic precipitator for all steps pertaining to installation and operation M0691622_en | Installation instructions TM 320-550... -
Page 82: Hydraulic Connection
▪ Unhindered and safe escape of the steam or water that is released must be ensured Return temperature control Diaphragm expansion tank M0691622_en | Installation instructions TM 320-550... -
Page 83: Connecting Up The Slide-On Duct Cooling
▪ 500 - 1500 kW rated heat output: place flow rate approx. 2.5 m 9 Safety valve DN15 General requirement: All pipe connections must be capable of being shut off and disassembled for maintenance work. Do not employ any press-fit connections. M0691622_en | Installation instructions TM 320-550... -
Page 84: Power Connection And Wiring
Tie any loose hanging cables to the drive motors using cable ties. The cables must not come into contact with the stoker duct! CAUTION! Lay the cables from components without risk of stumbling! NOTICE! To save from damage use cable ducts or conduits for laying! M0691622_en | Installation instructions TM 320-550... - Page 85 ▪ Entire front of boiler ▪ Minimum distance of 150 mm to insulation of the FGR duct ▪ All areas of the following graphics which are marked grey: Boiler right Front of boiler Boiler left Back of boiler M0691622_en | Installation instructions TM 320-550...
-
Page 86: Final Installation Steps
Ä If the paper cannot be removed: the door is sealed. Ä If the paper can be removed: the door is not sealed properly - tighten the locking hook! Ü "Adjusting the doors" [} 87] M0691622_en | Installation instructions TM 320-550... -
Page 87: Adjusting The Doors
Loosen the nut on the locking hook r Tighten or loosen the locking hook as required r Fix in place using lock-nuts M0691622_en | Installation instructions TM 320-550... -
Page 88: Commissioning
Check all blanking plugs (e.g. drainage) for tightness r Check that the drives and servo motors are working and turning in the right direction NOTICE! Check the digital and analogue inputs and outputs - See the instruction manual for the boiler controller. M0691622_en | Installation instructions TM 320-550... -
Page 89: Initial Startup
ENplus / DINplus certification scheme General note: Before refilling the store, check for pellet dust and clean if necessary. TIP: Fit the Froling PST pellet deduster for separating the dust particles contained in the return air M0691622_en | Installation instructions TM 320-550... - Page 90 Incorrect parameter settings have a significant adverse effect on the functioning of the boiler, and as a result this will invalidate the guarantee. Therefore: r If the fuel is changed (e.g. from wood chips to pellets), the system must be reset by Froling customer services. M0691622_en | Installation instructions TM 320-550...
-
Page 91: Non-Permitted Fuels
If the fireclay in the combustion chamber needs to be screed dried: r Provide the following quantities of dry firewood: Ä Systems up to 250 kW: ¼ m³ Ä Systems up to 500 kW: ½ m³ Ä Systems up to 1500 kW: 1 m³ M0691622_en | Installation instructions TM 320-550... -
Page 92: Screed Drying
Close the combustion chamber door. r Leave the boiler in this state for a few hours (ideally overnight). The boiler can then be used in accordance with the operating instructions ("Operating the system" section). M0691622_en | Installation instructions TM 320-550... -
Page 93: Decommissioning
(e.g. AWG in Austria) r You can separate and clean recyclable materials and send them to a recycling centre. r The combustion chamber must be disposed of as builders' waste. M0691622_en | Installation instructions TM 320-550... - Page 94 M0691622_en | Installation instructions TM 320-550...
- Page 95 M0691622_en | Installation instructions TM 320-550...
- Page 96 Manufacturer’s address Froling srl Froling SARL Fröling Heizkessel- und Zweigniederlassung Behälterbau GesmbH Aschheim Industriestraße 12 Max-Planck-Straße 6 Via J. Ressel 2H 1, rue Kellermann A-4710 Grieskirchen 85609 Aschheim I-39100 Bolzano (BZ) F-67450 Mundolsheim +43 (0) 7248 606 0 +49 (0) 89 927 926 0 +39 (0) 471 060460 +33 (0) 388 193 269 info@froeling.com...
Need help?
Do you have a question about the TM 320-550 and is the answer not in the manual?
Questions and answers